| This is Dare's astronomy
page. Over the years, I have progressed in my ability
to take presentable astronomy-related photos -- from simple
images directly 'out of the camera', to more recent
experiments using 'stacking' and 'image enhancement' to
bring out fine details that the optics cannot do on their
own. I hope you enjoy seeing them as much as I did in
creating them! |
CONTENTS
EVENTS
| Year |
Event |
| 2024 |
Comet |
| 2024 |
Sun & Aurora May 2024 |
| 2024 |
Partial Solar Eclipse
2024 |
| 2022 |
Planets Alignment 2022 |
| 2021 |
Google
Pixel Smartphone Widefield 2021 |
| 2020 |
Great
Conjunction |
| 2020 |
Mars
Opposition |
| 2020 |
Comet Neowise |
| 2019 |
Jupiter
Opposition |
| 2017 |
Partial
Eclipse |
| 2016 | Mega Super Moon |
| Super
Hunter's Moon |
|
| Wide Field 2016 |
|
| 2015 |
M42 |
| Moon |
|
| M33
& M45 & IC1805/IC1795 |
|
| M13 & M27
& M57 |
|
| 2014 |
M31 |
| M27 & M31 & M33 | |
| M31
& M45 |
|
| Sky
2014 |
|
| Planets
2014 |
|
| Moon |
|
| Sun |
|
| 2013 |
M31
& M42 & M52 |
| Messier
Variety |
|
| M31 &
Moon |
|
| M31 |
|
| M45 |
|
| Wide Field |
|
| Panstarrs & M31
& M45 |
|
| 2012 |
Wide Field Fall |
| Meteor Showers |
|
| Sky |
|
| Venus Transit |
|
| Partial
Eclipse |
|
| Sun |
|
| Venus
& M45 |
|
| Saturn |
|
| 2011 |
Jupiter |
| Moon |
|
| Sky |
|
| Sun |
|
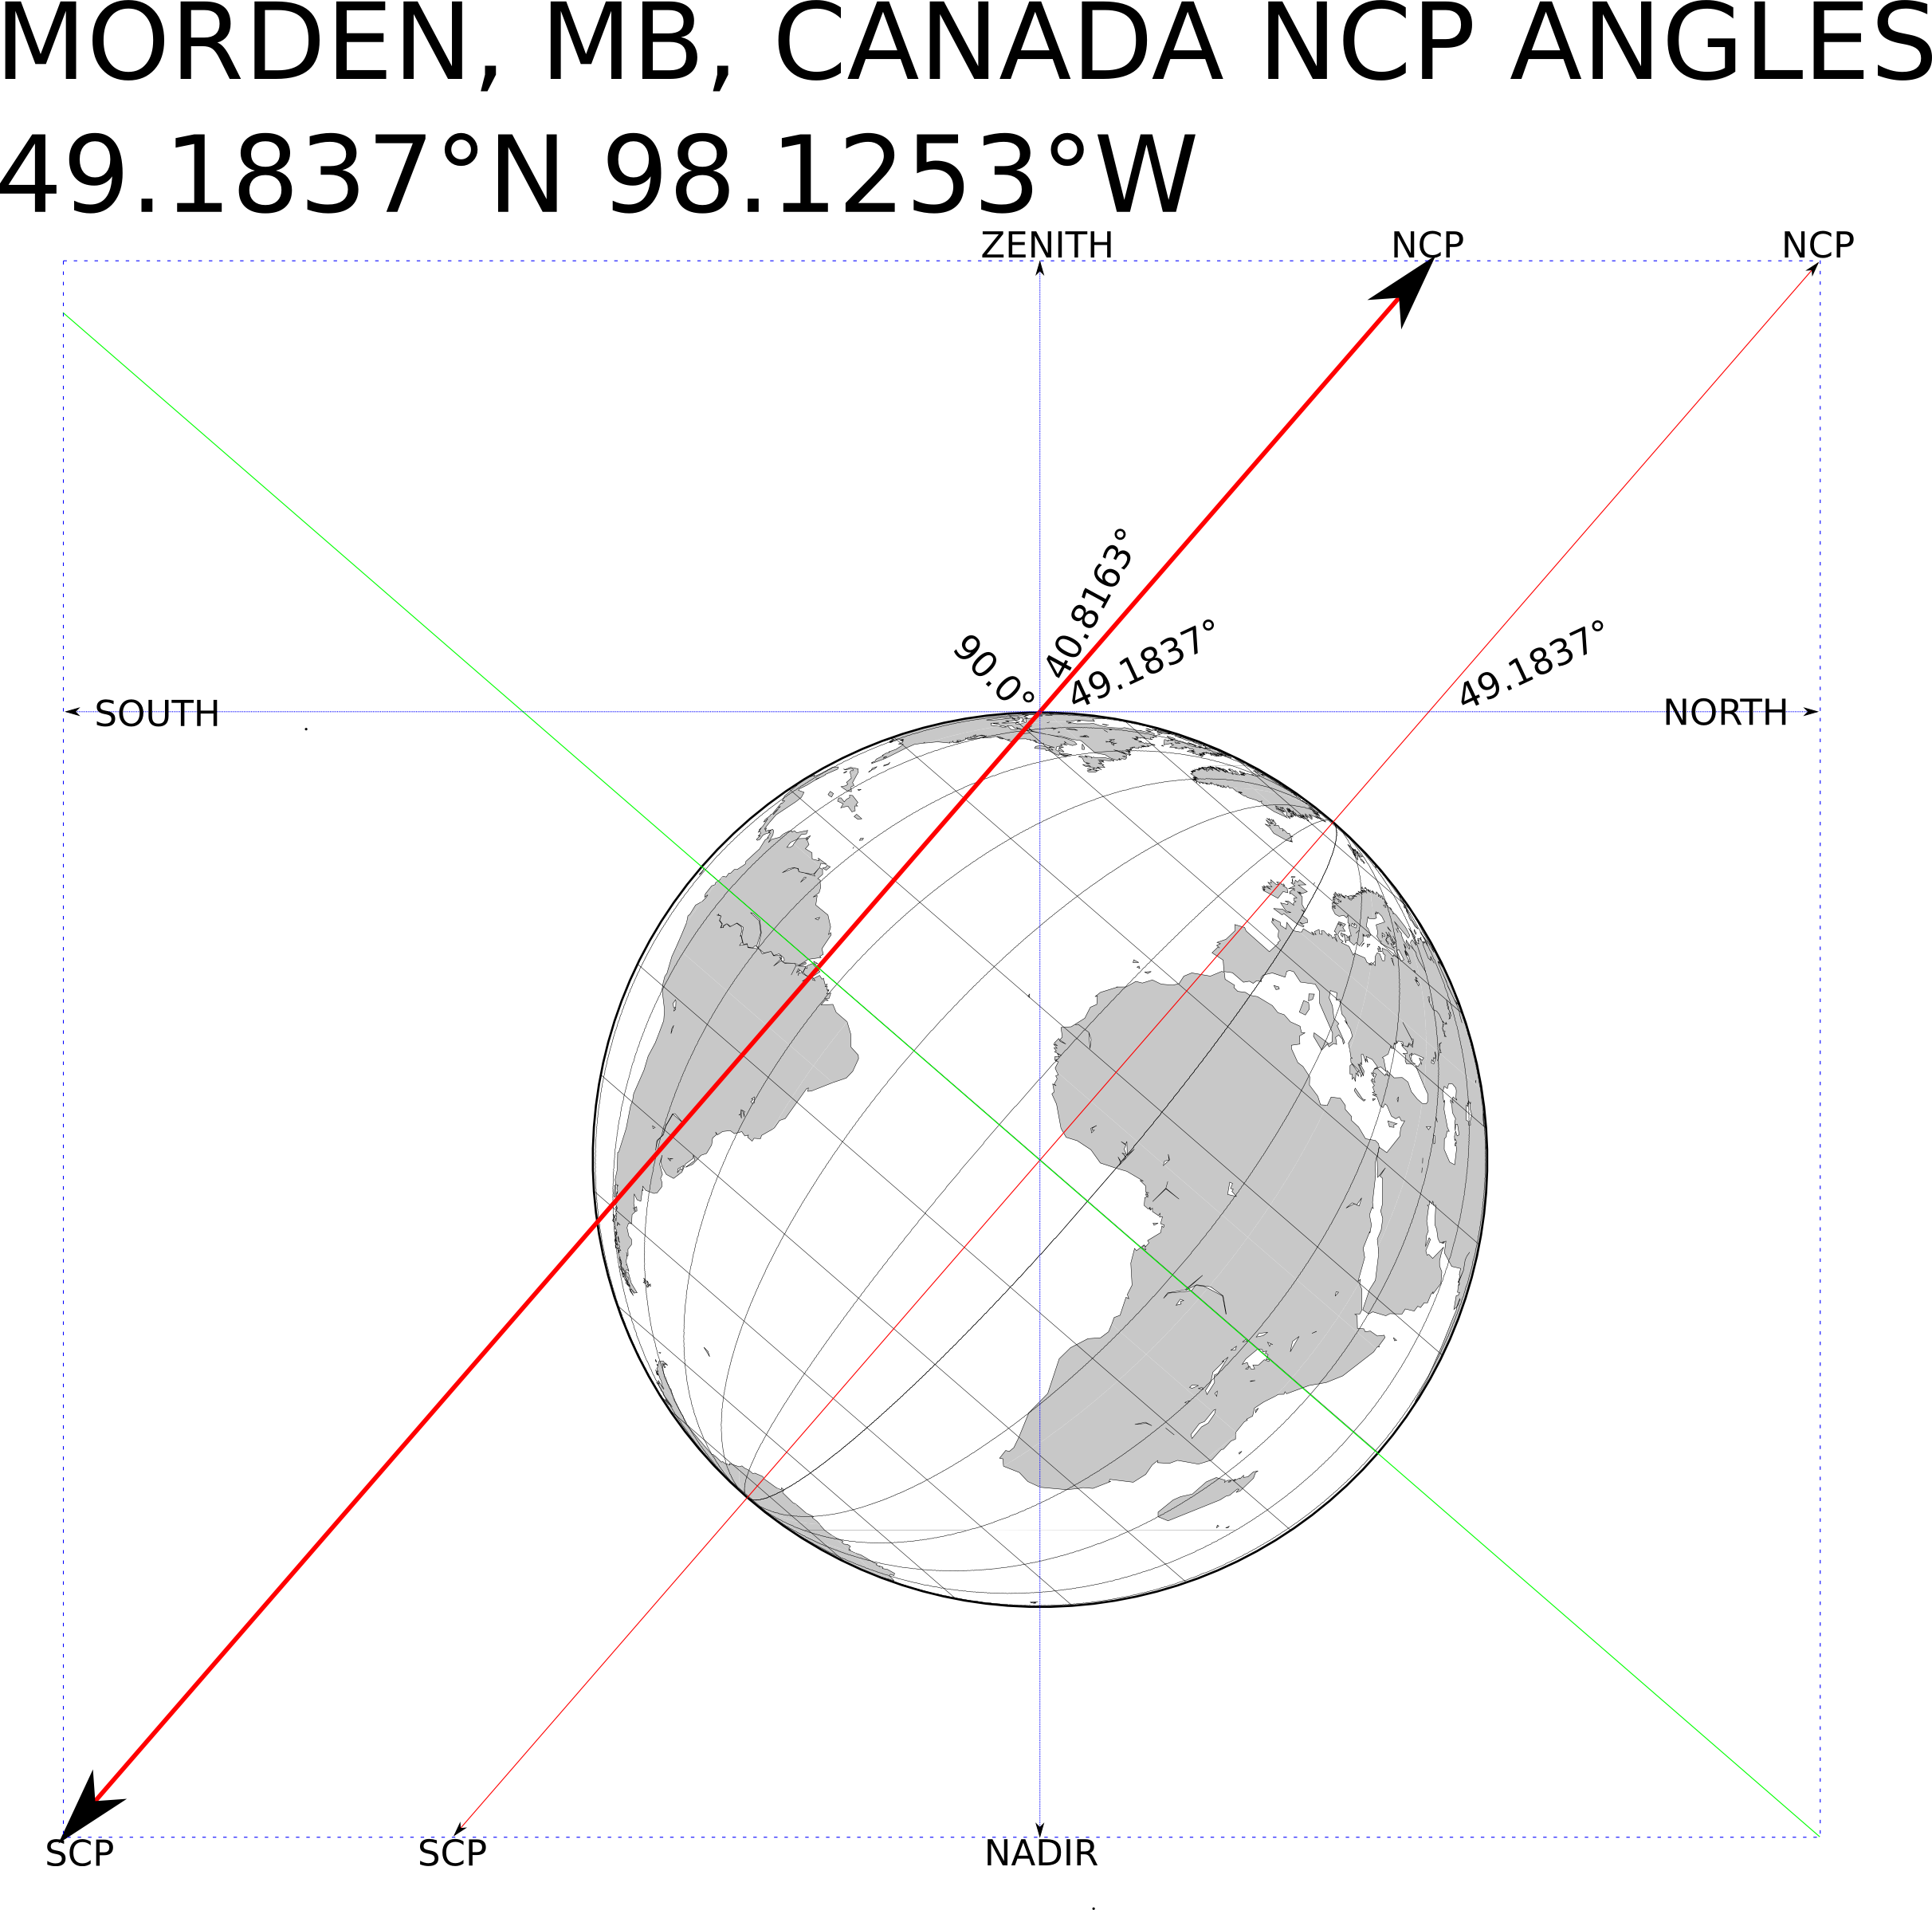
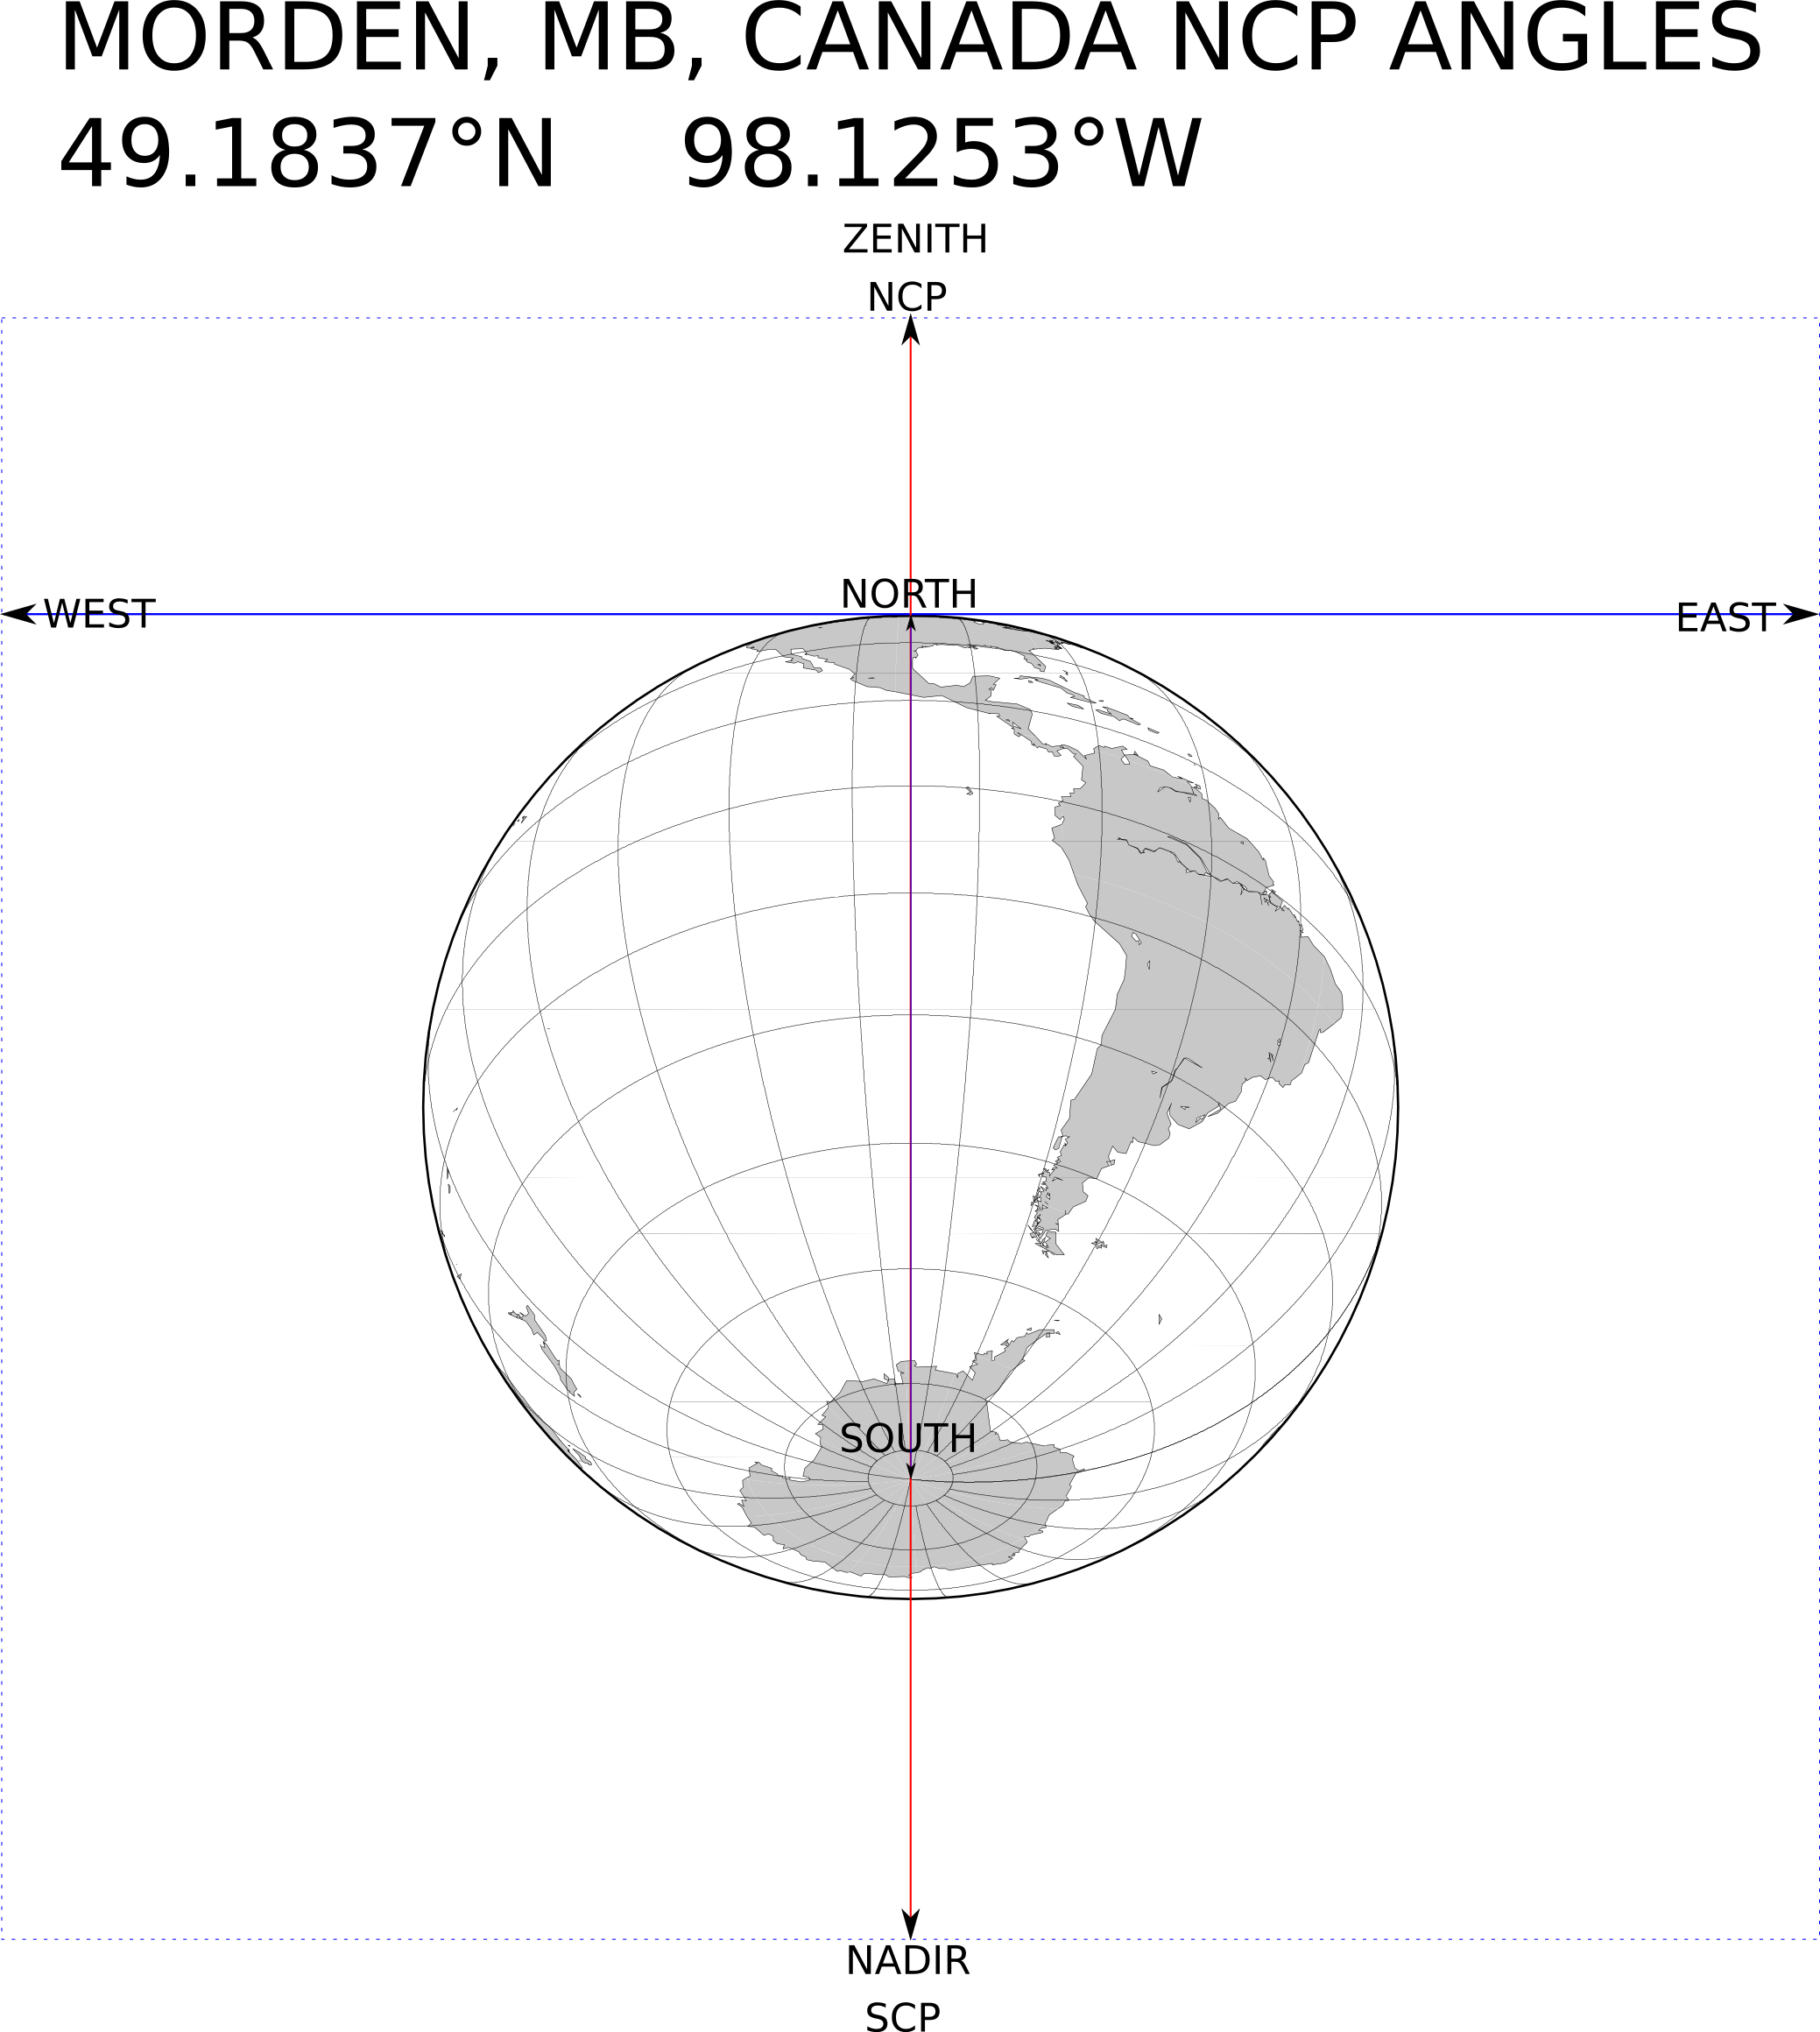
| NCP
Chart |
|
| 2010 |
Sky |
| Uranus |
|
| Jupiter |
|
| 2009 |
Sky |
| 2003 |
Jupiter |
| Saturn |
|
| Mars | |
| Sun |
|
| Moon |
|
| 1979 |
Eclipse |
| Year | Equipment |
| 2013 |
Mount #2 |
| 2011 |
Scope #3 |
| 2009 |
Mount #1 |
| 2004 |
Scope #2 |
| 1990 |
Scope #1 |
| 1975 |
Scope #0 |
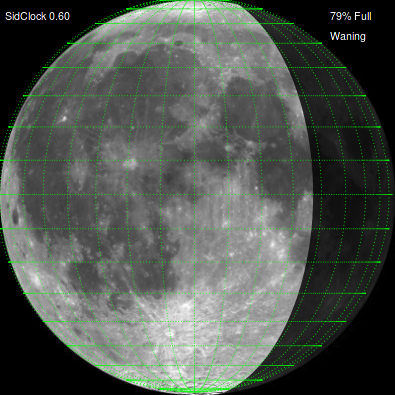
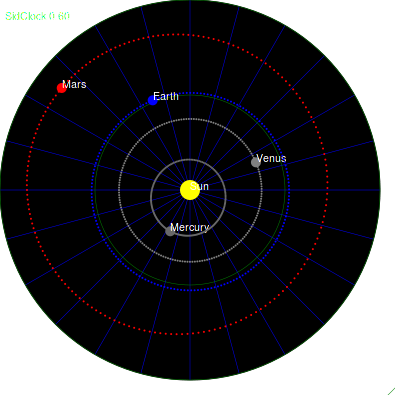
| SidClock |
| Local
Sky Map |
| Clear
Dark
Sky |
MAPS
| Dark Sky Map |
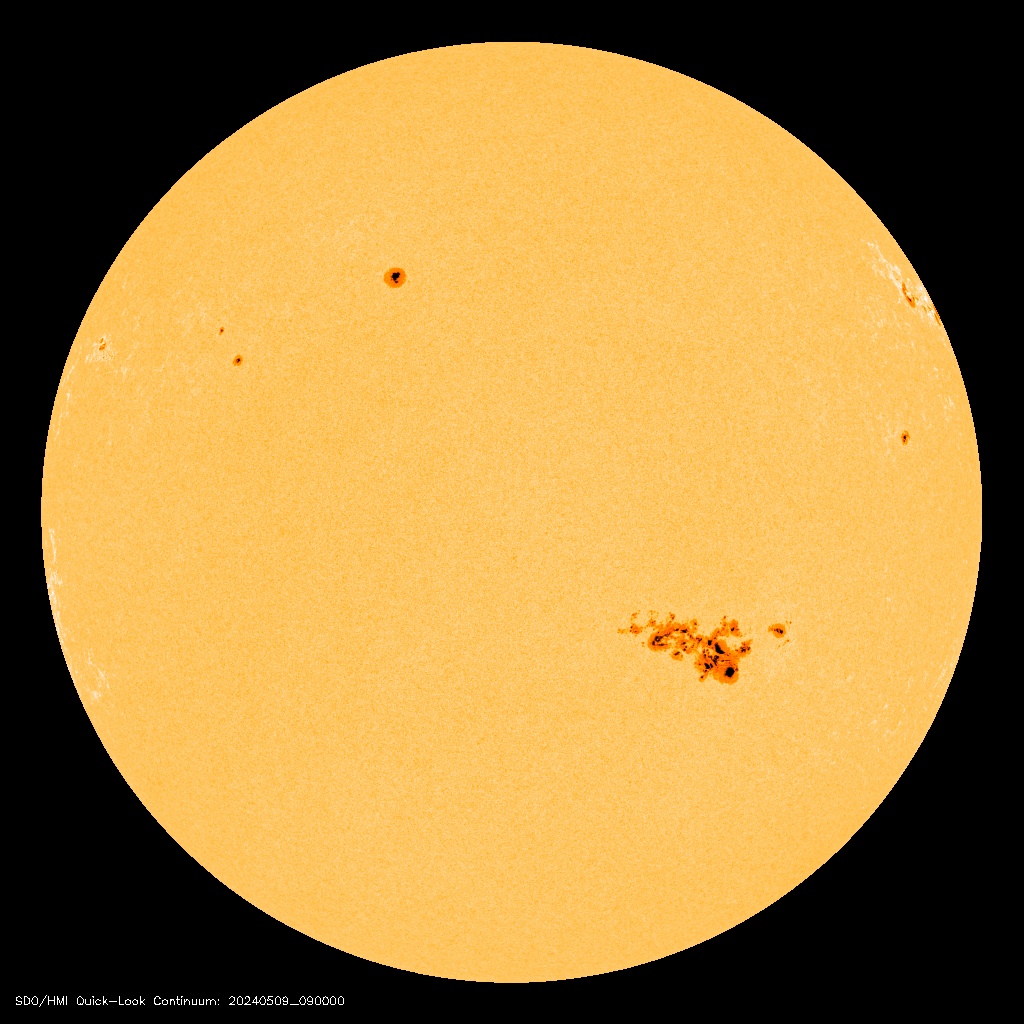
| Current
SOHO & SDO Images |
| Solar
System Scale Model OSM Map |
| Sunrise/set Plot
for Morden |
| Hipparcos
Catalogue
HR Diagram |
| SChronos
& SOrrery Diagrams |
| www.astronomyforum.net |
| www.cloudynights.com |
| www.iceinspace.com.au |
| CalSKY |
| ClearDarkSky |
| Your
Sky |
| Your
Horizon |
| Your
Telescope |
| Heavens Above |
| Winnipeg RASC |
| SkyView Cafe |
| SOHO |
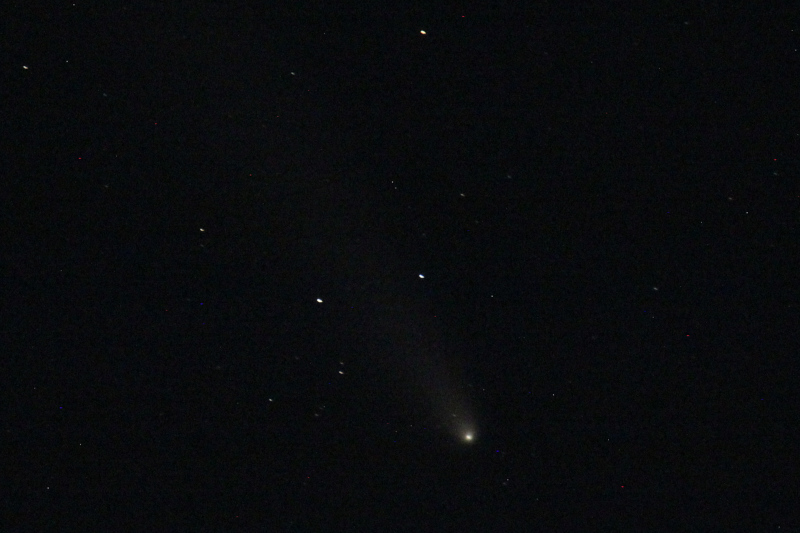
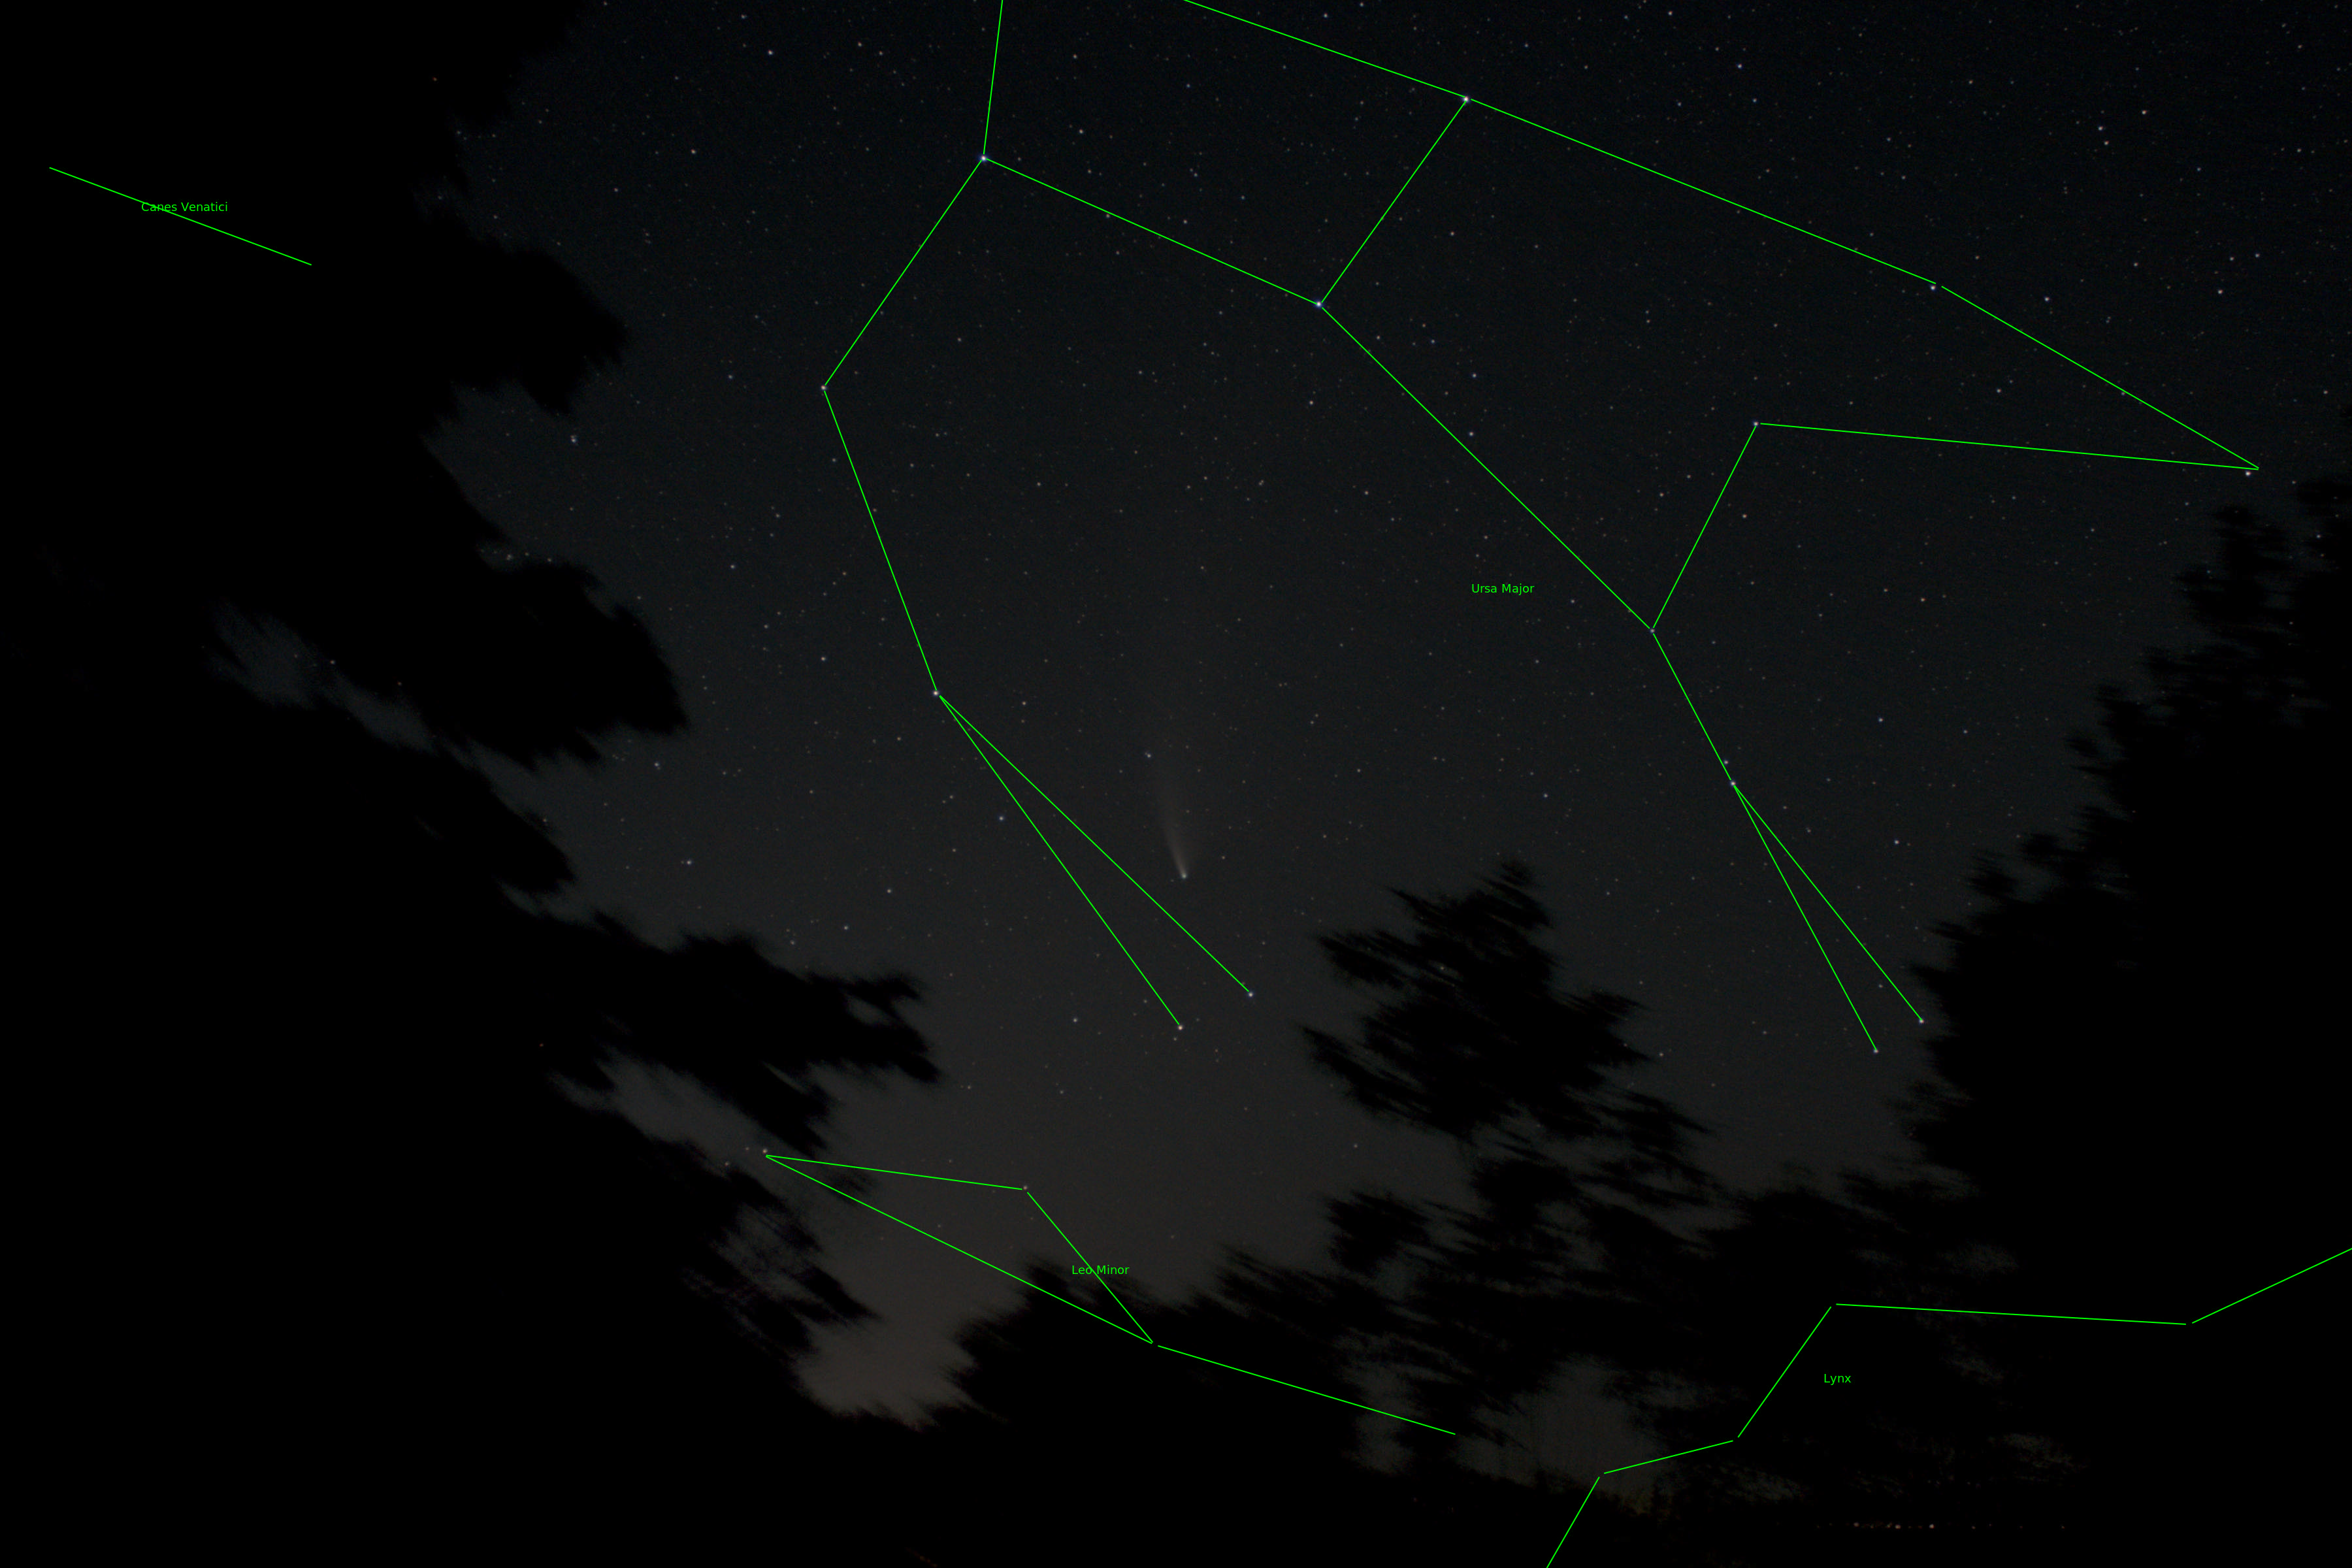
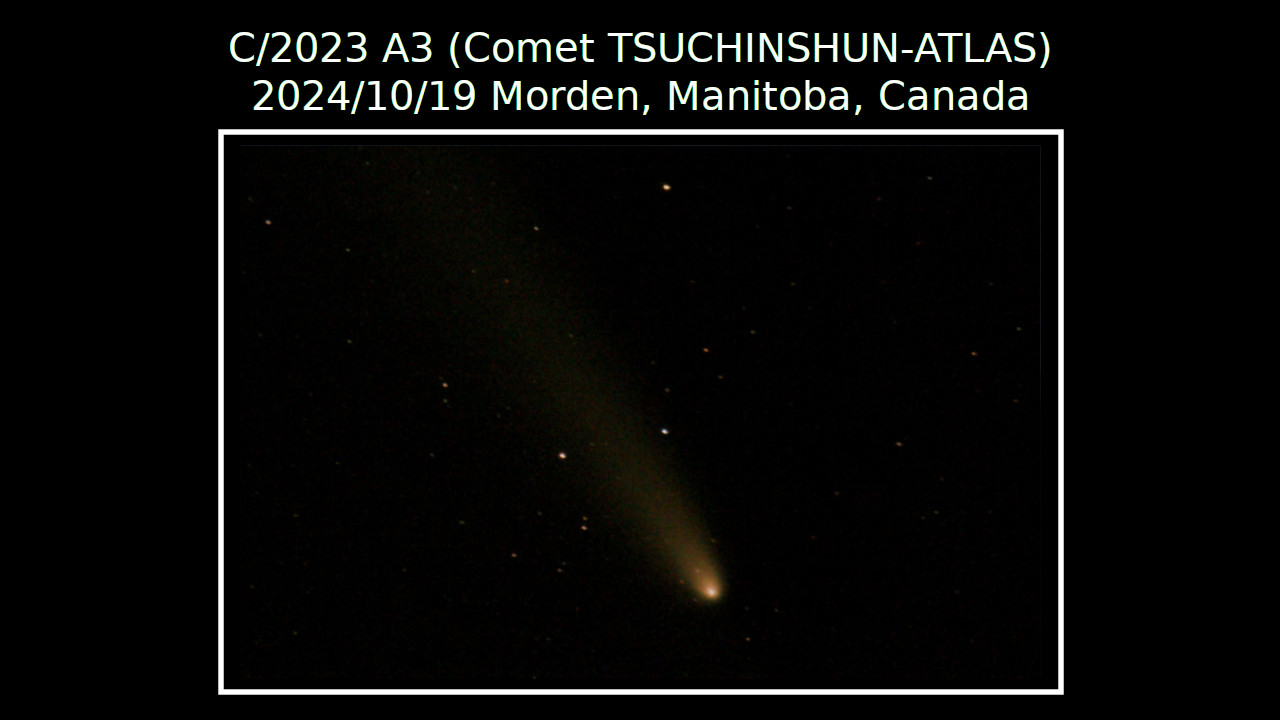
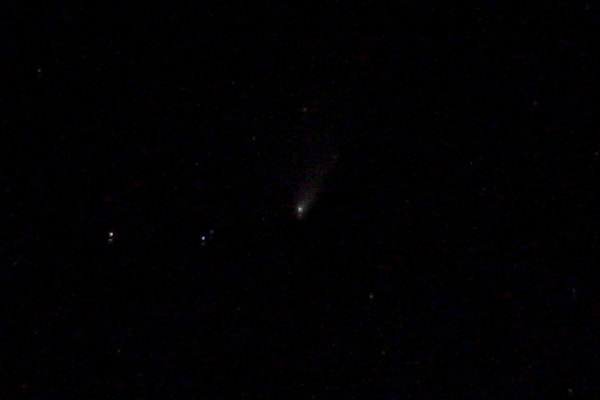
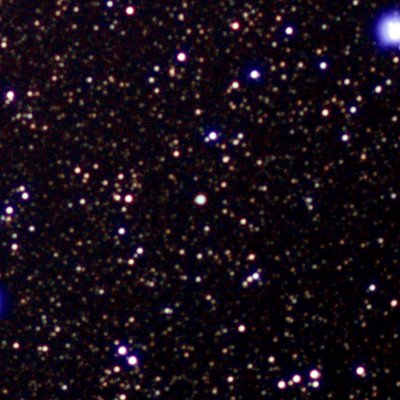
| Comet TSUCHINSHAN-ATLAS was
popular in October 2024, and I waited too long to grab a
few shots of this comet, hoping that it would still be
clearly visible to my eyes on 2024/10/19, but it was not
so! I had almost given up looking for it, but using
averted vision (and a small pocket scope to confirm), I
finally found it around 19:20 that night.
Temperatures much milder than typical (around
12°C!). Apparently, the brightness magnitude of this
comet had already dropped to around 7 -- the normal limit
of human vision for an object in a dark sky! I had also tried previously on the night of 2024/10/16, and had given up due to sky haze and a super-bright Hunter full moon. |
||||
 |
||||
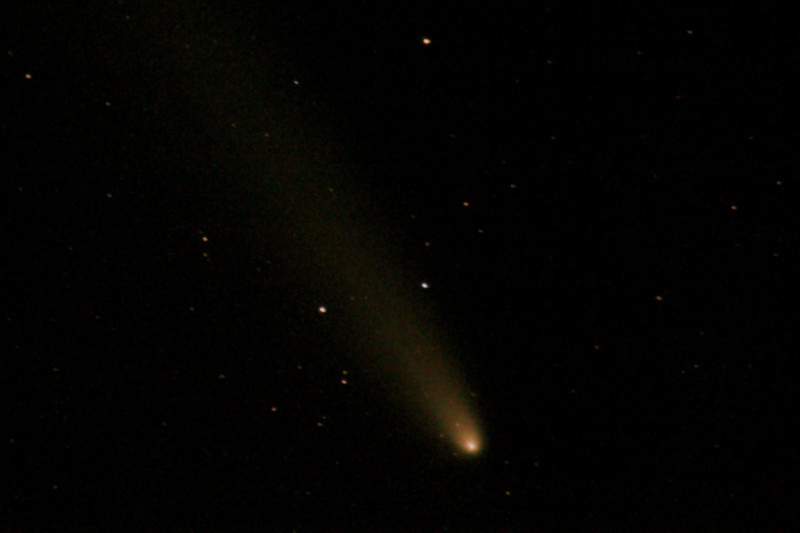
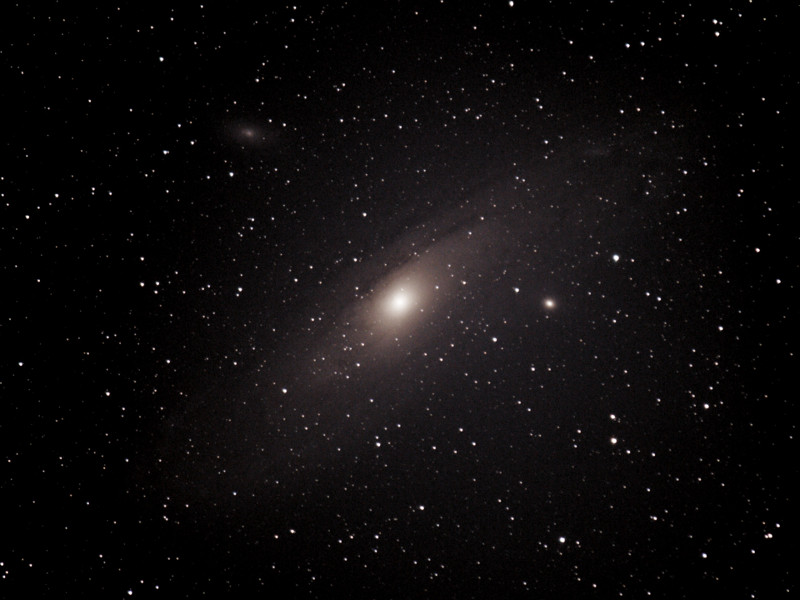
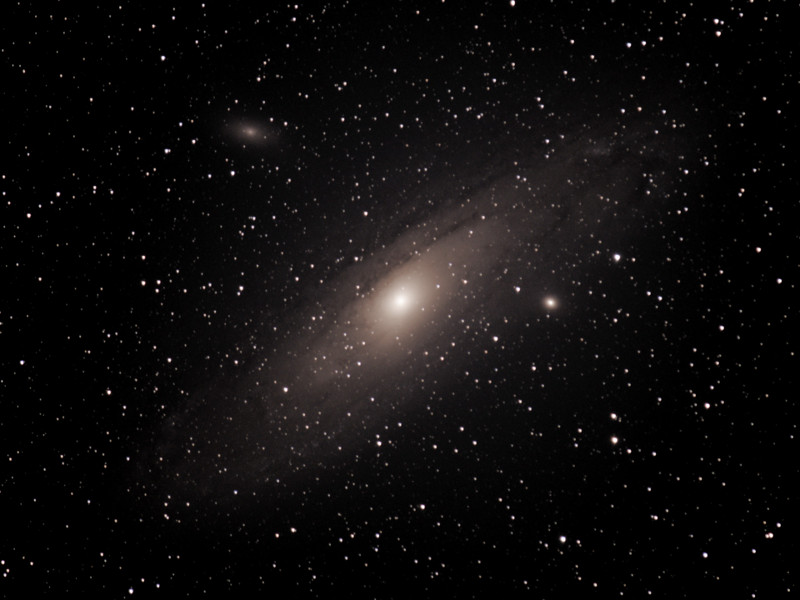
| The image was a stack of 18 'light' and 4
'dark' images into the DeepSkyStacker Windows app and further processed using the GIMP multi-platform image editor. Here is a comparison between one of the single JPG images straight out of the camera, and the final stacked/edited image: |
||||
|
||||
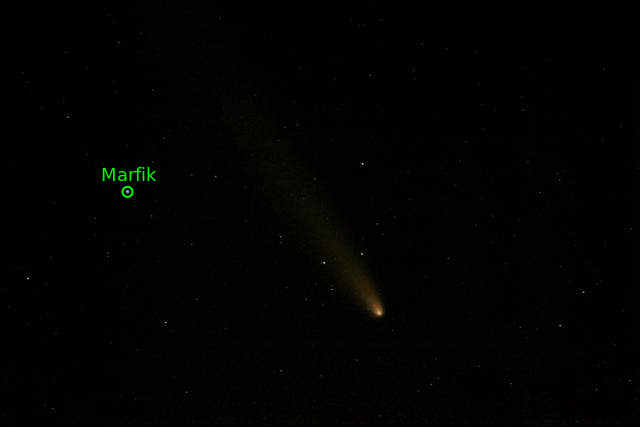
Astrometry
was also easily able to match the background stars in the
image and link it to the proper star (Marfik)
in the constellation Ophiuchus:
|
||||
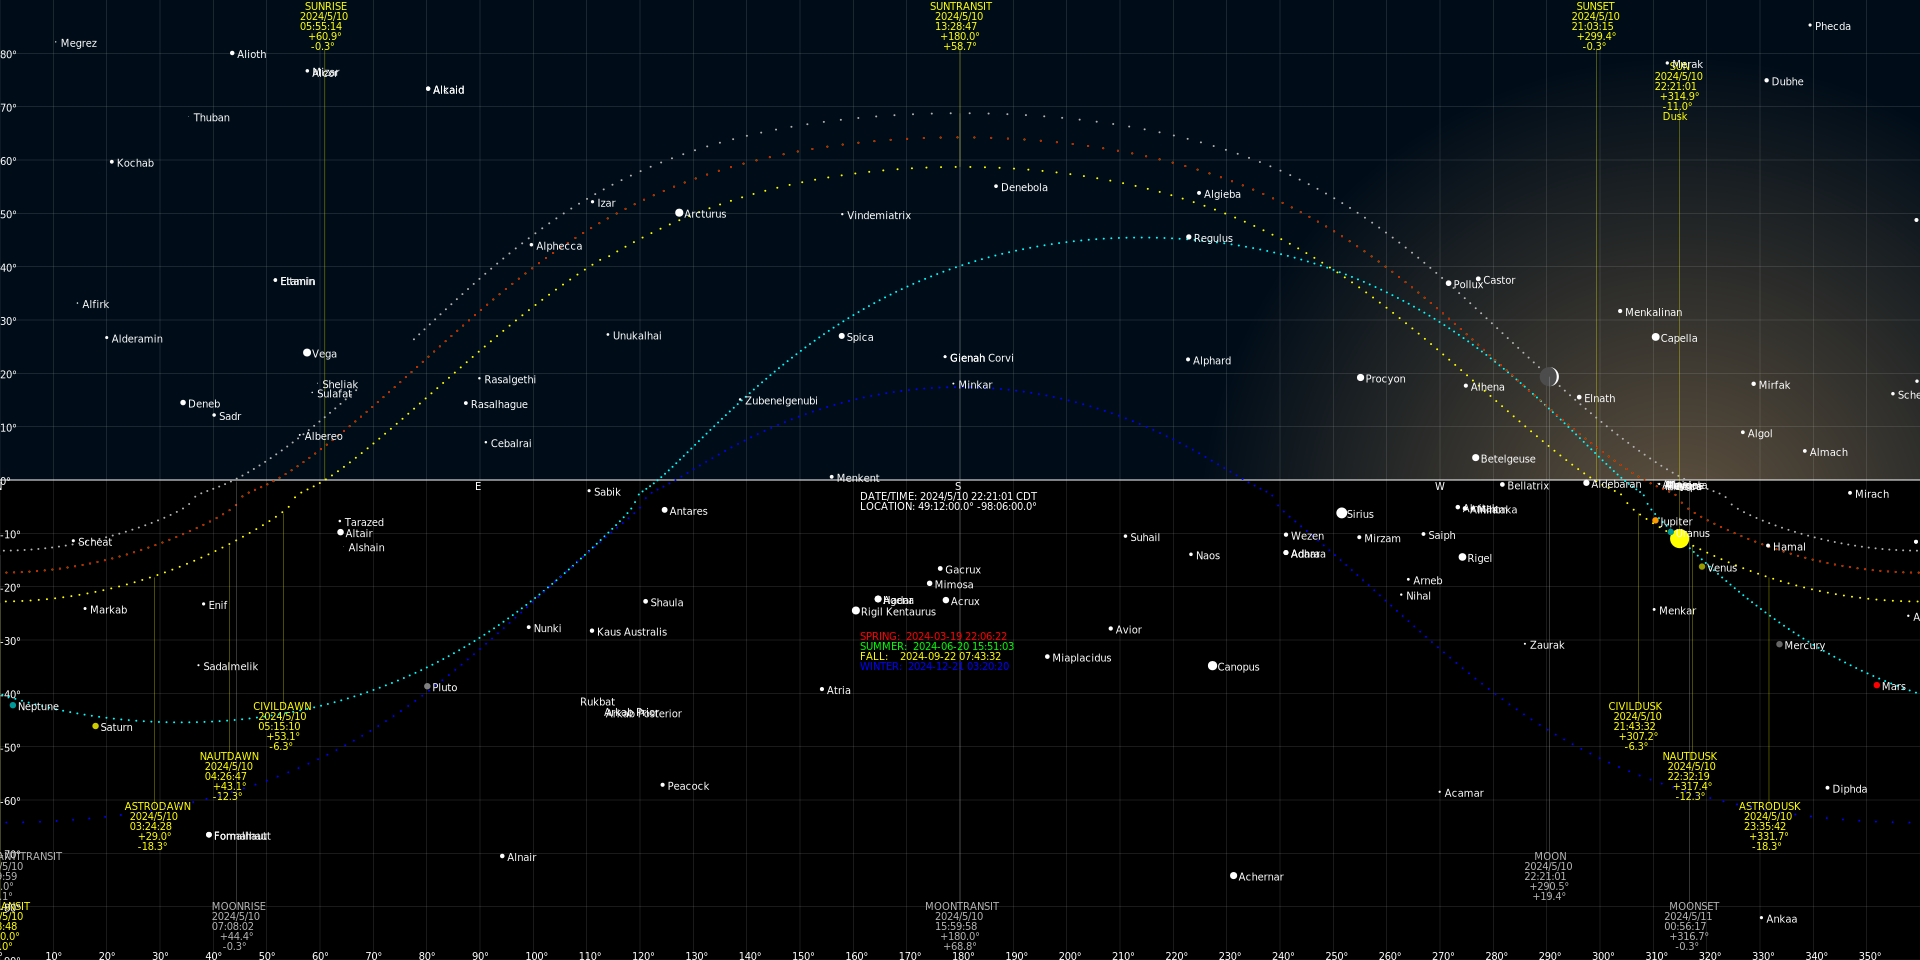
| Here is what TheSkyLive
predicted the sky in my area would look like at that
date/time. |
 |
||
|
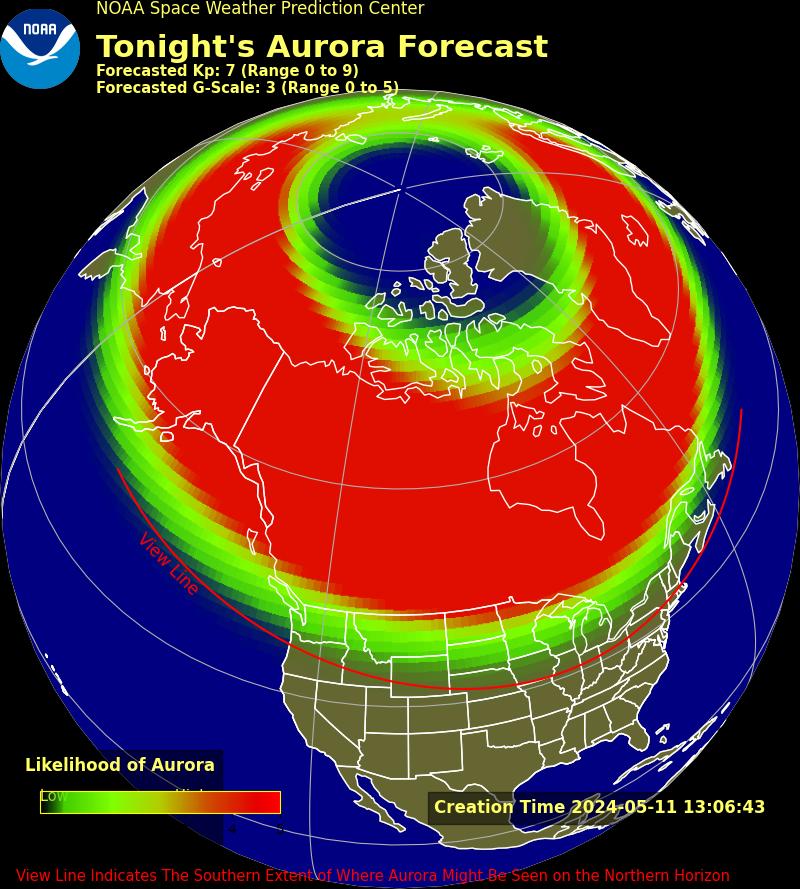
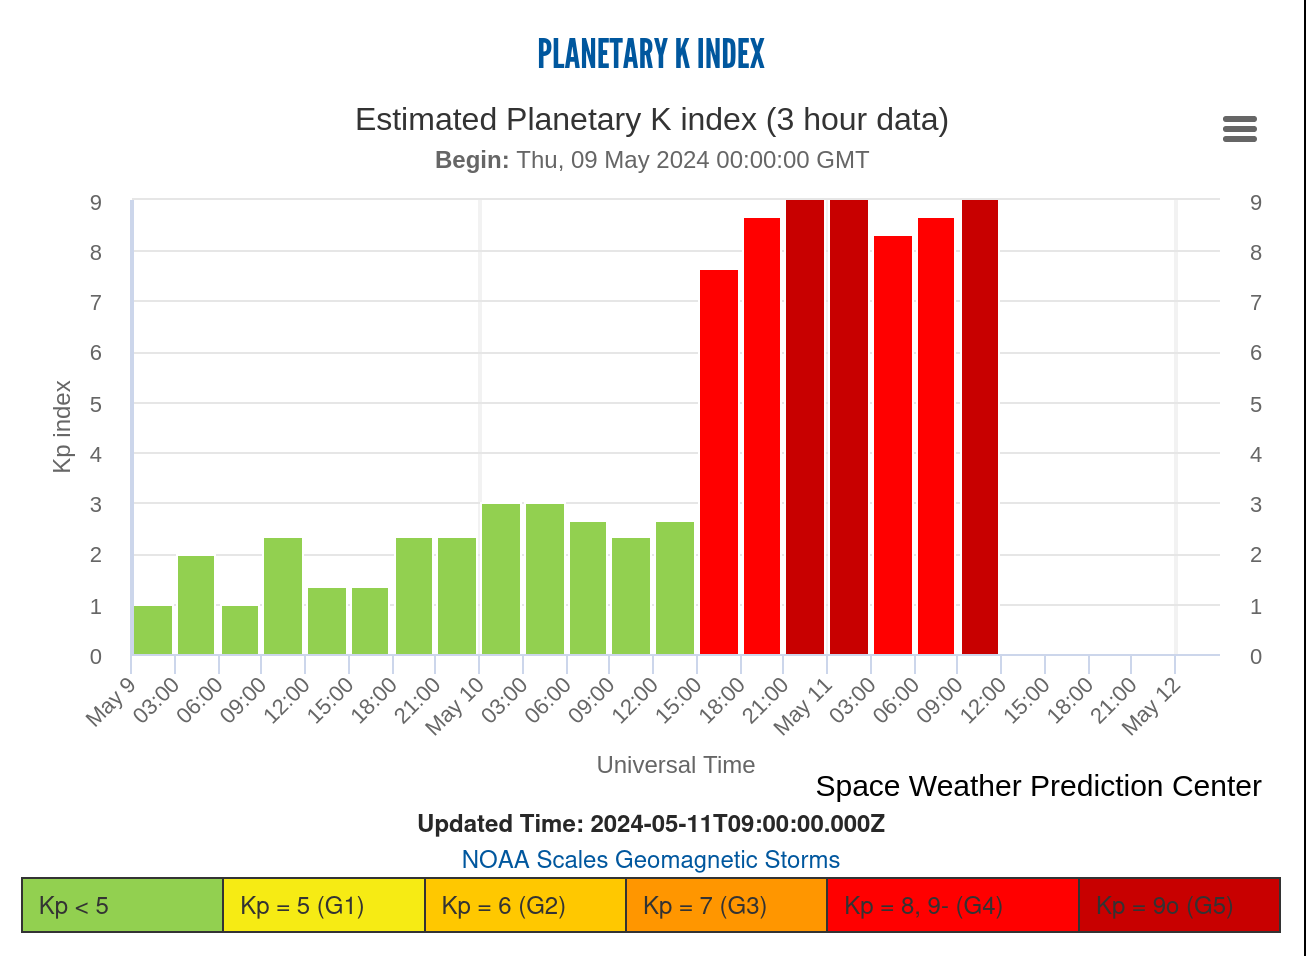
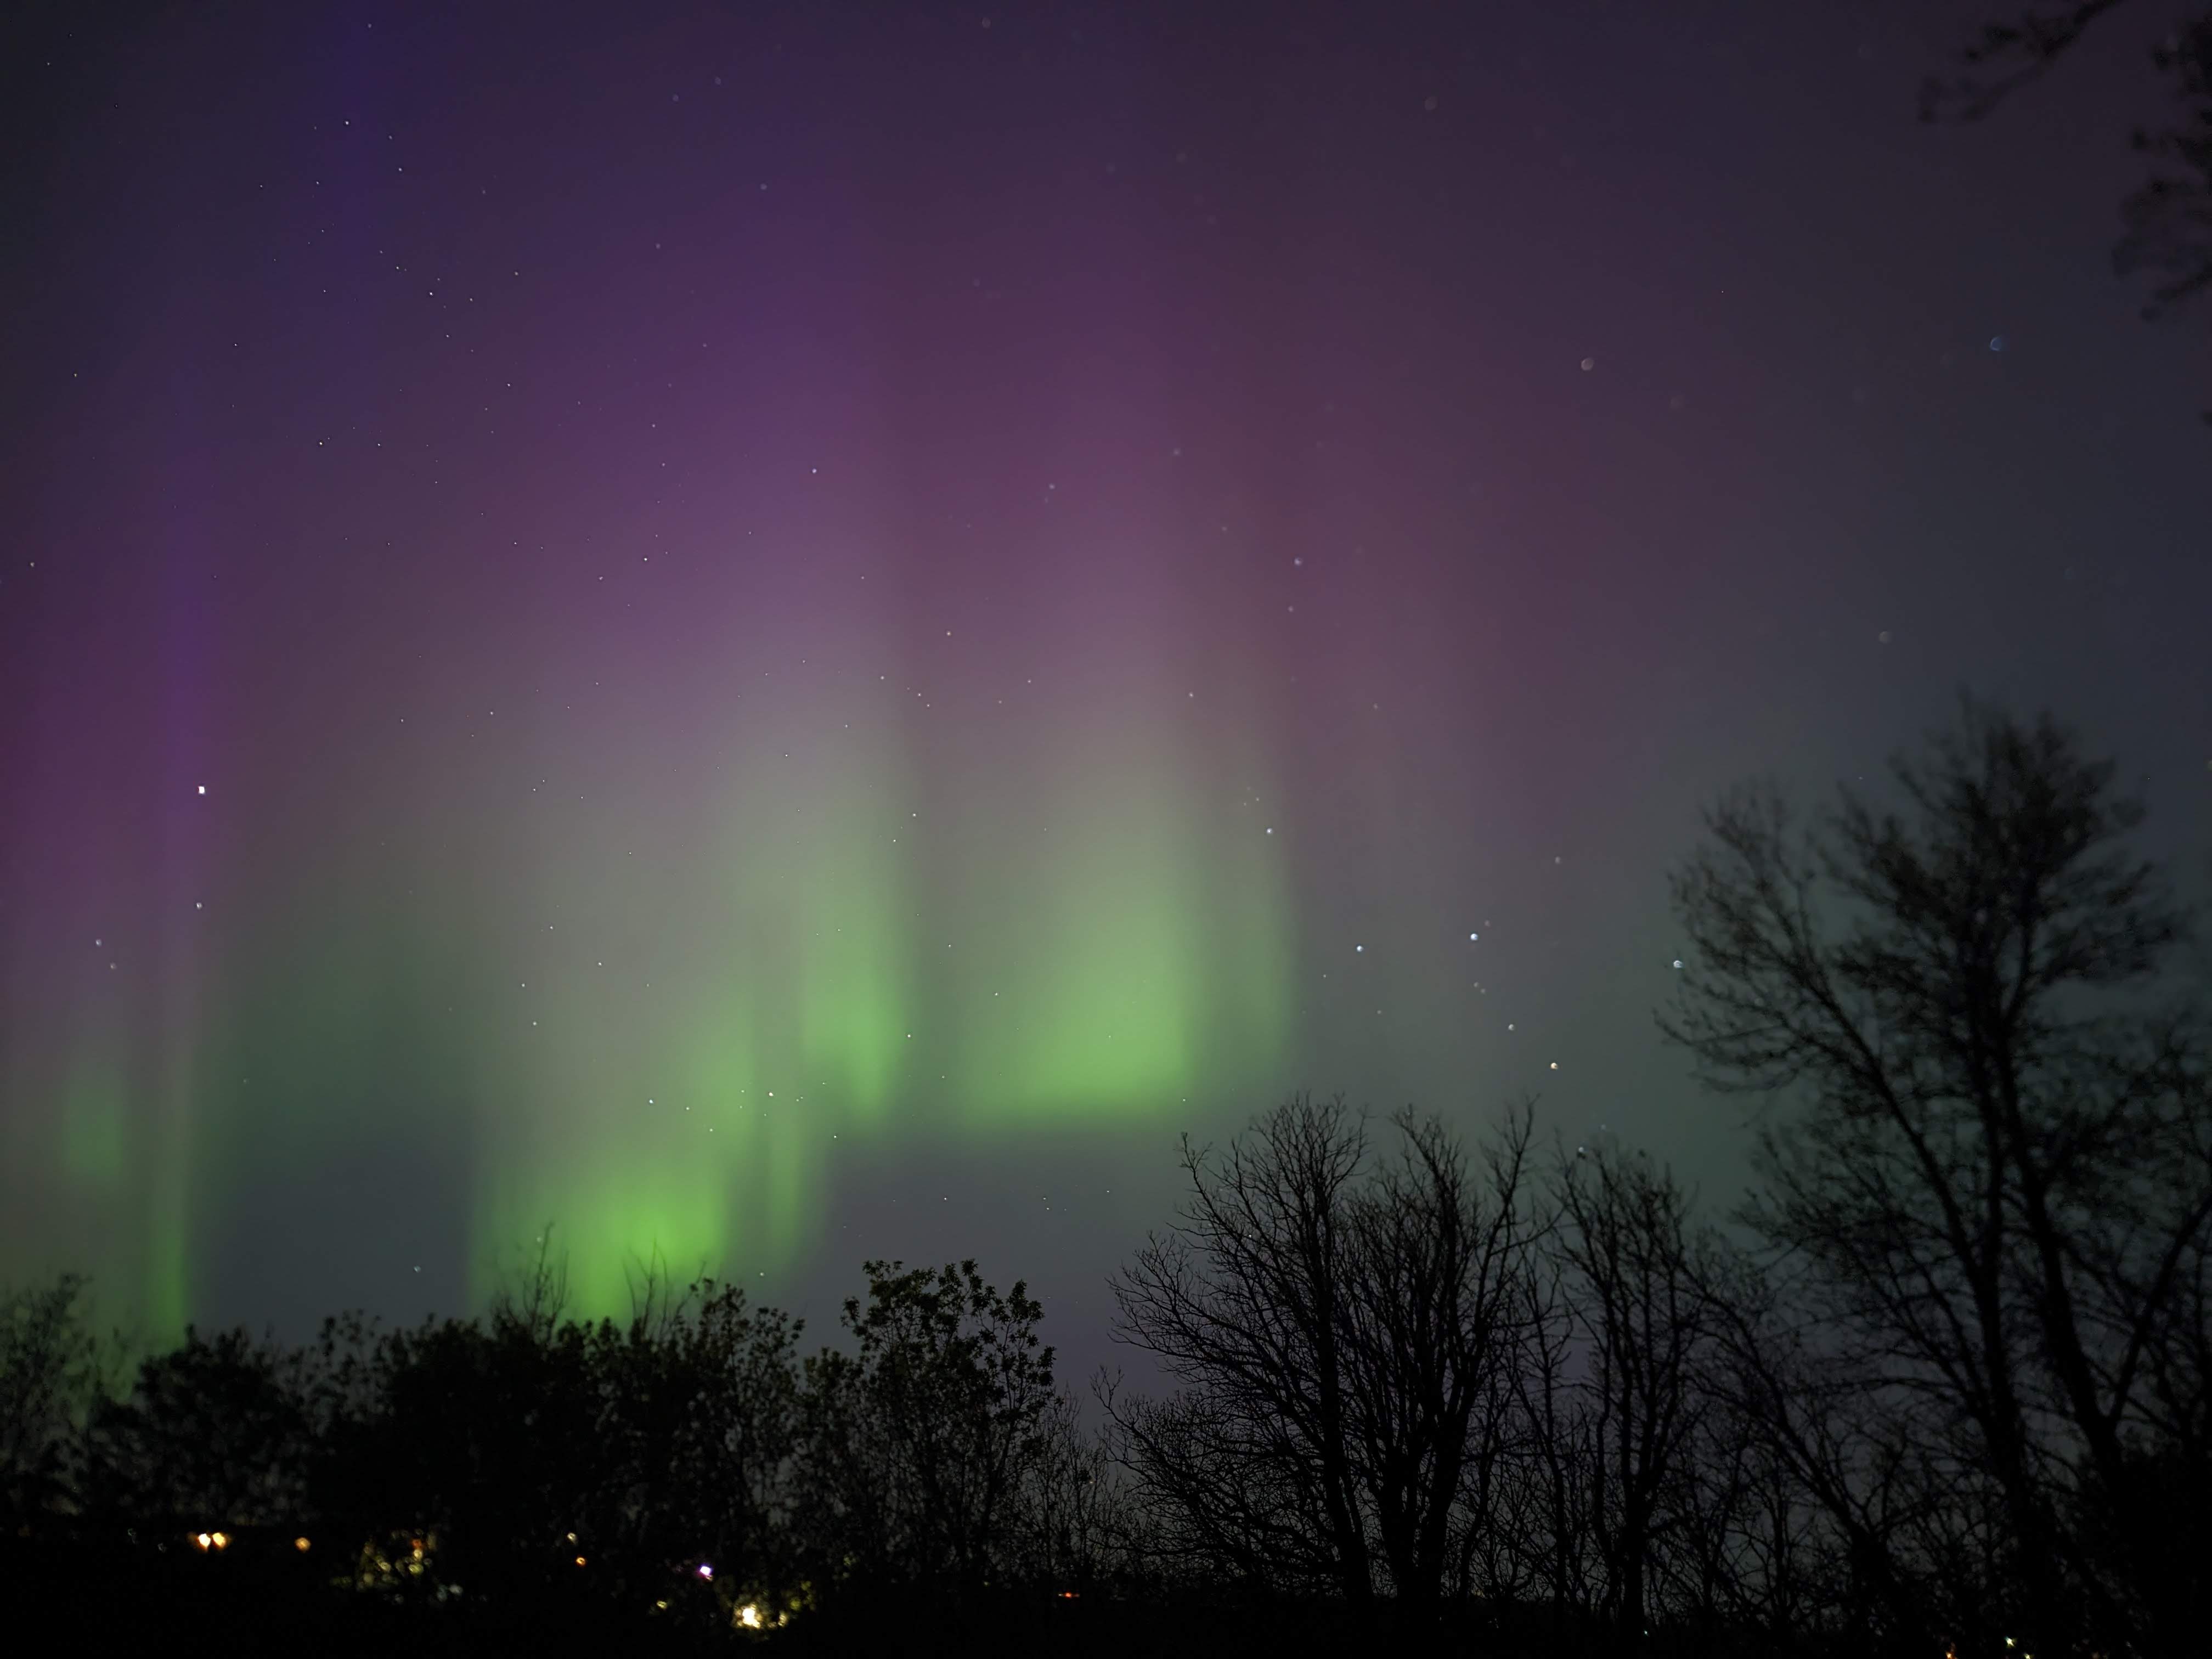
The National Oceanic and Atmospheric Administration (NOAA)
issued the first geomagnetic storm watch at the
second highest level of G4 since 2005. This resulted in
strong aurora around the world, and easily included
southern Manitoba, where I live. As predicted, the
G4-level storm (sometimes peaking at G5!) resulted in a
Planetary K-index of 8, and sometimes 9 (see this
for a chart). According to the forecasts, this might get
repeated for May 11th nighttime as well :) This storm was caused by large sunpot
region 3664, which in turn caused solar
flares and a coronal
mass ejection (CME), and which struck the Earth on
May 10th. For more information, see here. |
||
 |
||
 |
||
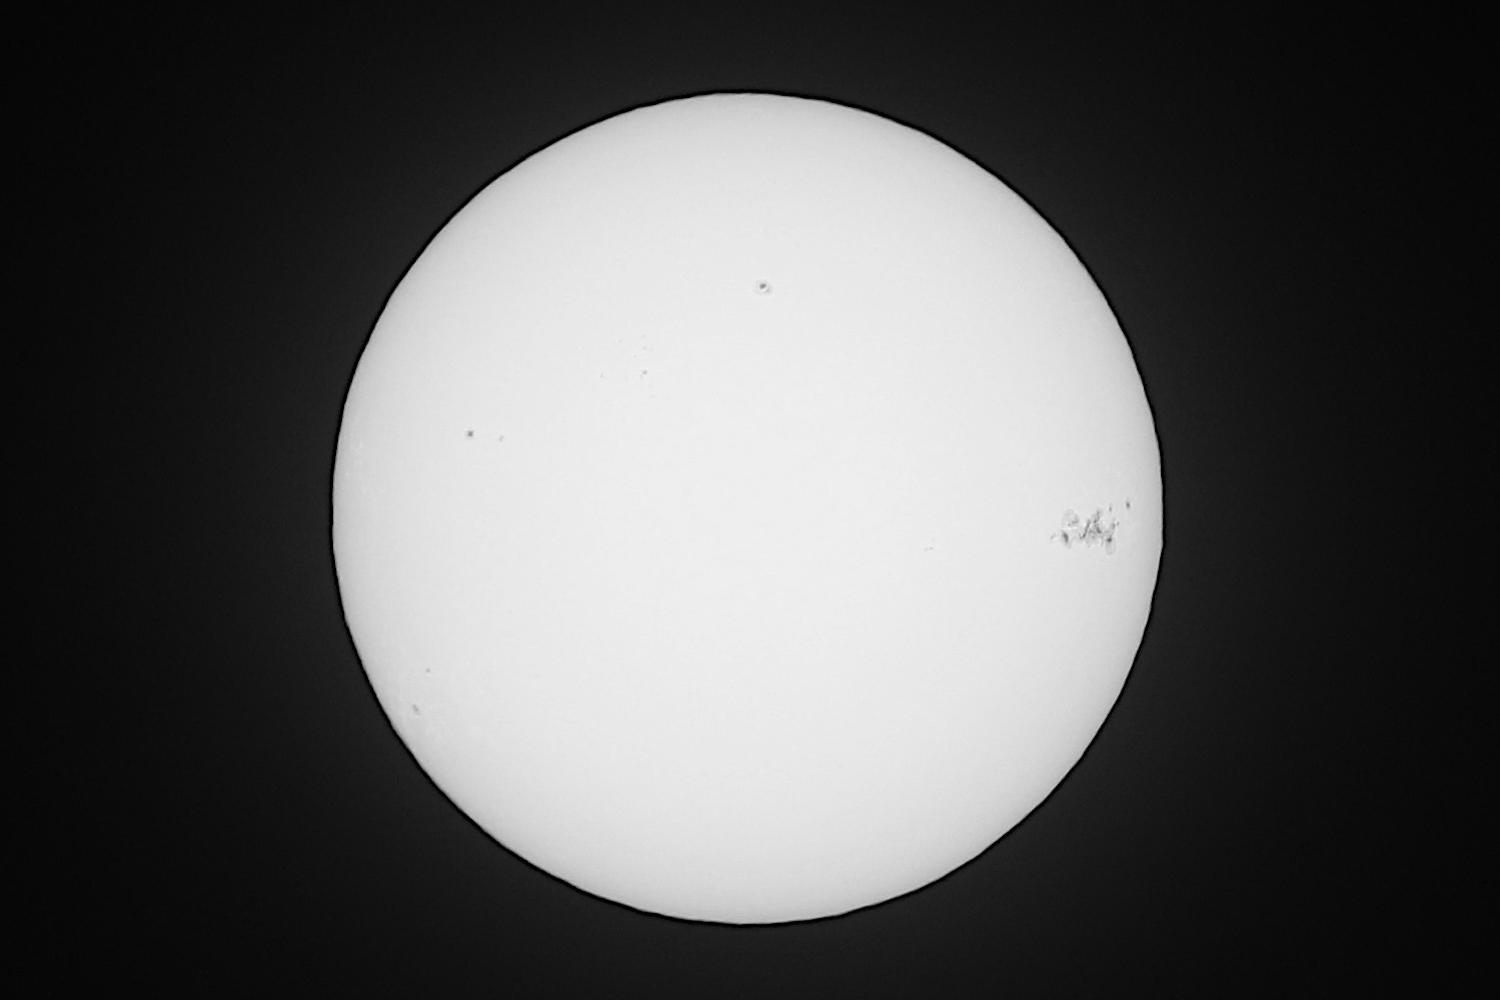
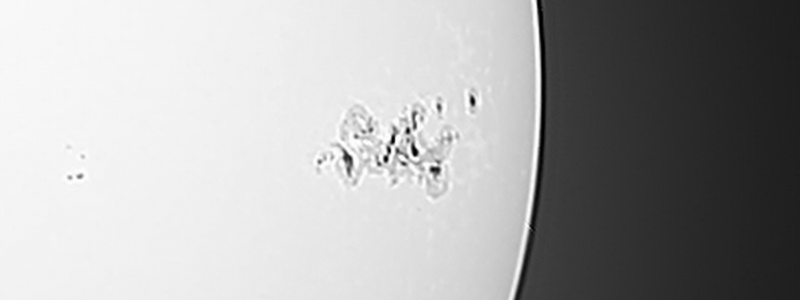
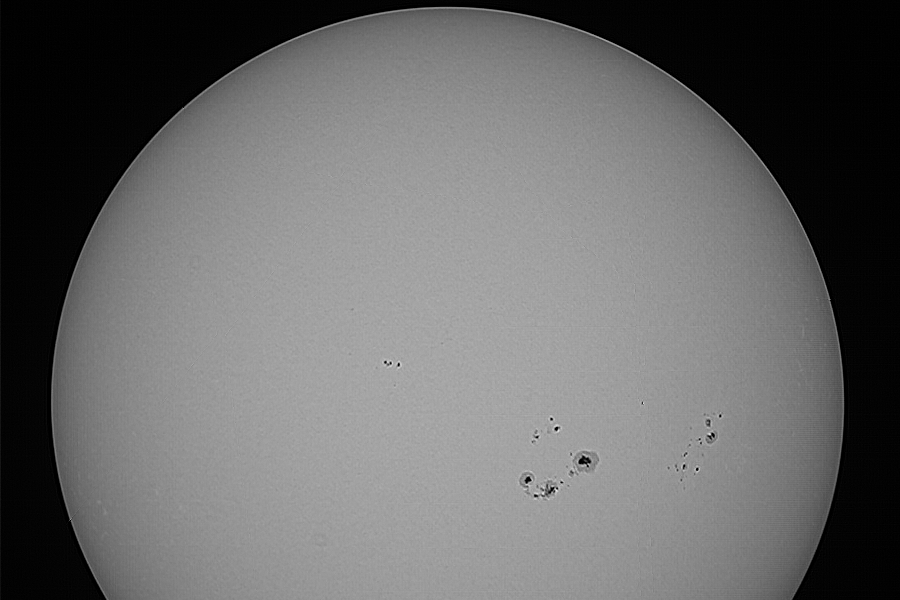
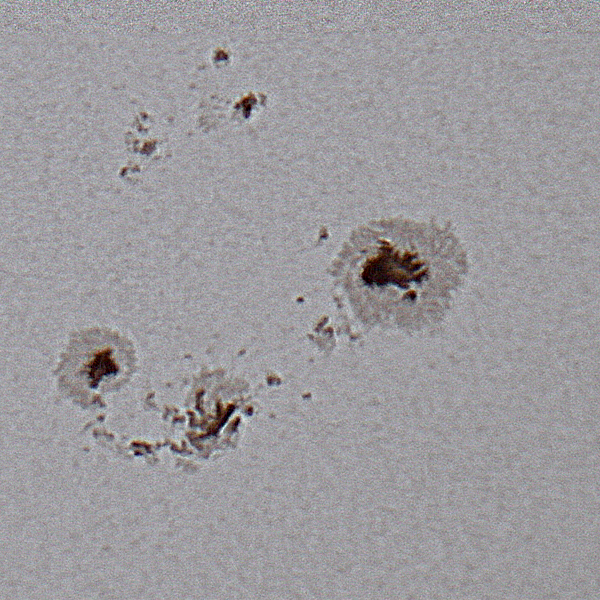
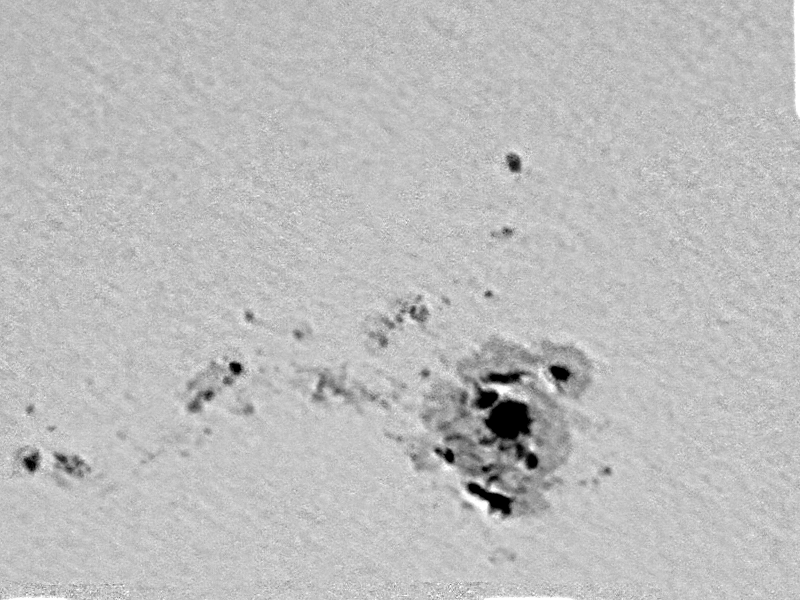
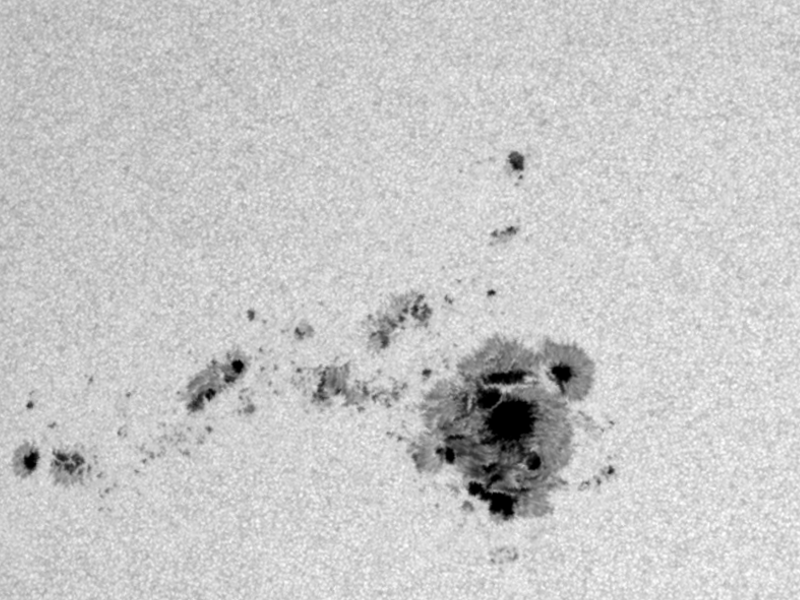
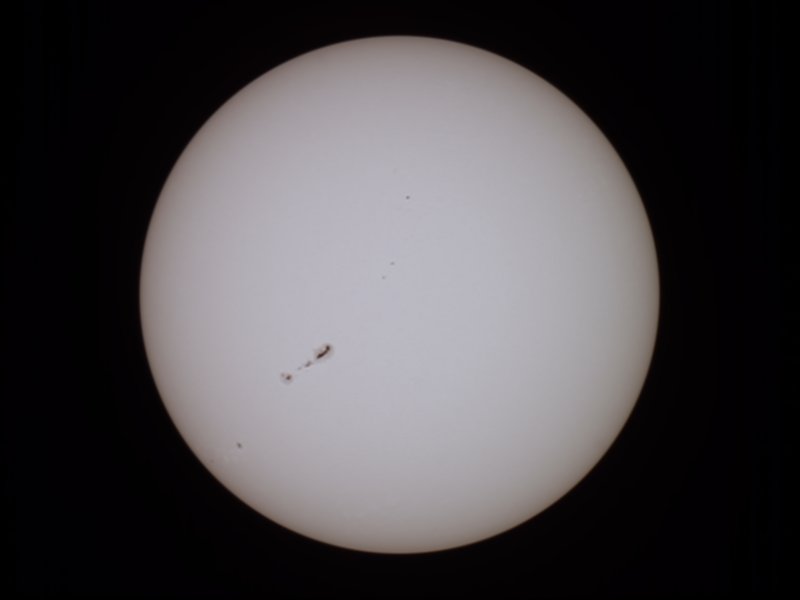
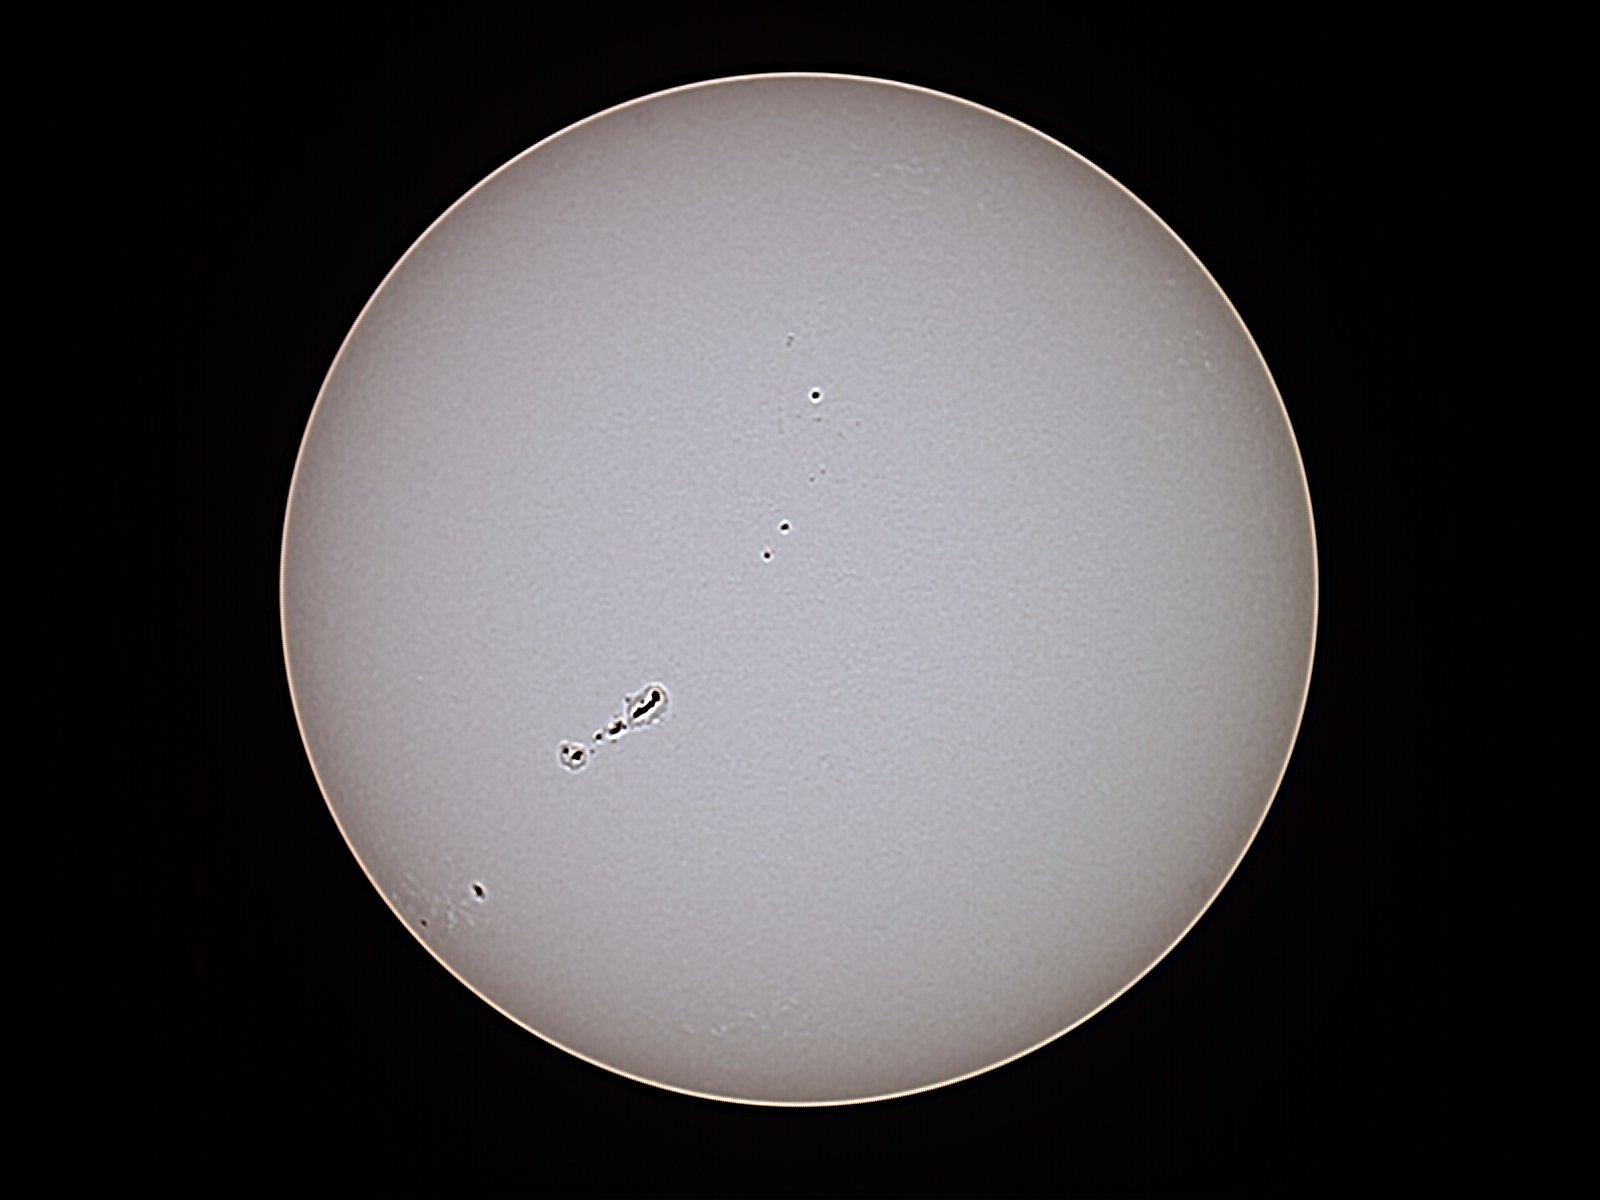
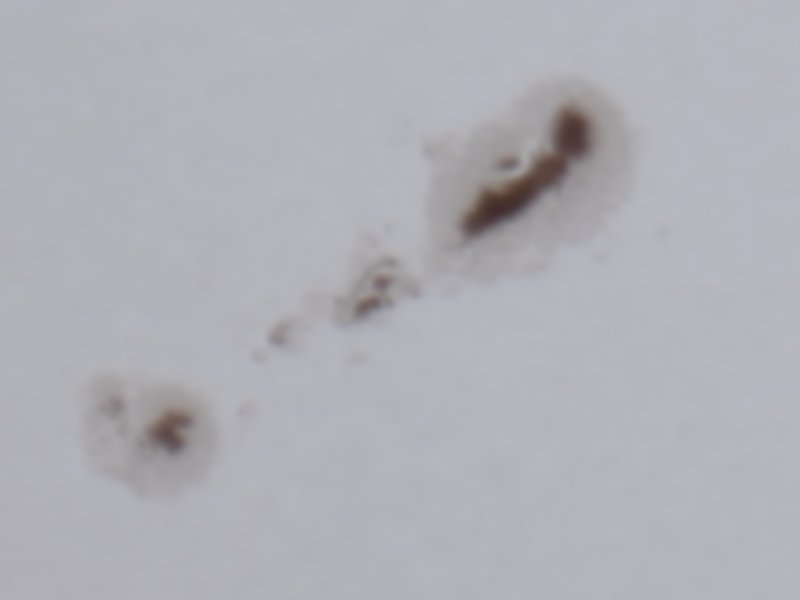
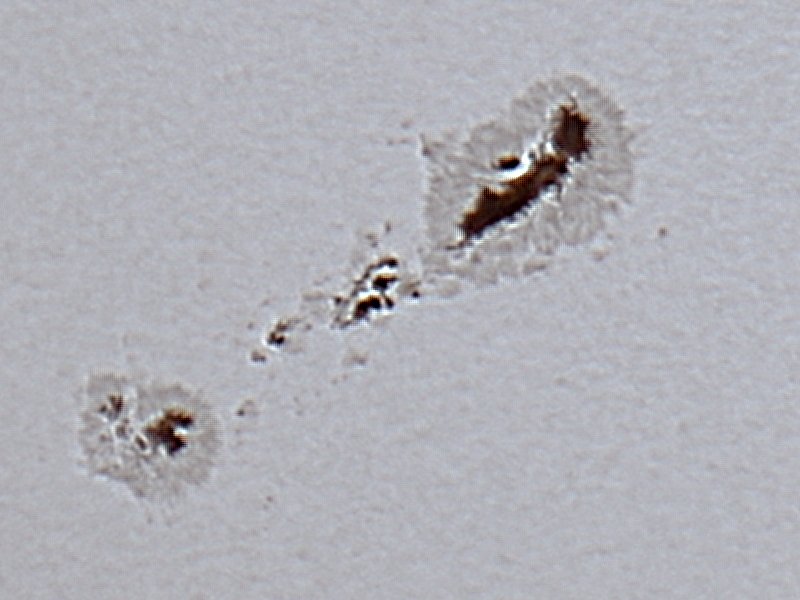
| The next day, I used my Canon T2i/550D
camera with solar filter to take a 'MOV' video of the
current sunpots on the Sun, zooming into the sunpot
region 3664 (slowly passing out of view). This
was converted to 'AVI' format using FFMpeg (i.e. 'ffmpeg
-i MVI_xxx.MOV -vcodec rawvideo -an MVI_xxx.avi').
I then used Windows software Registax
to stack and wavelet-adjust to a nicer image. |
||
The Aurora
Dashboard website is very useful and
accurate for showing aurora predictions.
|
||
|
I used the night sight mode on my Google Pixel 4a phone to try to capture some images. However, this appears to not work properly when used for the full duration exposures i.e. some lost focus and ended up blurred. Got a few good ones though! :) |
||
| This is a short time lapse clip produced a
long exposure of some of the aurora. |
 |
||||||
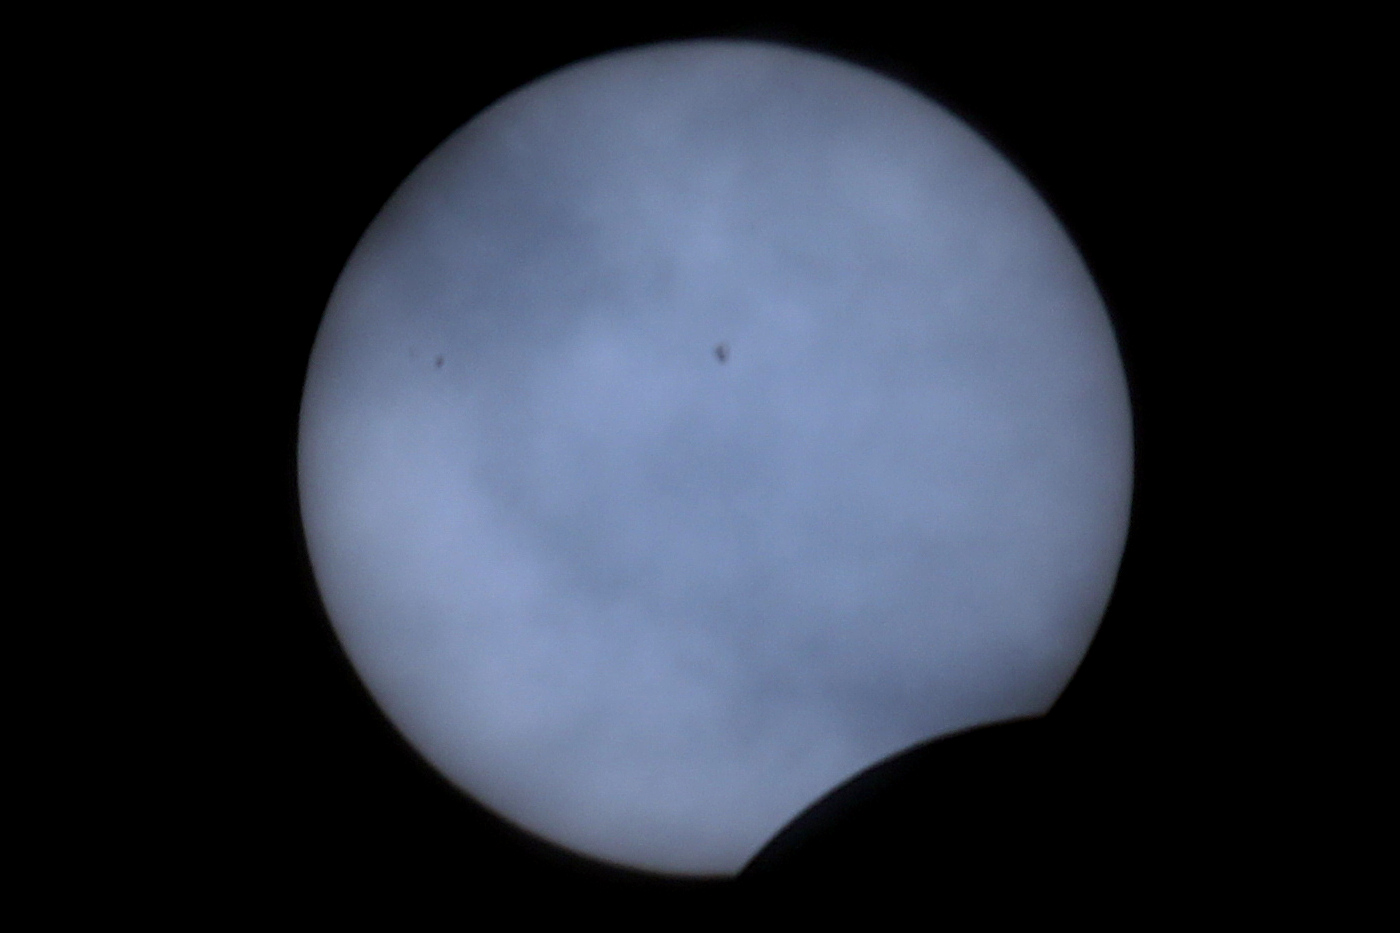
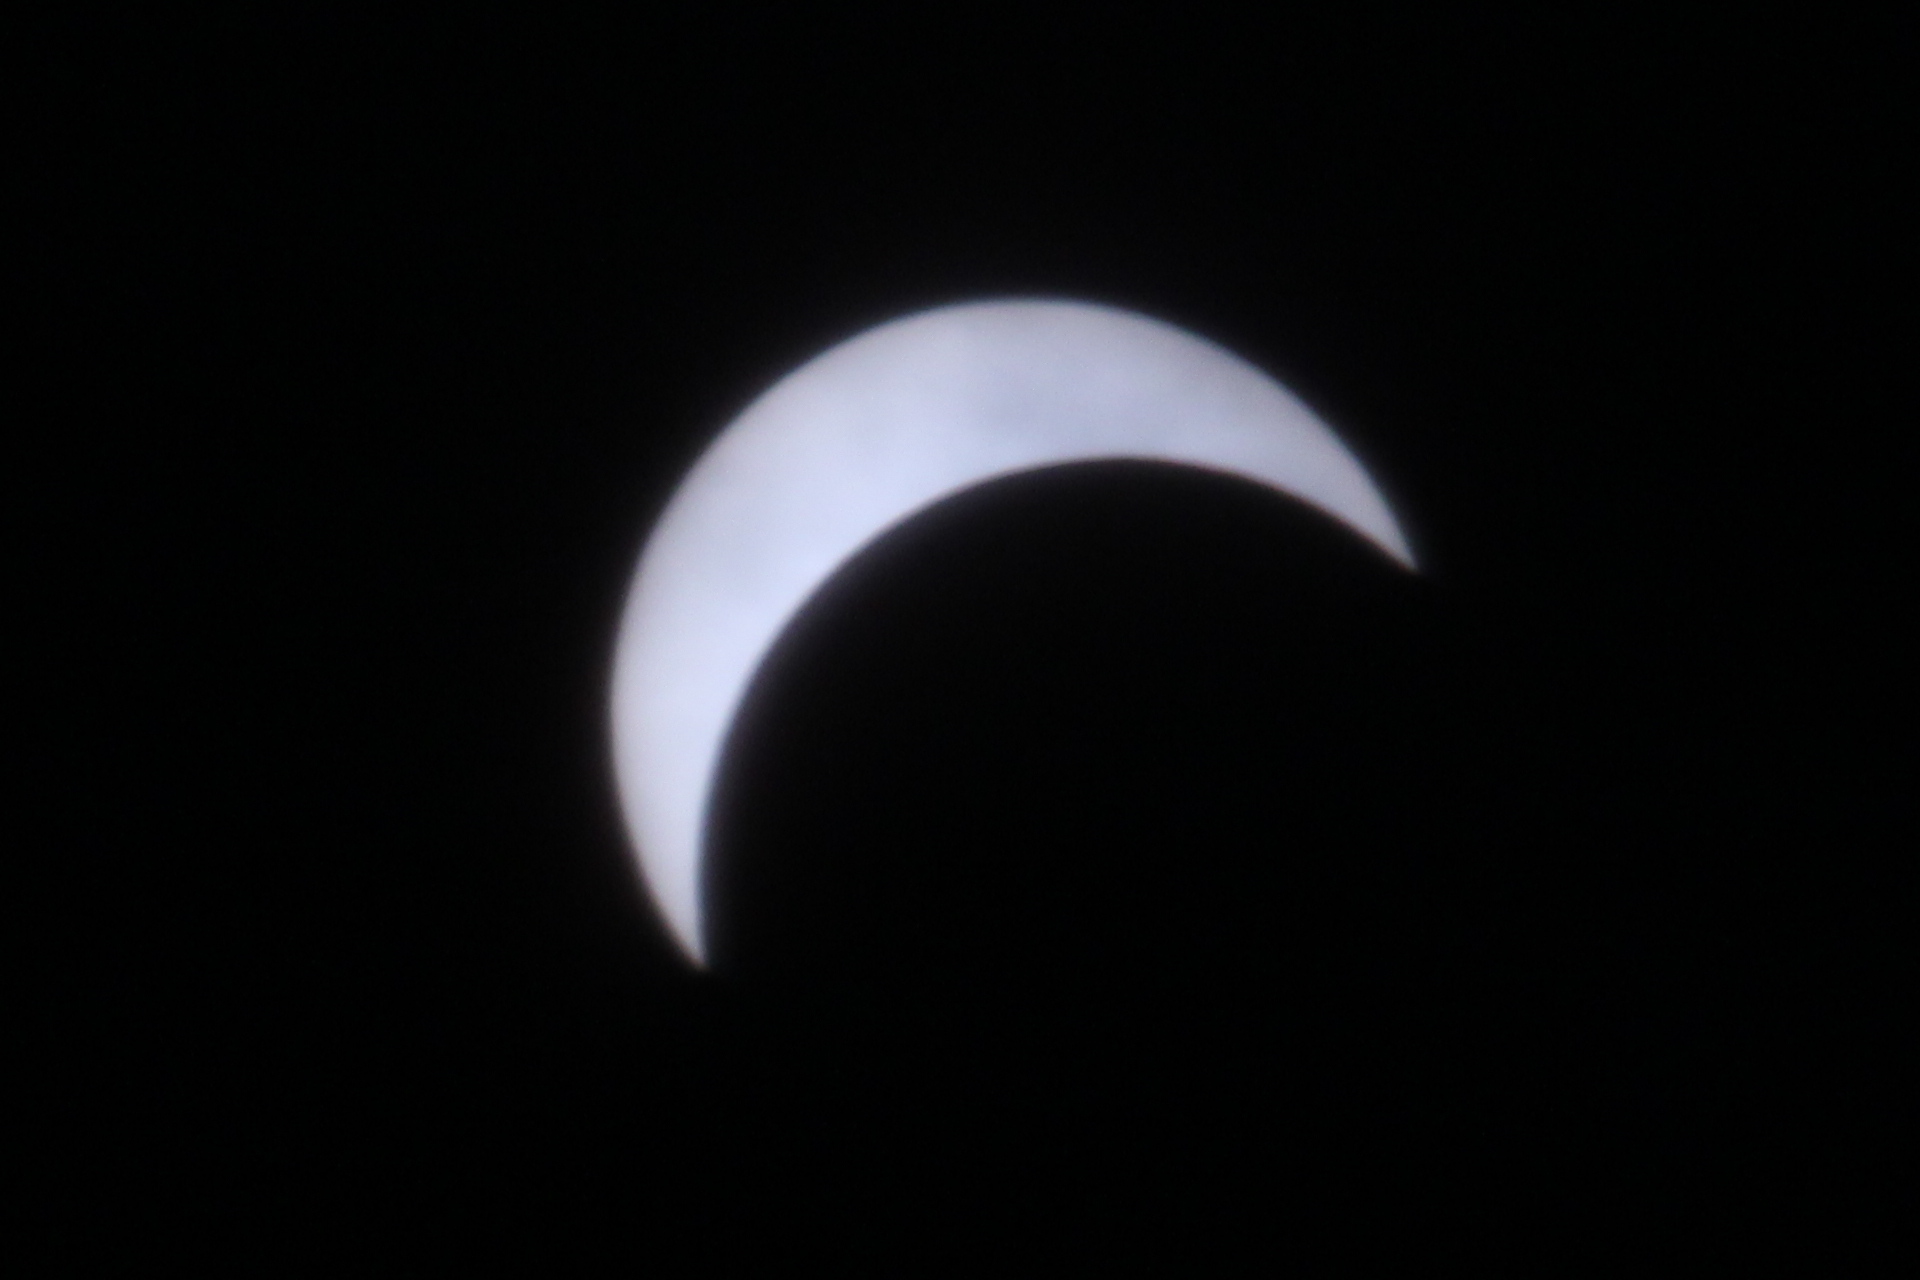
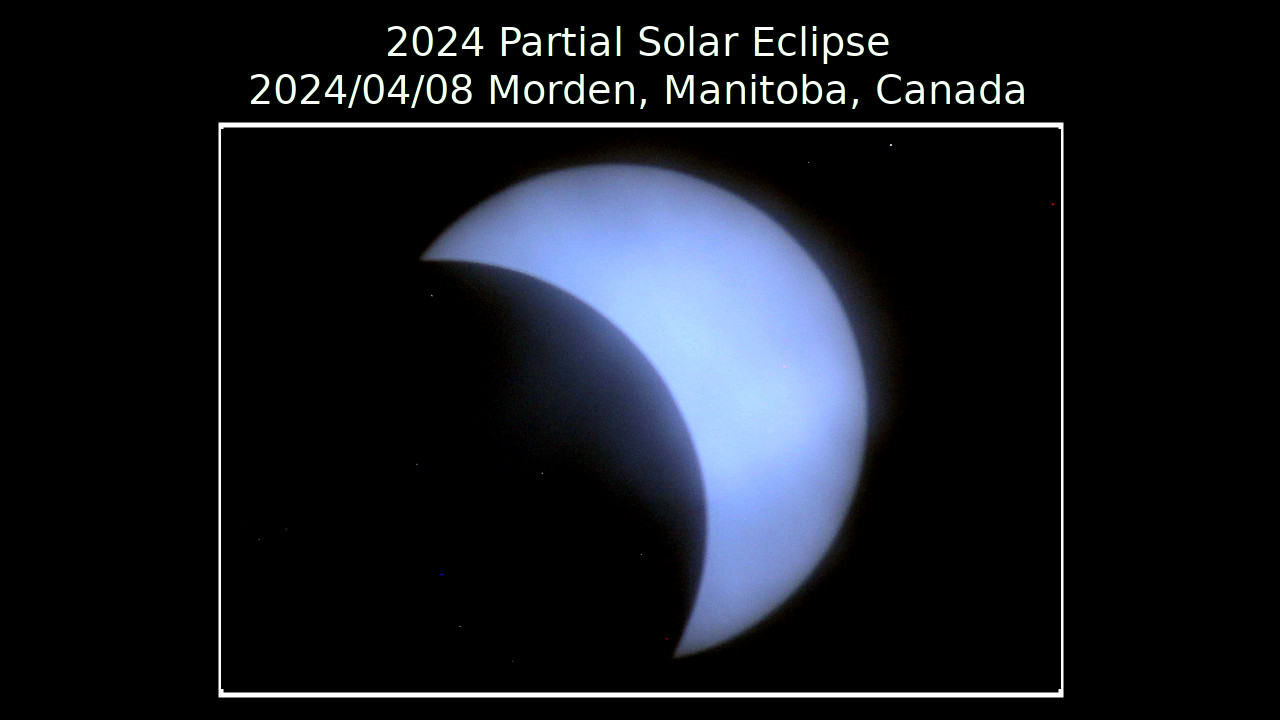
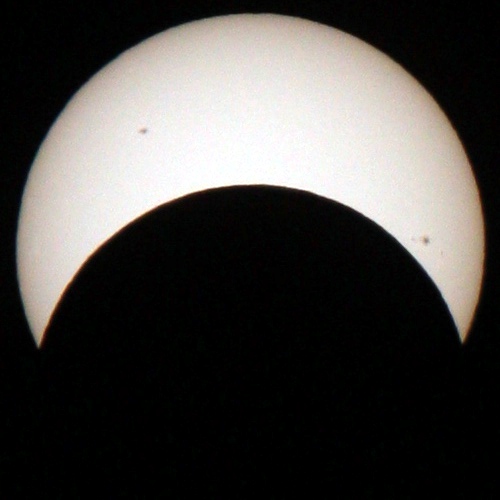
| The 2024 Full Solar Eclipse that crossed Mexico, the USA, and eastern Canada was the astronomy story-of-the-year. Where I was located, the eclipse was only a 54% coverage event. I also had the pleasure of an interview with Connie Bailey of radio CFAM to talk about this full/partial eclipse leading up to the actual event: CFAM Connie Bailey 2024 Partial Eclipse interview | ||||||
|
||||||
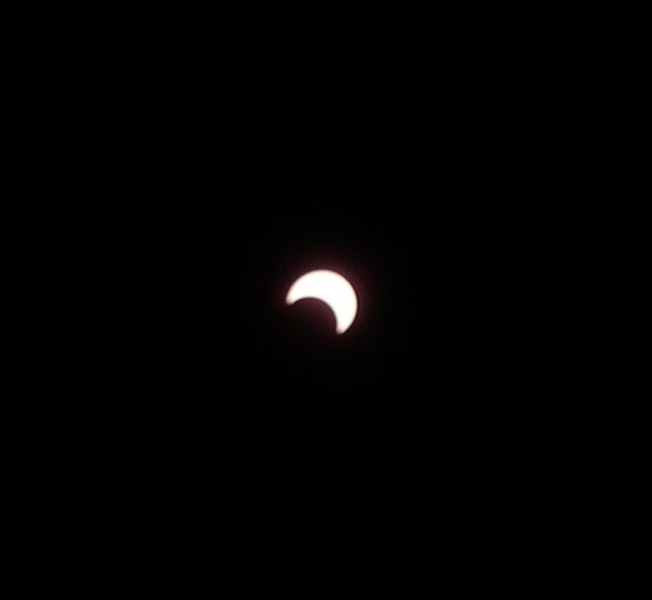
| This is a short video I took with the same
camera/lens sometime before the peak time, showing the
clouds moving through the sequence. |
||||||
 |
||||||
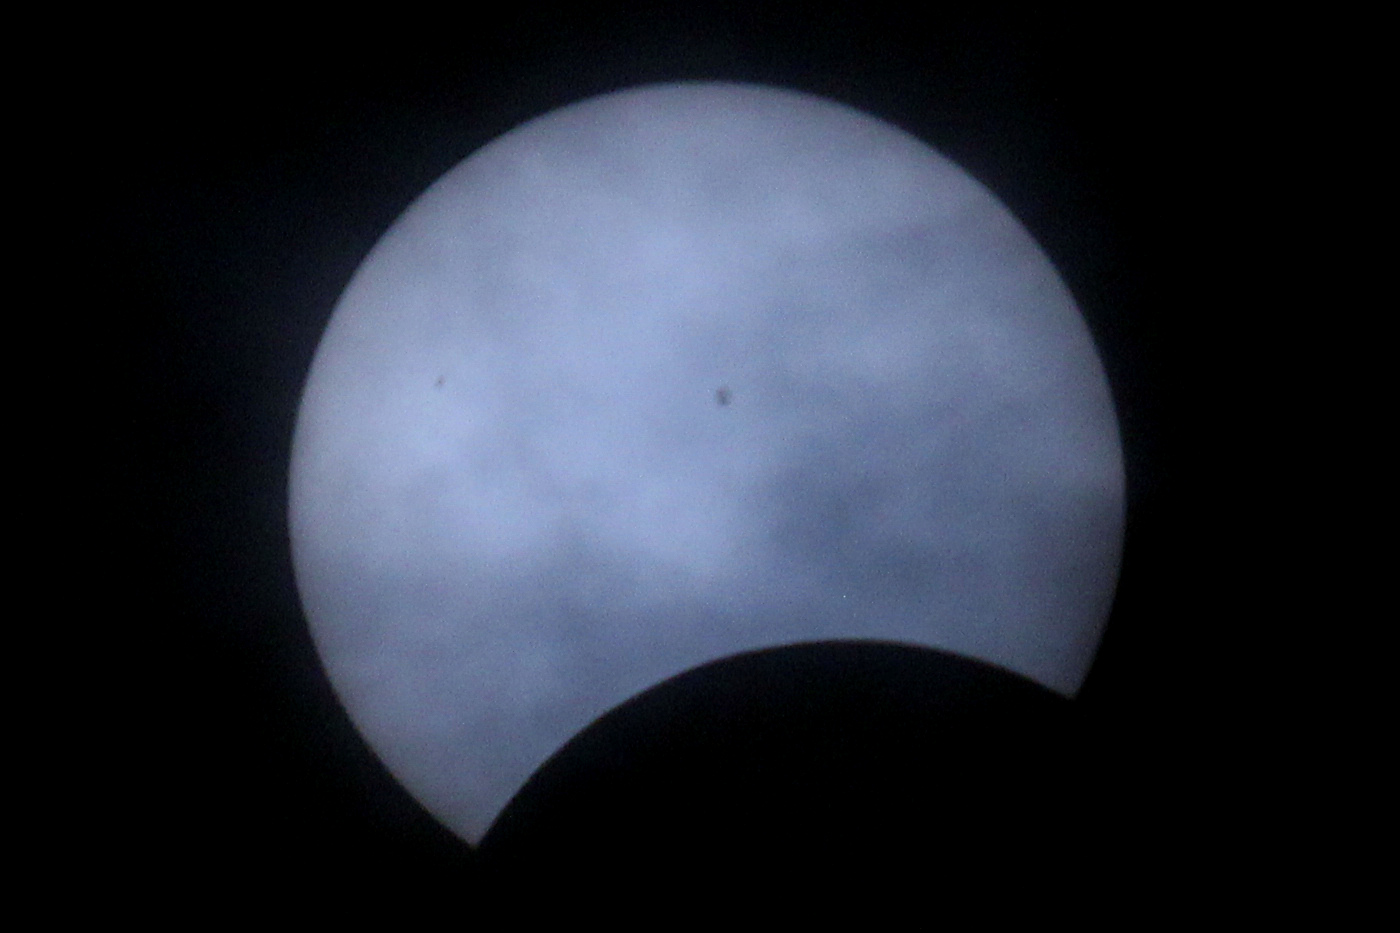
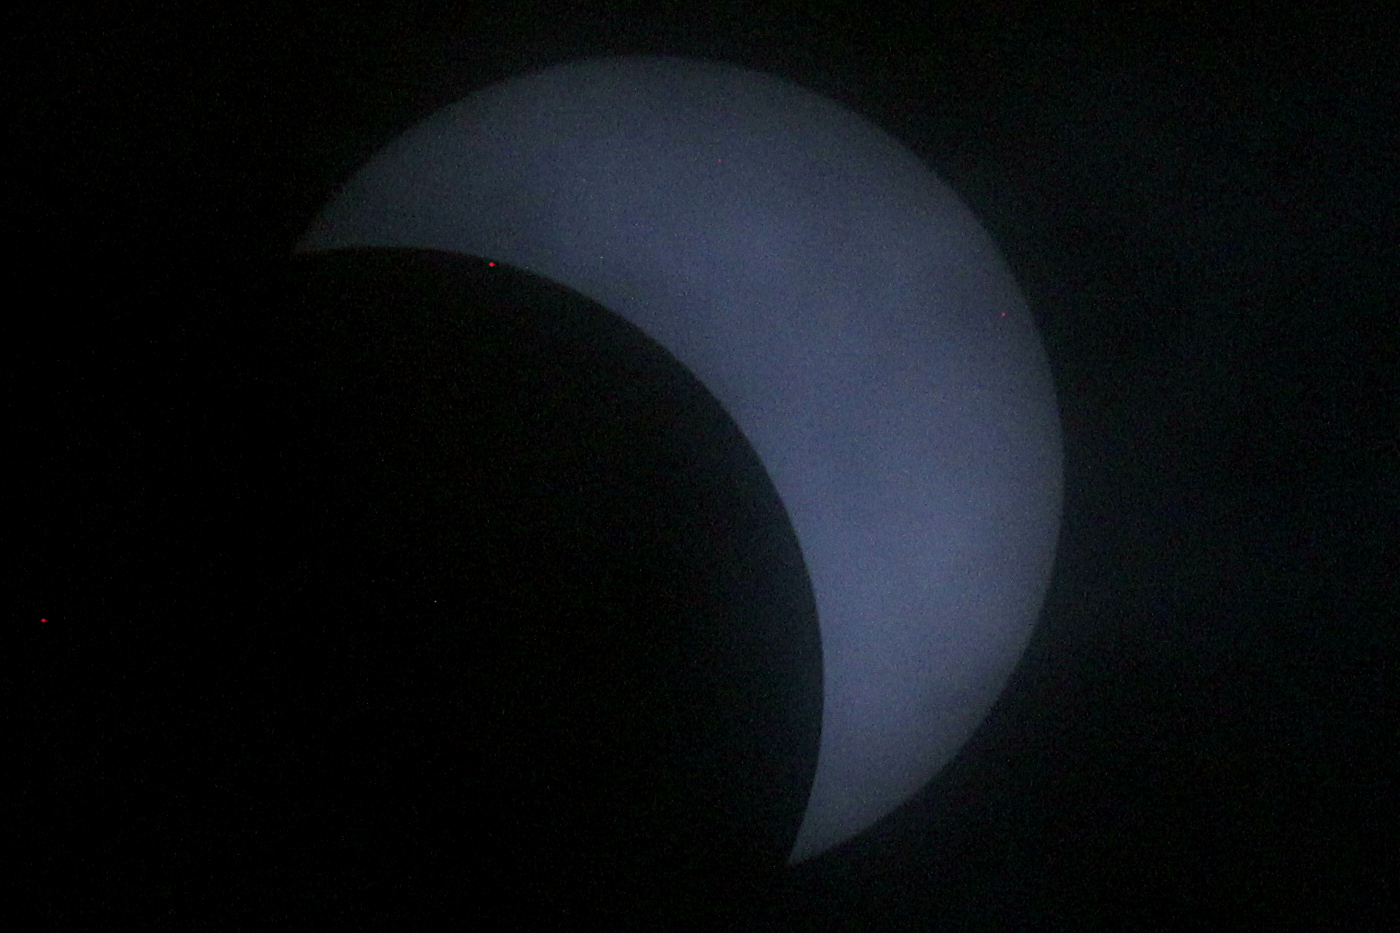
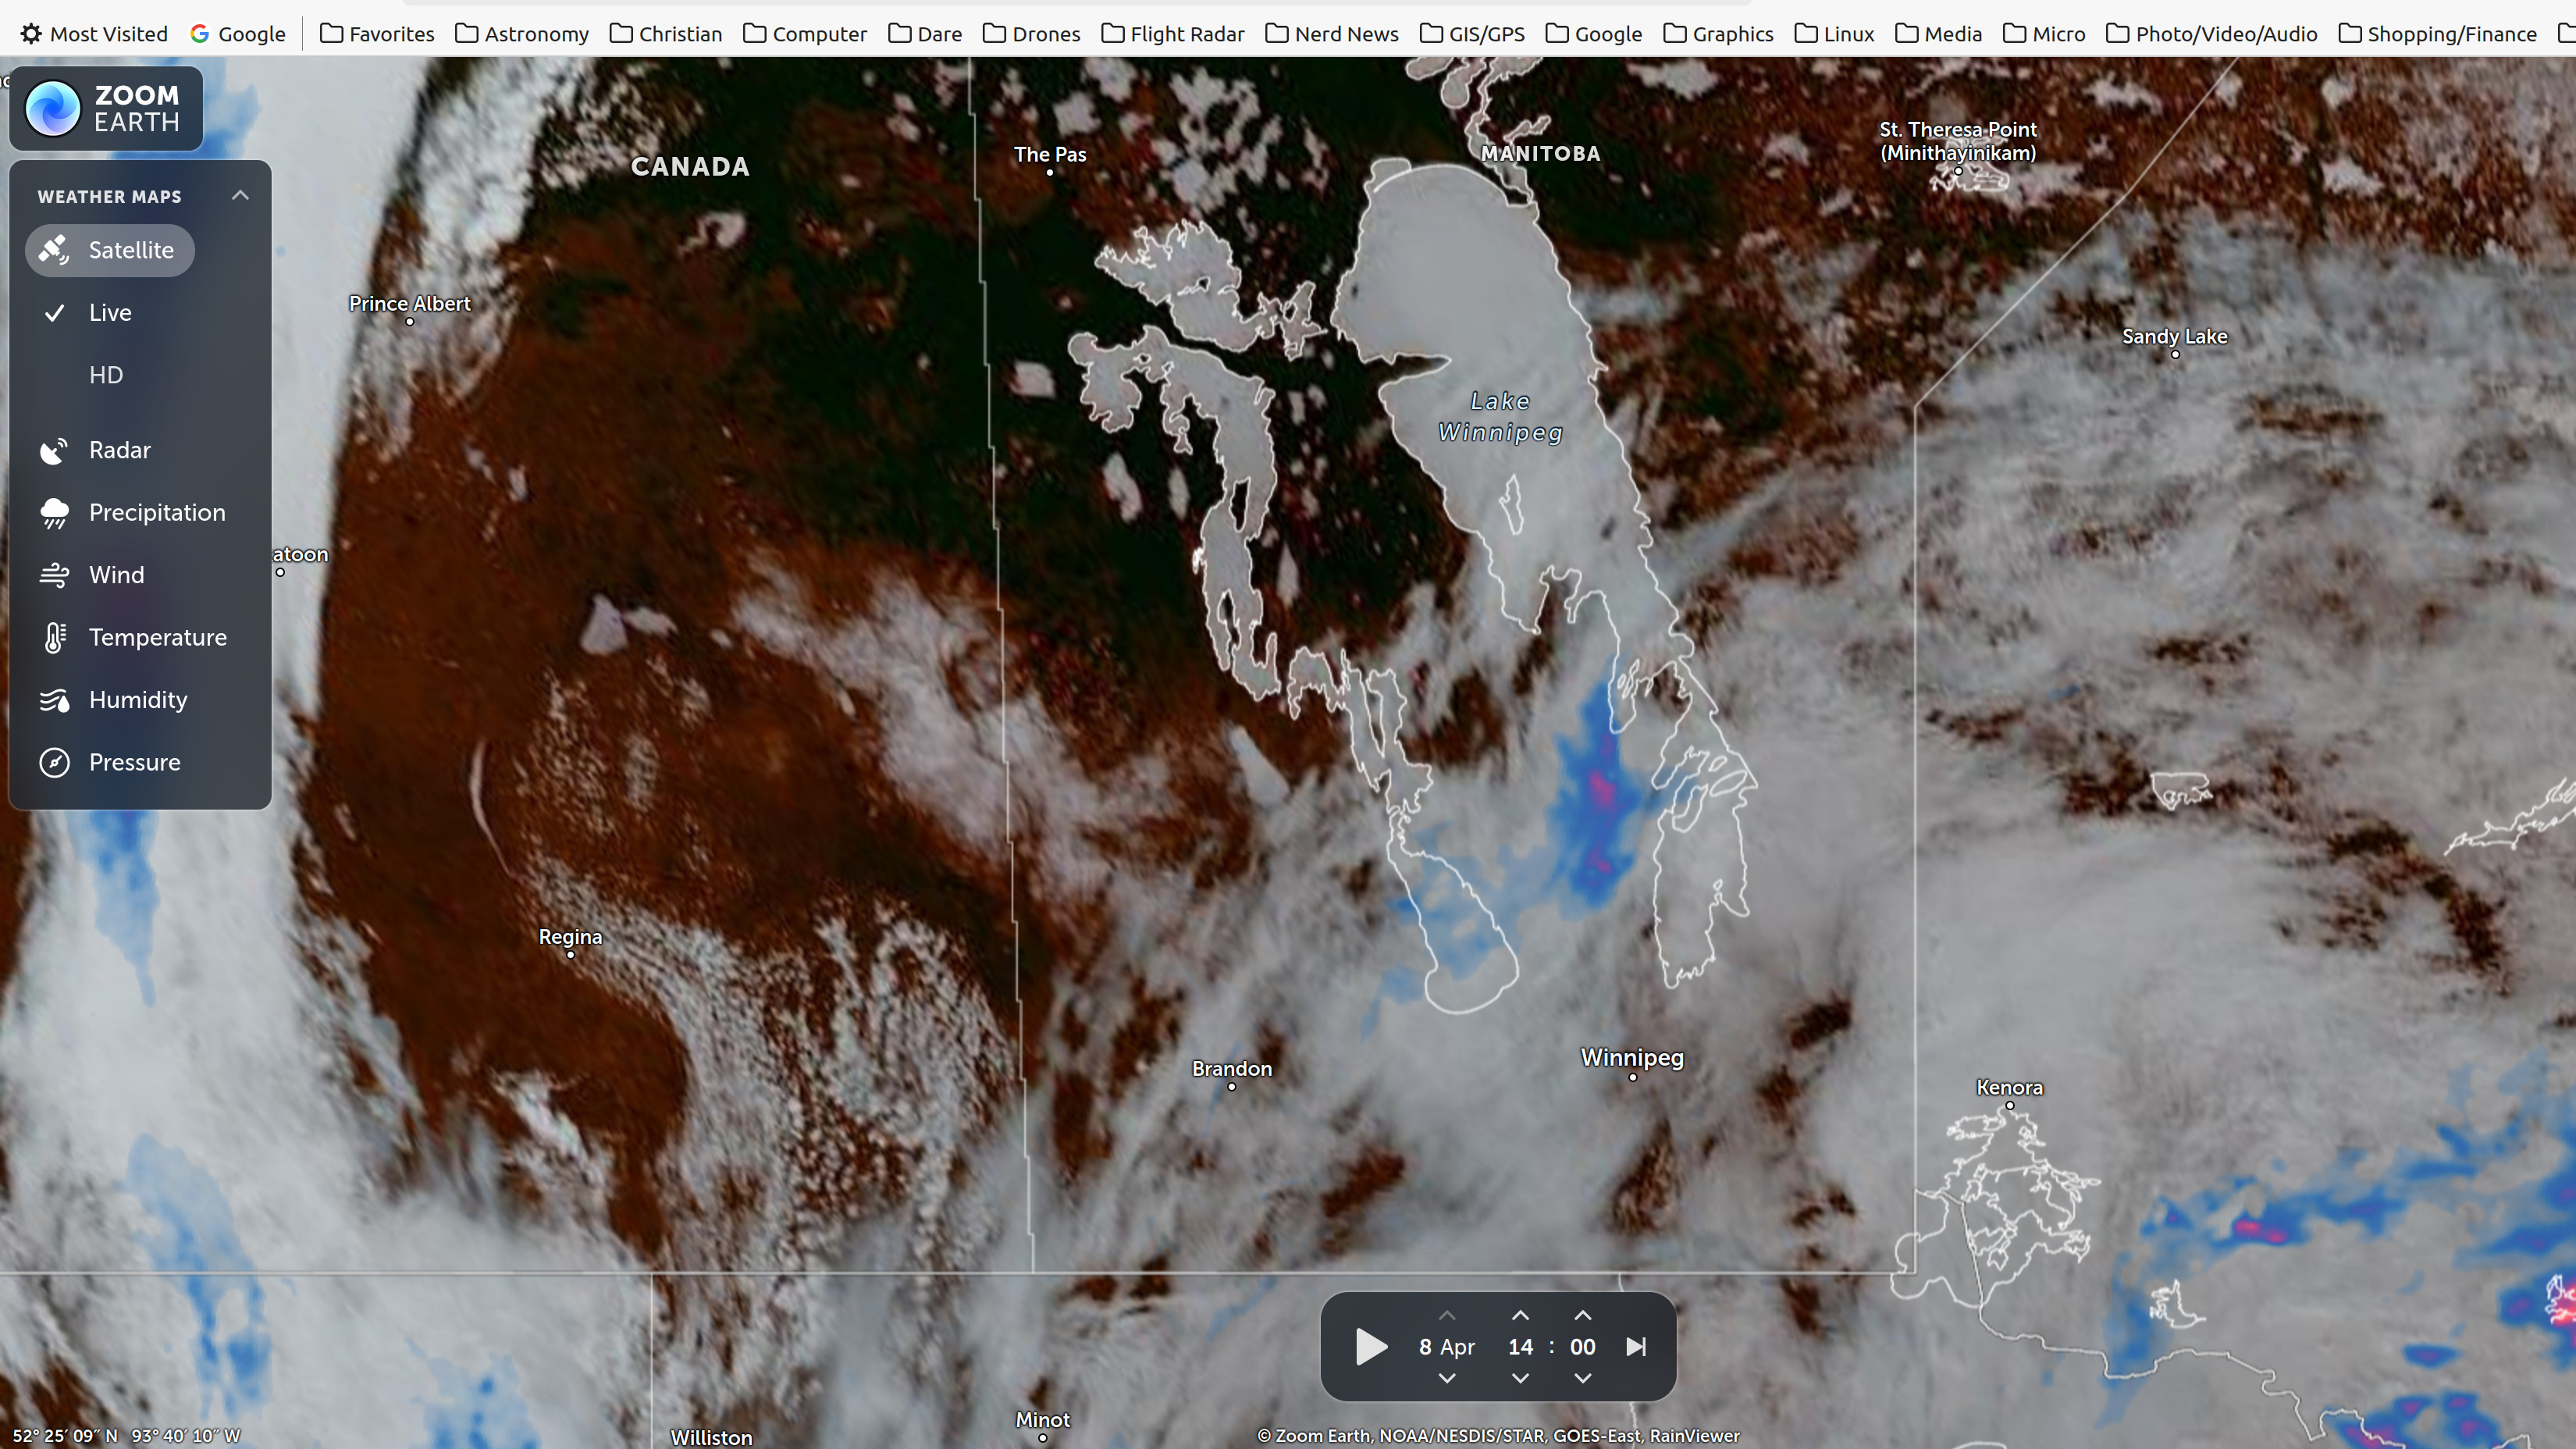
| Once again, morning clouds threatened to mess up my plans for the afternoon, but as the 12:52 eclipse start time for me approached, the clouds improved dramatically, and I was able to start taking reasonable photos. However, at 14:00 -- during peak coverage -- the situation had diminished to the point where good photos were no longer possible. The view above shows the clouds in Southern Manitoba at 14:00 CDT, at the peak of the partial eclipse. | ||||||
 |
||||||
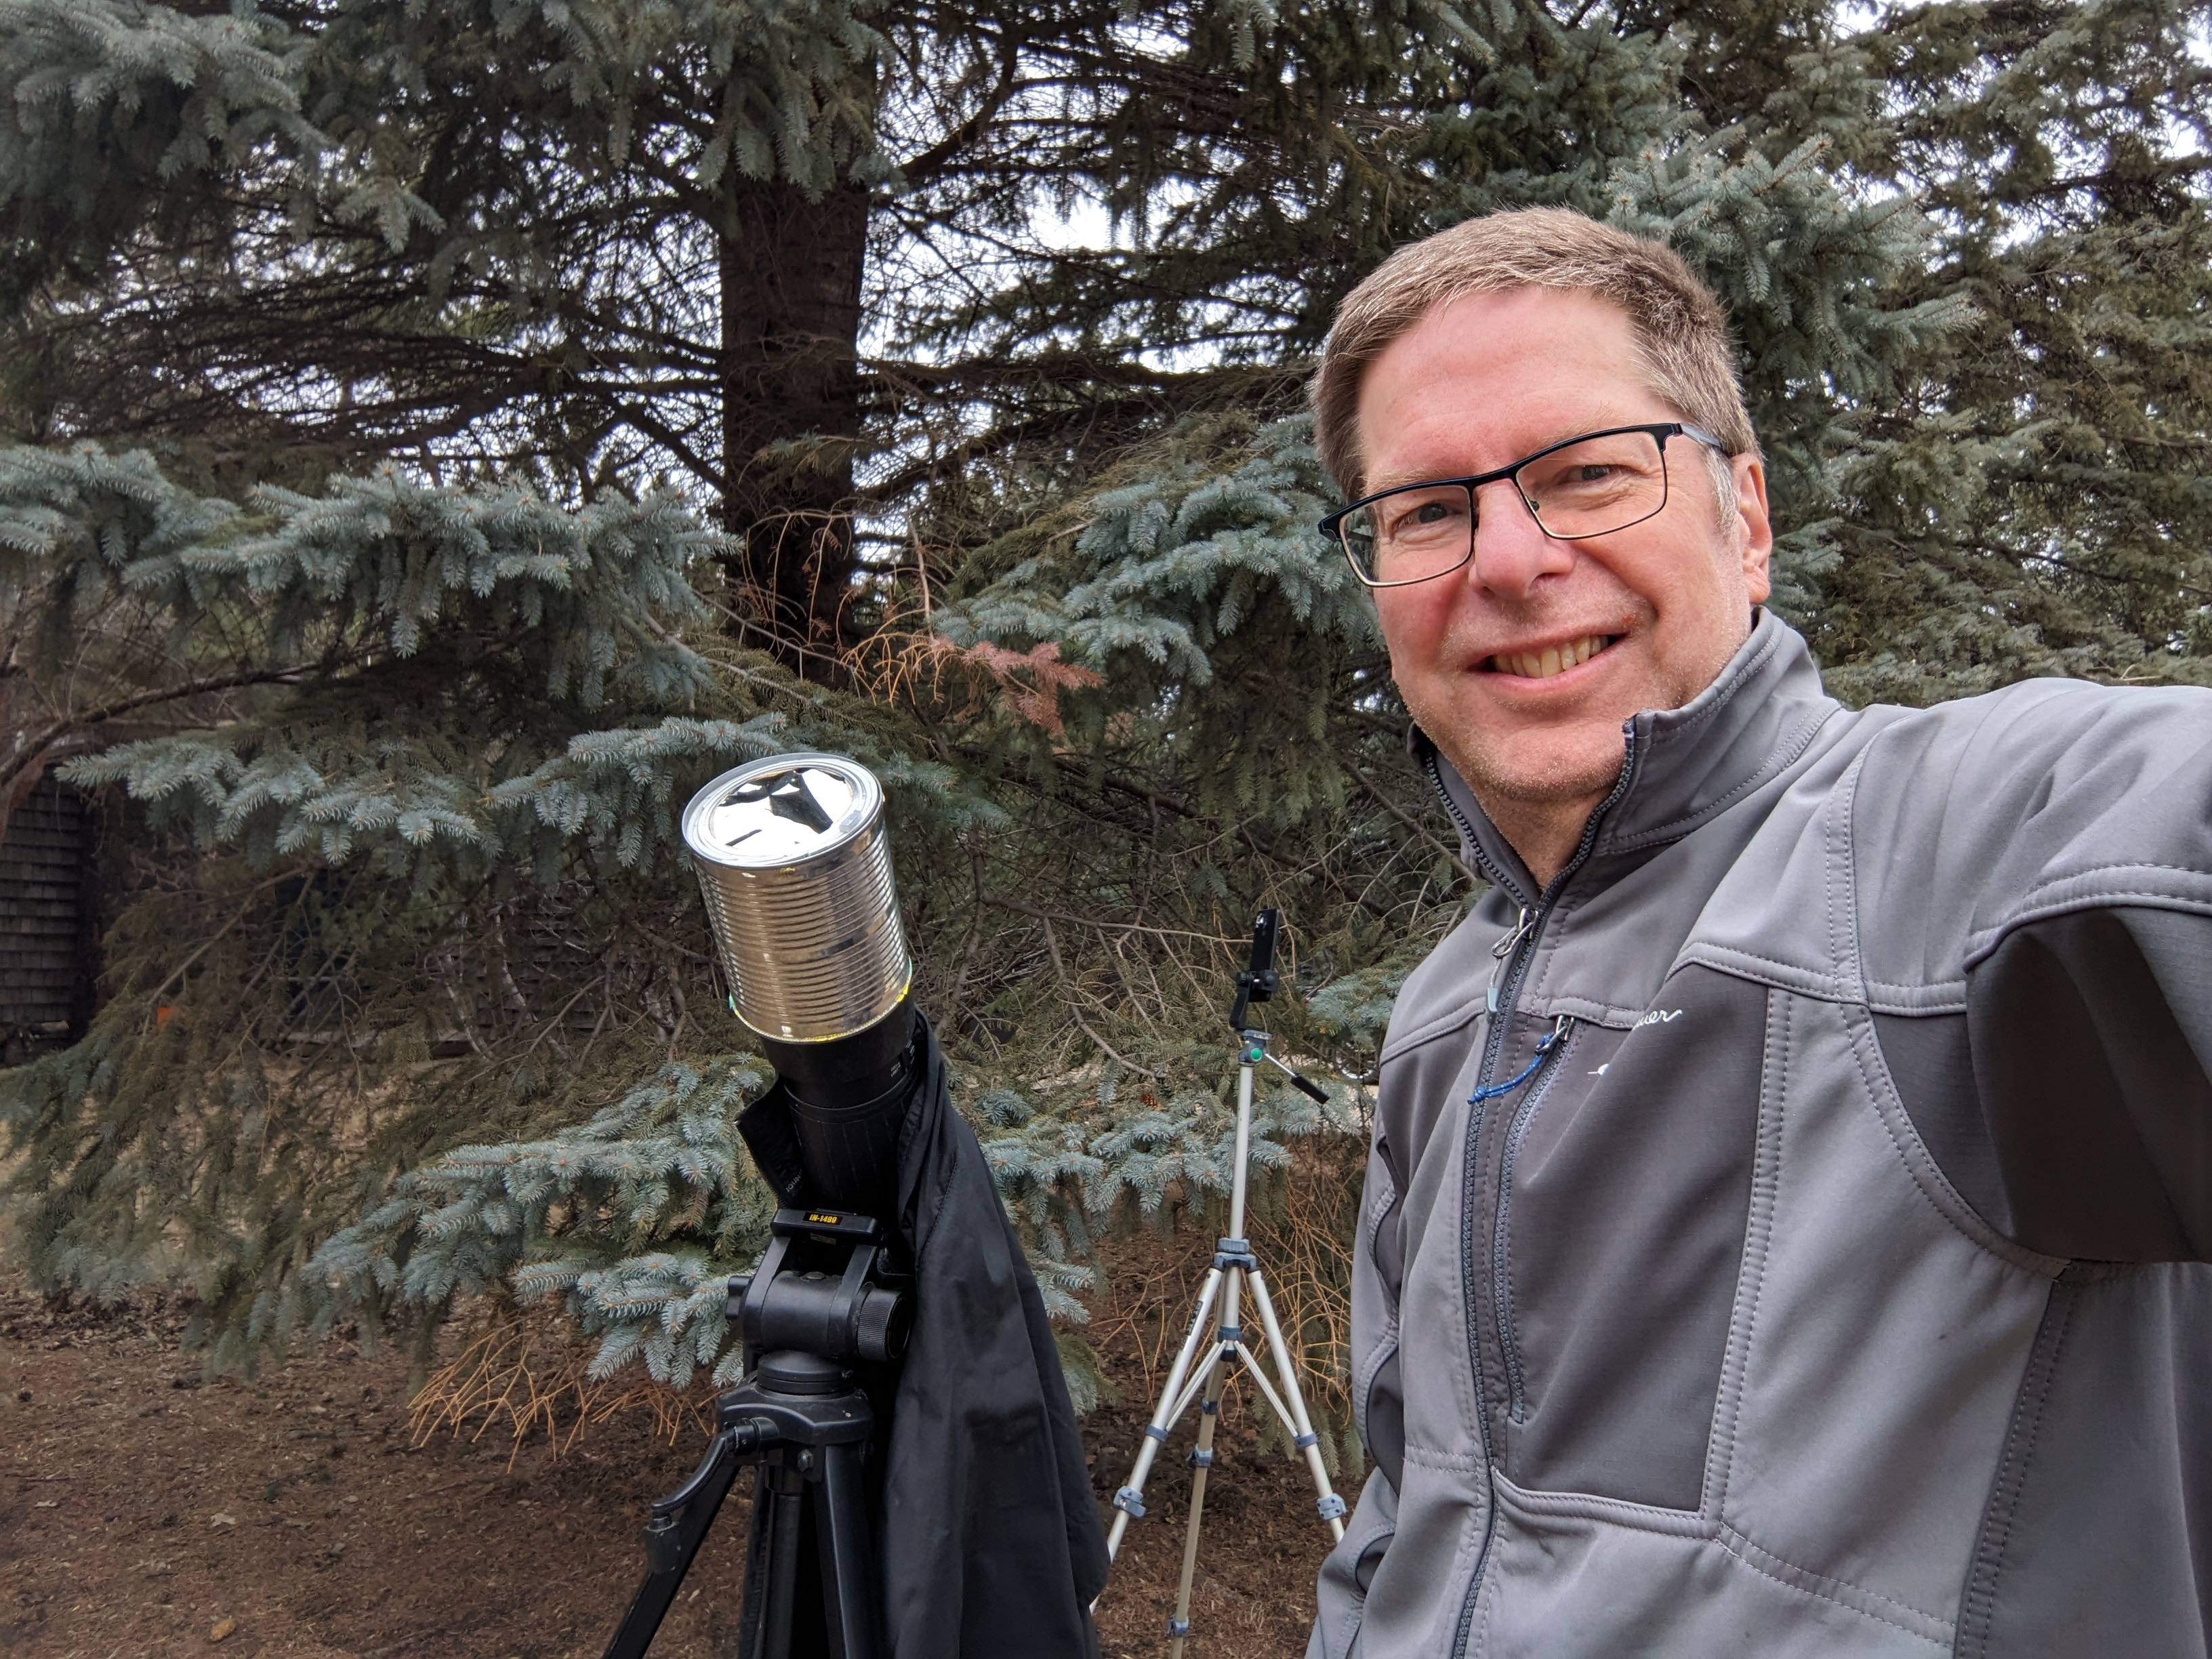
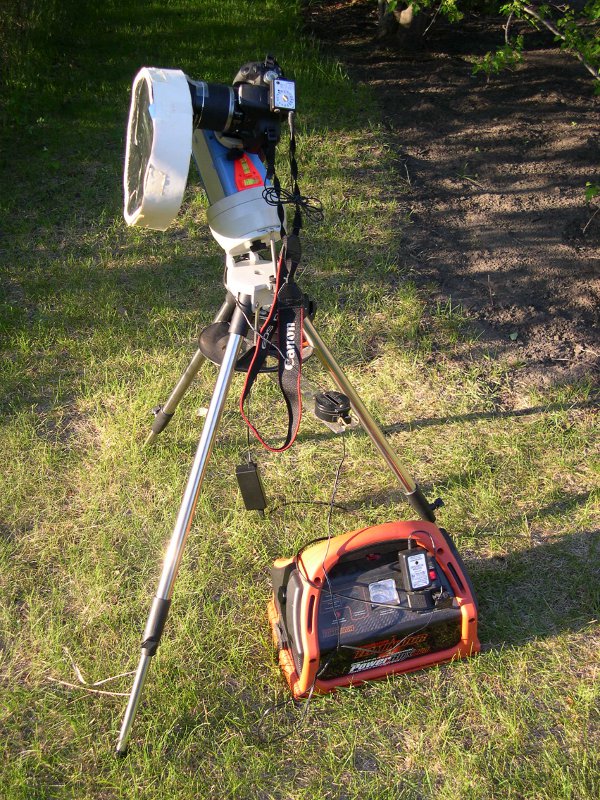
| Here I am trying to make the best of the
cloudy conditions of April 8th, 2024 :) |
||||||
 |
||||||
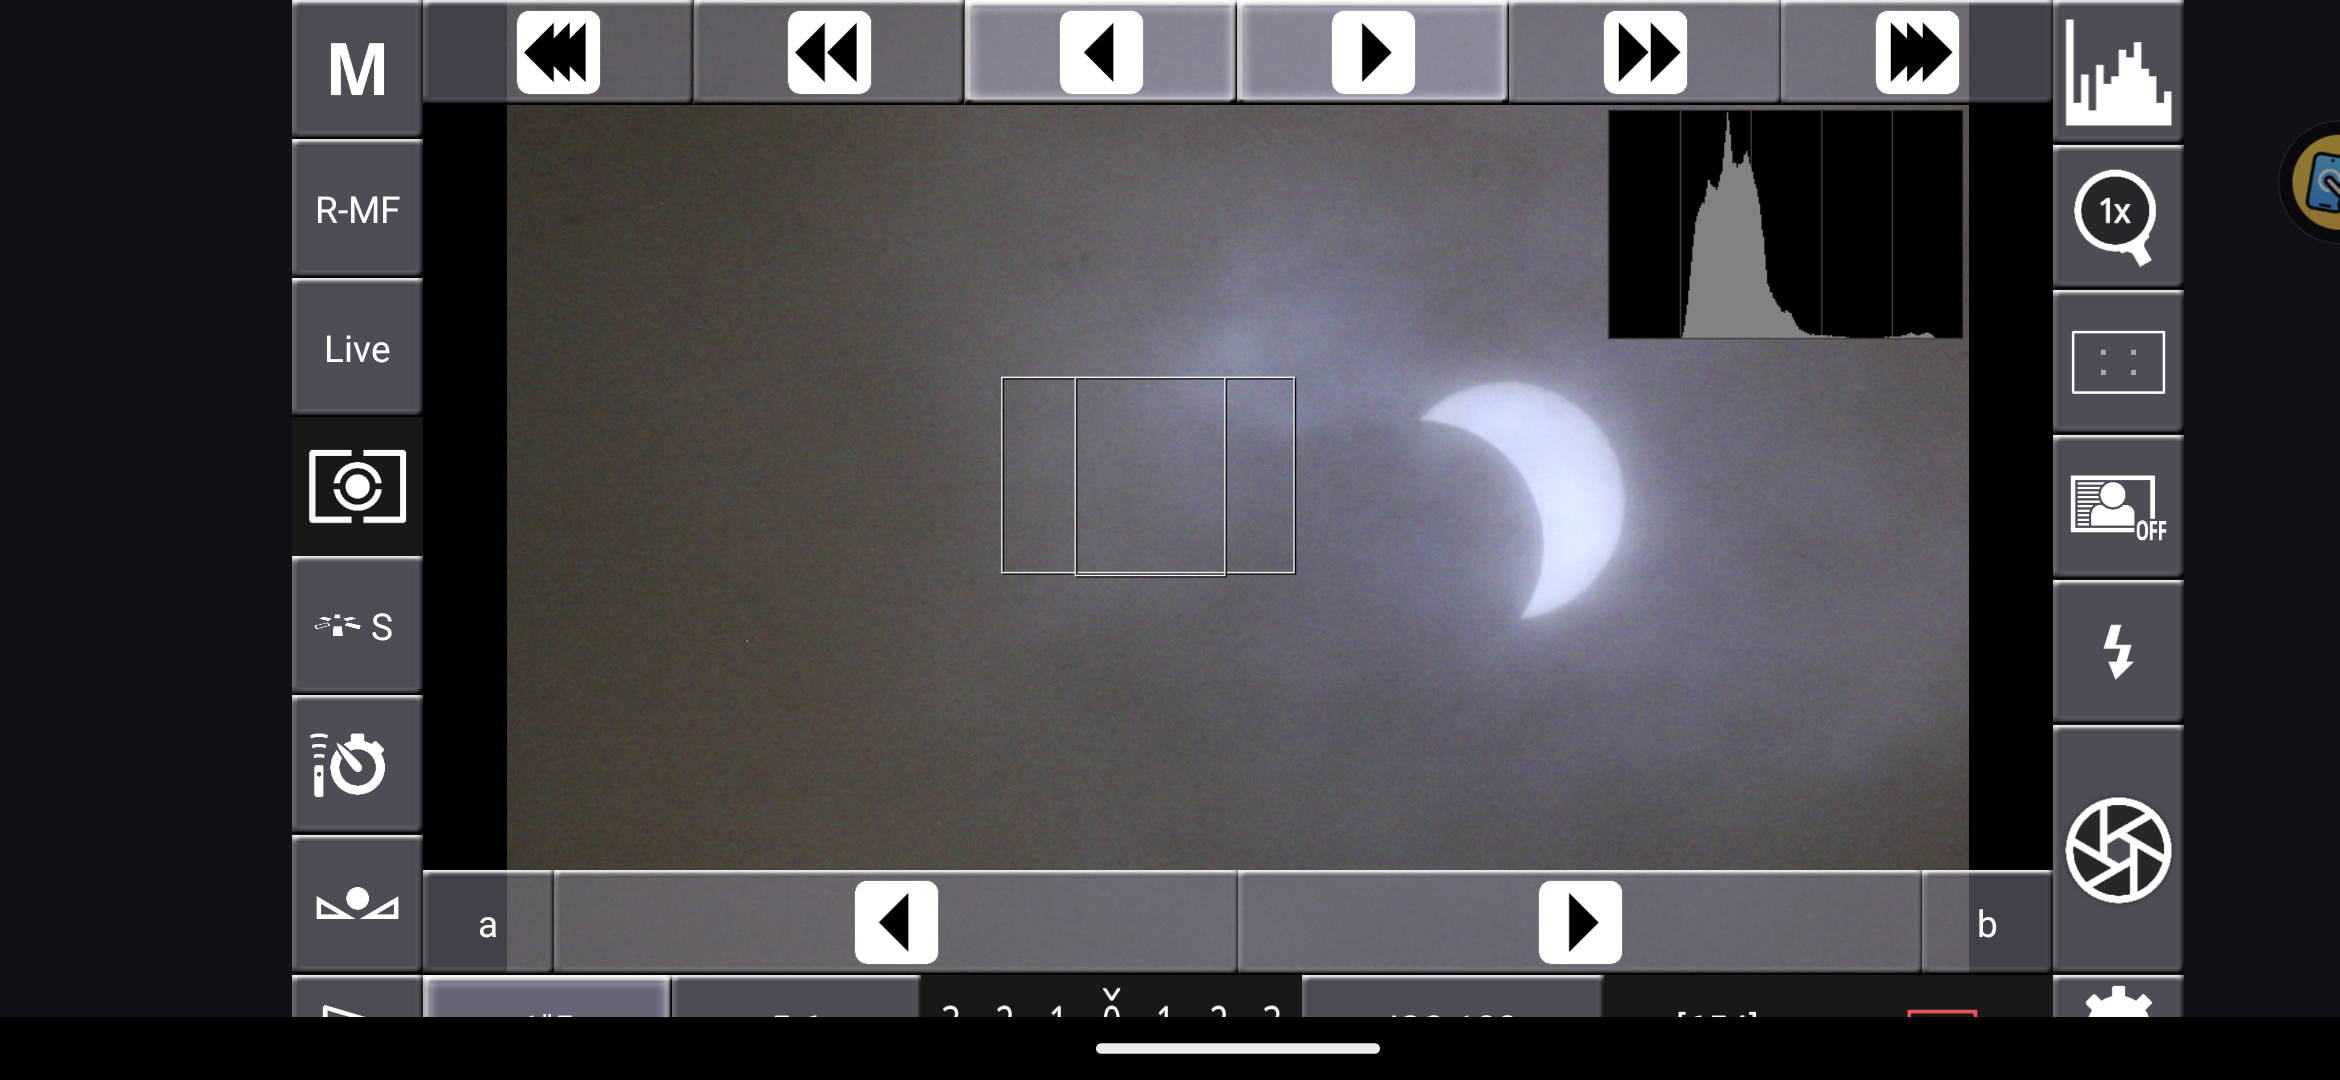
| DSLR Controller
app on my android phone, to control fine-focus and
exposure |
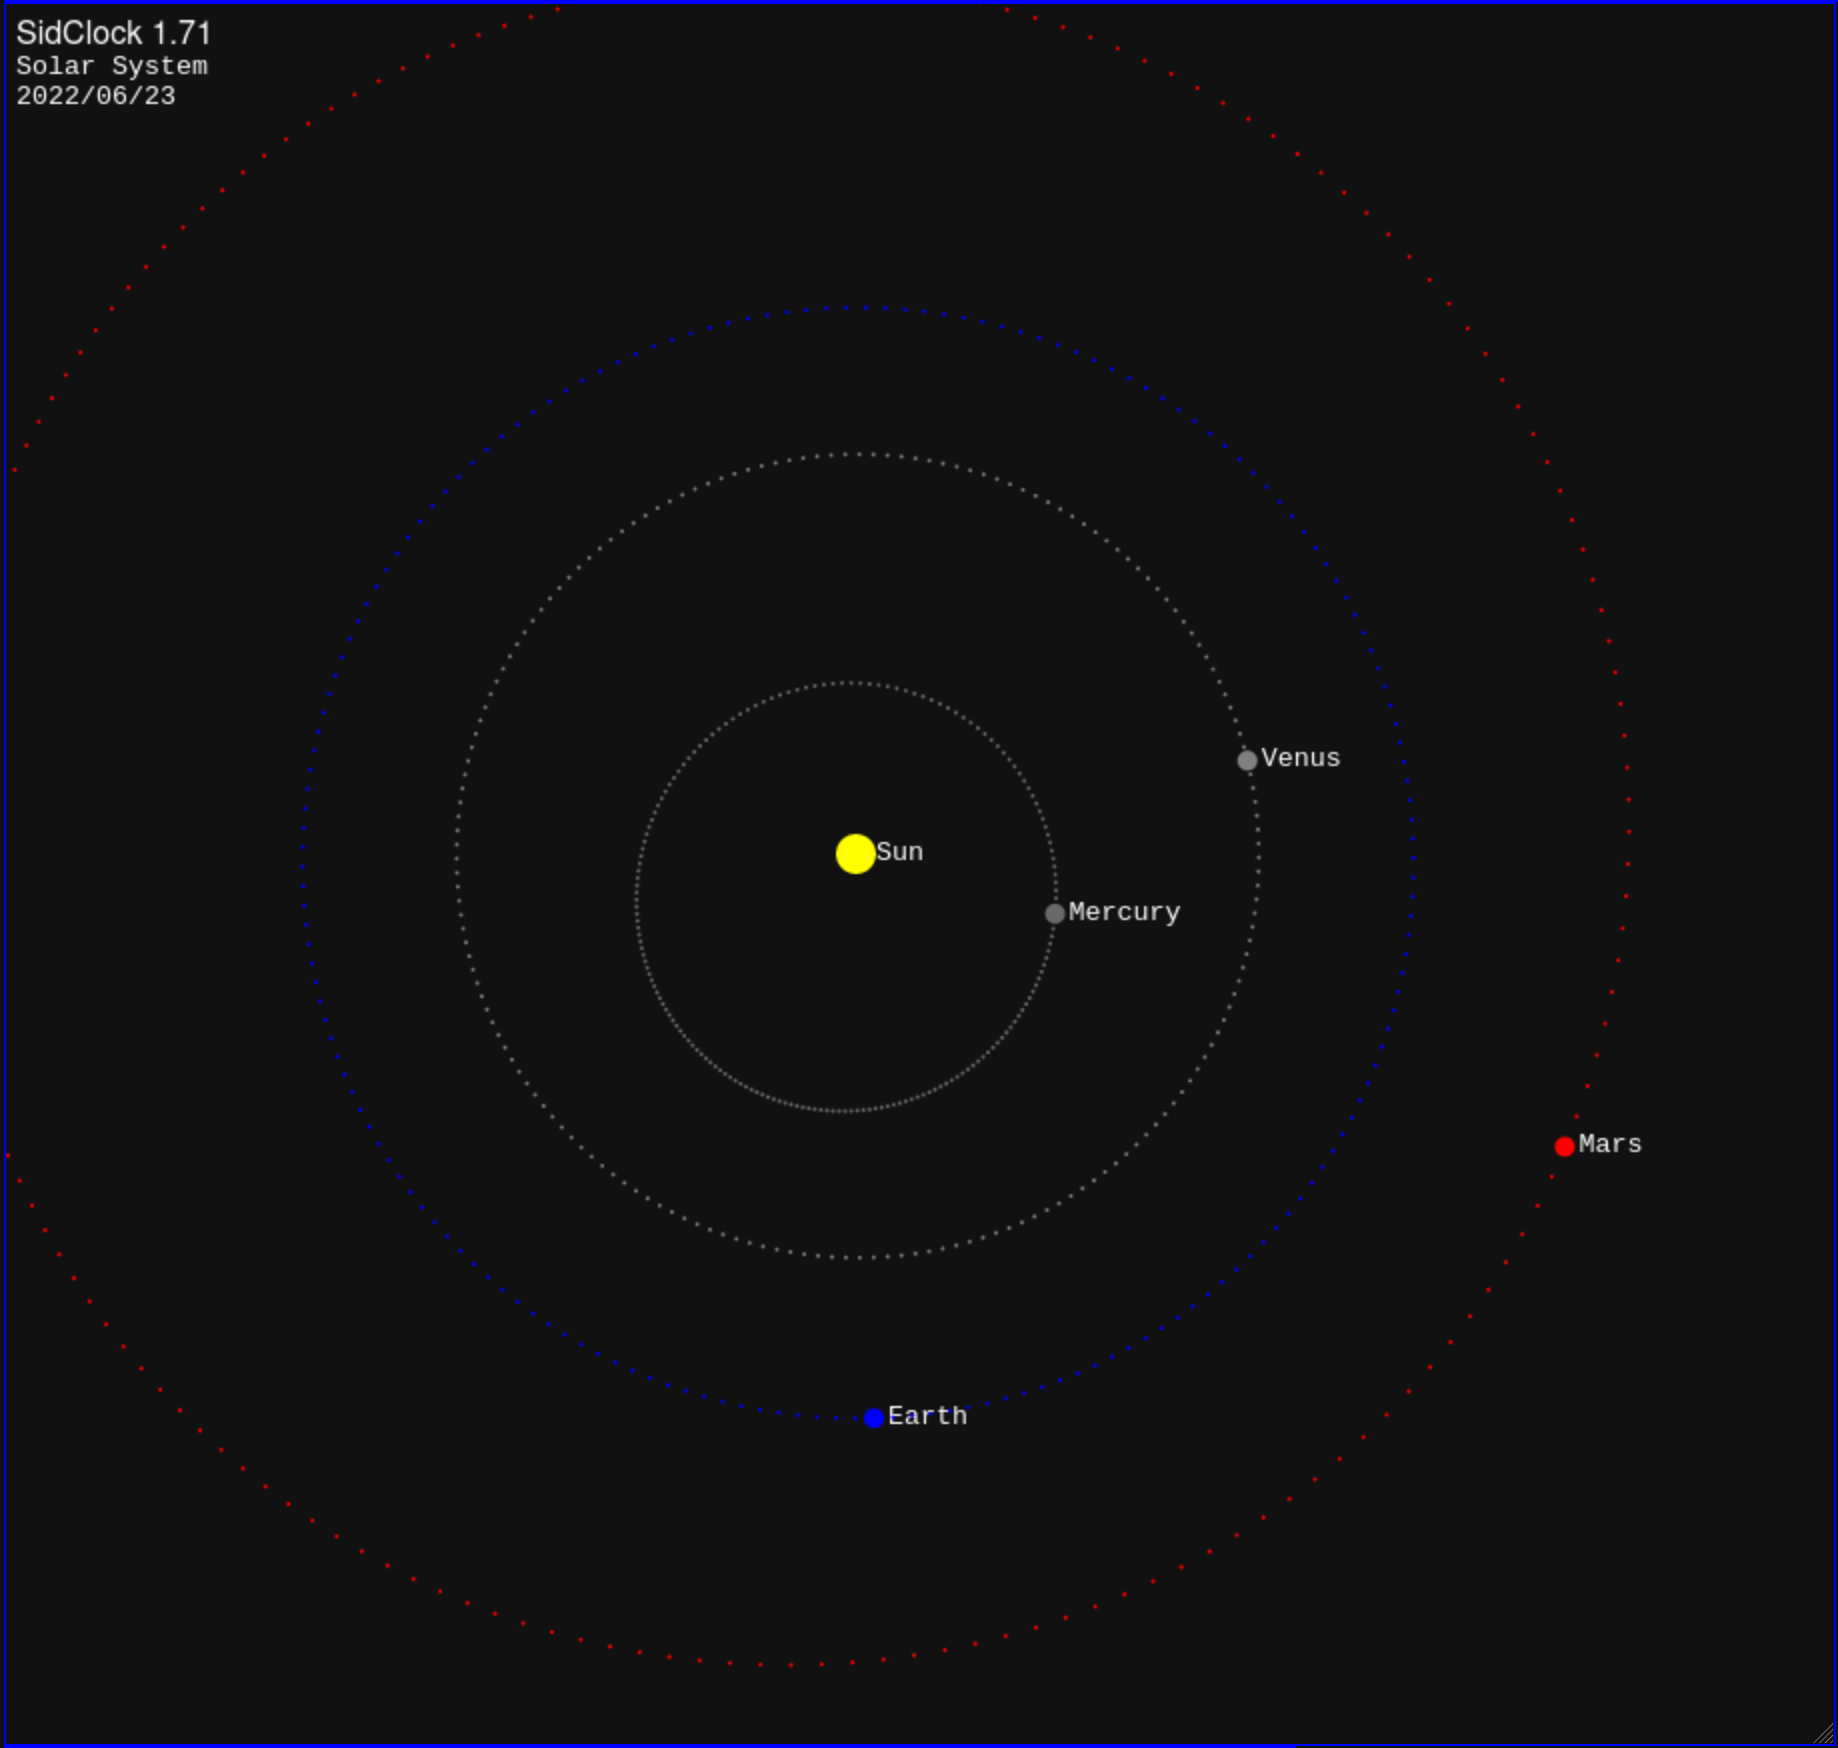
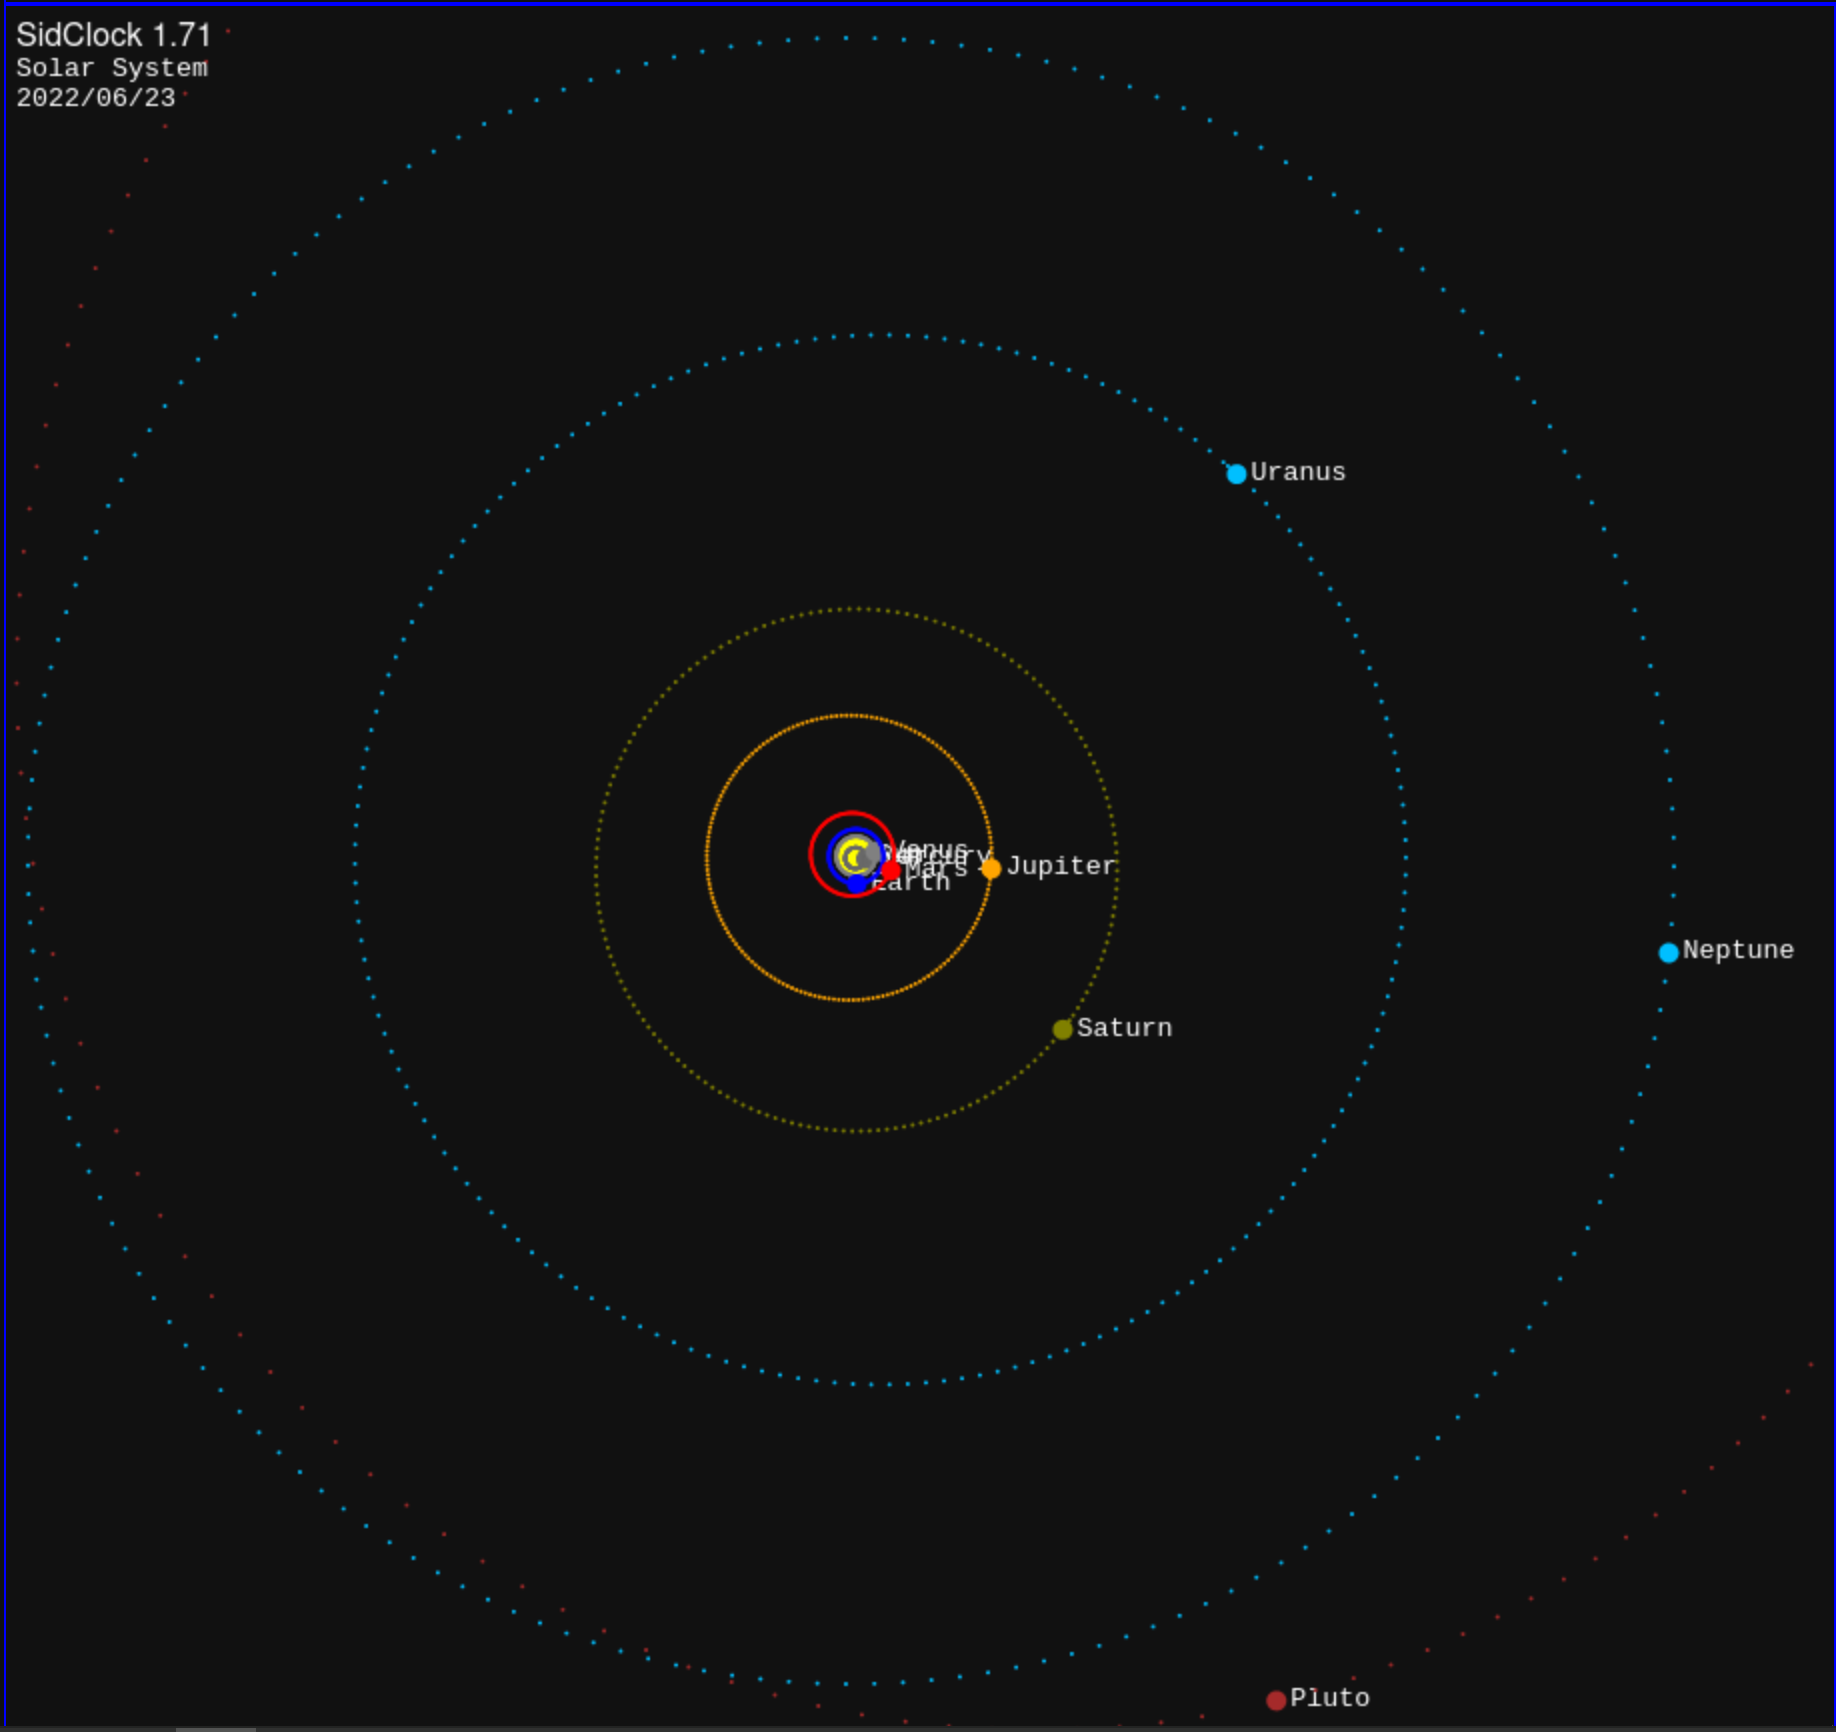
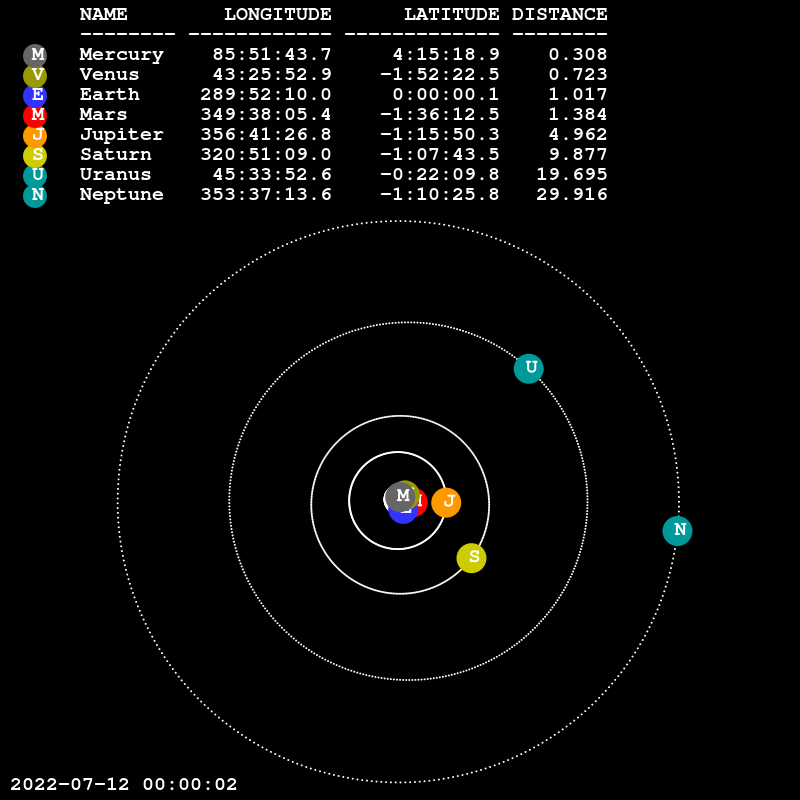
| An alignment of some of the planets
occurred on 2022/06/23, and I wanted to capture this
moment. |
||
 |
||
| Canon T1i/500D: Wide View |
||
 |
||
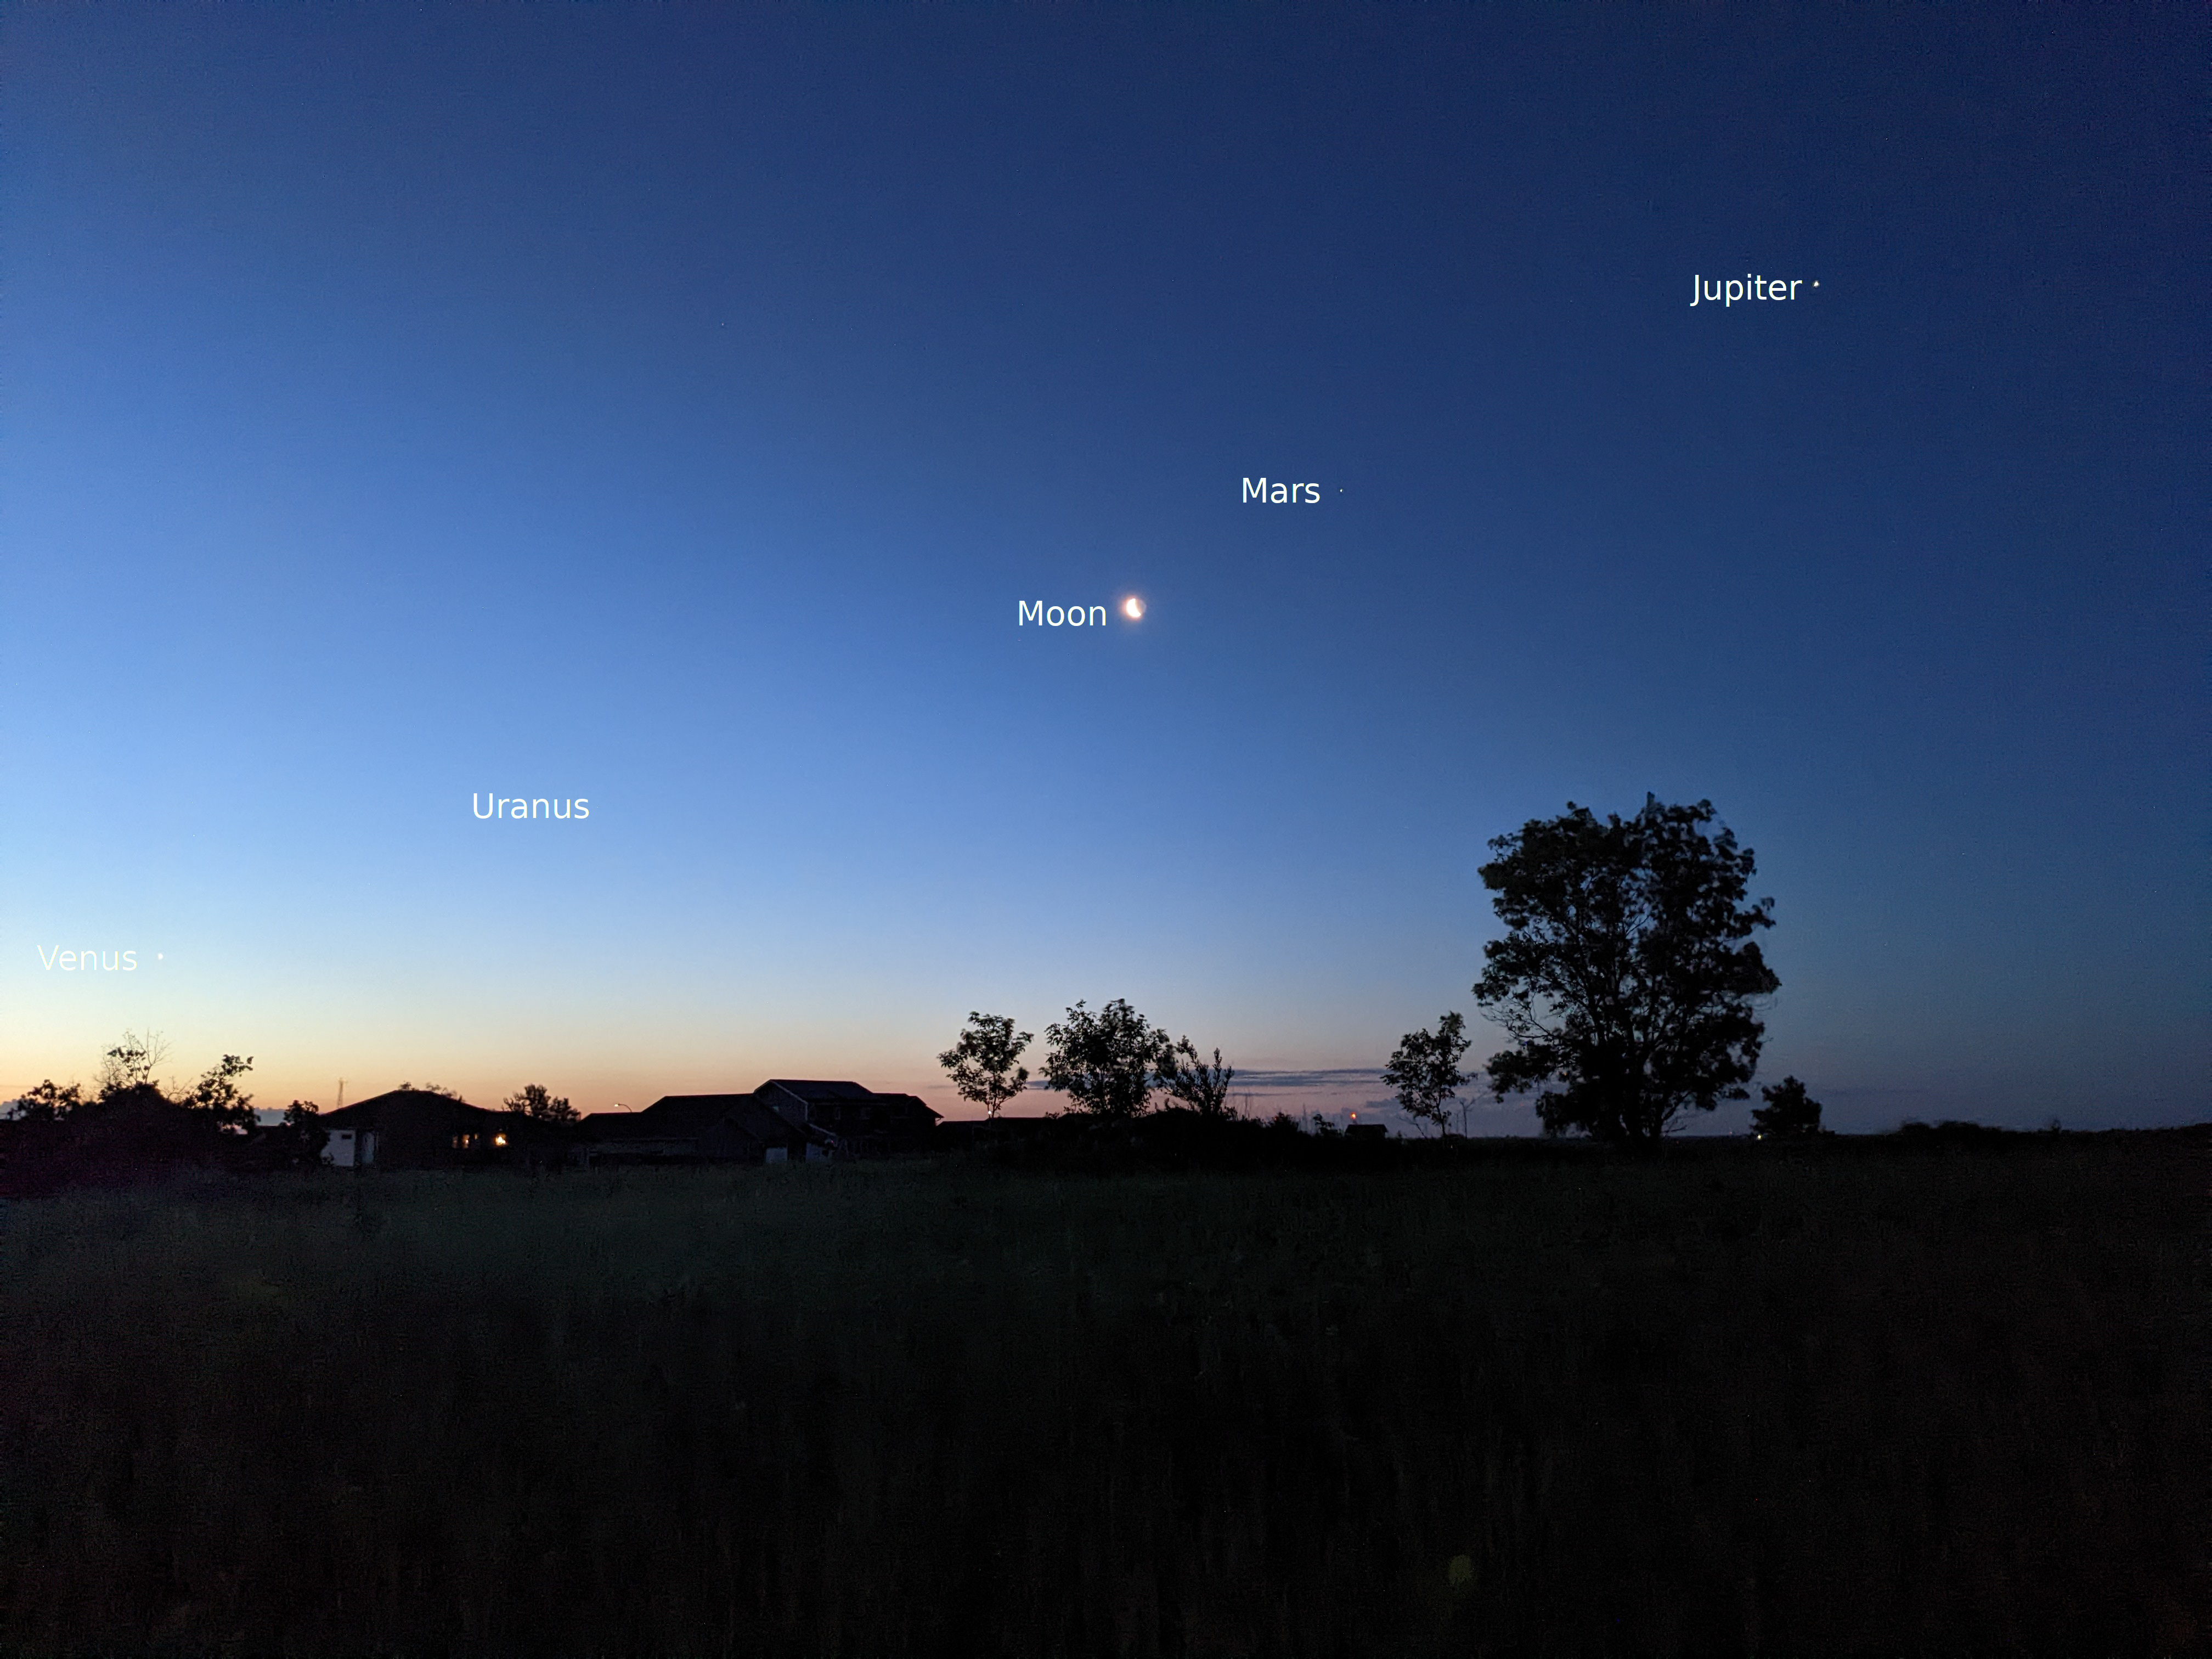
| East View Pixel 4a: Includes Uranus |
||
 |
||
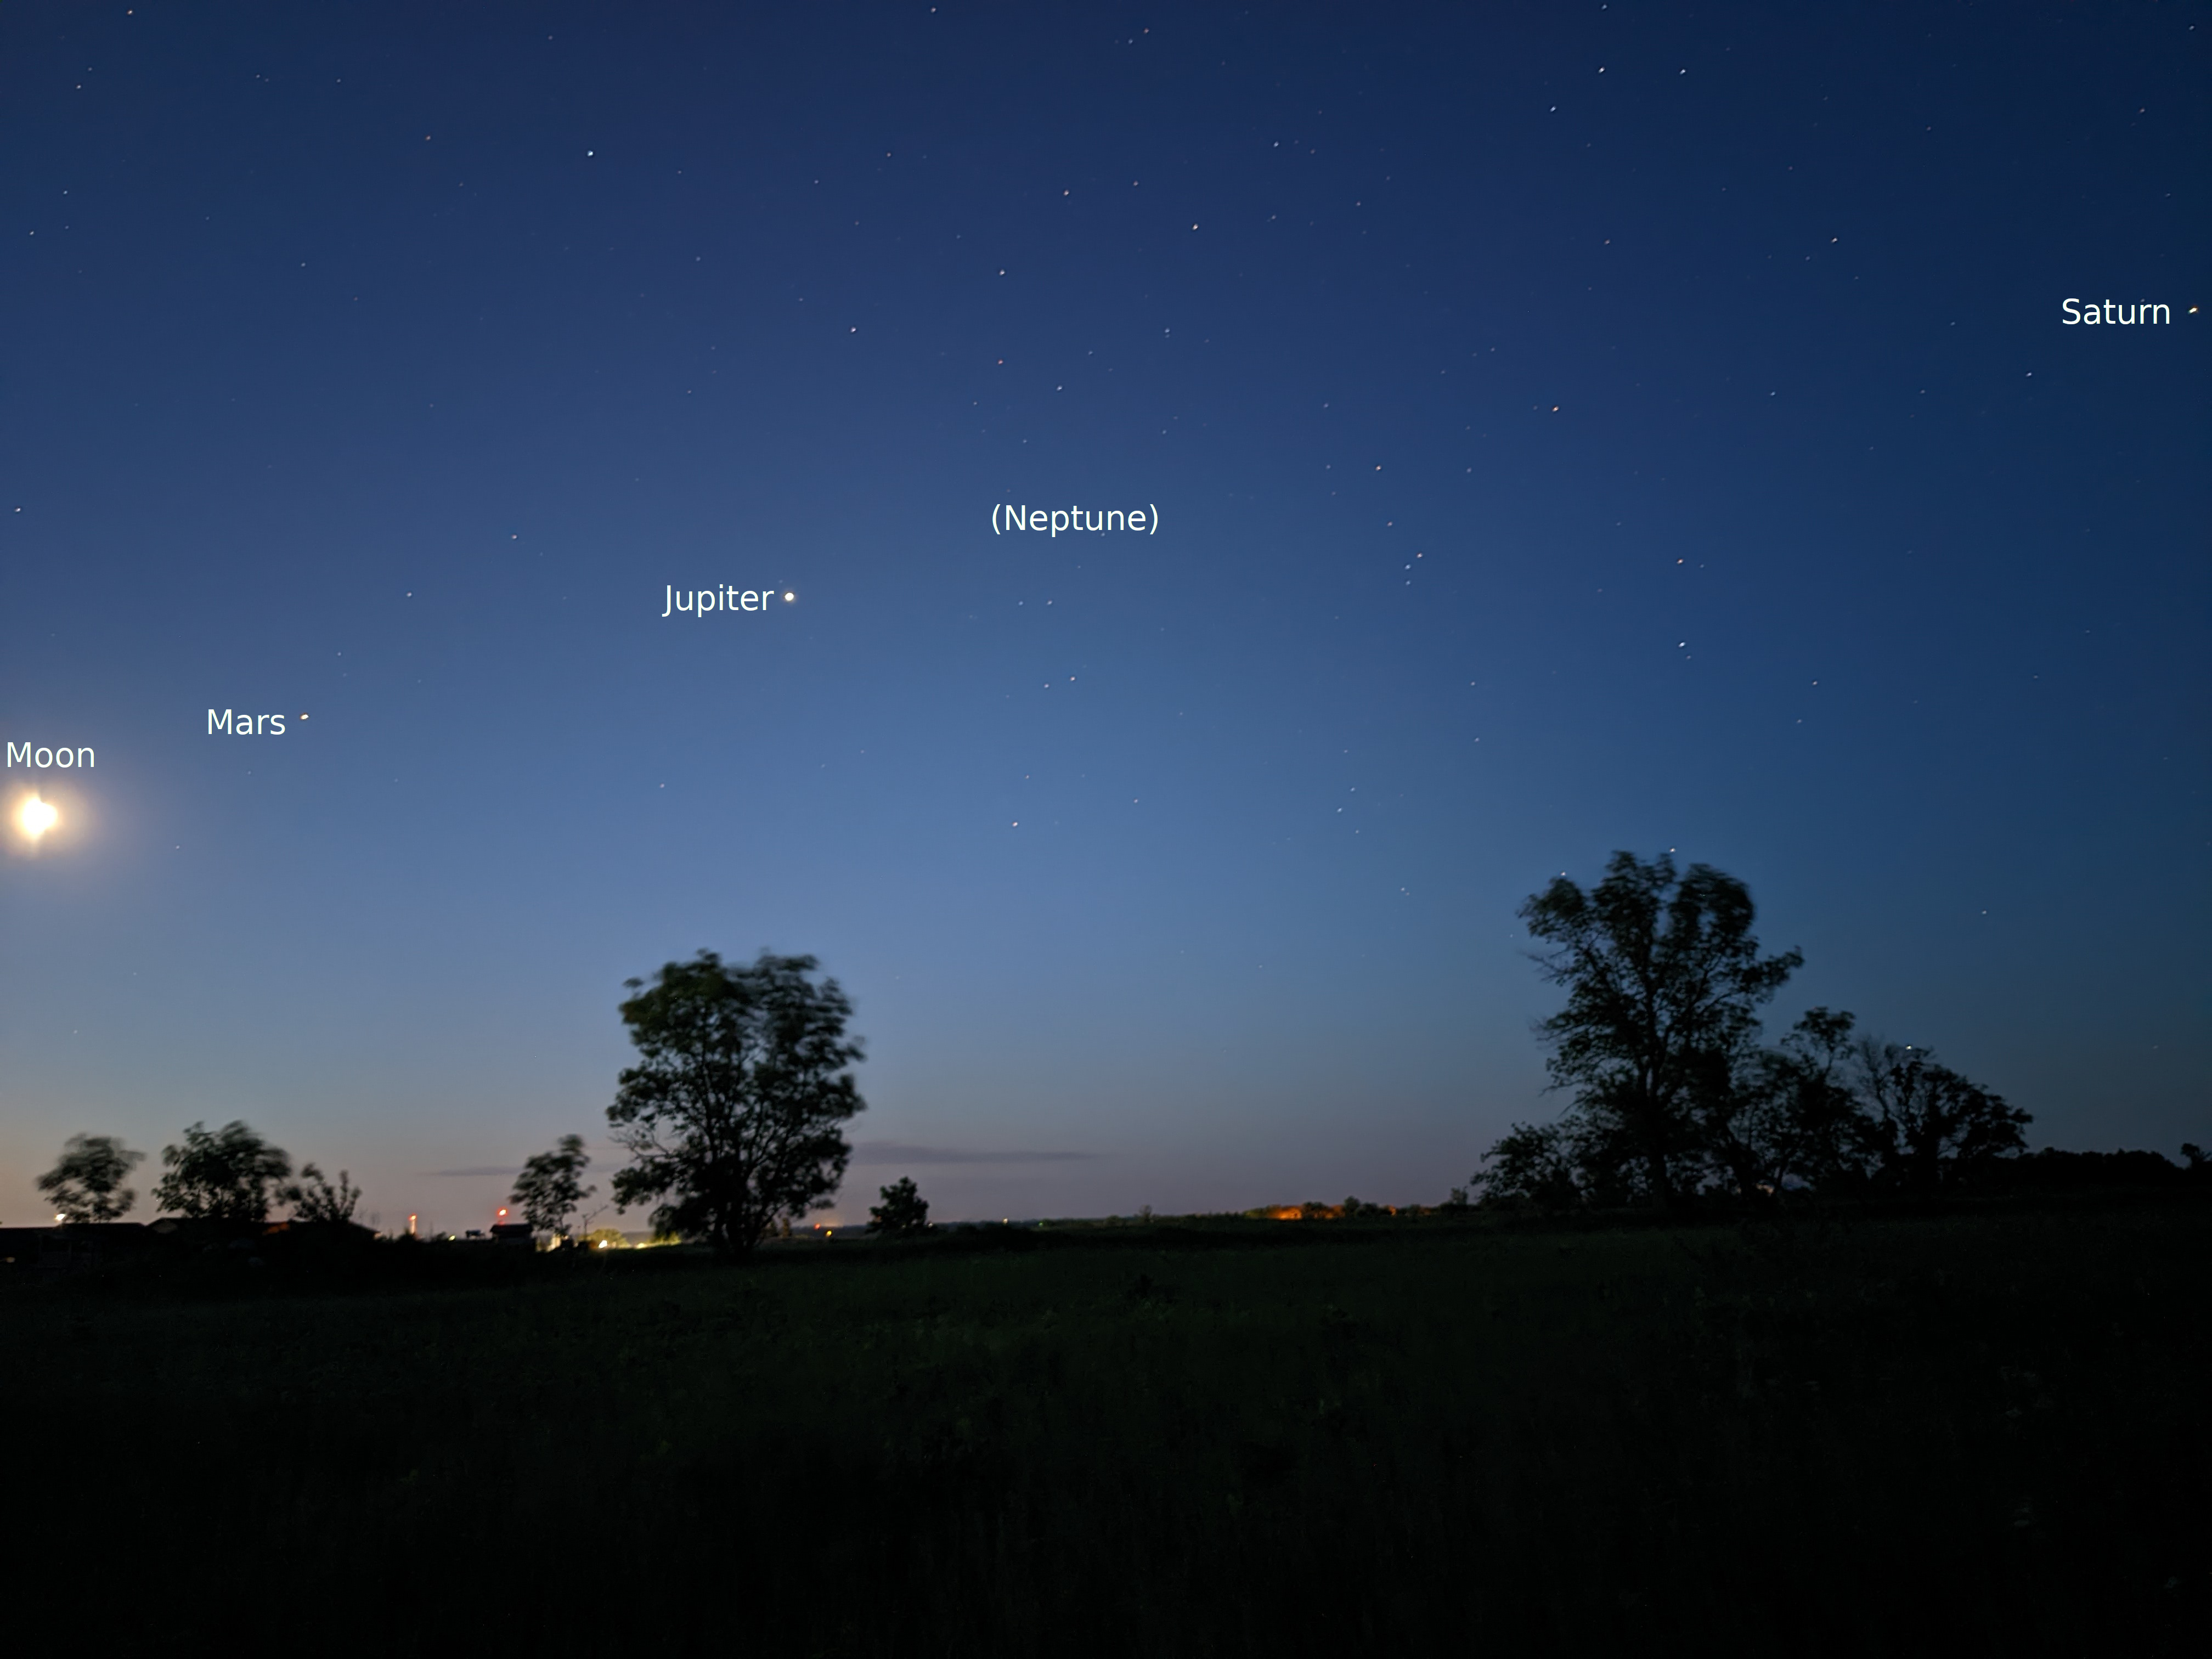
| West View Pixel 4a: Includes Neptune and
Saturn. |
||
Planet orbit plots from my Sidclock
app showing inner and outer planets on this day
|
||
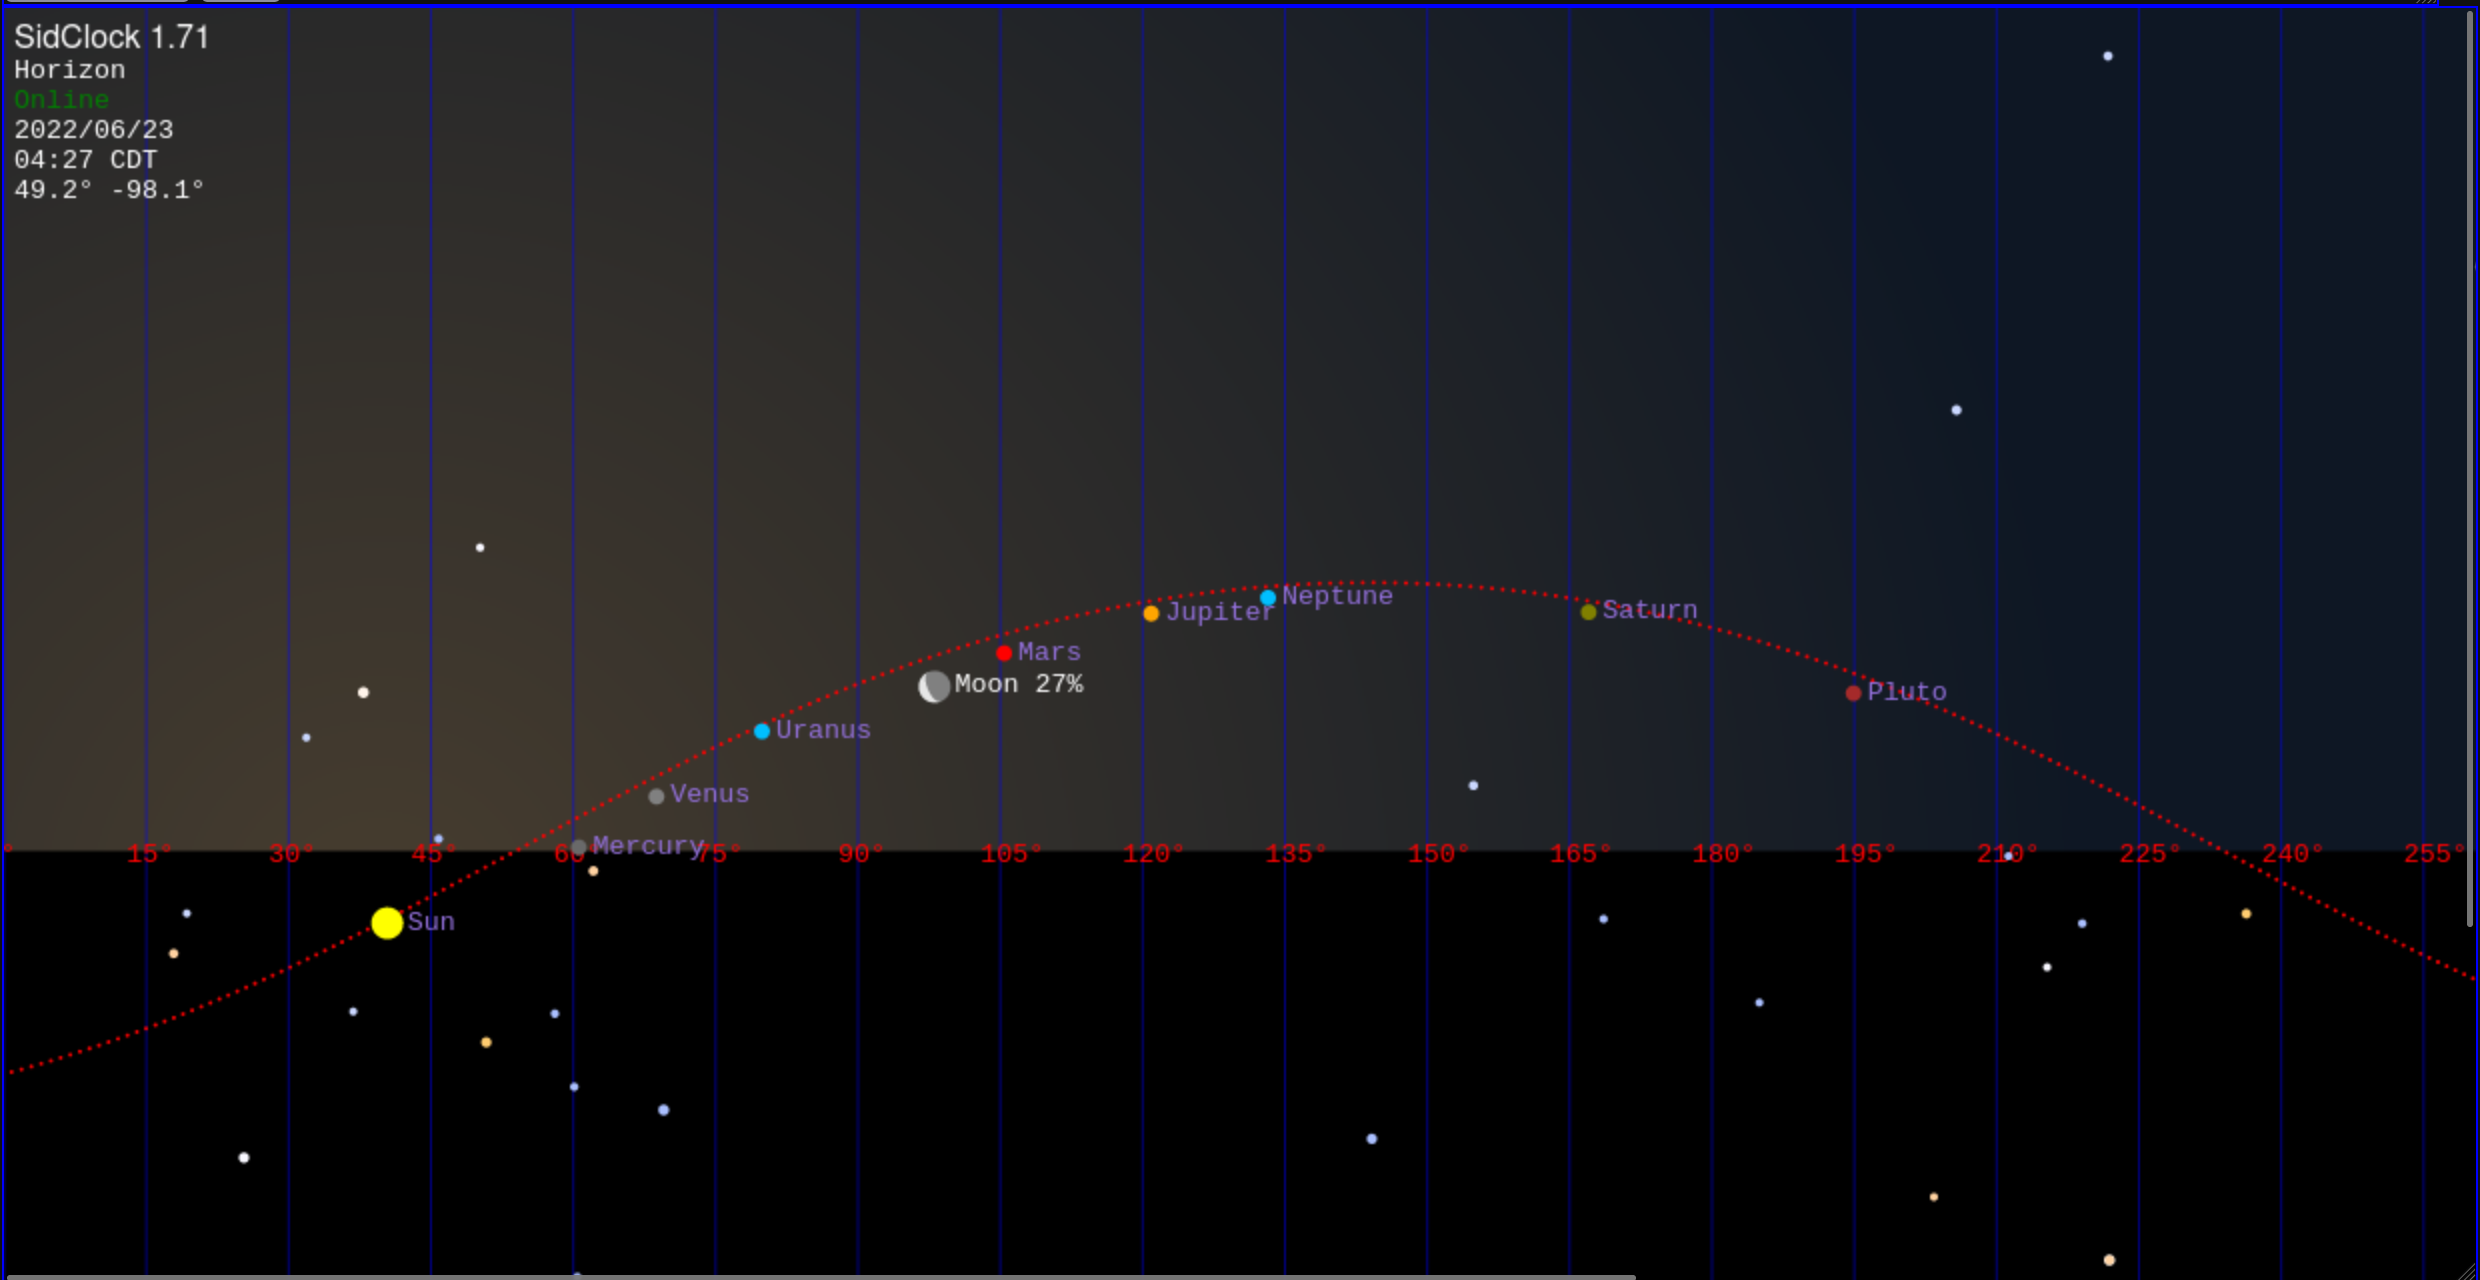 |
||
| Horizon planet position plot from Sidclock |
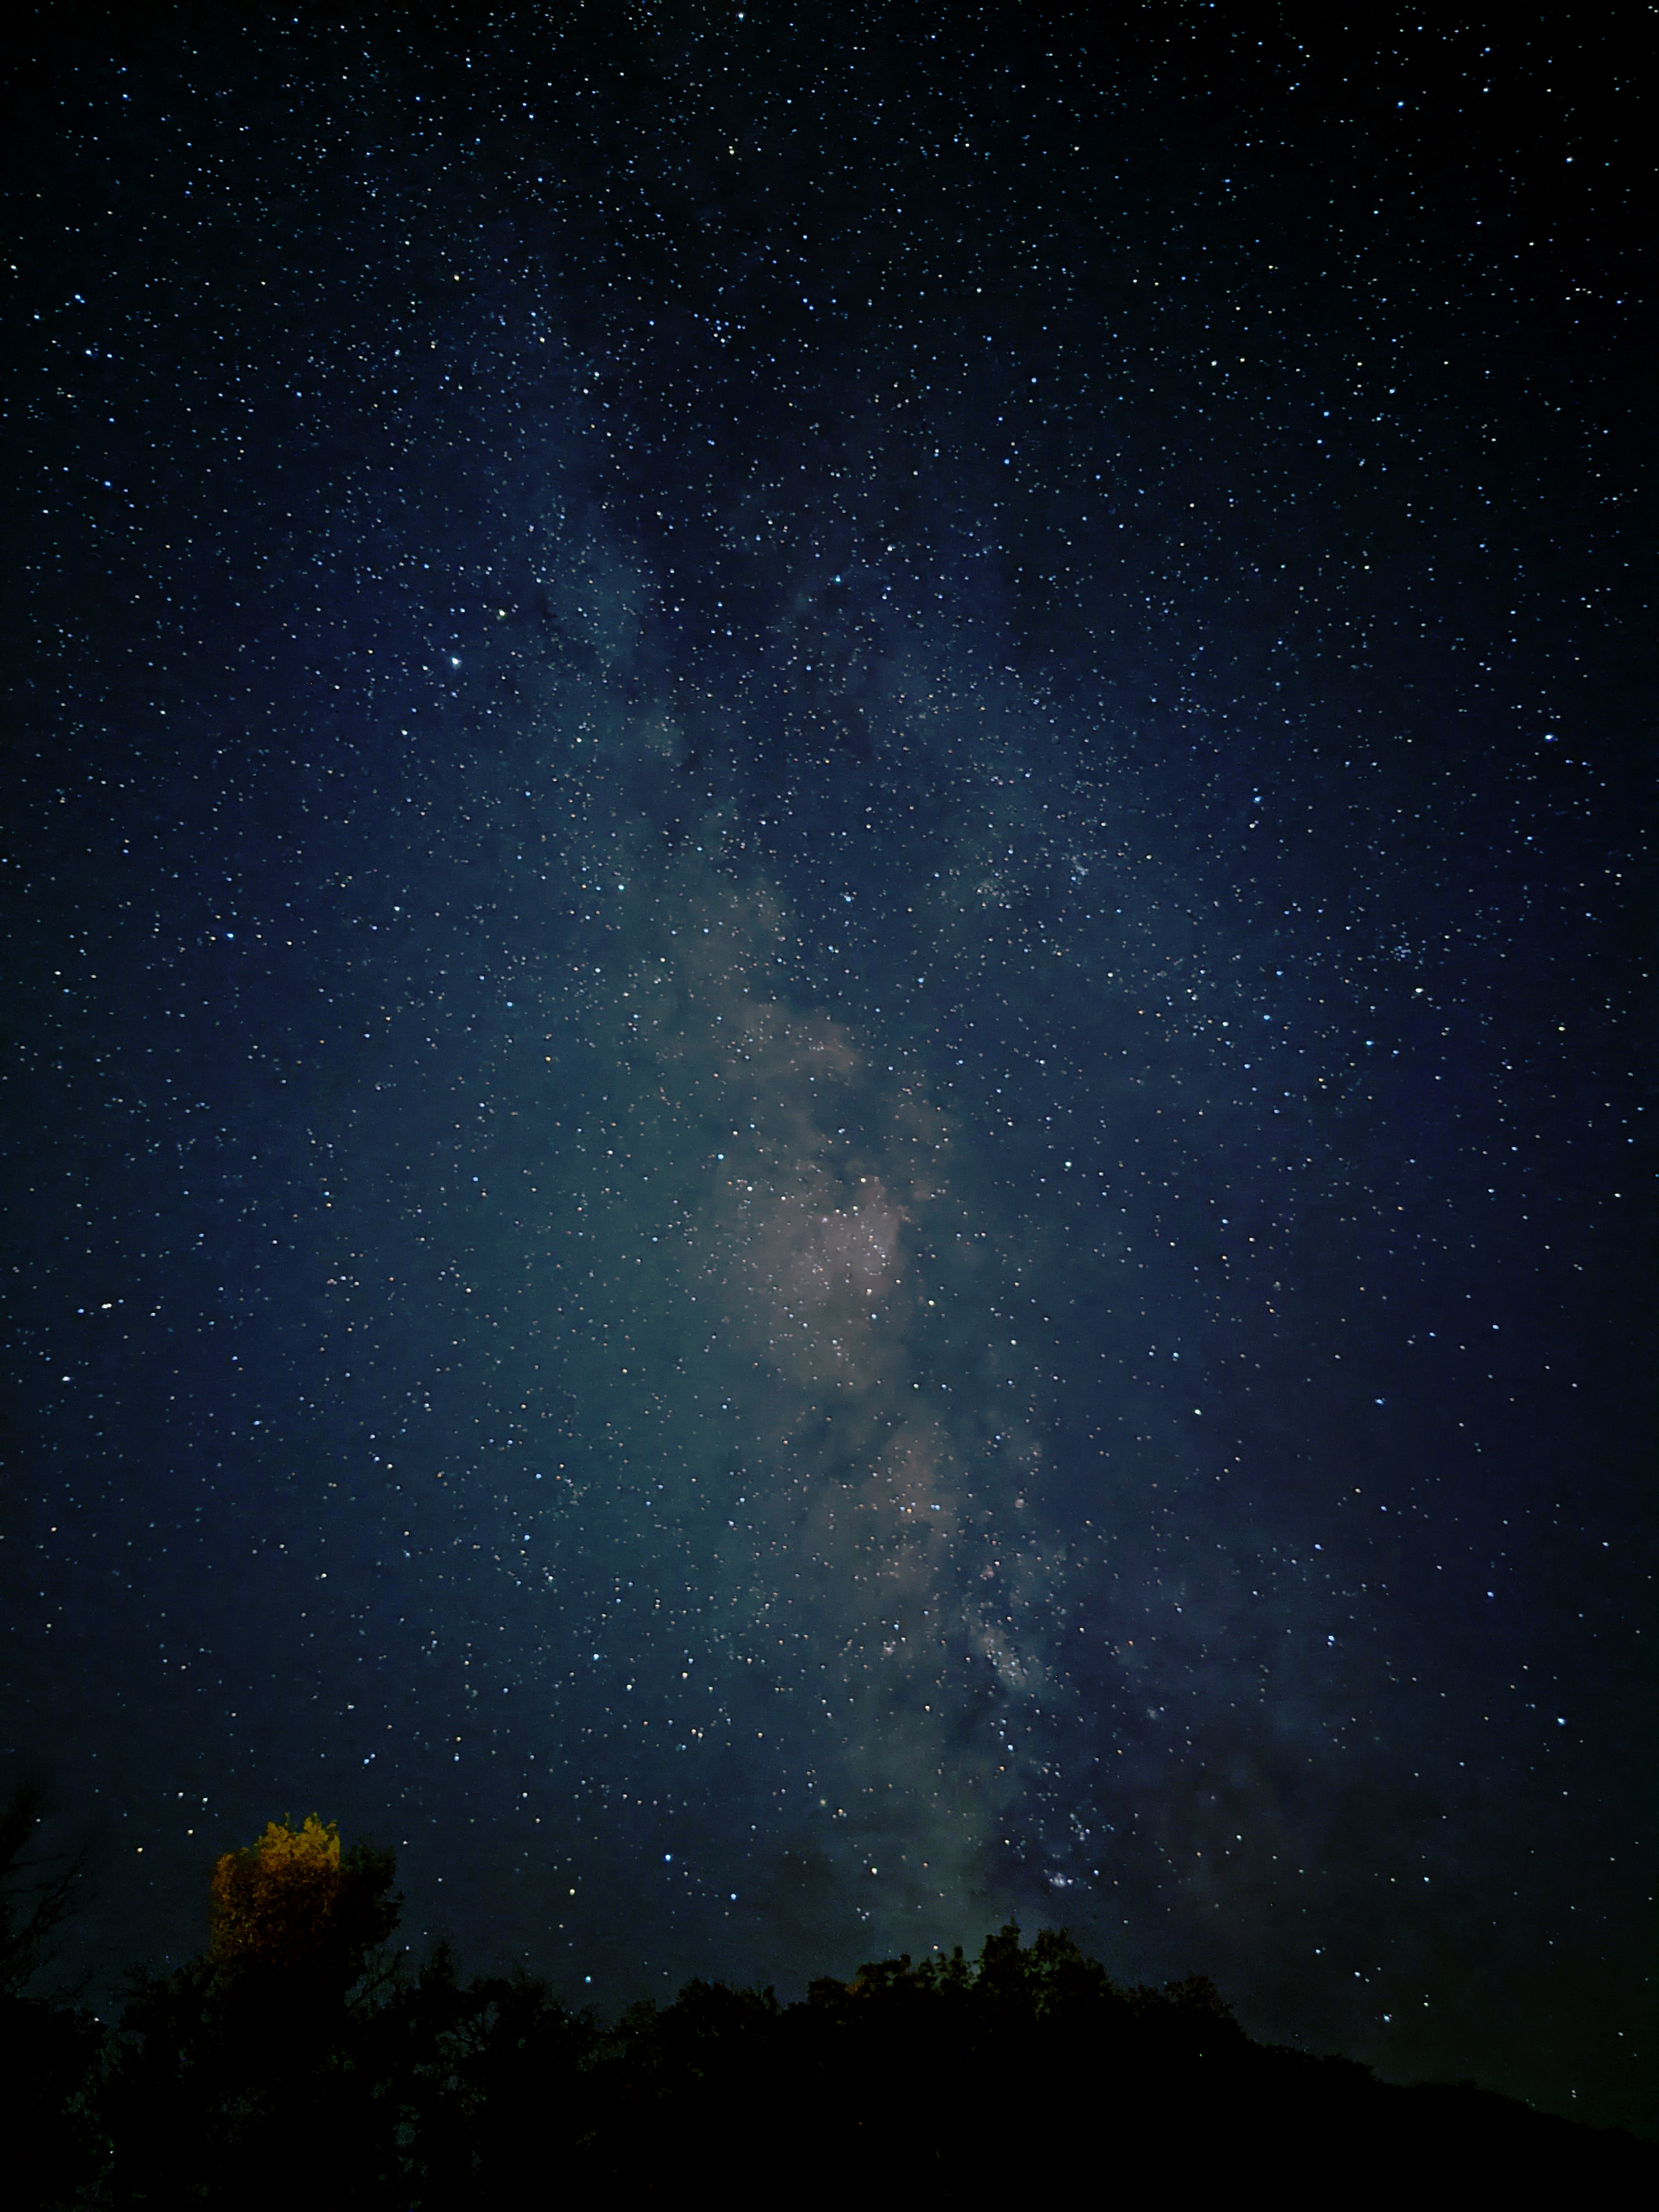
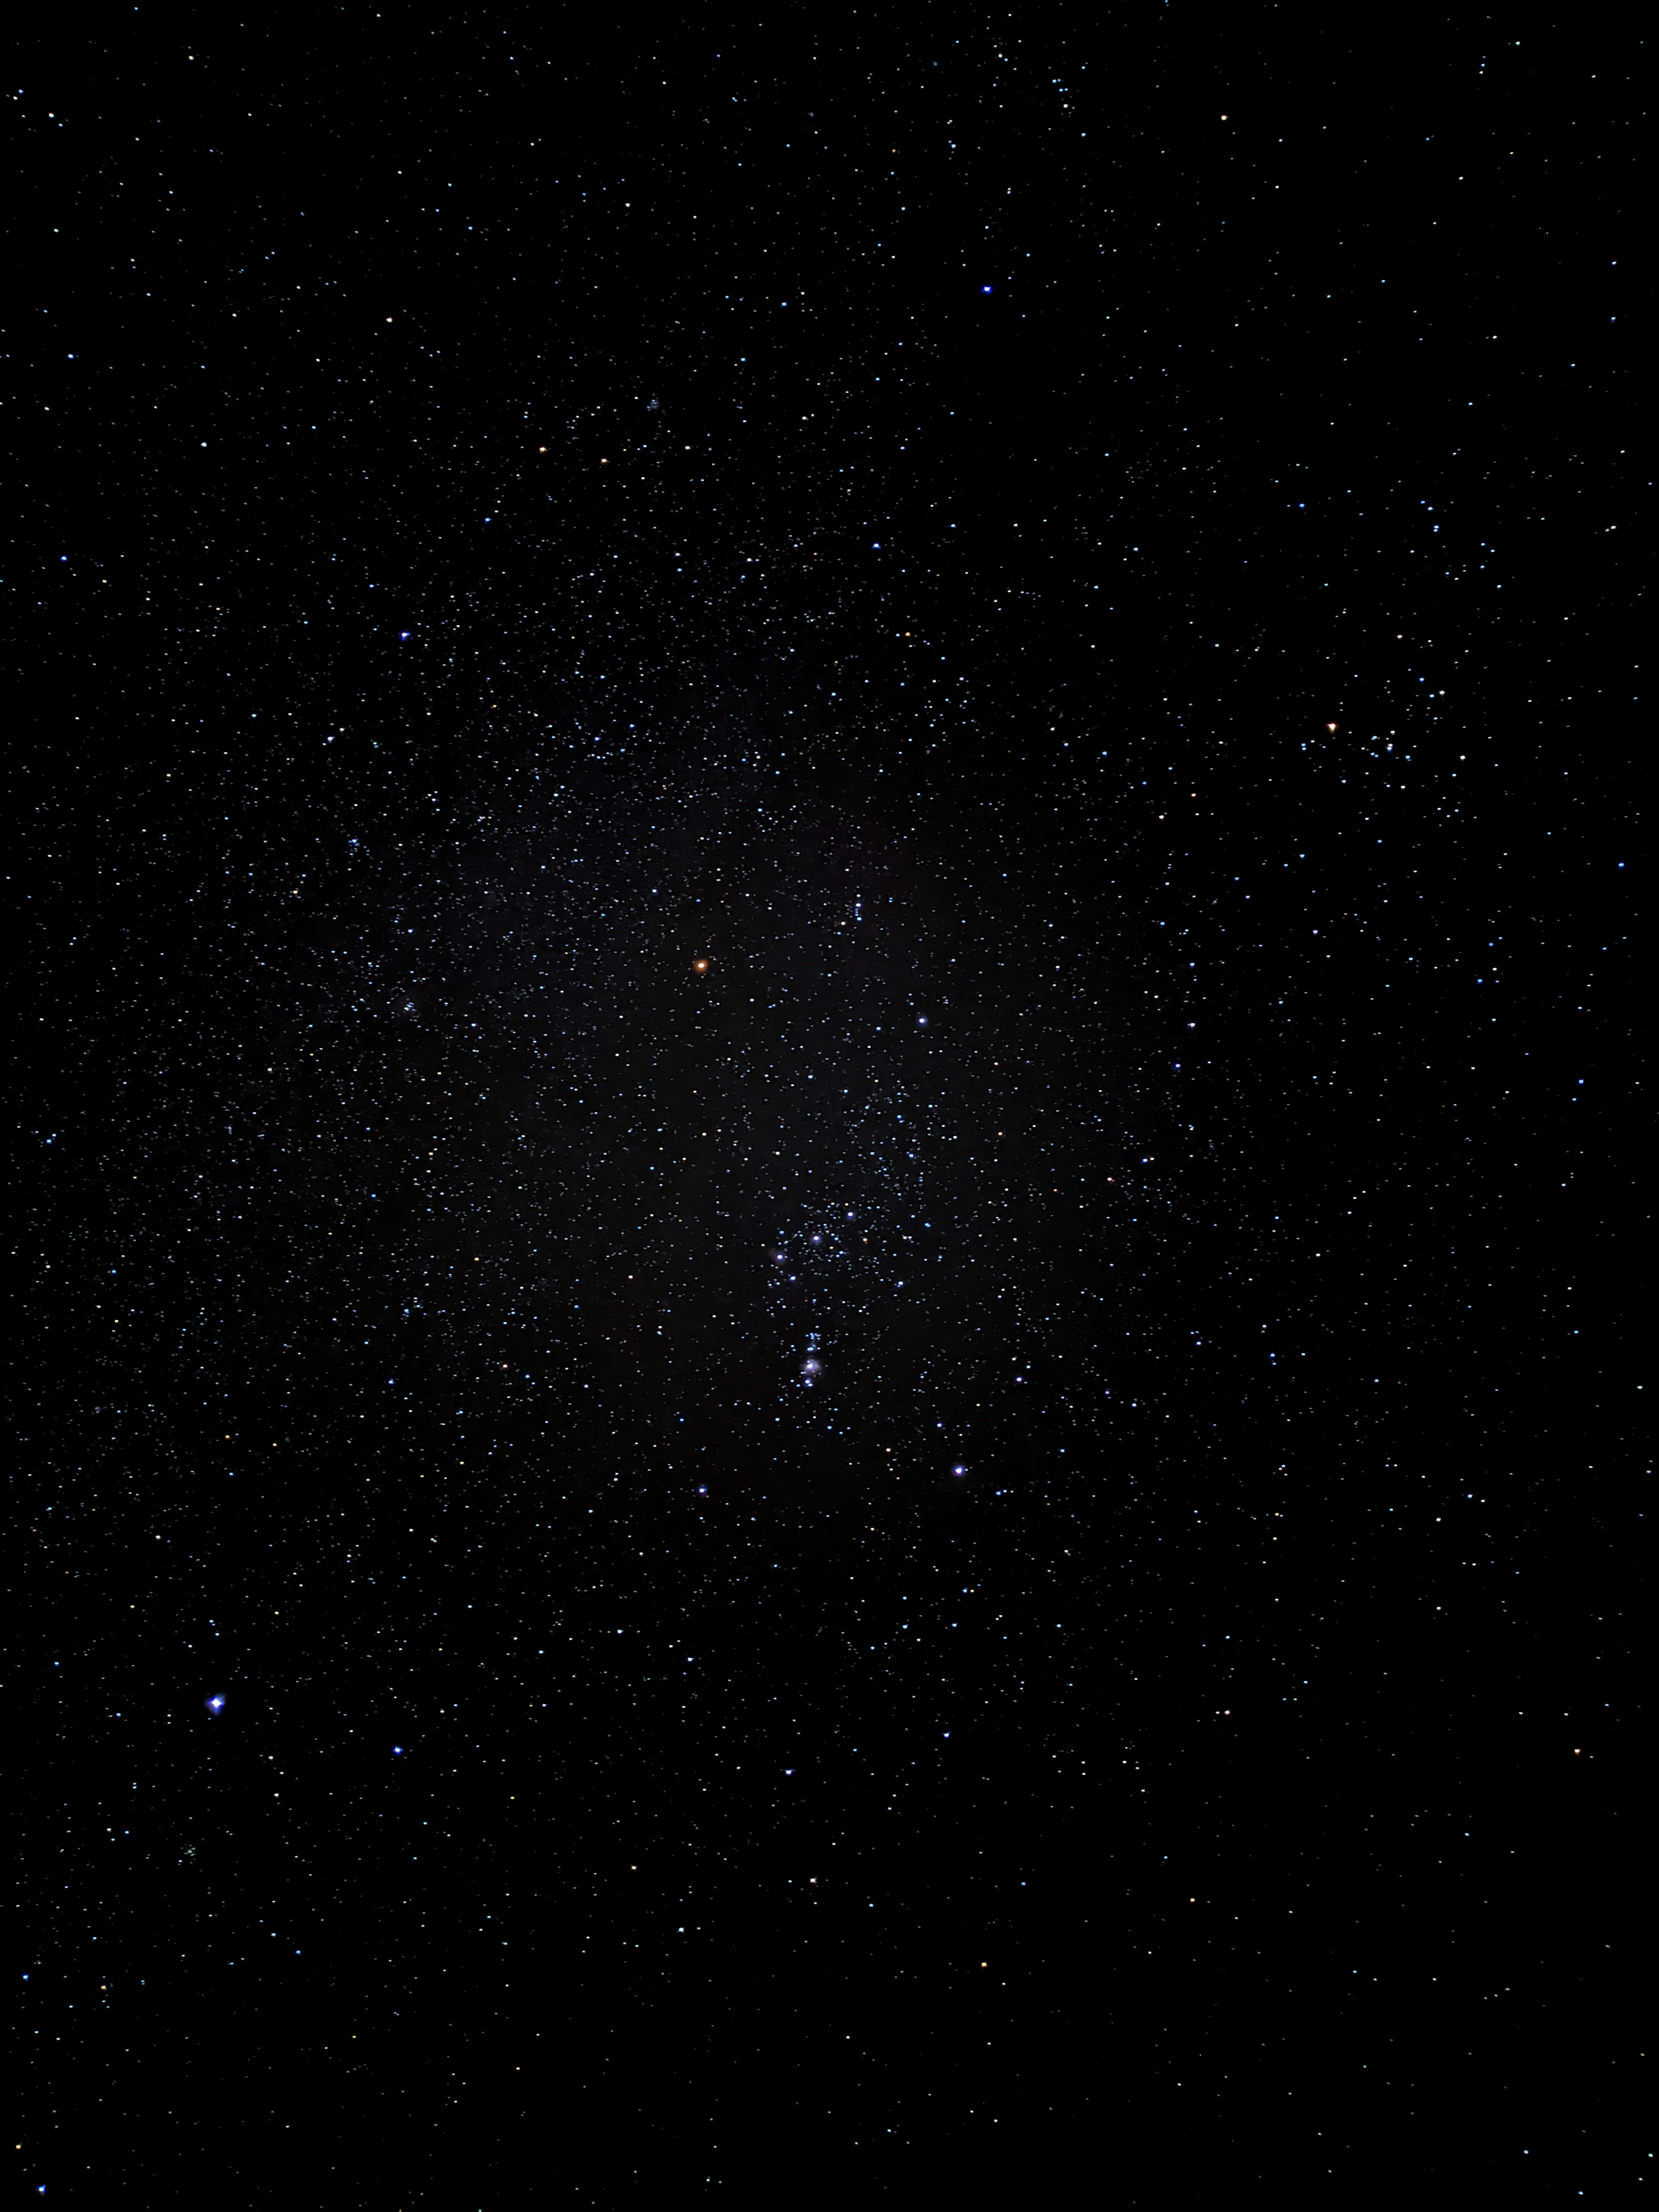
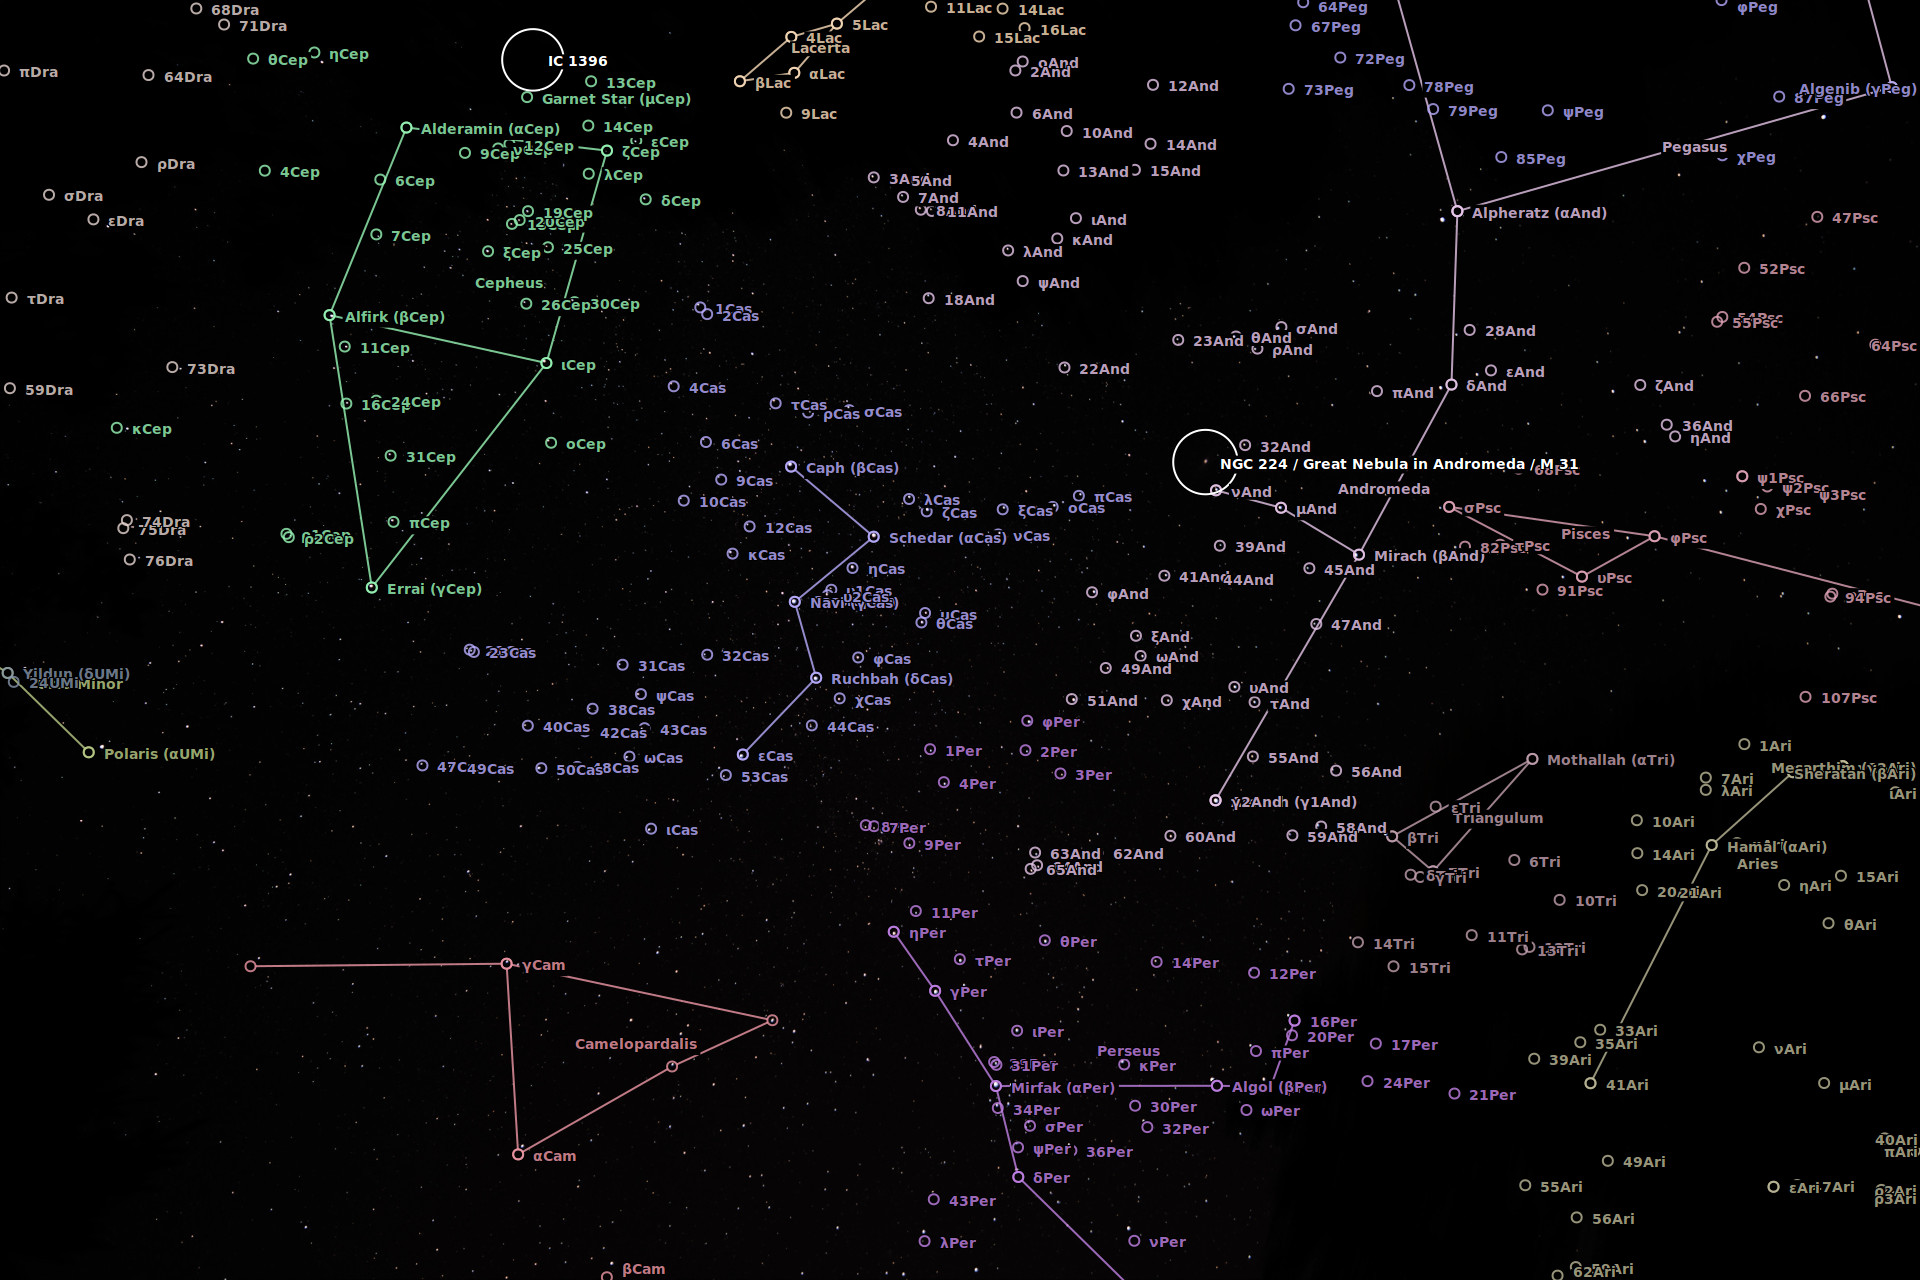
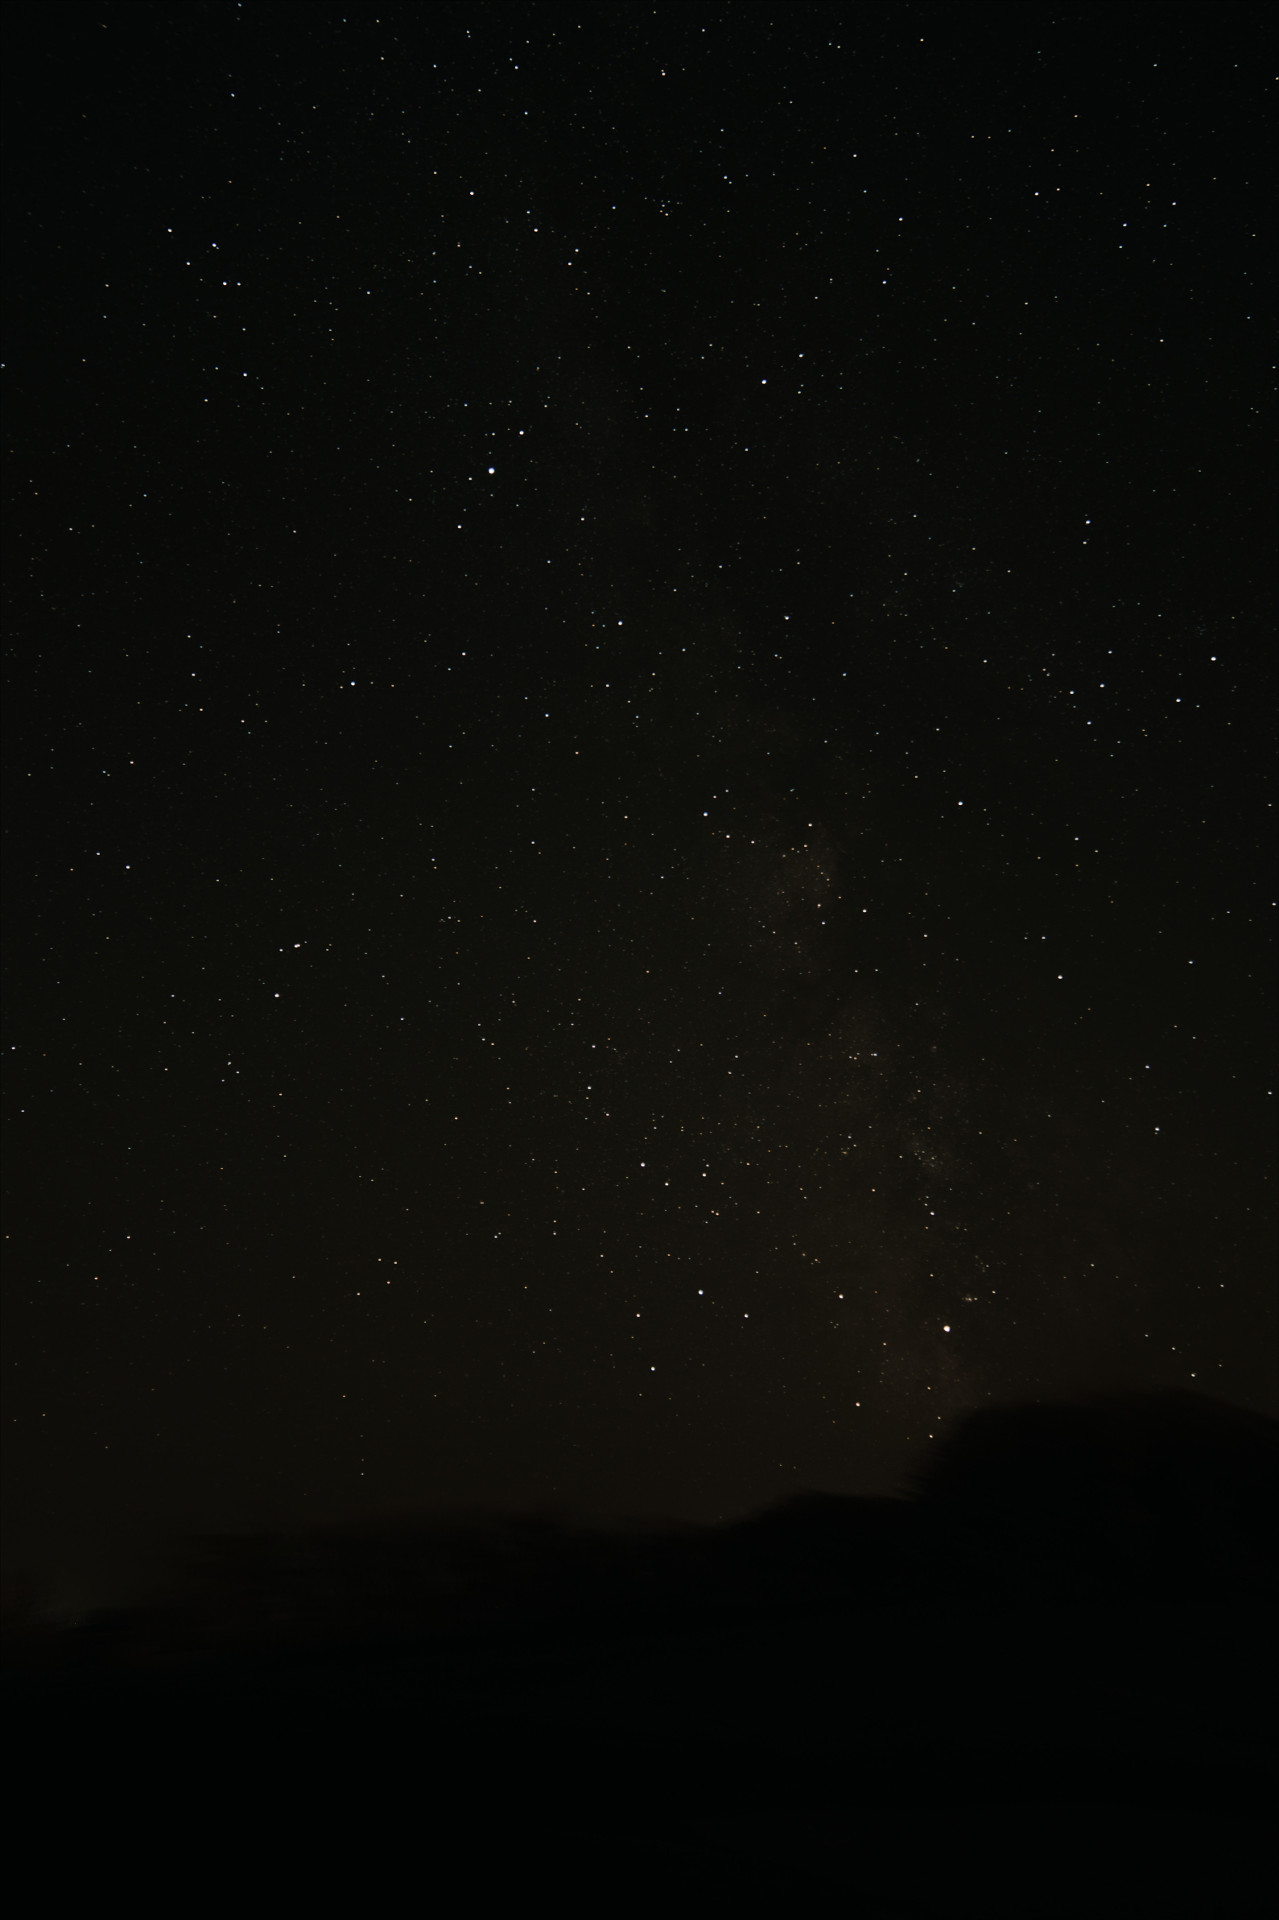
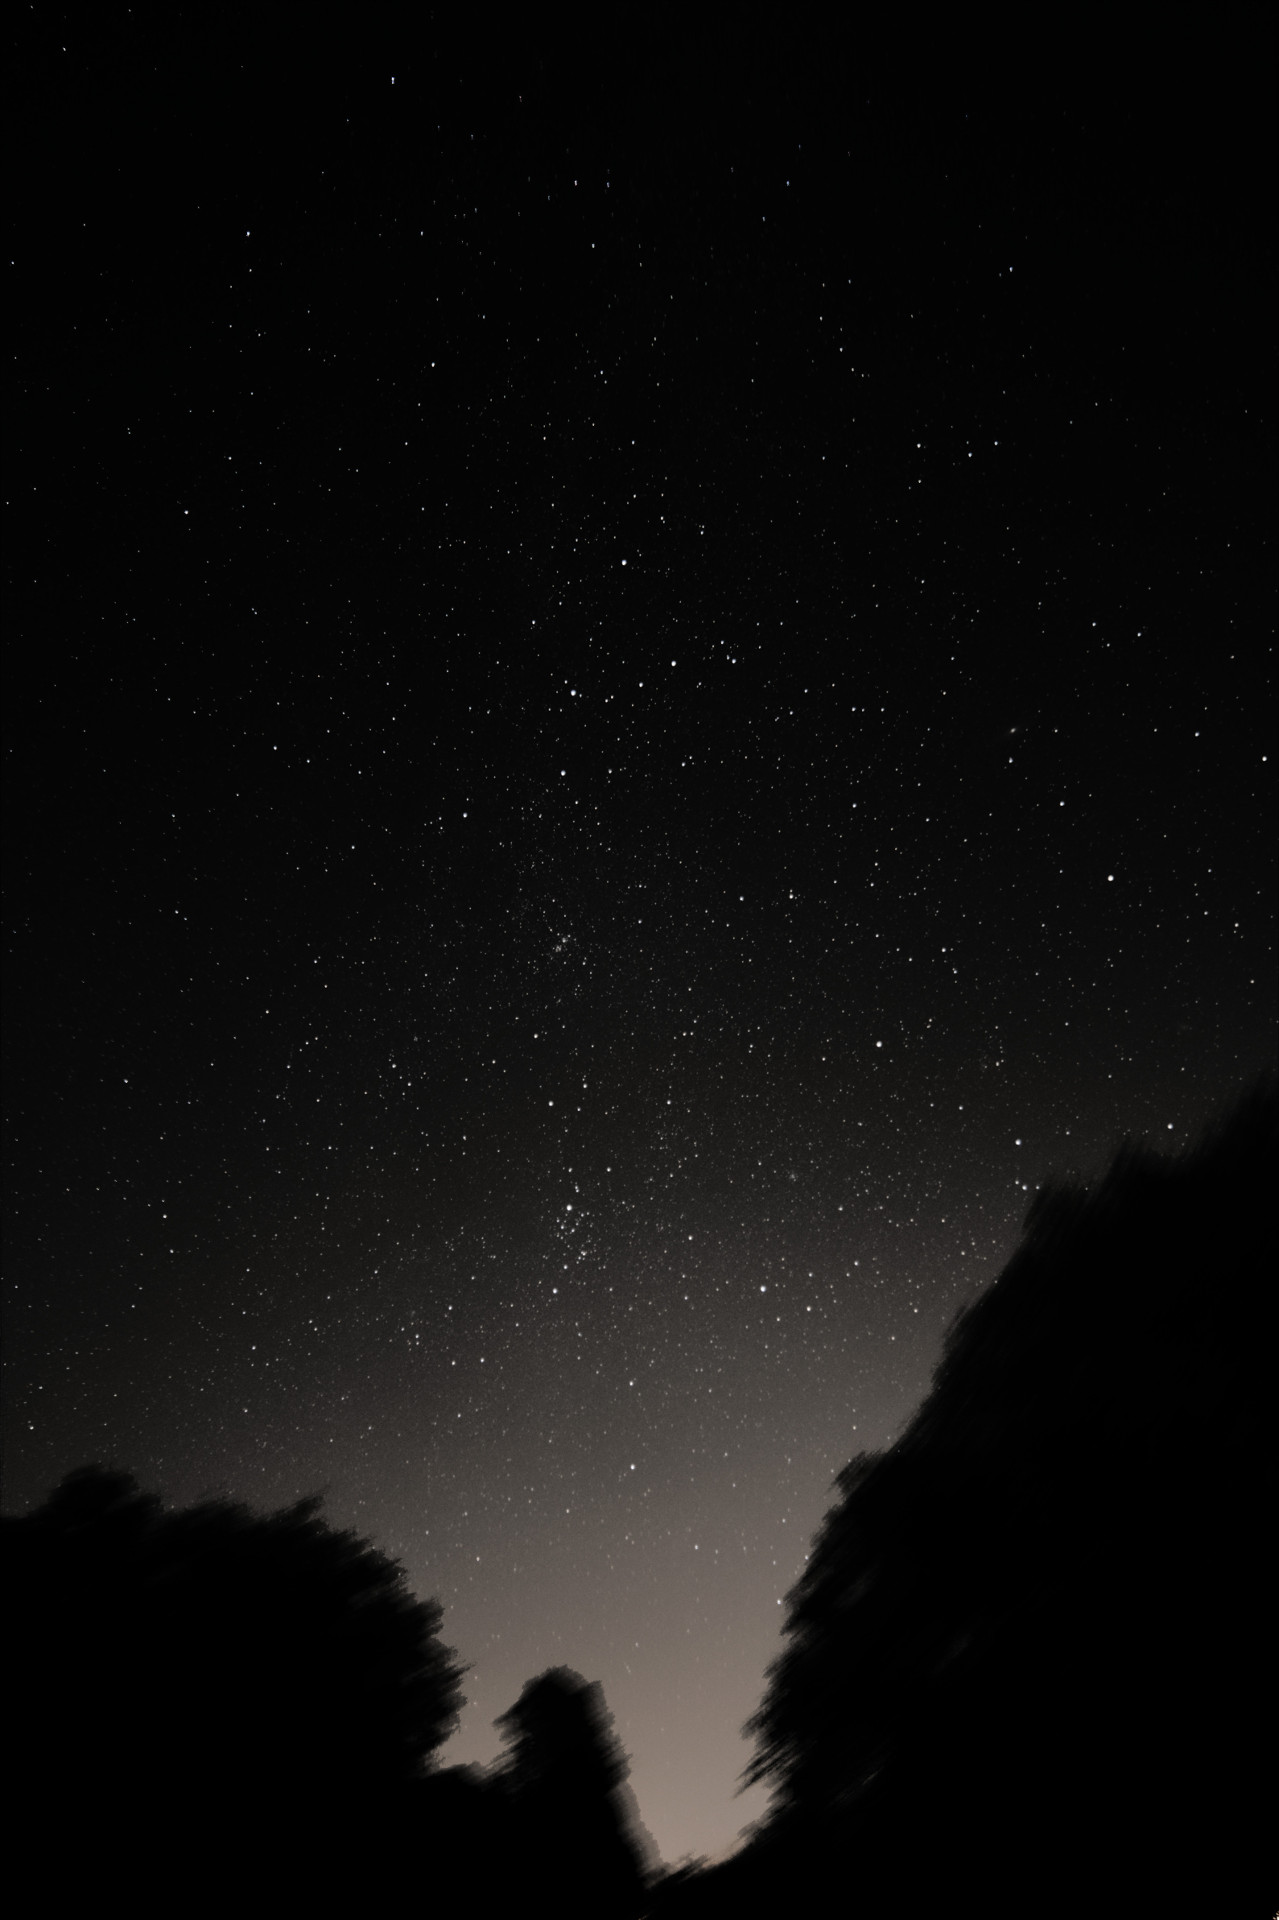
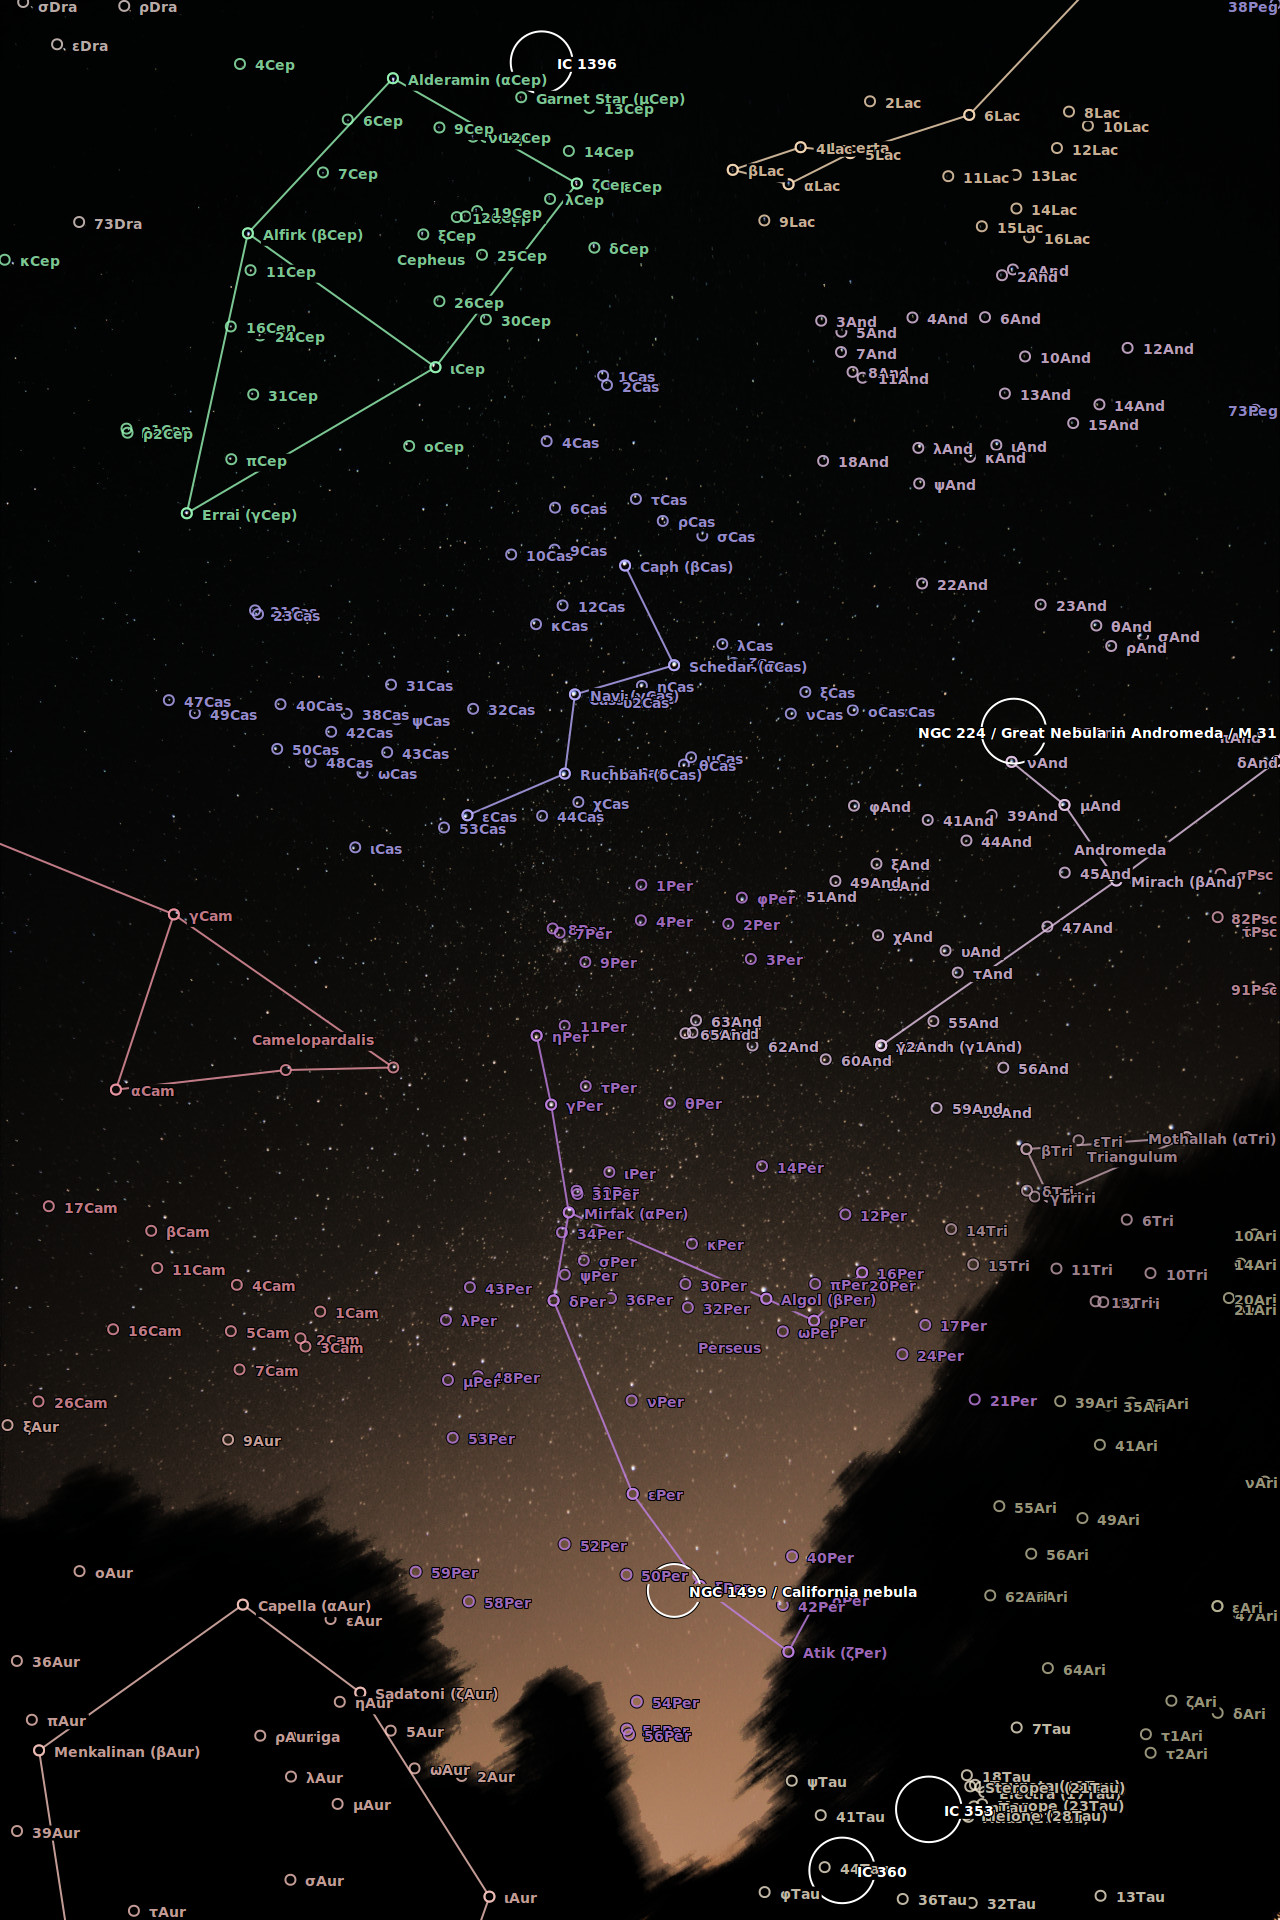
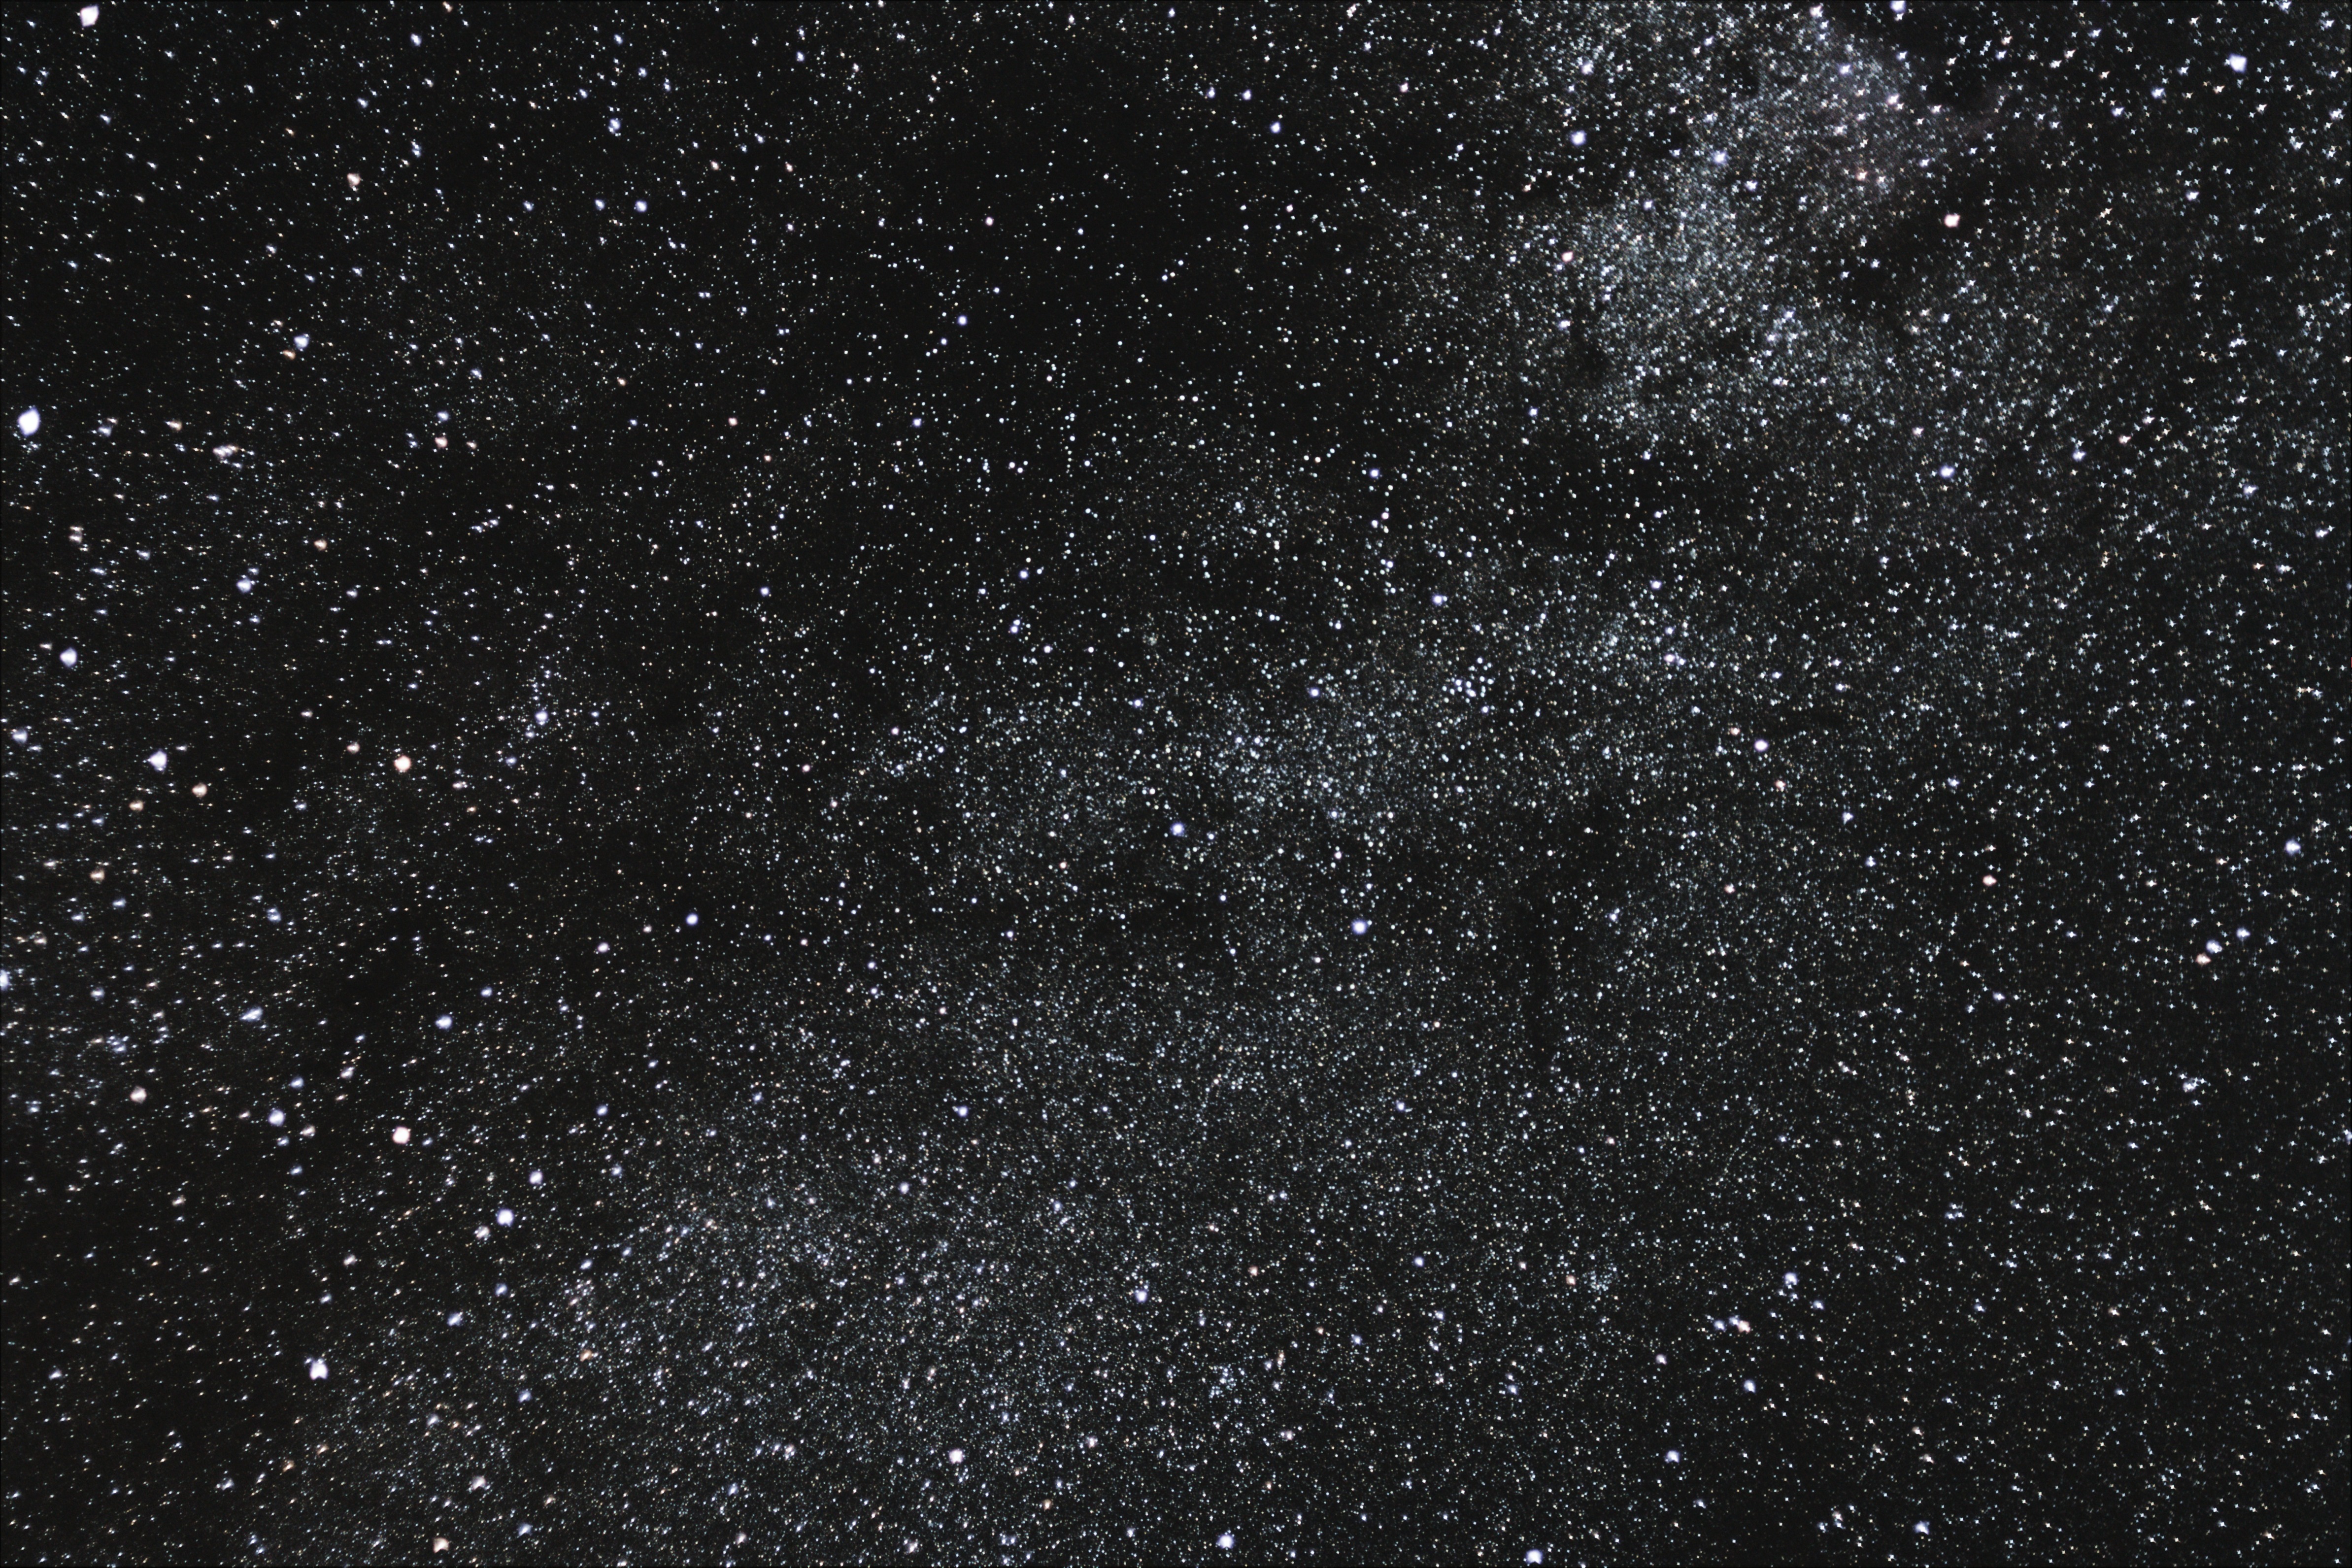
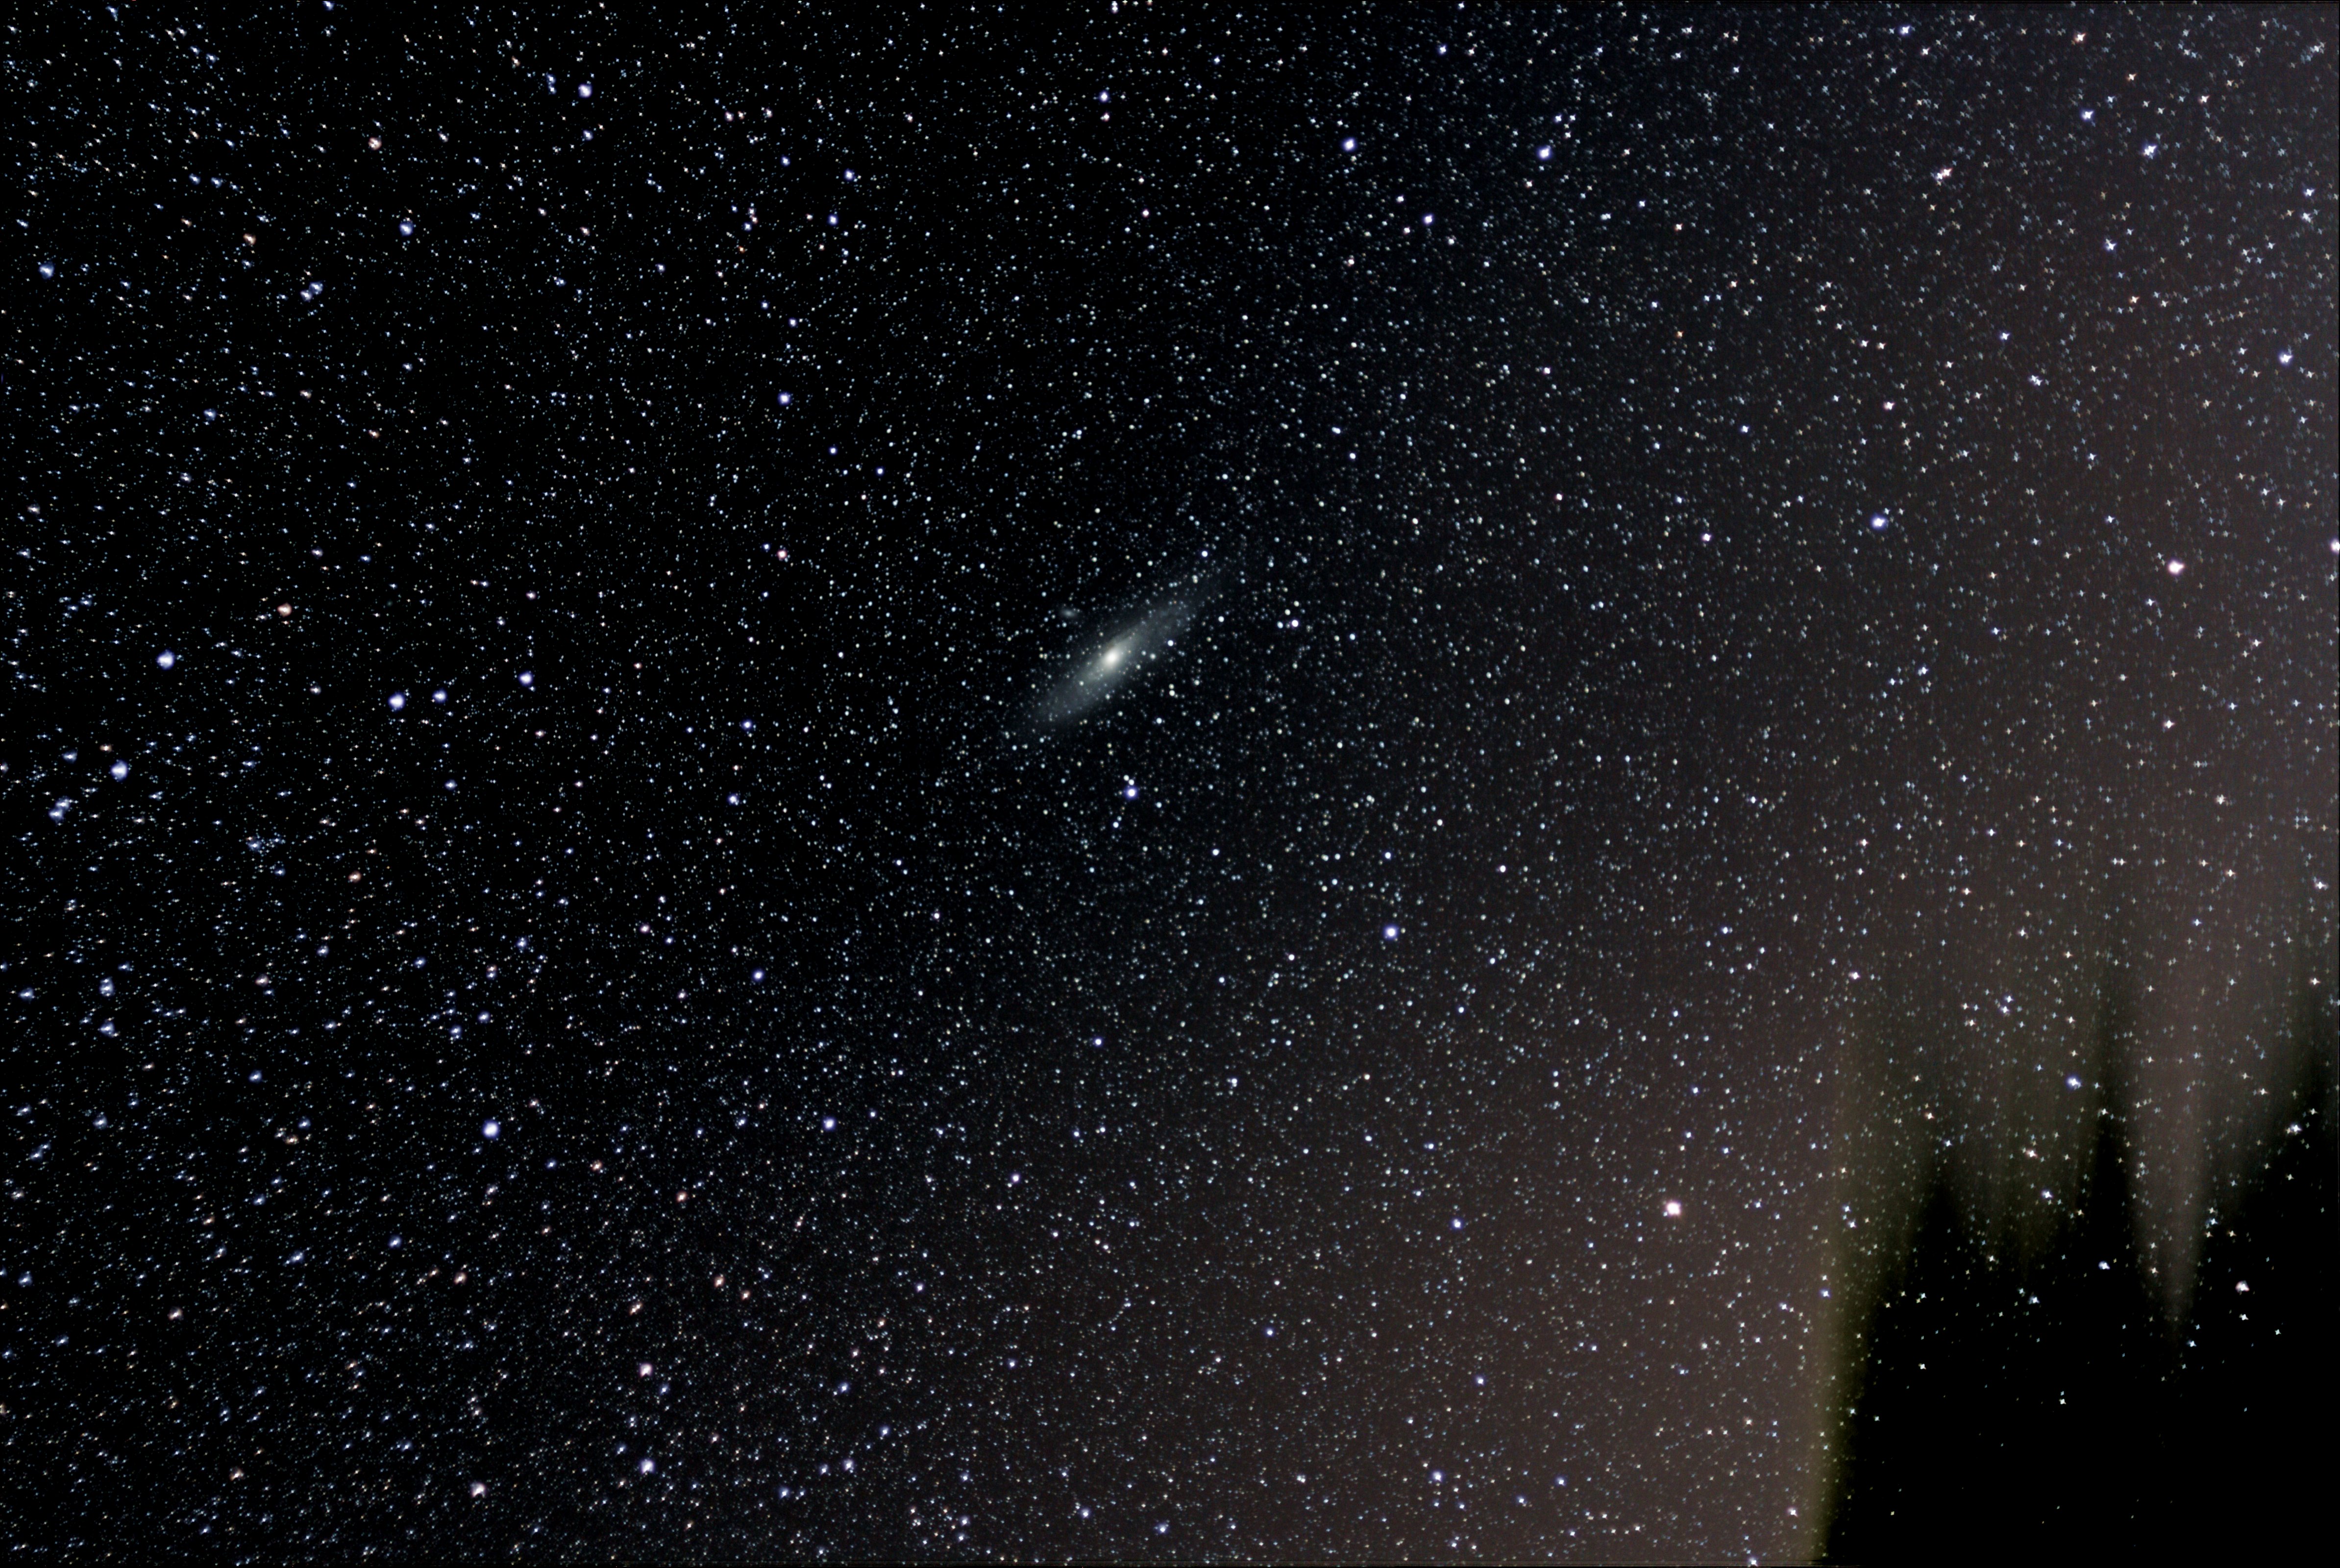
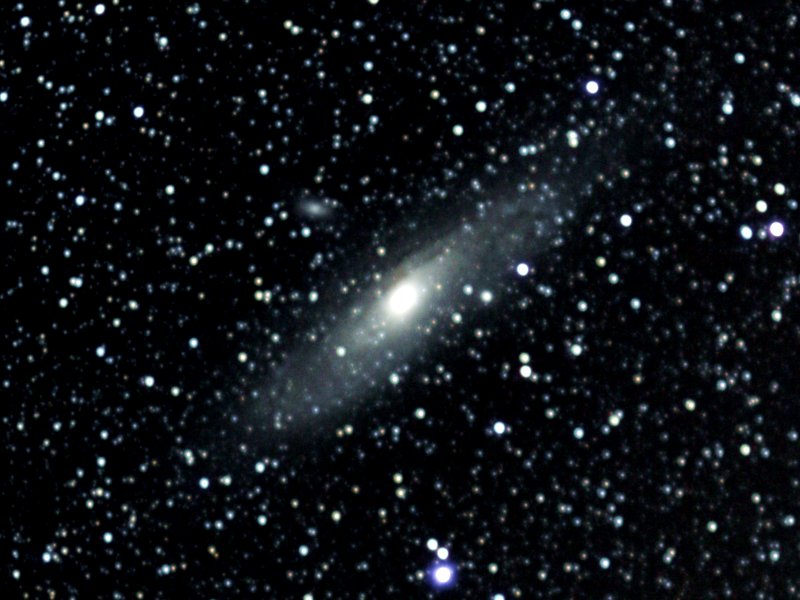
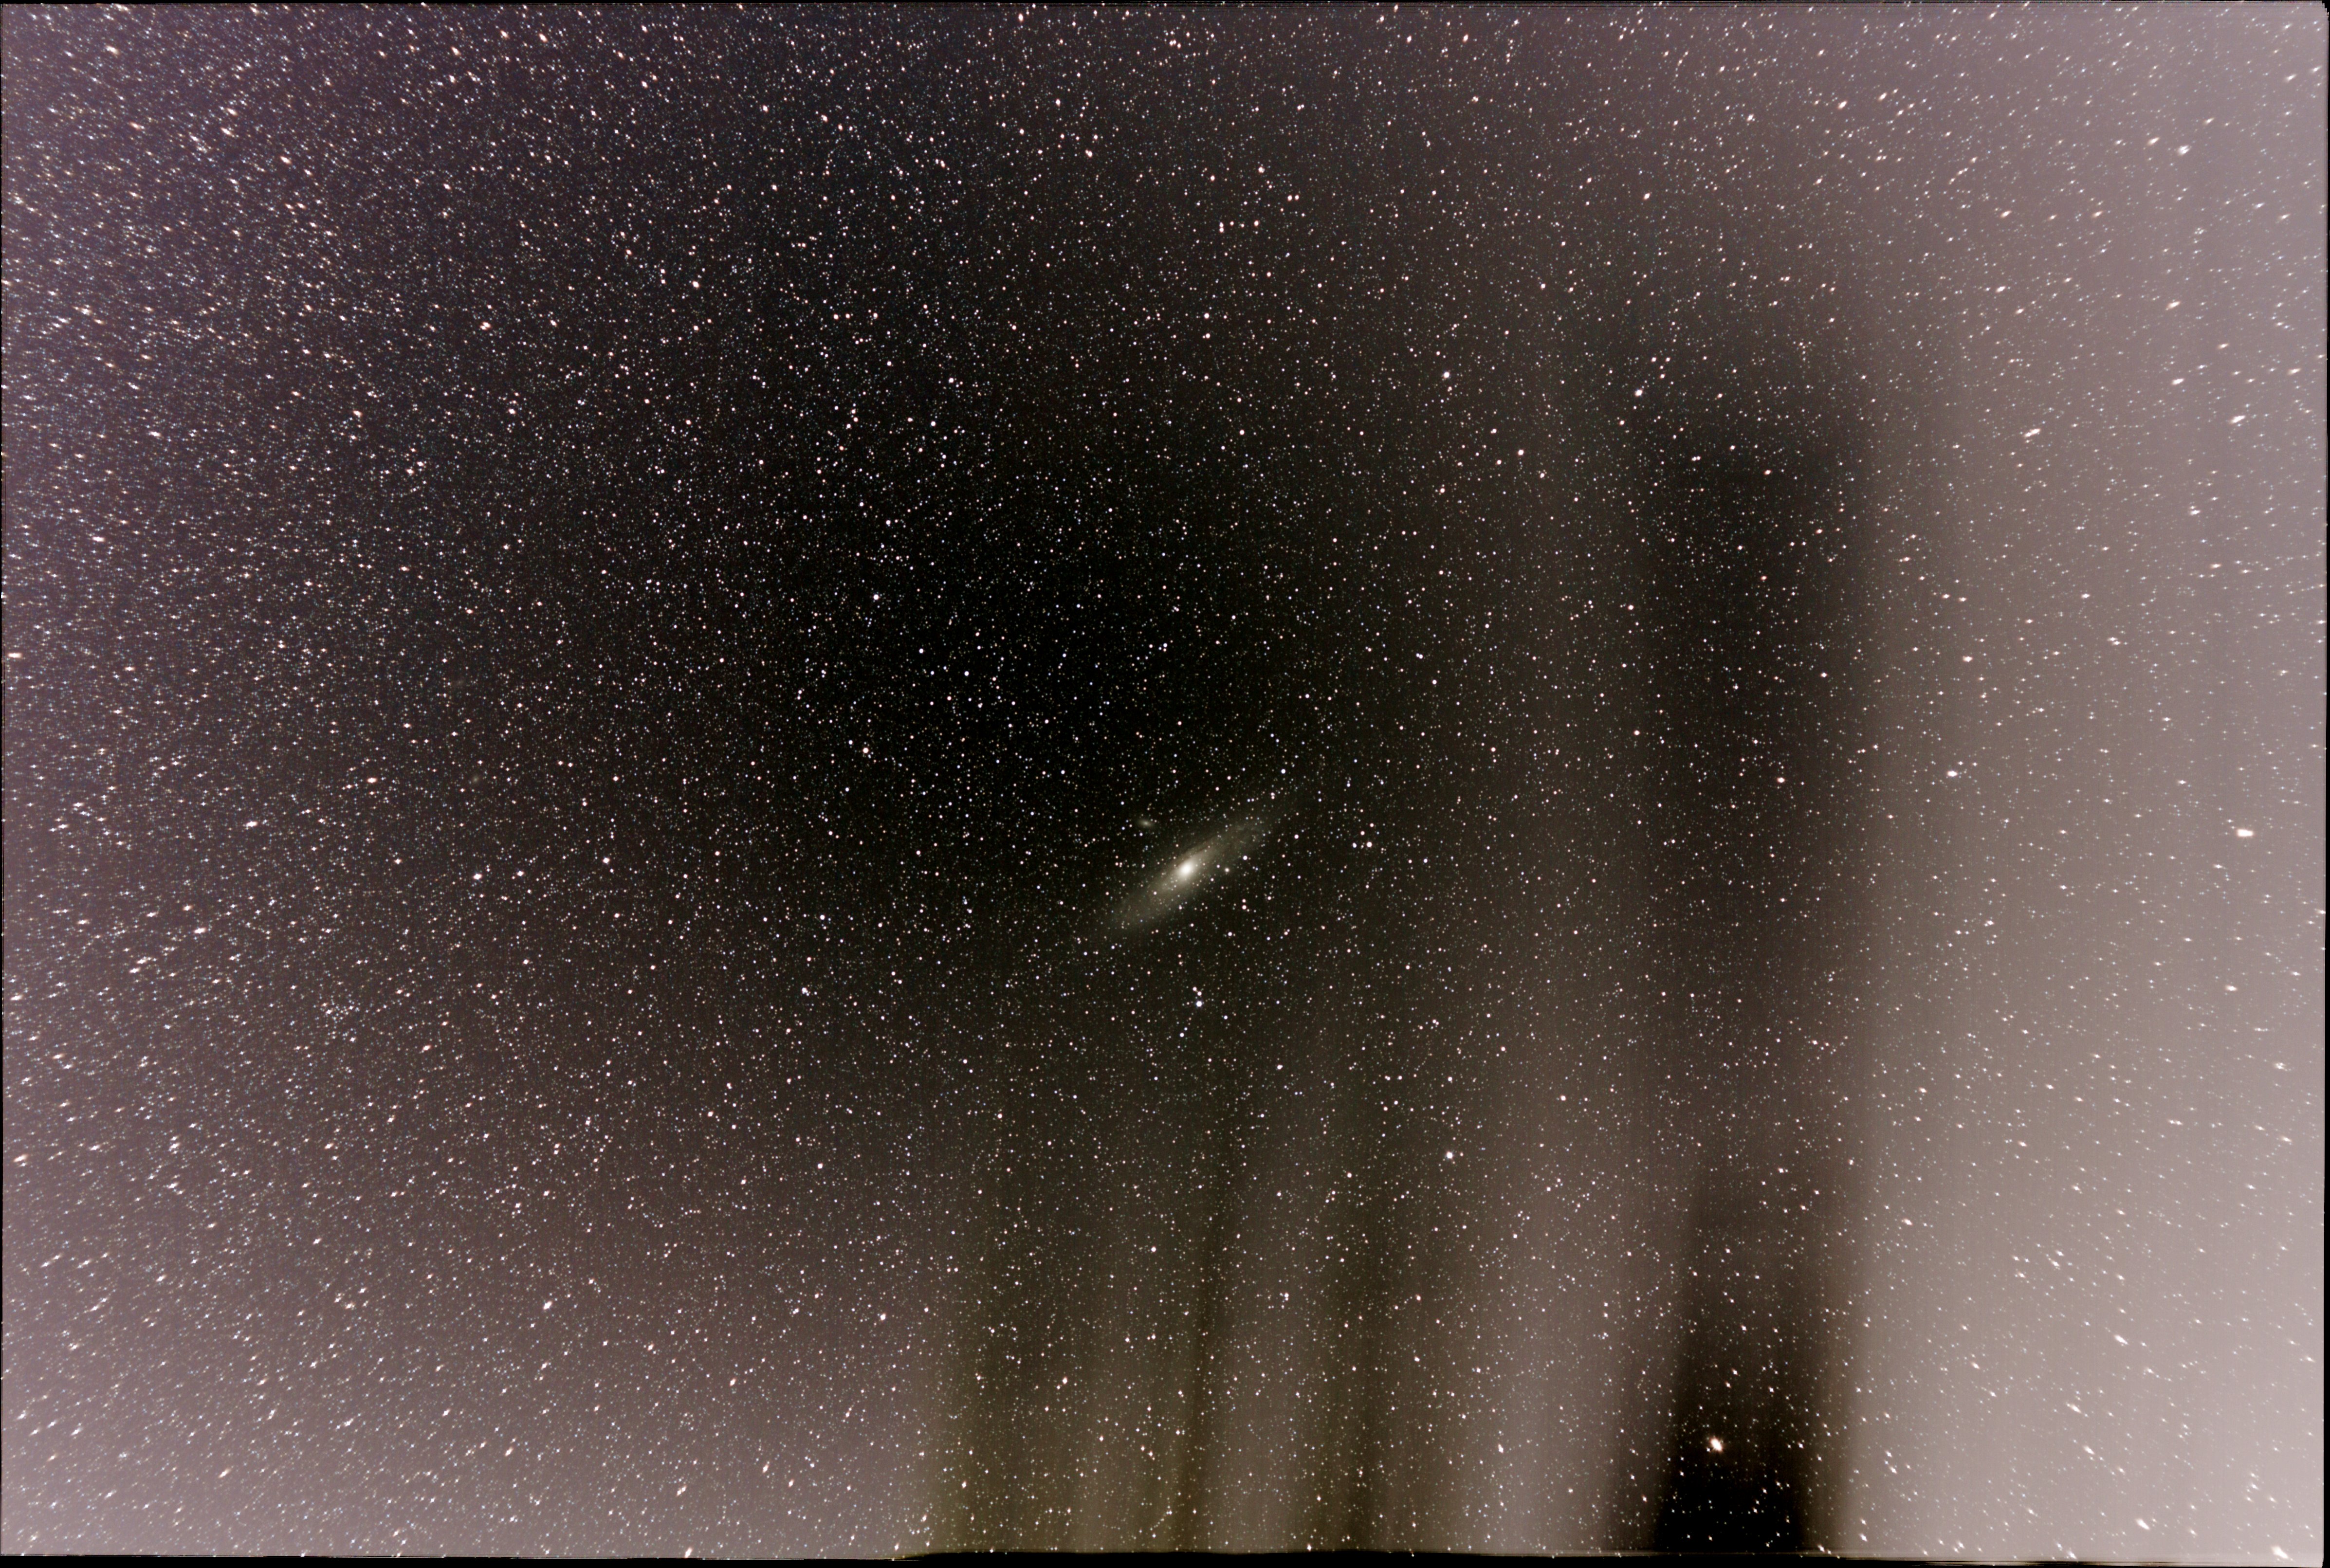
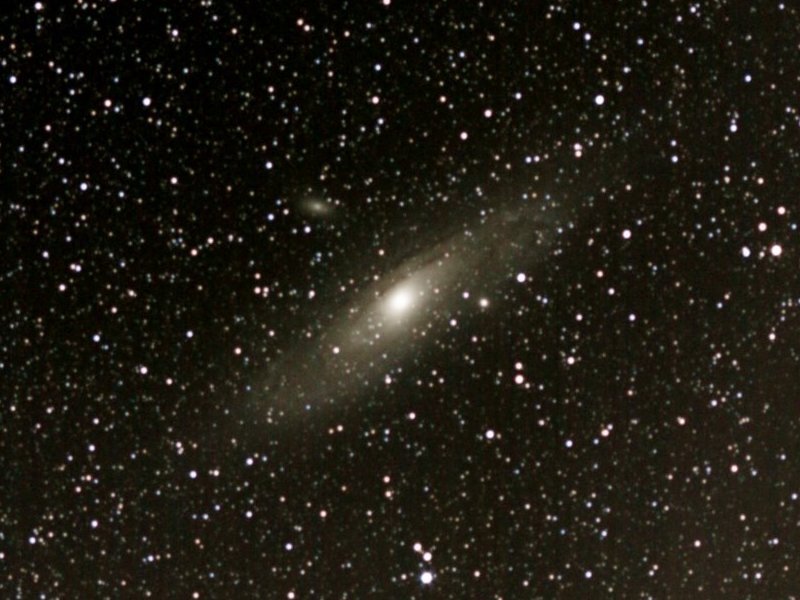
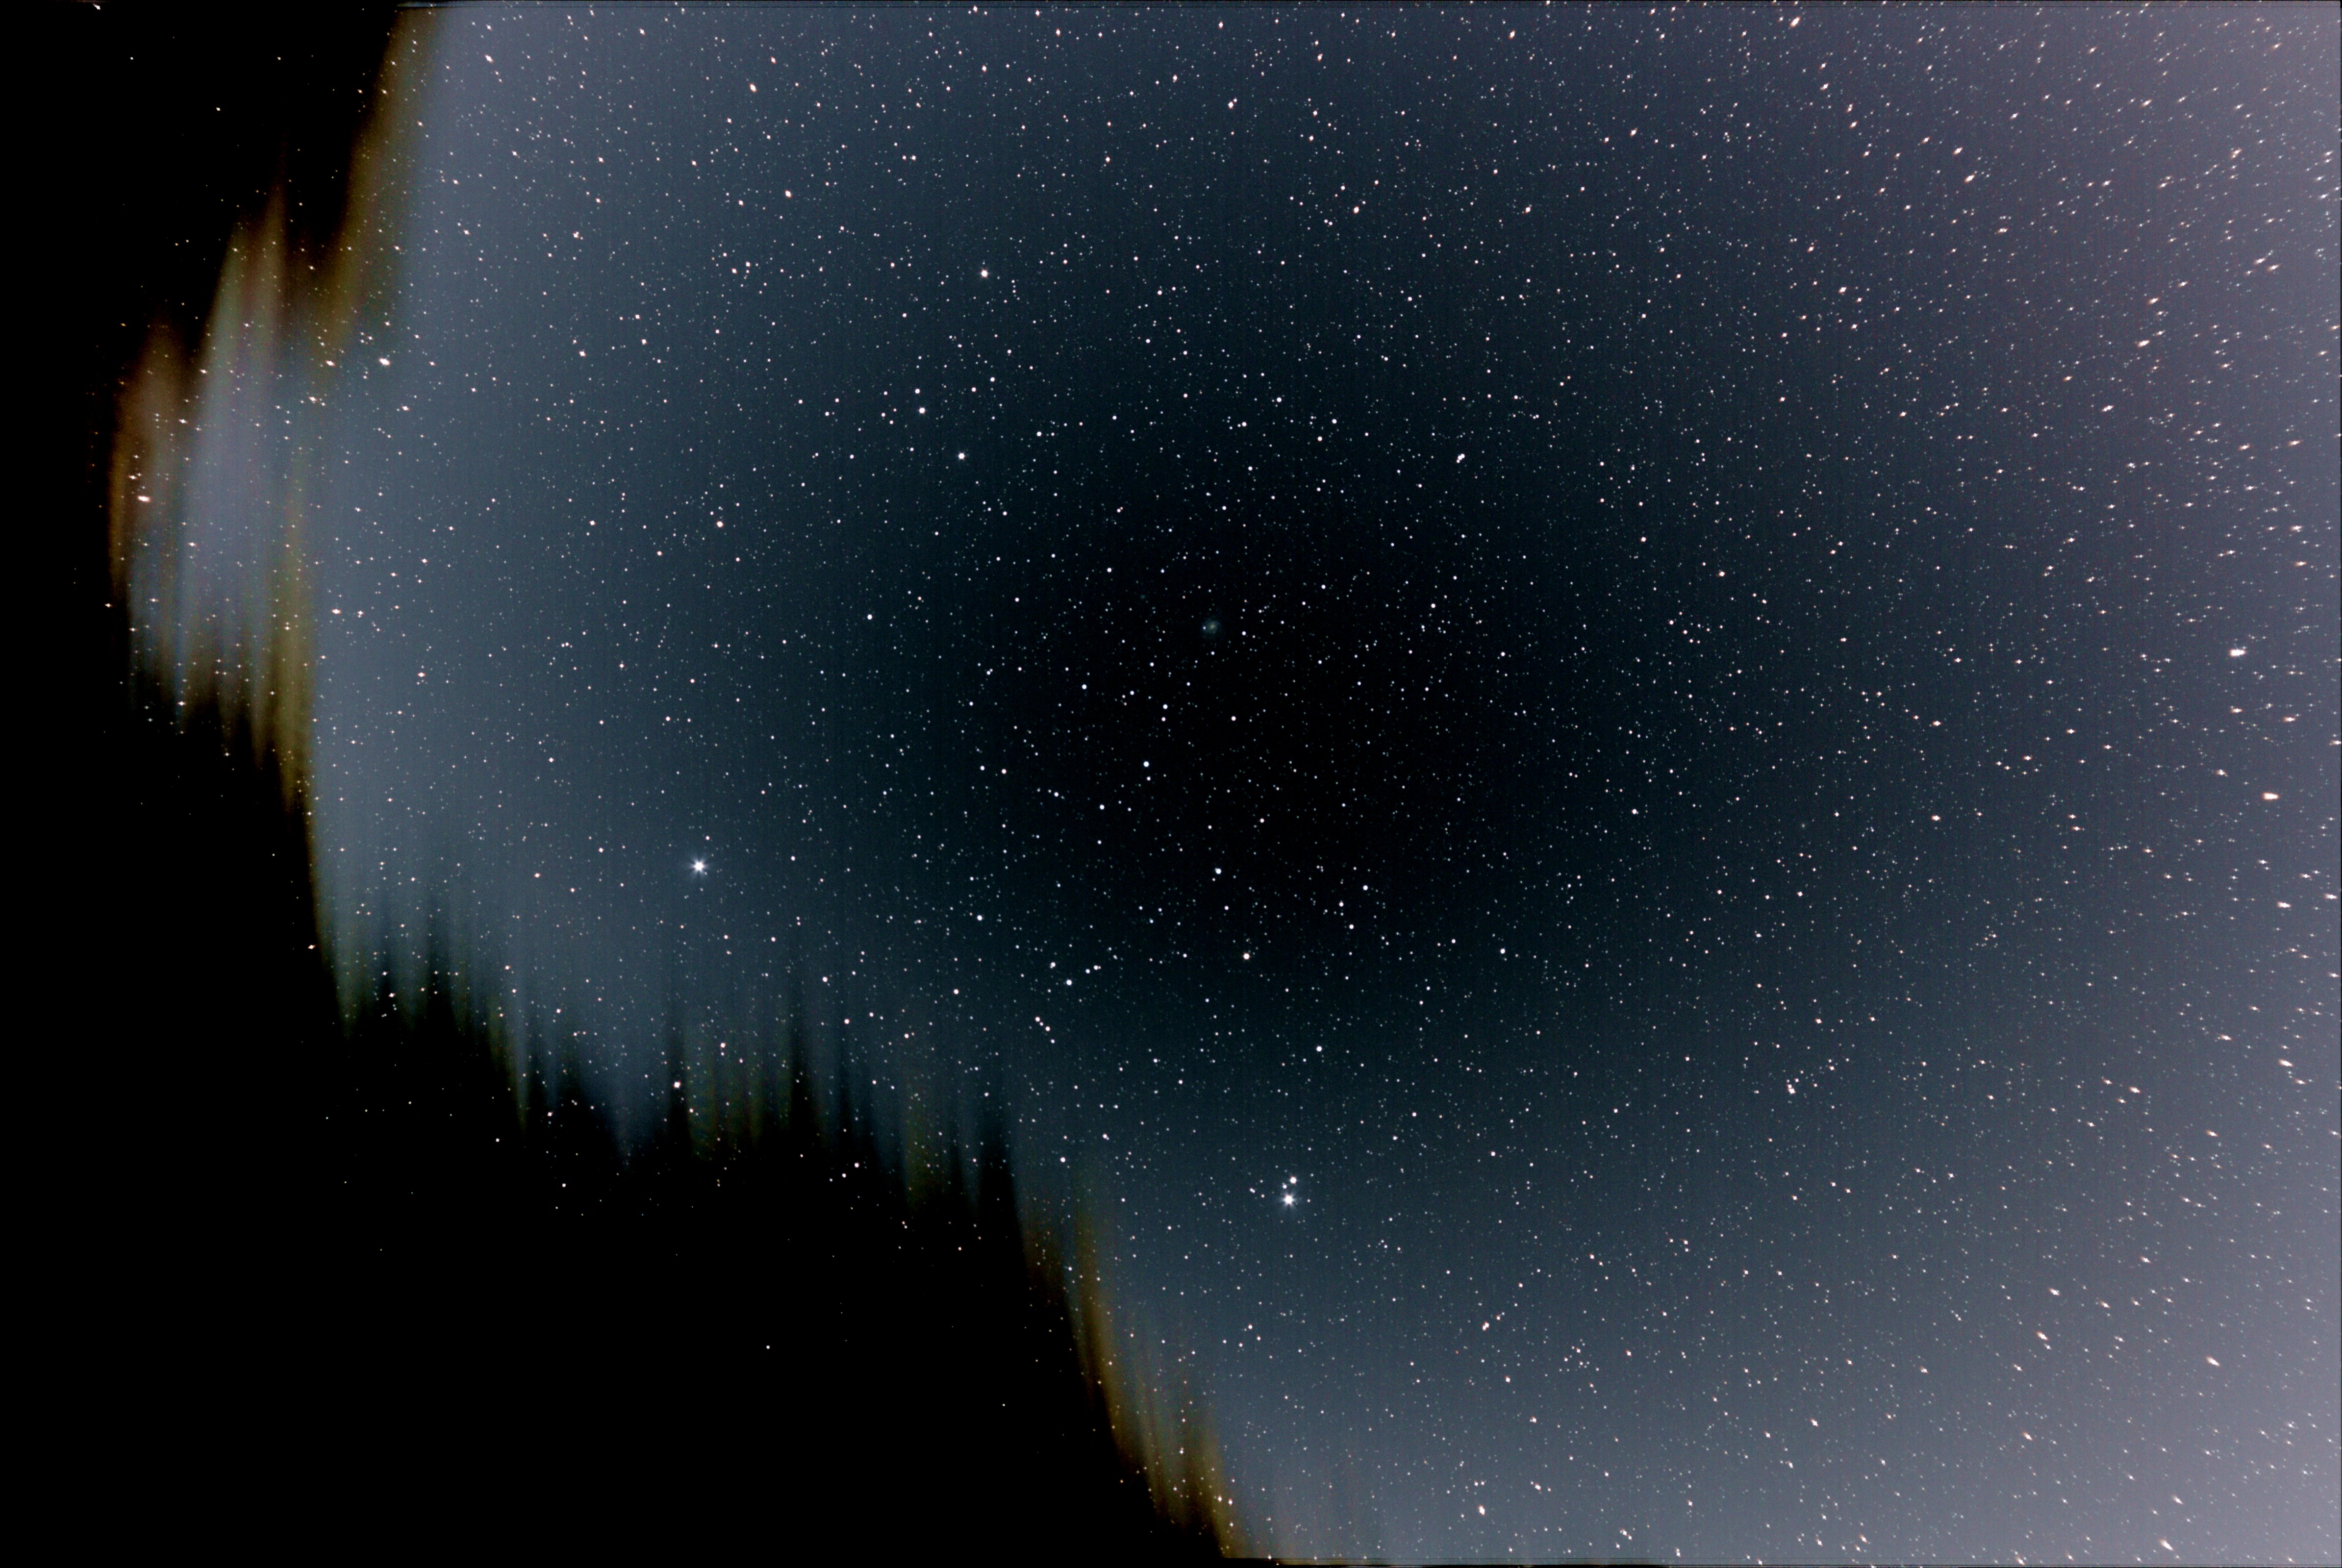
| With my newly-acquired Google Pixel 4a
smartphone and its ability to take 'Night
Sight' long-exposure stacked photos (up to 15
exposures over 4 minutes at 16 seconds per exposure), I
spent some time taking some wide-field shots of the night
sky in September/October 2021. |
||||||||
|
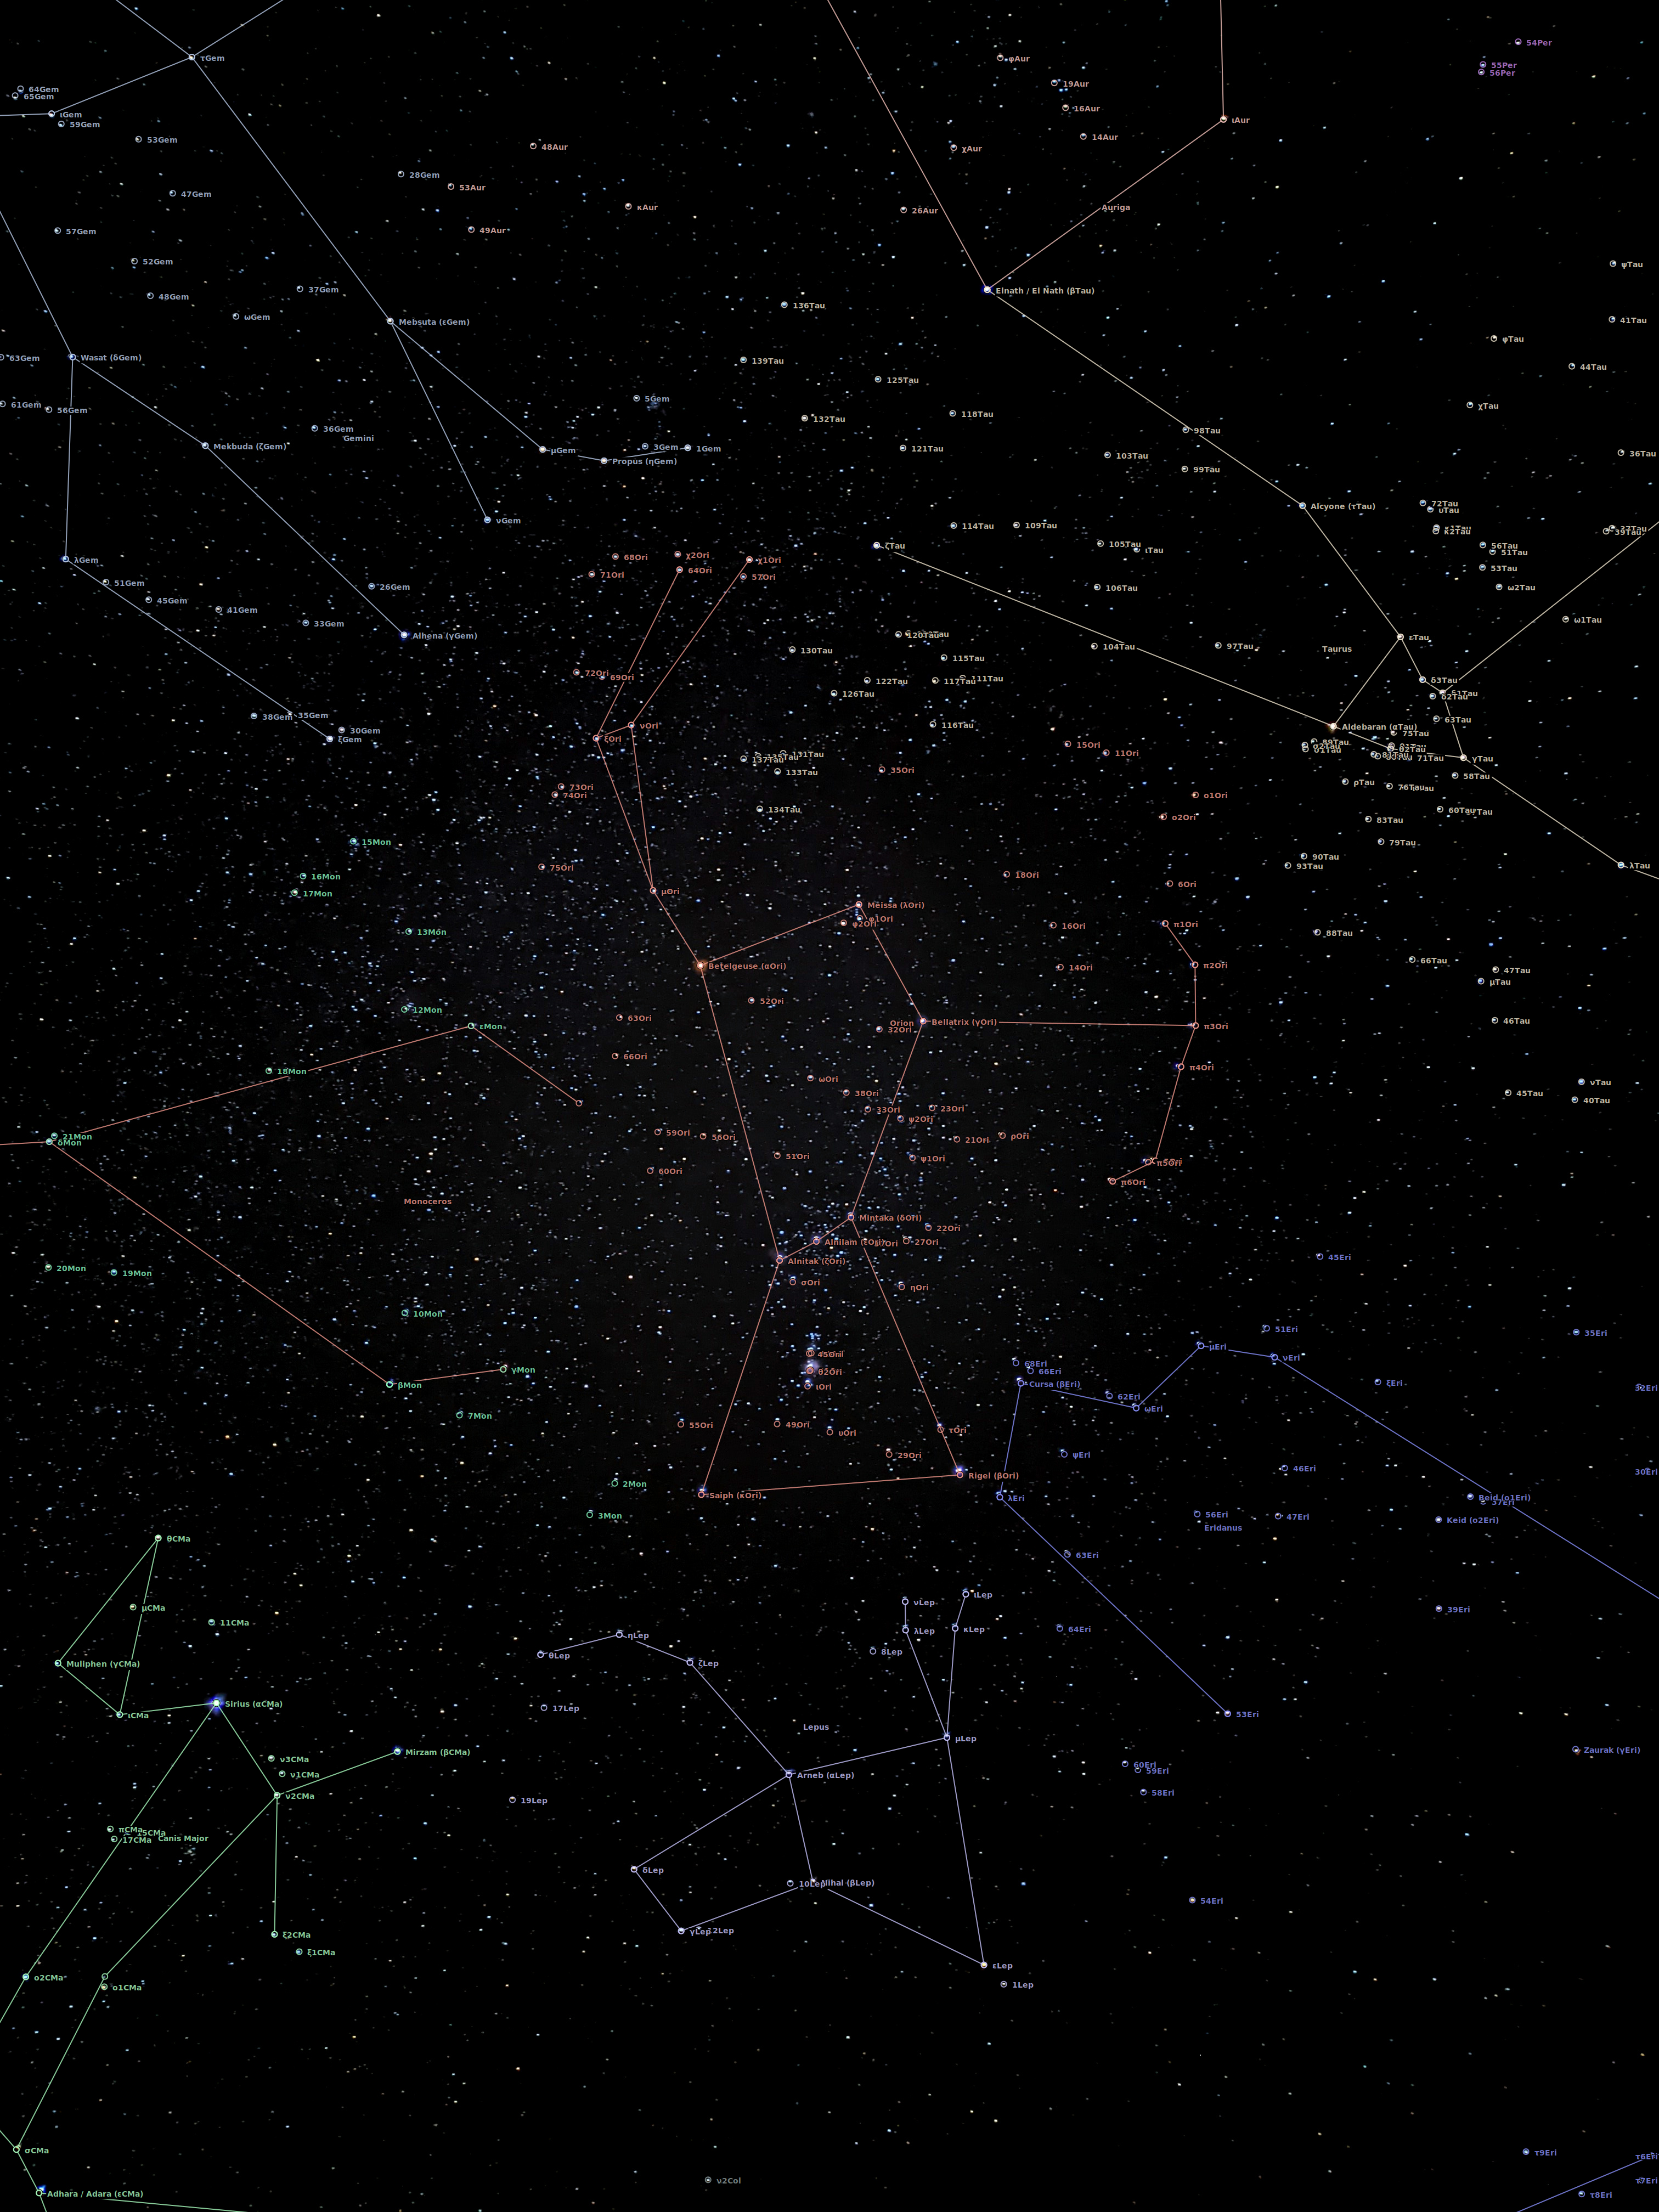
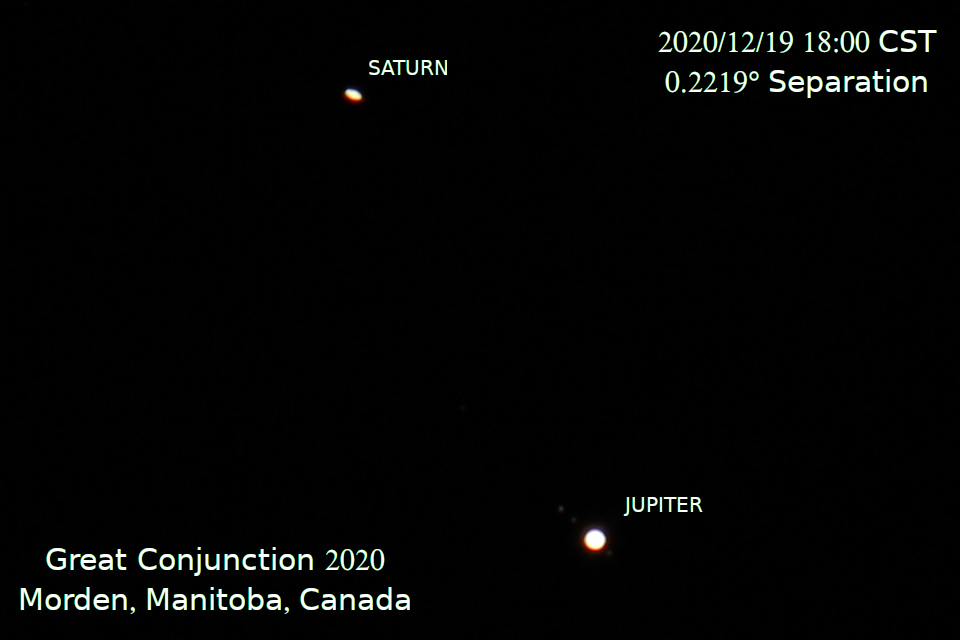
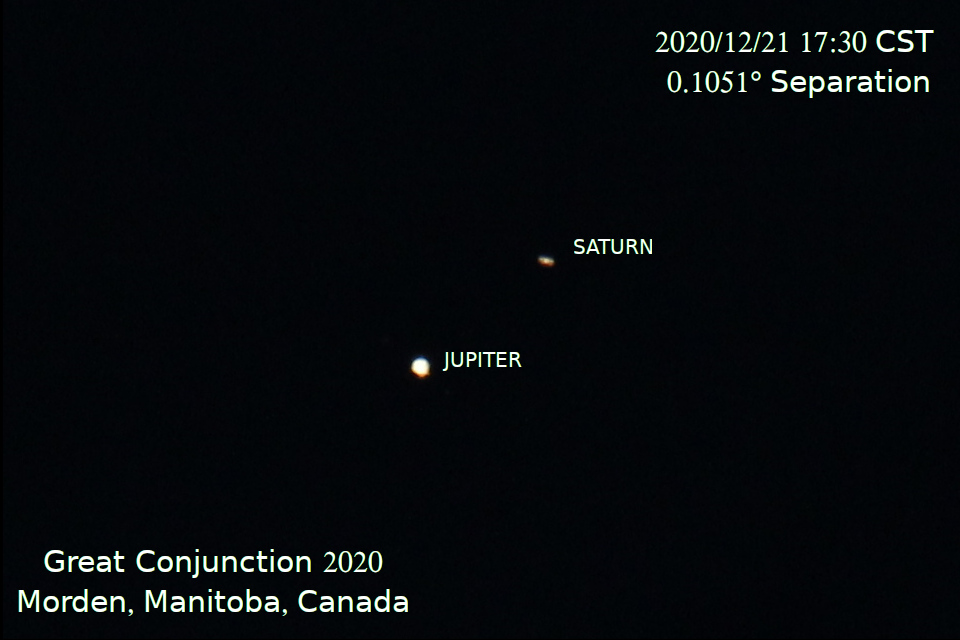
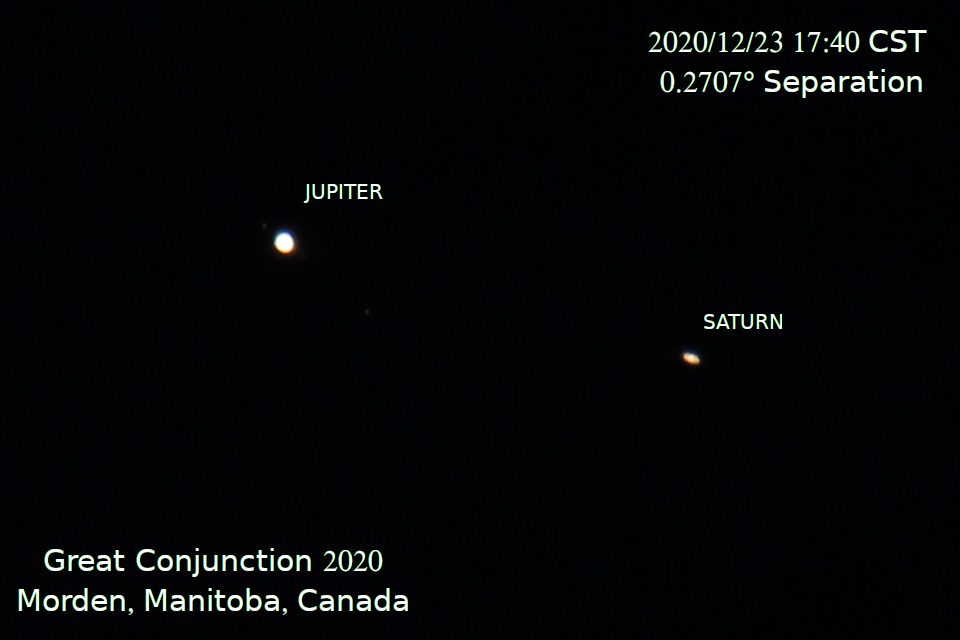
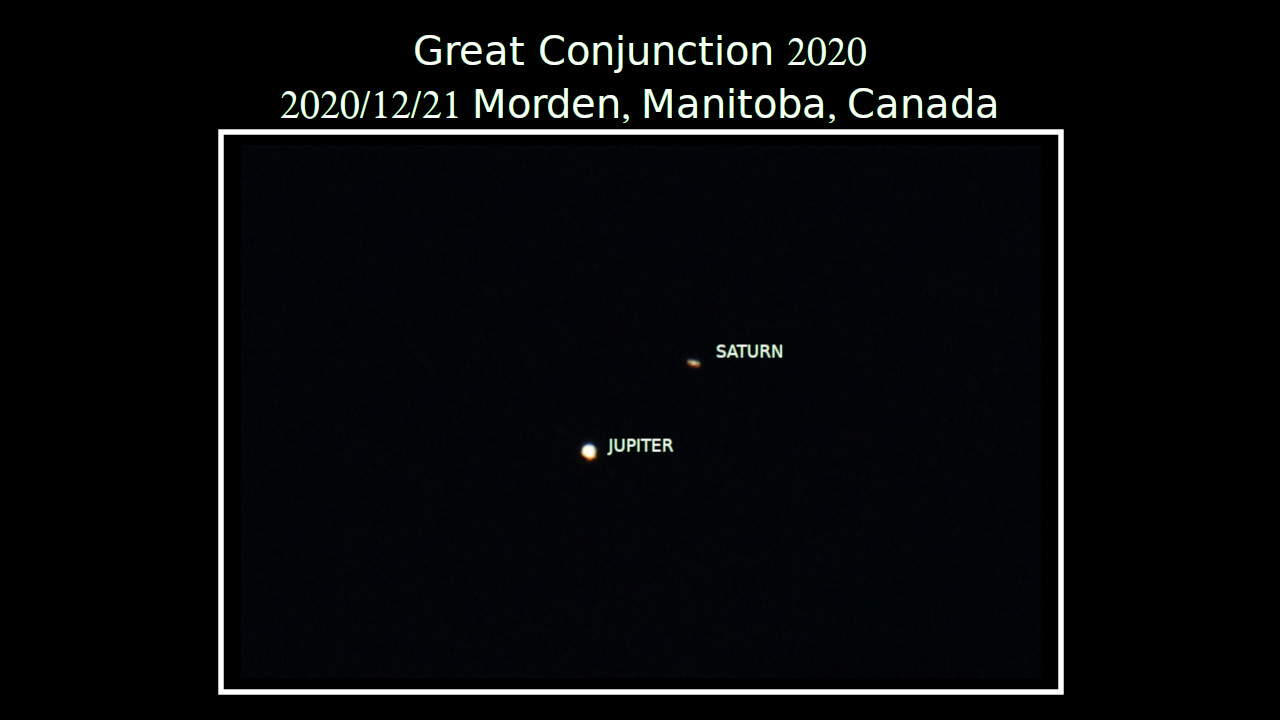
| Approximately every 20 years, a conjunction
of the planets Jupiter and Saturn occur -- named the Great
Conjunction. The one in 2020 was especially
noteworthy since the separation was smaller than it had
been since 1226! A CFAM radio interview by Jayme
Giesbrecht was subsequently posted to The
Great Conjunction 2020 - Darren Enns on Pembina Valley
Online blog. Some of my pictures were also
included on this page: The
"Christmas Star" (PHOTOS) - PembinaValleyOnline.com |
||||||
 |
||||||
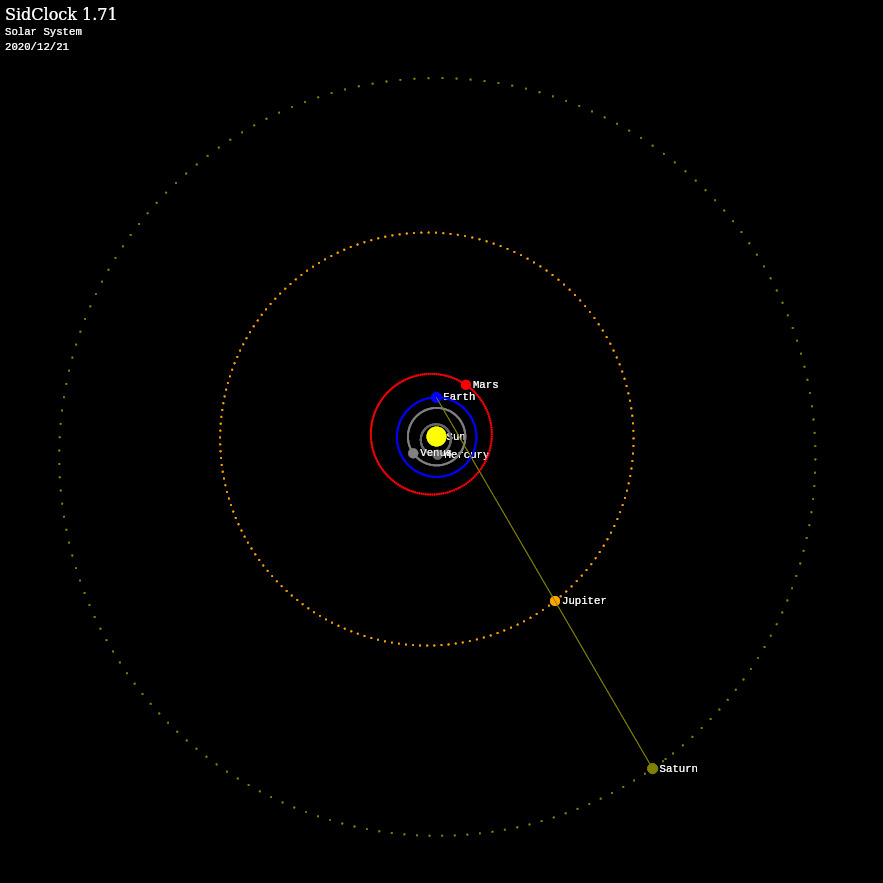
| I used my home-grown SidClock app to once
again generate a Solar System map of the relative
positions of the planets -- including the aligned Jupiter
and Saturn. |
||||||
 |
||||||
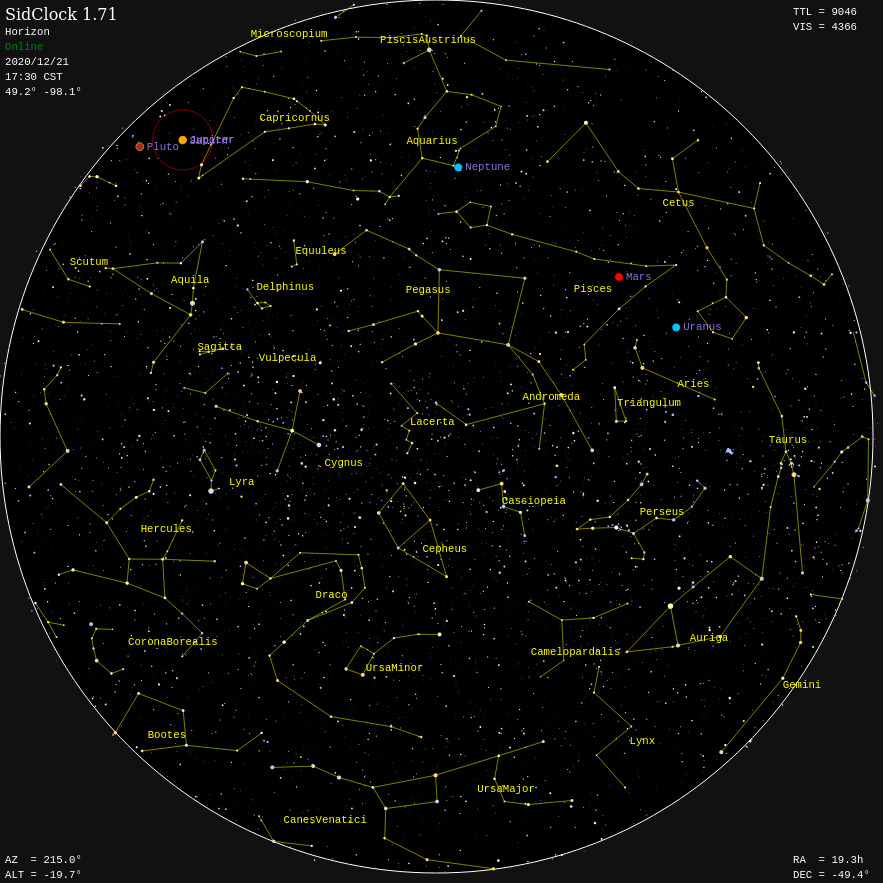
| SidClock was also used to create a horizon
chart for my location at the optimal viewing time --
showing how close this was to the horizon, adding extra
challenges to viewing. |
||||||
 |
||||||
|
||||||
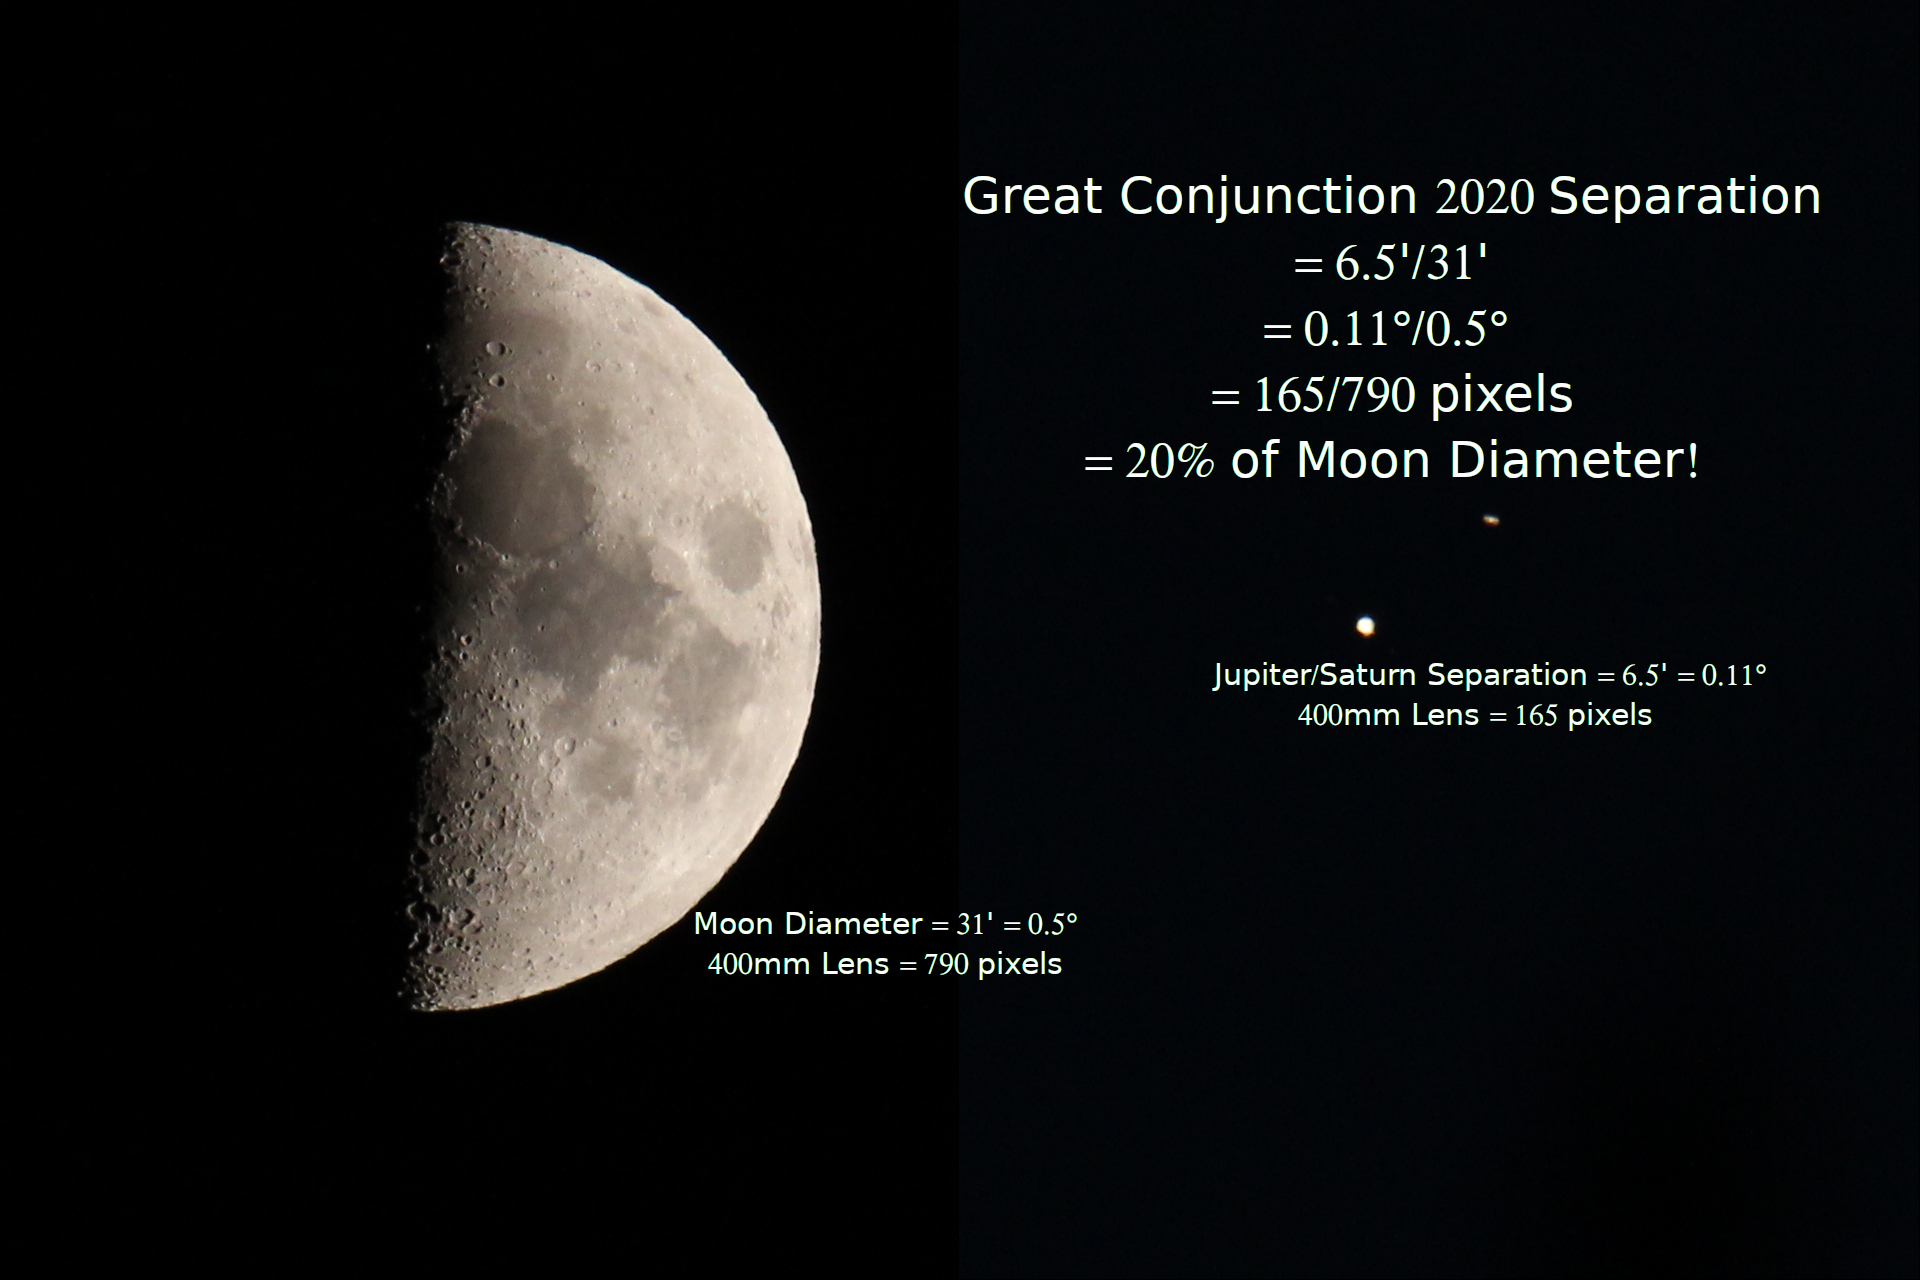
| I took a photo of the Moon the same night,
and used it below in a composite photo with Jupiter/Saturn
to show that the claim of the separation being "20% of a
Moon diameter", was, in fact, correct! |
||||||
 |
||||||
| I also wanted to use whatever tools I could
in order to generate a localized (and more accurate
depiction) of the alignment/separation progression where I
live. I used SkyField to
generate a data file of horizon coordinates and angular
separation for Jupiter and Saturn from 2020/12/14 to
2020/12/28, and Matplotlib
to create a nice graph, all in one Python script.
Originally, I used my older skills to create a graph
separately using a GnuPlot
script. |
||||||
 |
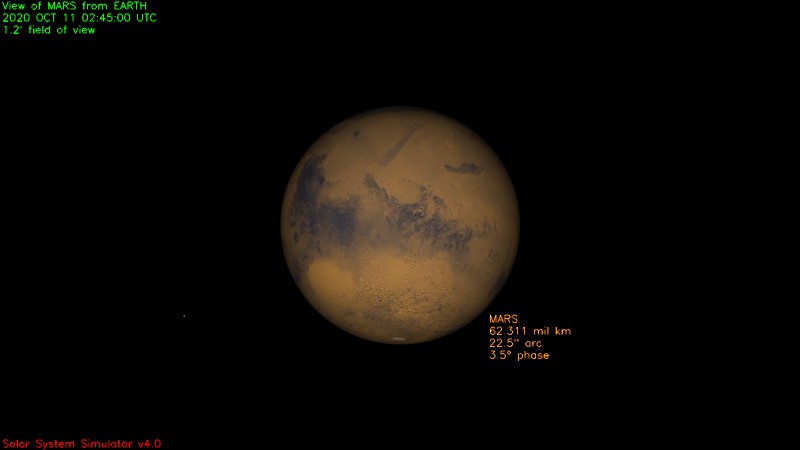
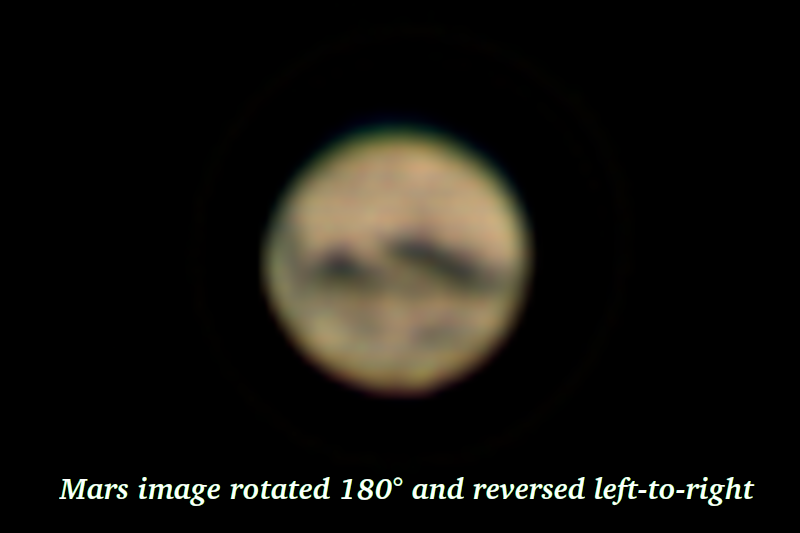
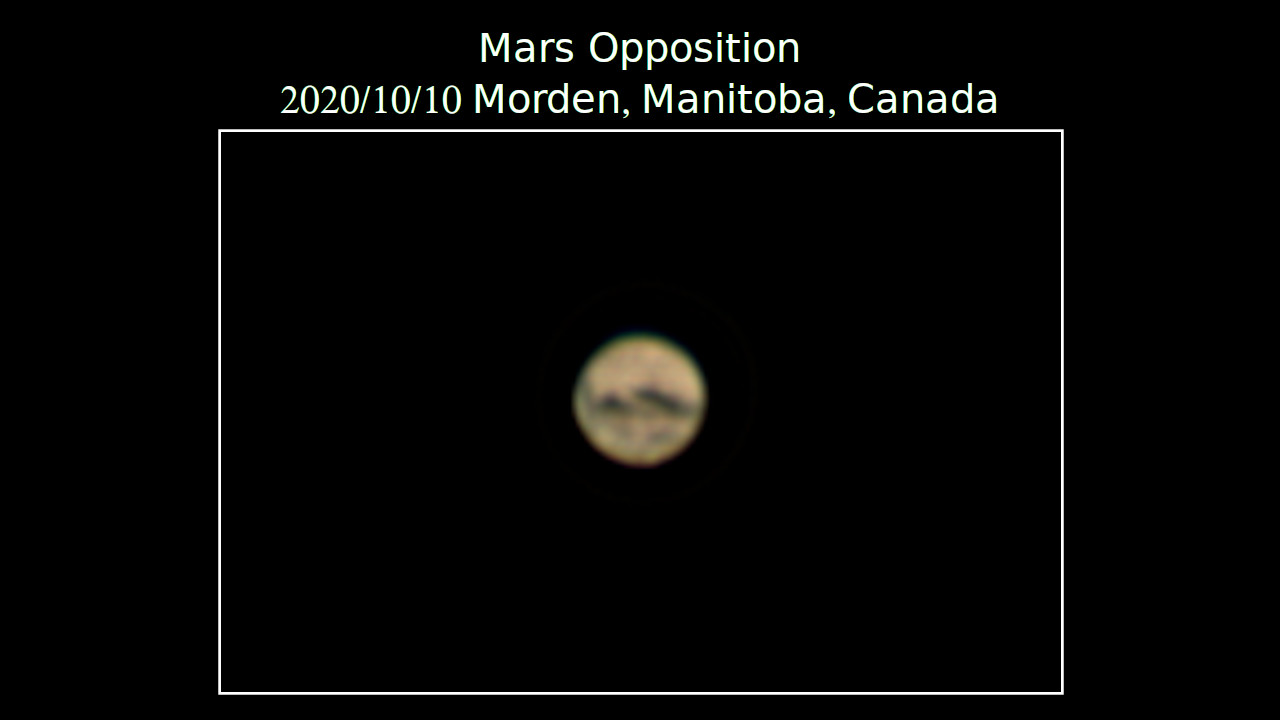
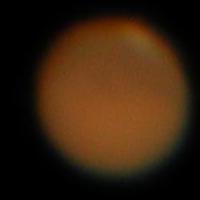
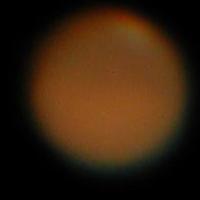
| Mars closest approach in 2020 occurred on
October 6, and true opposition occurred on October 13, and
during my first (and possibly only) attempt at capturing
this event on October 10, I opted to try on my new SVBONY
T7 astro camera, purchased as a less-expensive
alternate to the ASI120MC
astro camera, rather than my traditional Canon 550D
DSLR. I paired this camera with my smallest
telescope -- the Celestron C90. I controlled the
camera using the Linux app AstroDMX
by Nicola Mackin on my Acer C720 Chromebook running Linux
LMDE, and created an AVI video compatible with Windows app
Registax.
I pre-processed the video using Windows app PIPP.
Next time, I would like to attempt an 'Linux -only'
solution :) A CFAM radio interview by Jayme Giesbrecht was subsequently posted to Catch a Glimpse of Mars This Week! - PembinaValleyOnline.com. |
||||
 |
||||
 |
||||
 |
||||
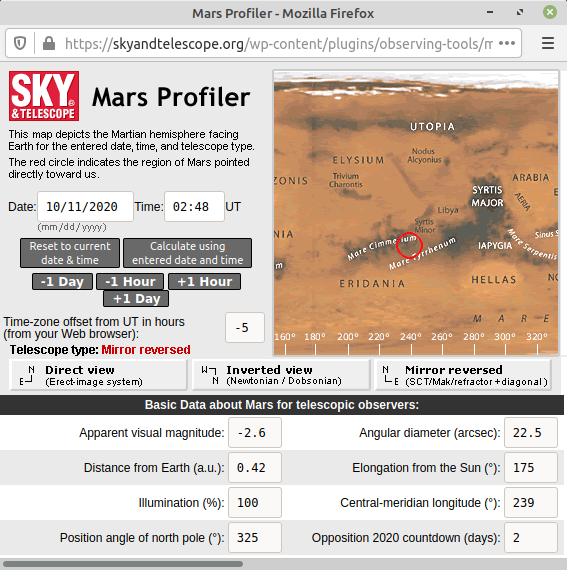
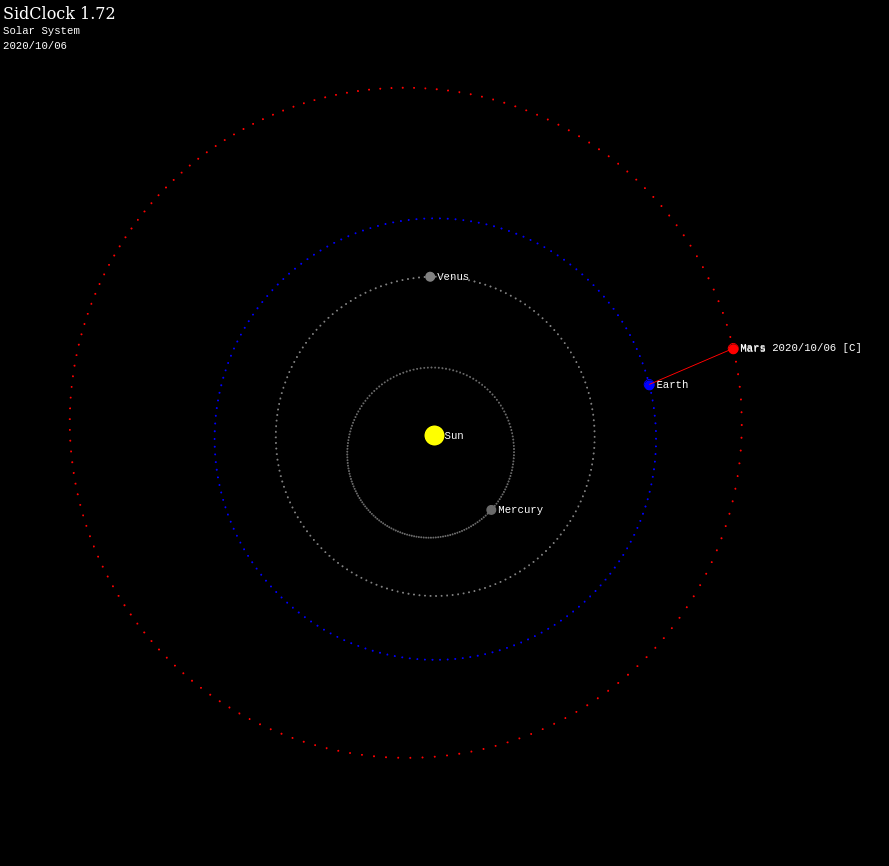
| I used my own Sidclock HTML5 app to plot
the Earth-Mars solar system proximity, and Sky map for my
latitude/longitude during optimal viewing conditions on
October 6th. |
||||
|
||||
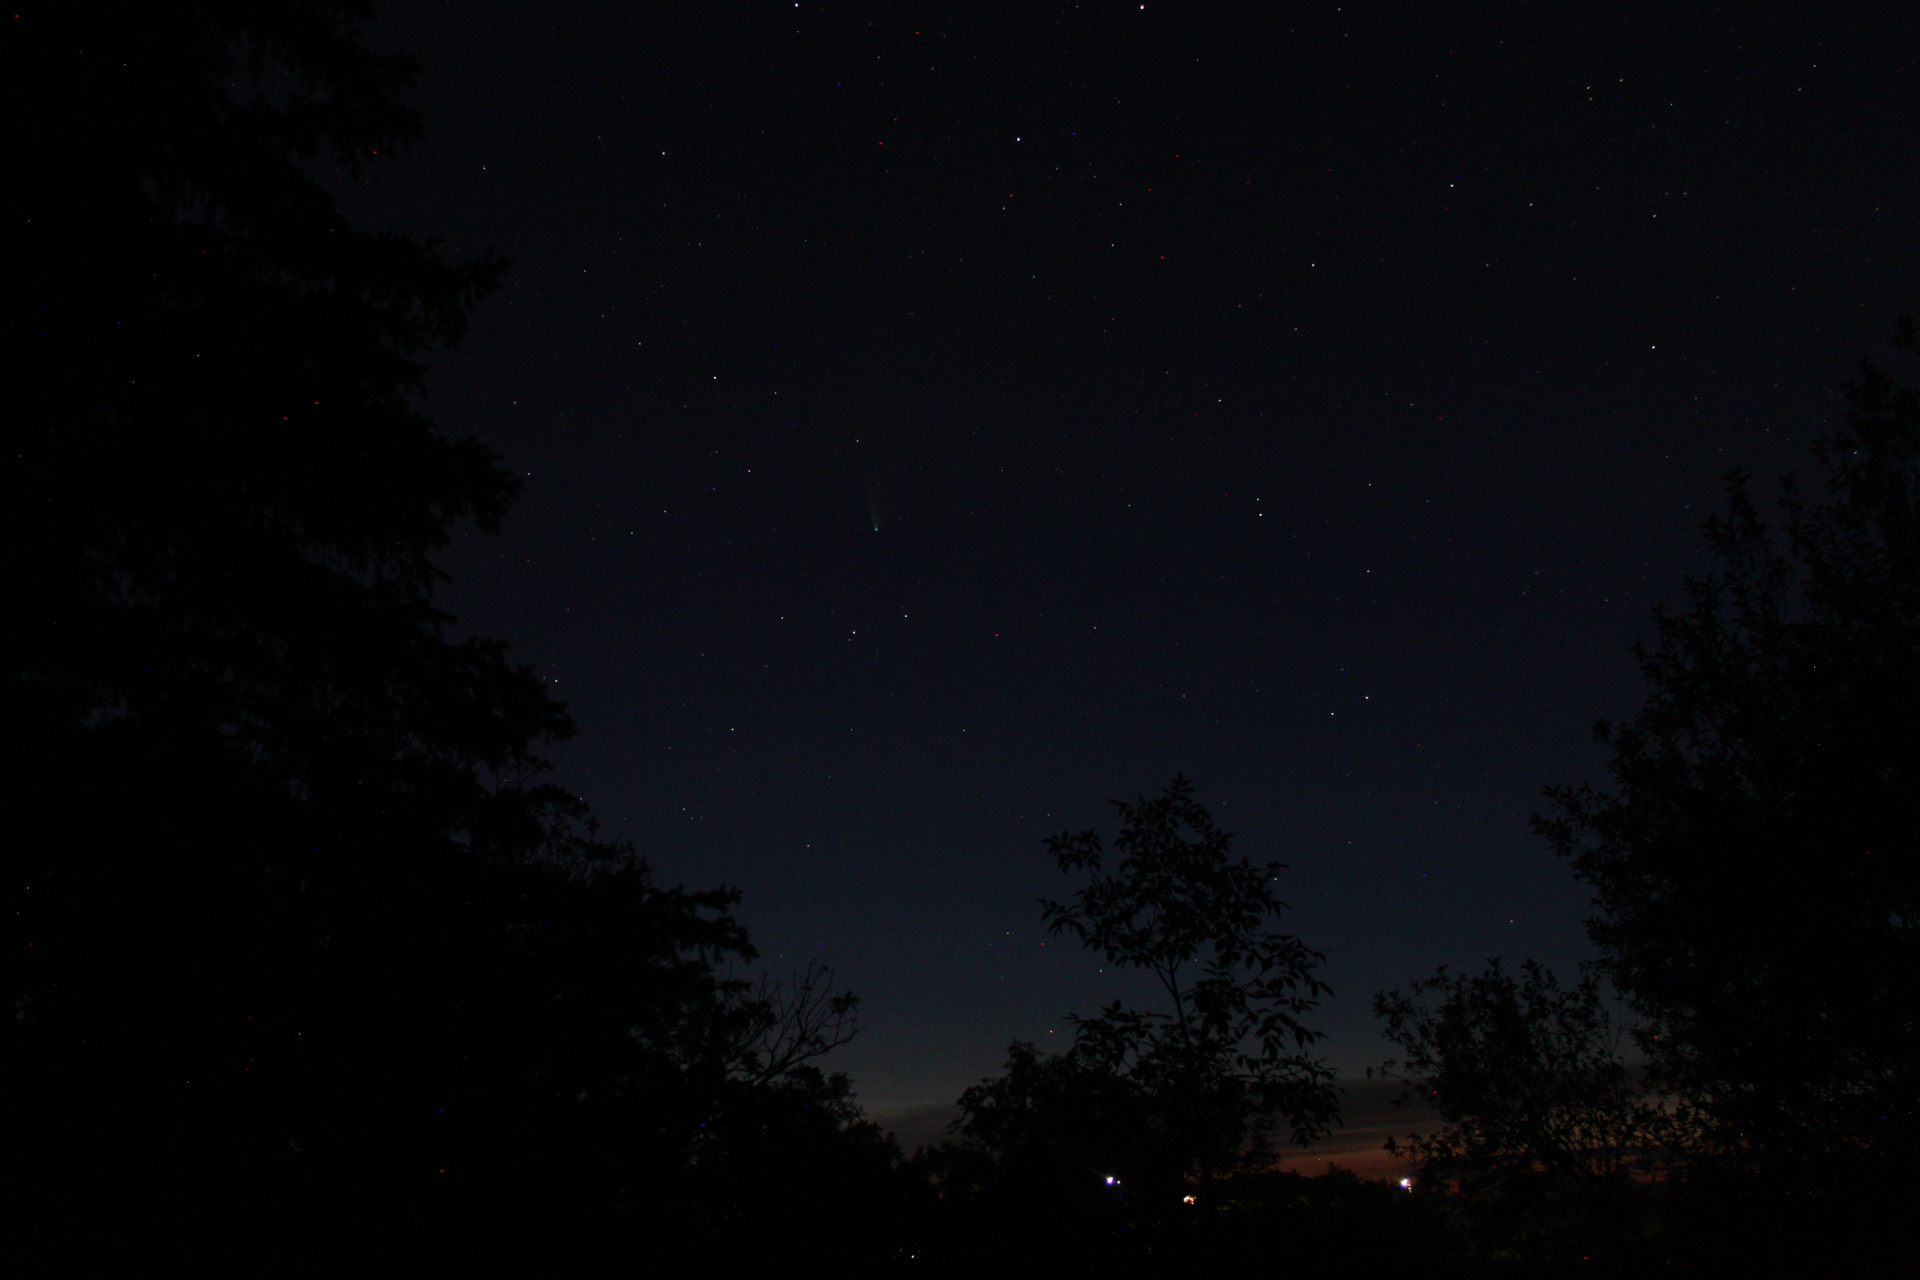
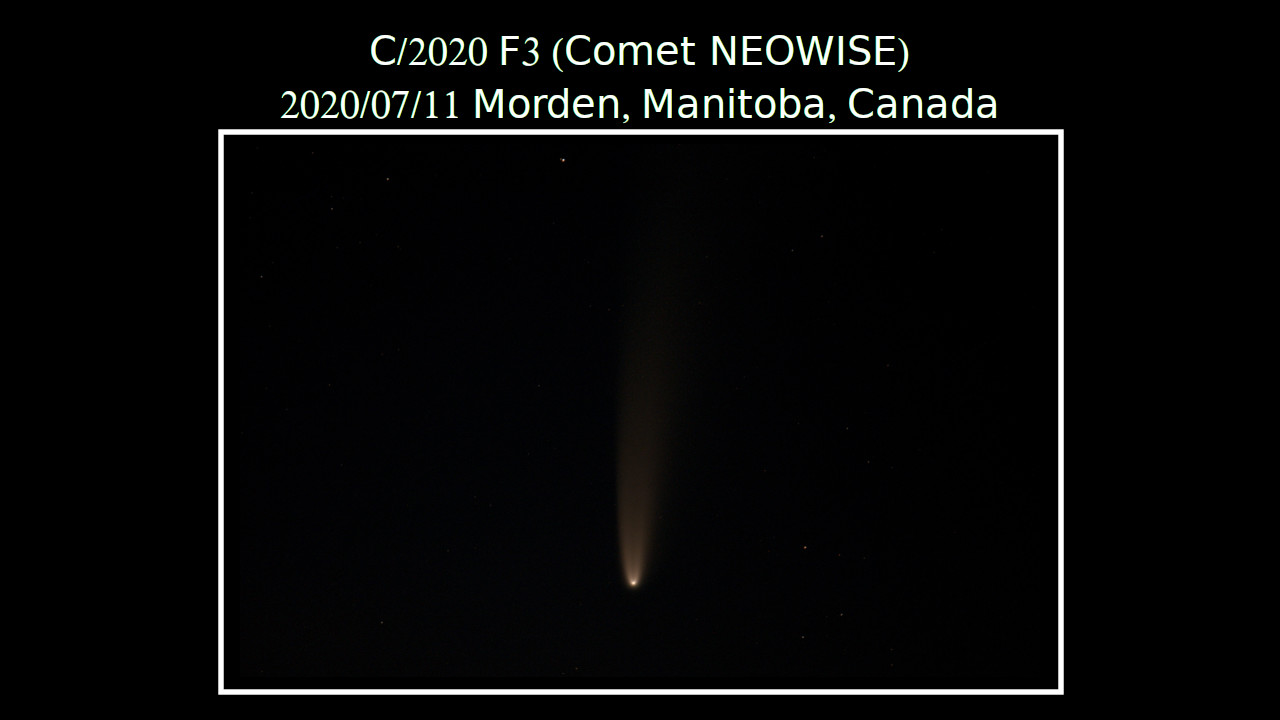
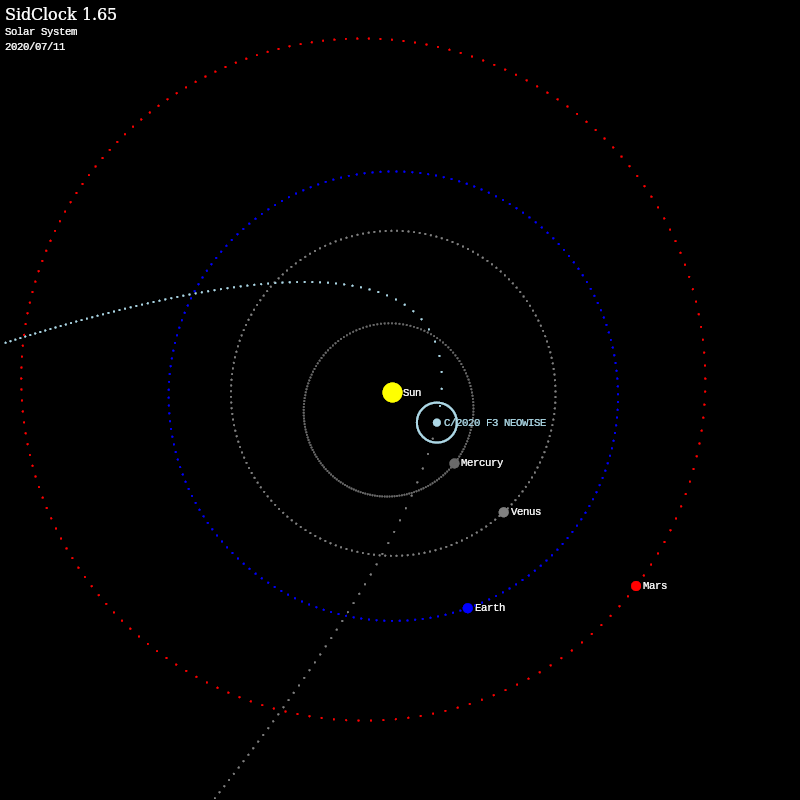
| Comet NEOWISE
surprised everyone by how bright it became as it passed by
the Sun, and I joined many others around the world in
attempting to grab a few shots of this rare naked-eye
sight, on 2020/07/11 from 03:00 to 04:30.
Temperatures were mild, and mosquitoes were slightly
annoying. |
||
 |
||
| This particular photo was taken with a
Canon 550D using a Sigma 400mm prime lens @ F/5.6 @ ISO
6400. It was stacked (with no dark frames) using 10
images using DSS and processed with GIMP. |
||
 |
||
| Intentionally over-exposed crop of same
photo with same camera/lens @ 1s @ F 5.6 @ 1600 ISO. |
||
 |
||
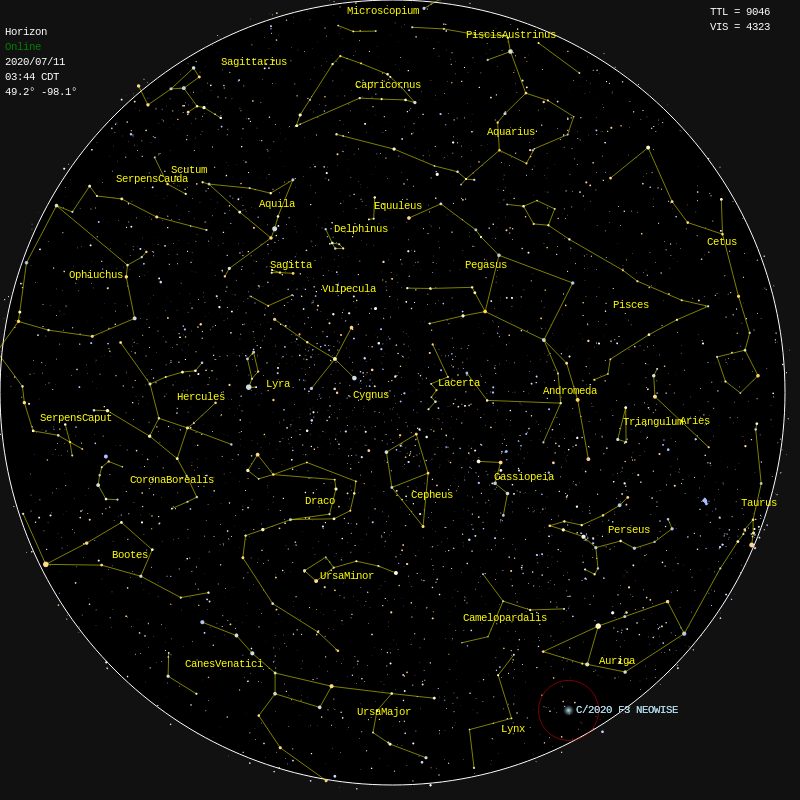
| Overhead sky map generated by my SidClock
HTML5 app showing the location of Comet NEOWISE when the
images above were taken. NEOWISE was very low (8°)
above the NNE horizon. |
||
 |
||
| Also from my SidClock app is a top-down
solar system orbit view showing the position of NEOWISE on
2020/07/11 at 03:44, when the same photos were taken. |
||
 |
||
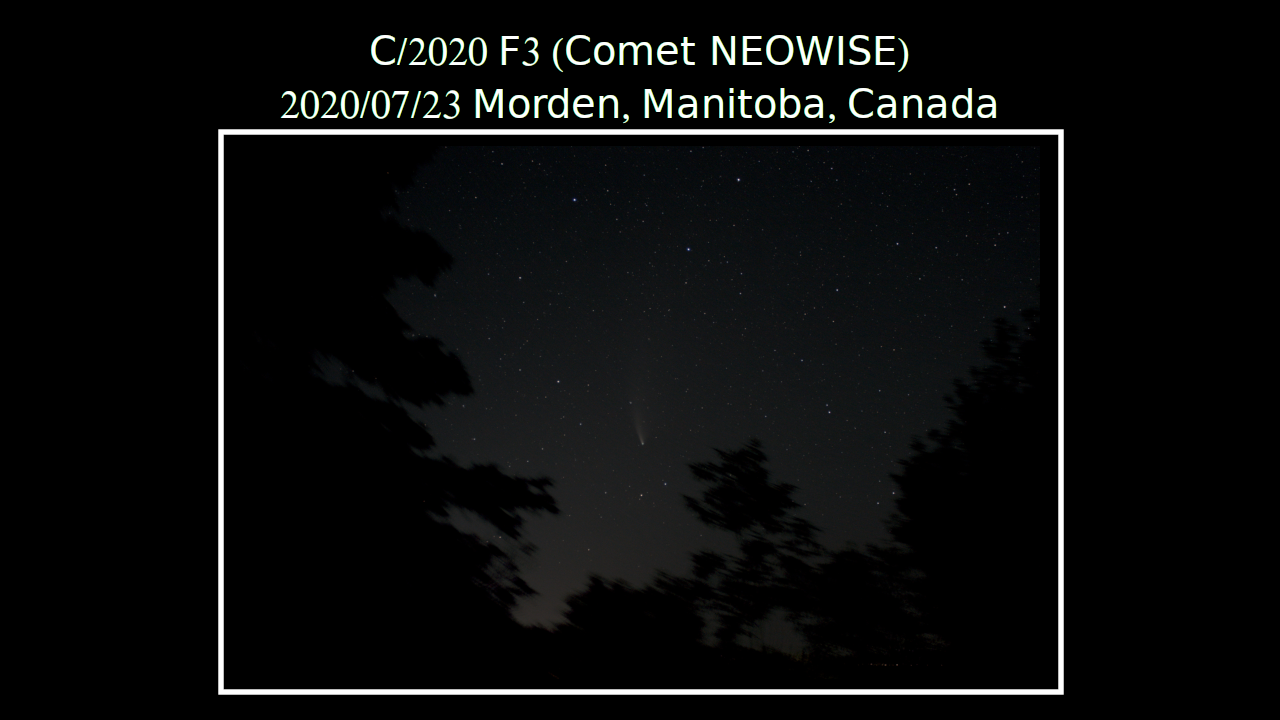
| I wanted another telephoto image of NEOWISE
on July 23, when the comet was closest to Earth, but
technical difficulties limited me to a stack of 29 photos
using my 55mm kit lens. Nevertheless, it does show
the background stars nicely, with Ursa Major ("Big
Dipper") stars above. |
||
|
||
| On the left is the stacked widefield shot
of NEOWISE, and on the right is the annotated version
created by Astrometry. |
| Jupiter Opposition occurred on June 10,
2019, and I made humble efforts to capture it just using
my Canon 550D/T2i in '640x480 Movie Crop' mode (7x
magnification) and my Sigma prime lens @ F/5.6. I
was out in the brisk night between 23:00 and 01:00, and
experienced a small equipment failure (the connection
between my Nexus 7 tablet running DSLR Controller, and my
camera, would not work -- even though it was just fine in
the house a few hours earlier) -- this forced me to focus
using the small screen on my camera instead. Much to my amazement, this web site -- and news of this event -- were mentioned in the blog of local radio station CFAM, after I was interviewed by one of their hosts: Look to the Skies in the Month of June! |
||||
|
||||
| |
||||
 |
||||
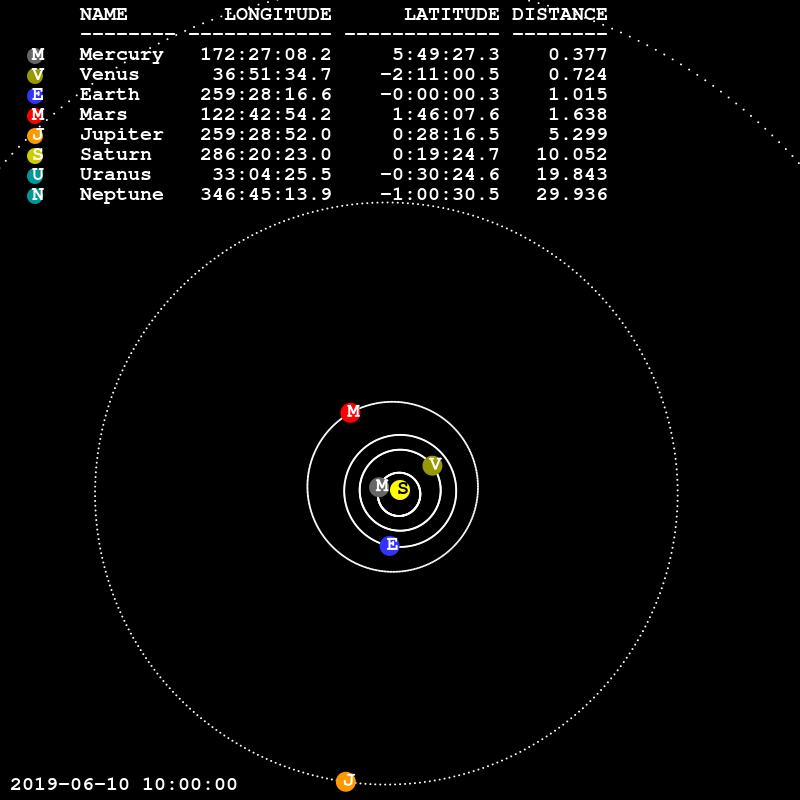
Orbit plot of Solar System up to Jupiter,
showing relative positions on 2019-06-10, specifically of
Jupiter being in 'opposition' to the Earth (opposite side
of Sun in direct line with Earth). The parameters I
used for this plot are:python sorrery.py -d 800 -D 800 -e '2019-06-10 15:00:00' -O -z 5 -t -f 20 -S 90Notice that the heliocentric longitude of Earth and Jupiter are the same at this time/date (259°). Technically, the Earth-Jupiter distance is not minimal at this point -- due to the elliptical non-circular orbits of the planets -- and the minimal separation distance actually is on 2019-06-12 03:00 UTC. |
| August 21, 2017 was a bit day for North
Americans: a total solar eclipse coast-to-coast in parts
of the USA, and a partial solar eclipse in Canada!
The closest point to me to see the full eclipse would have
been approximately 1100km south, and because of the
time/expense/risk of traveling that far, I contented
myself with remaining where I was and taking photos of the
partial solar eclipse. What I had not
counted on was poor weather! |
||
|
||
| |
||
| The peak of the partial eclipse was to
occur at almost exactly 13:00 CDT where I lived.
Thick clouds were present about 30 minutes before this
time, but I then noticed some patches of blue sky! I
quickly rushed to get some basic photo equipment ready,
and by 12:45 the breaks were becoming large enough to see
glimpses of the eclipse in progress. The photos
themselves did not turn out very well, so I also took some
video during the cloudy periods, and put it on
YouTube. At around 13:15 the clouds rolled back in
and that was the end of my plans. I had wanted to
make an extensive time lapse sequence, but I was glad to
see what I saw :) |
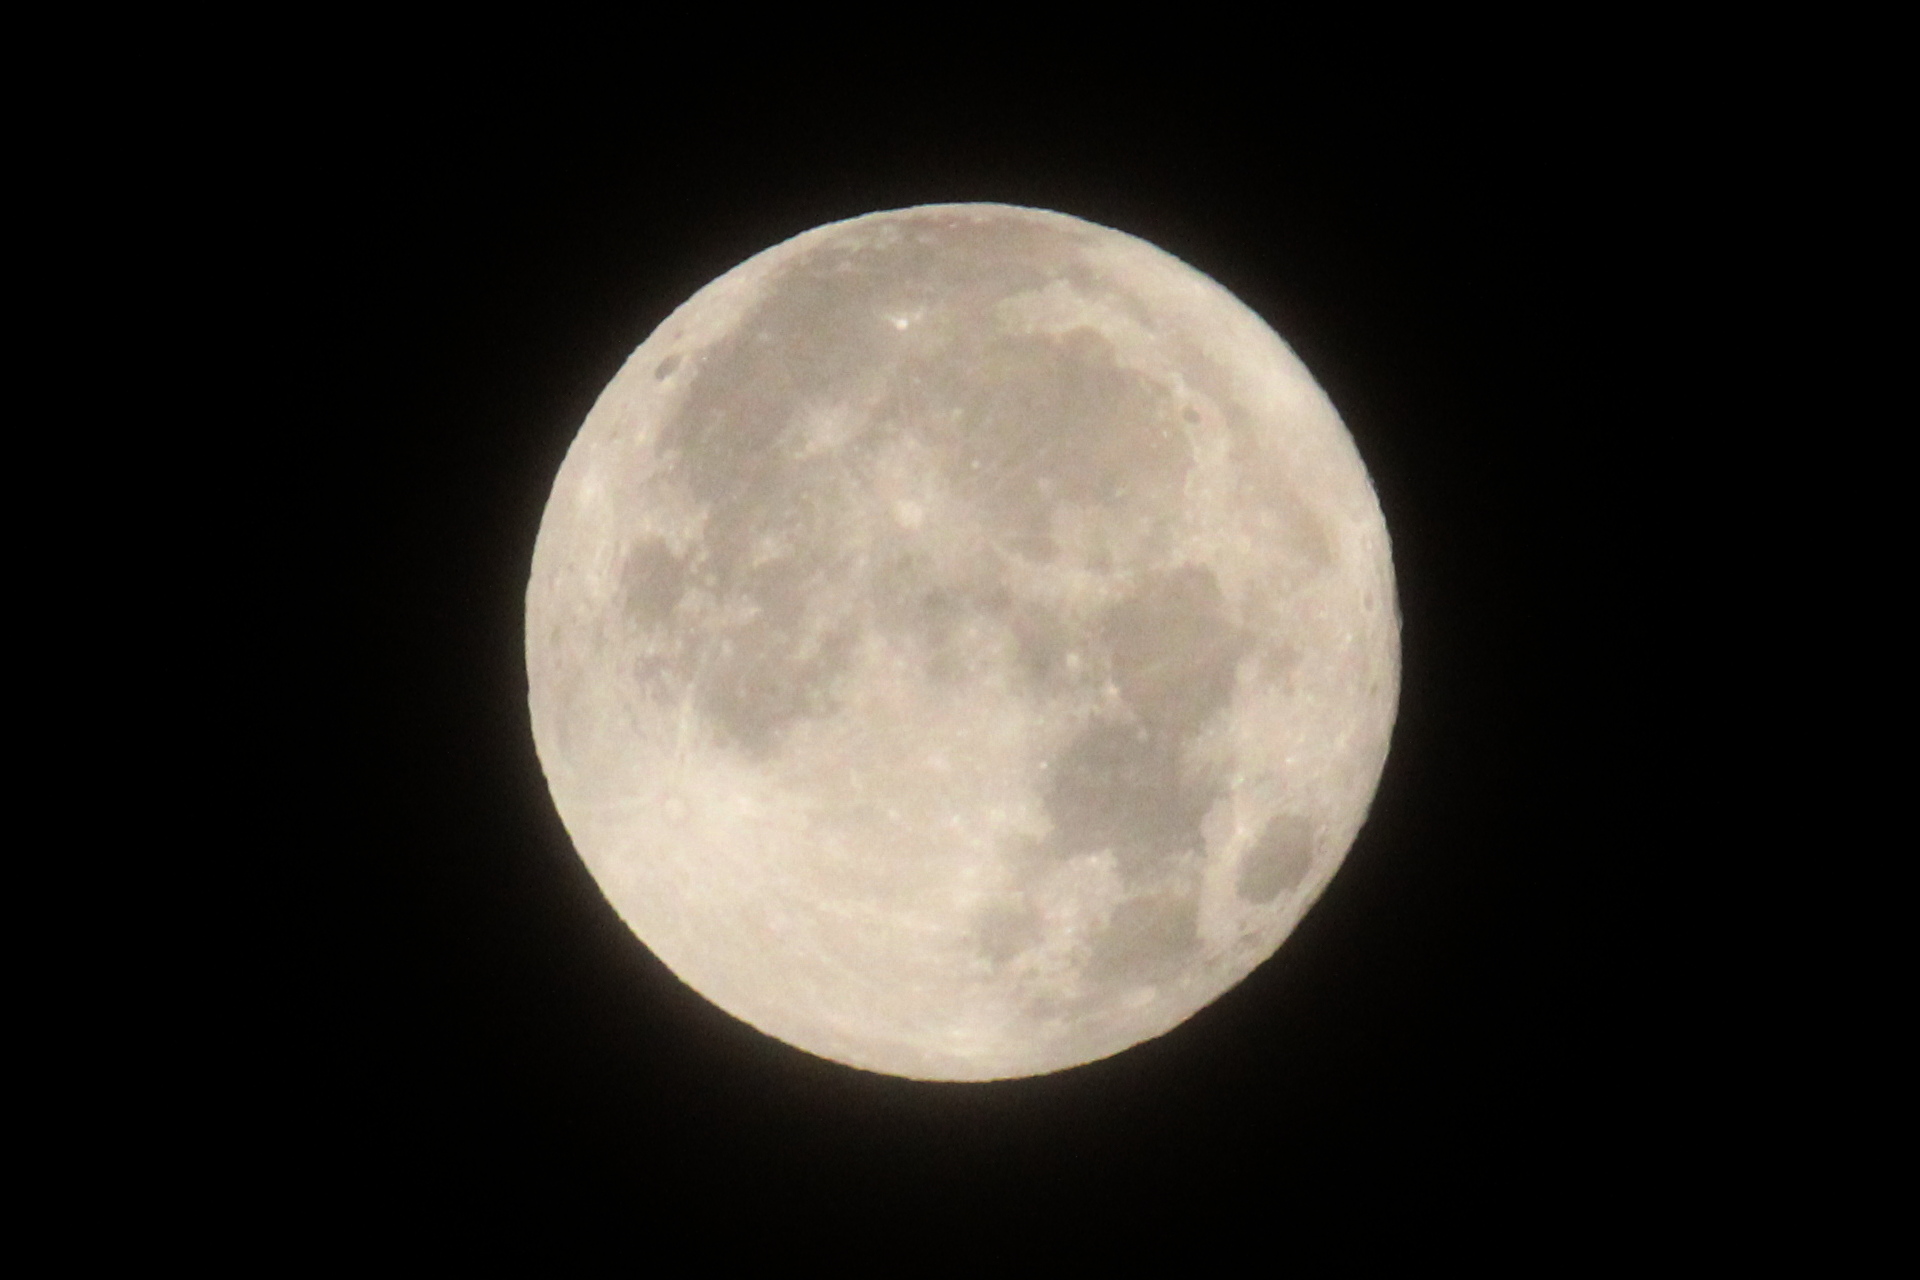
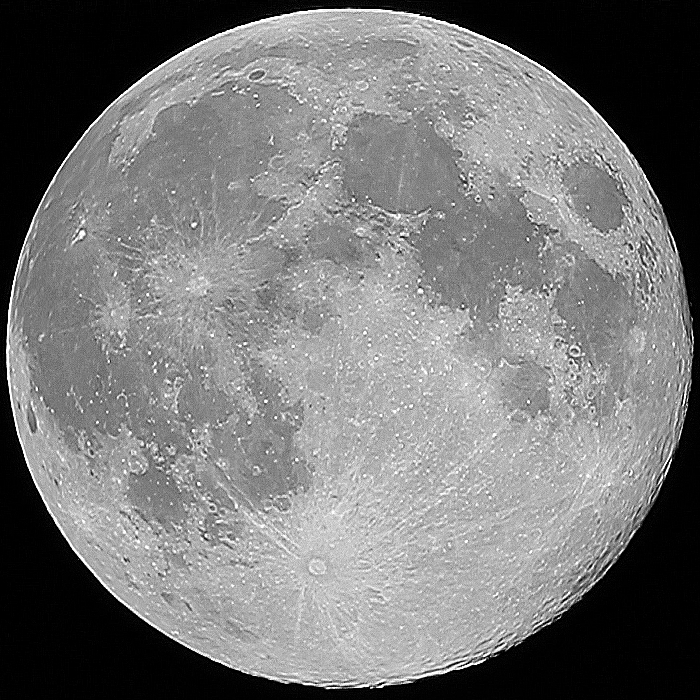
| "Super Moons" seem to be all too common
lately, but when I found out that the October 13, 2016
version was the closest since January 26, 1948, I made the
efforts required to capture it. Fortunately, the
temperature was *much* above normal (around 10�C), and so
it wasn't too cold. Initially, thin clouds obscured
the Moon as it rose, but ample opportunities existed to
capture it :) |
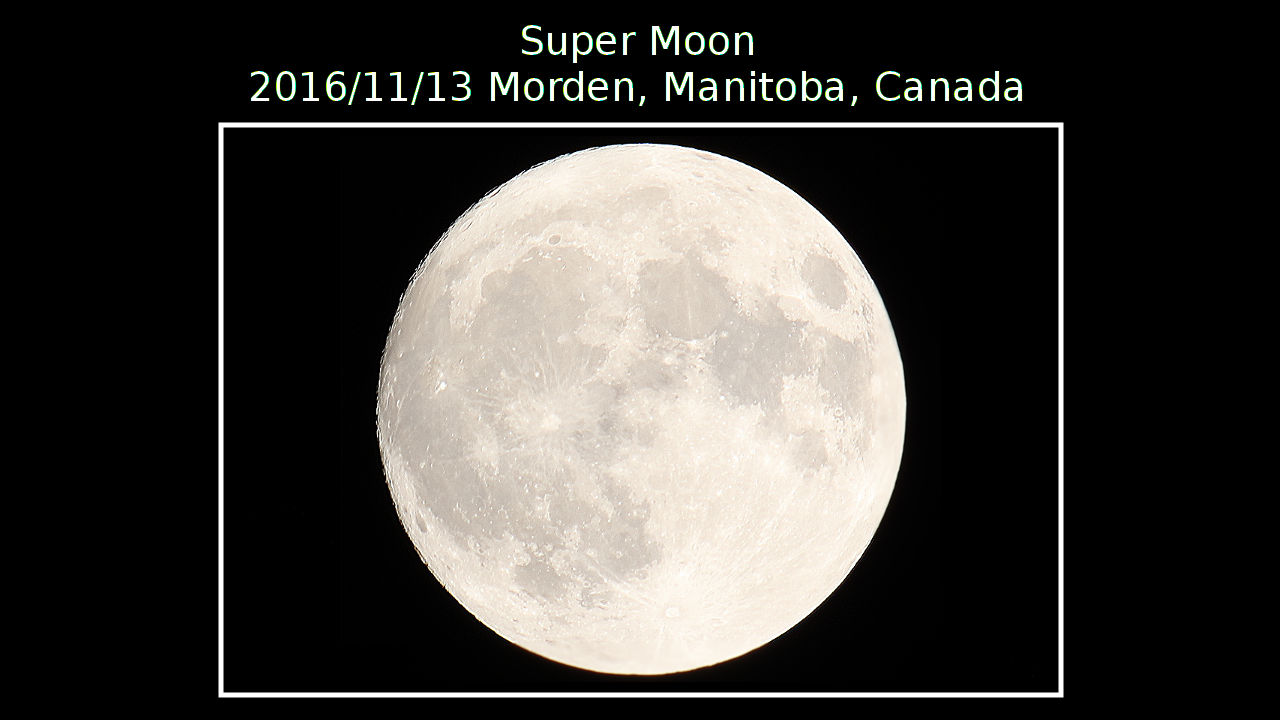 |
| 21 image stack @ F5.6, 1/1500s exposure,
800ISO, with 400mm Sigma prime lens. |
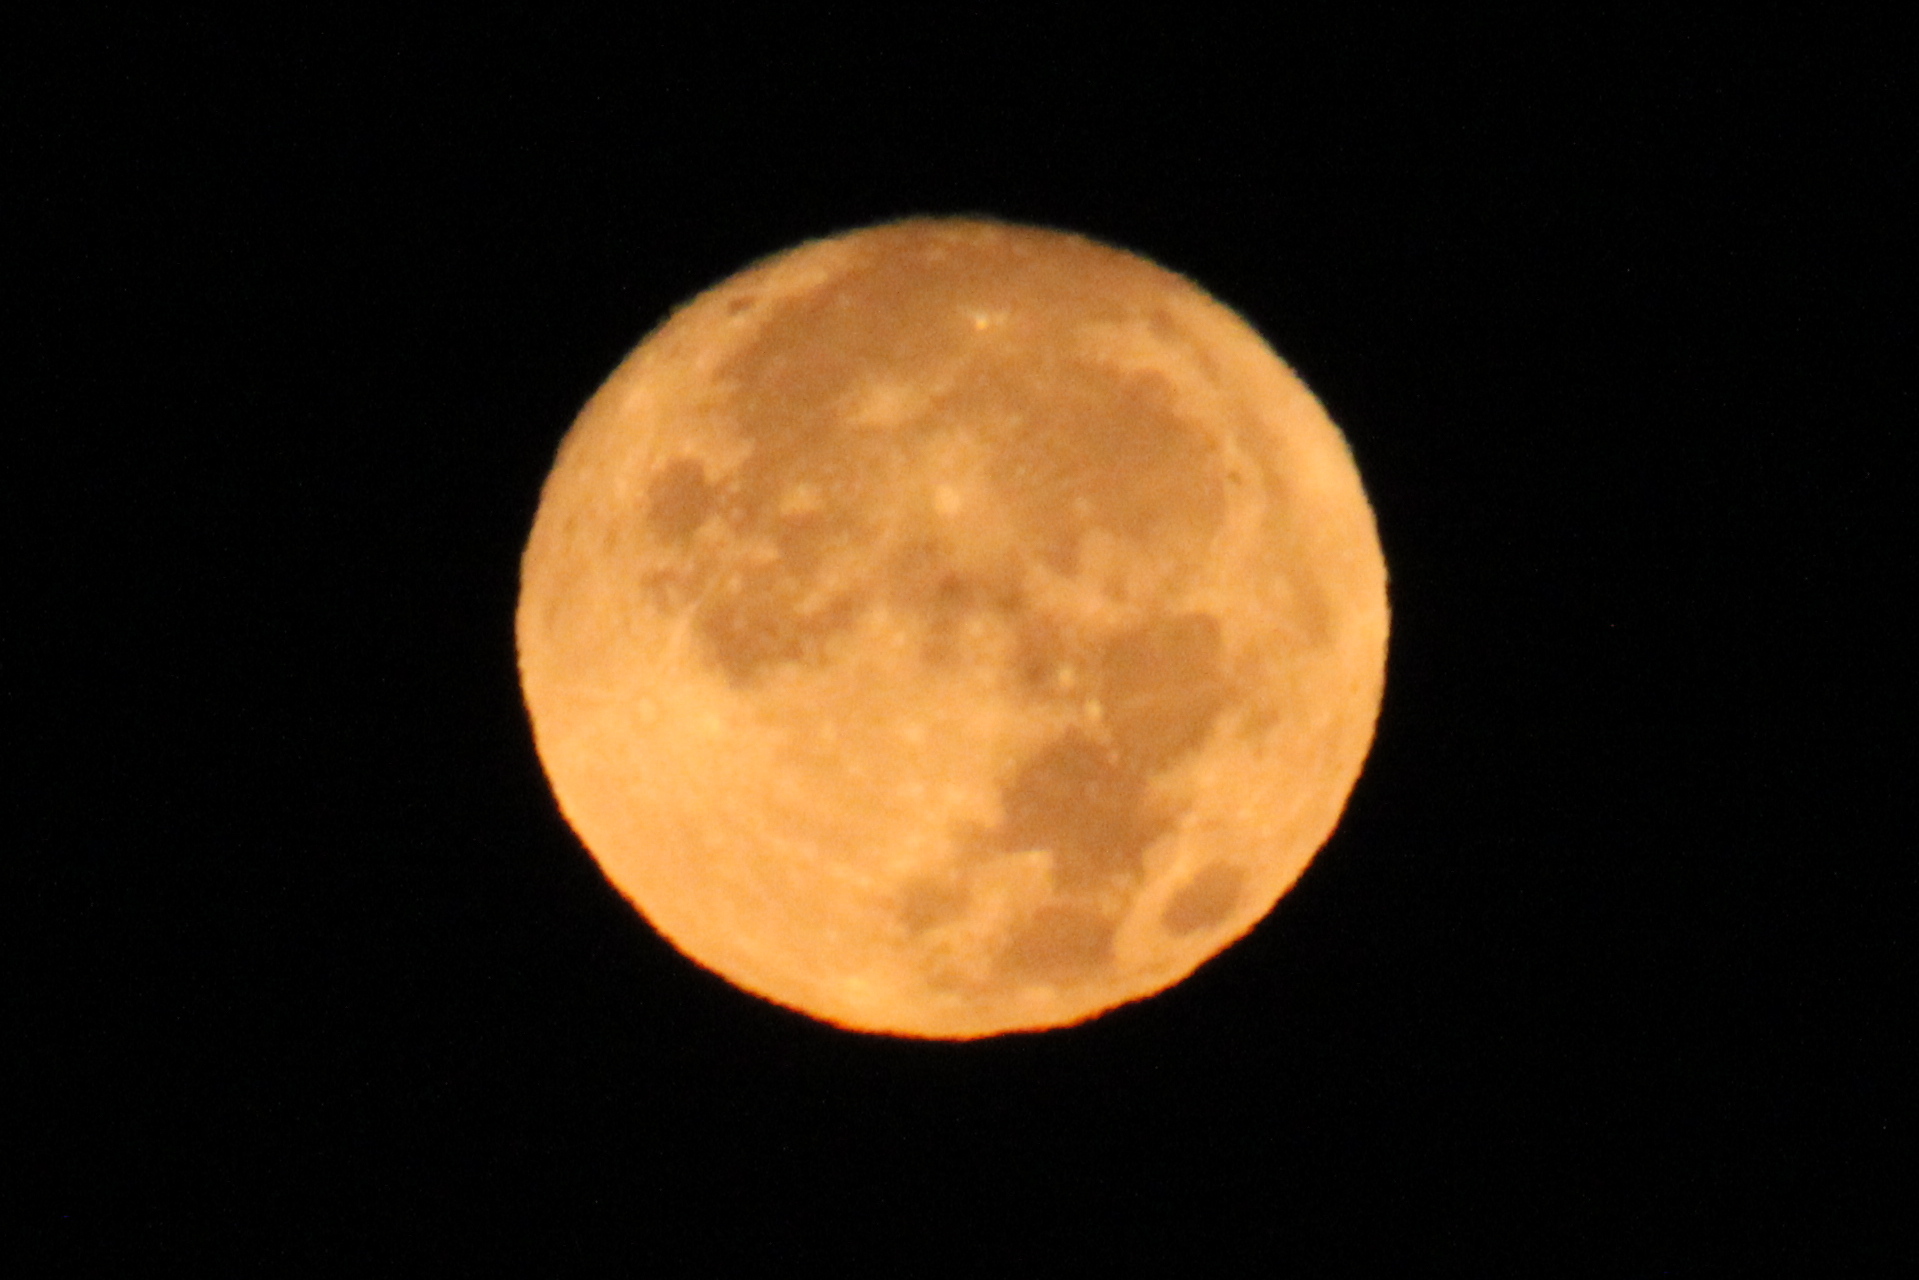
| For the fun of it, I decided to snap the
so-called "Hunter's Moon" of October in 2016, especially
considering it was another "Super Moon". On the
morning of October 15th, the Moon was very low and near
the horizon when I grabbed it -- it was dramatically
'yellow' and distorted (squashed vertically). The
next morning, October 16th, it was higher in the sky and
more of a natural 'white' color. Both images
taken with a Sigma 400mm prime lens @ F/5.6. |
||
|
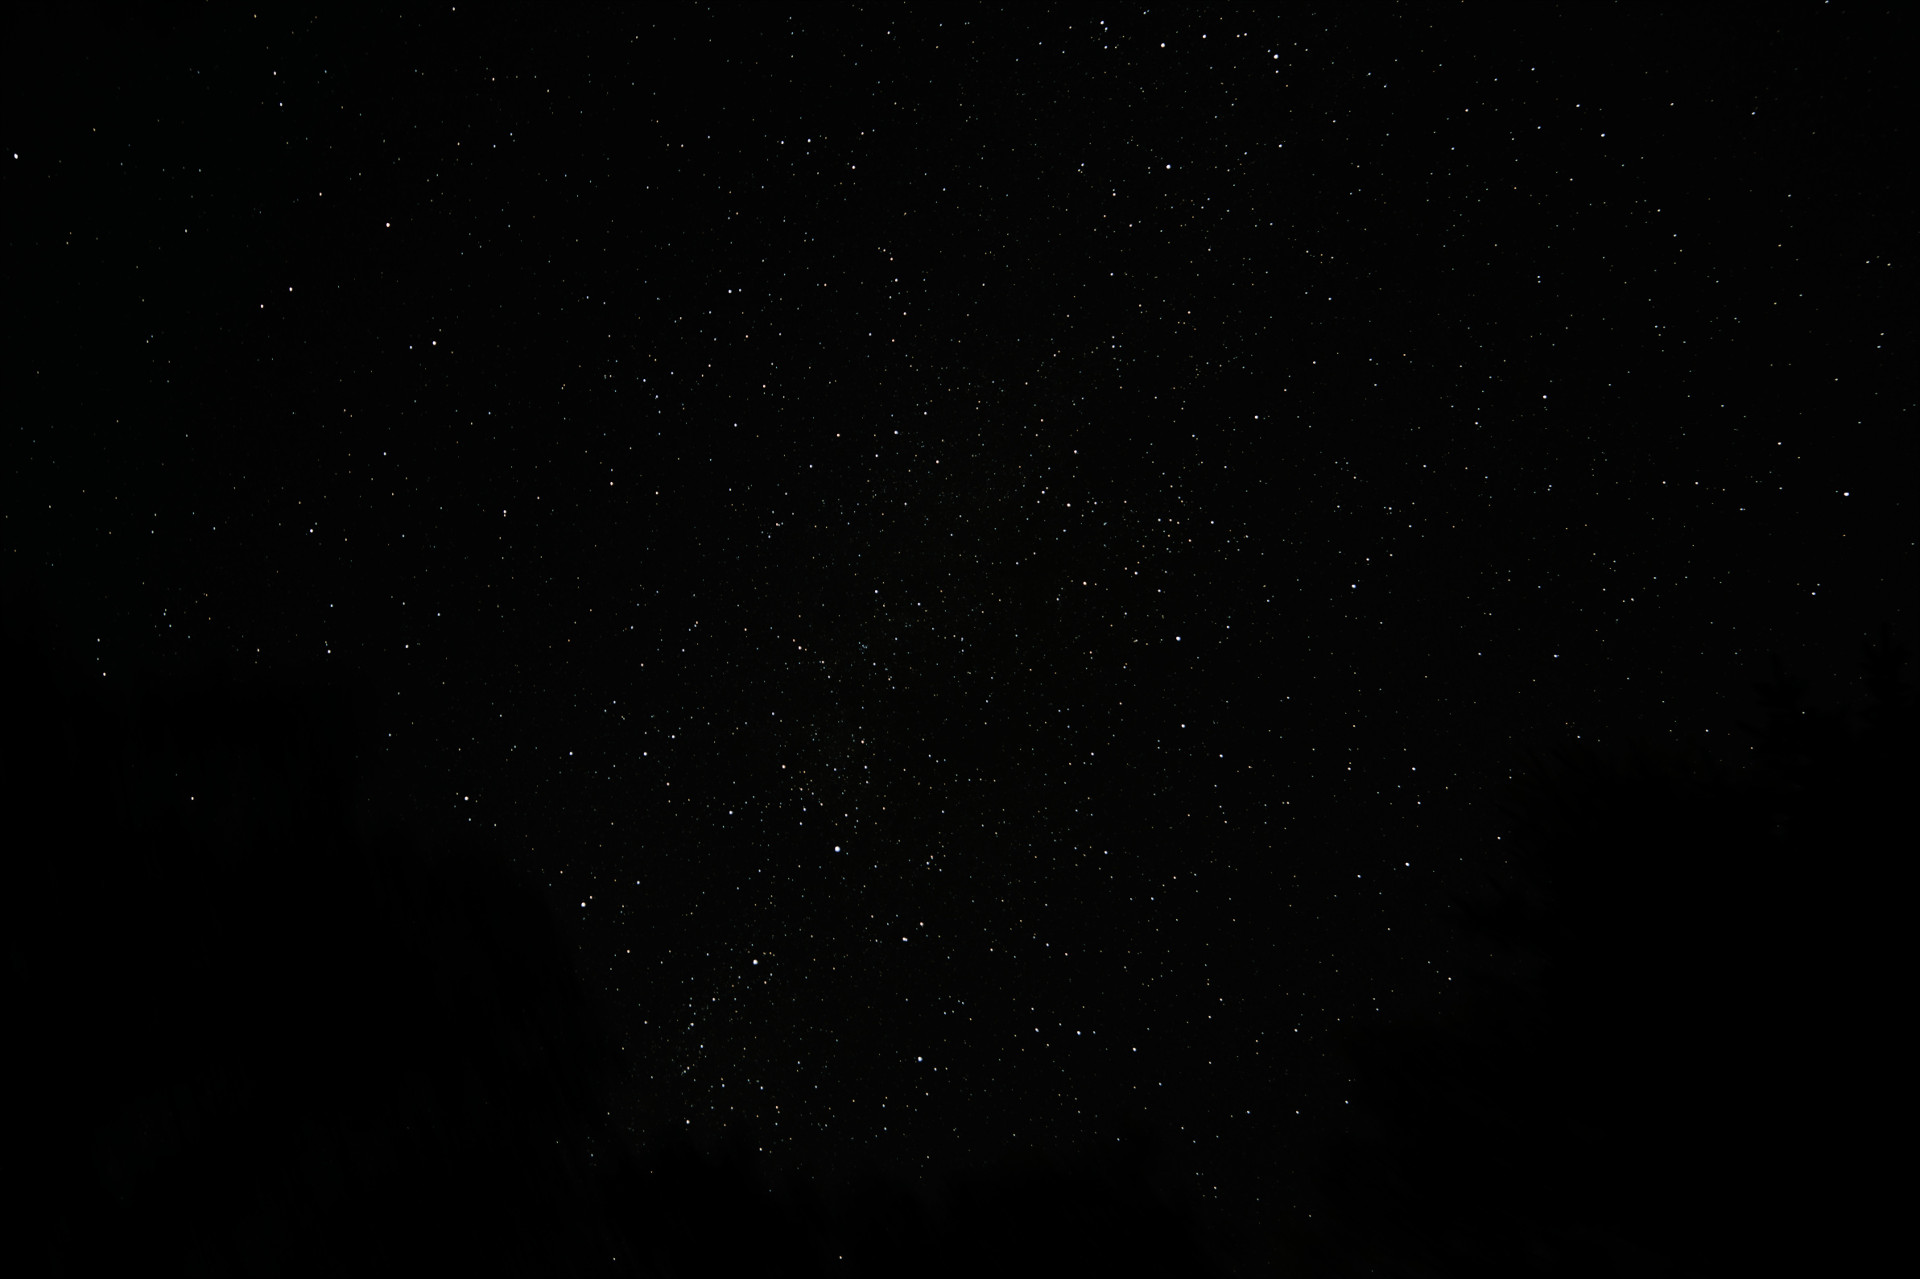
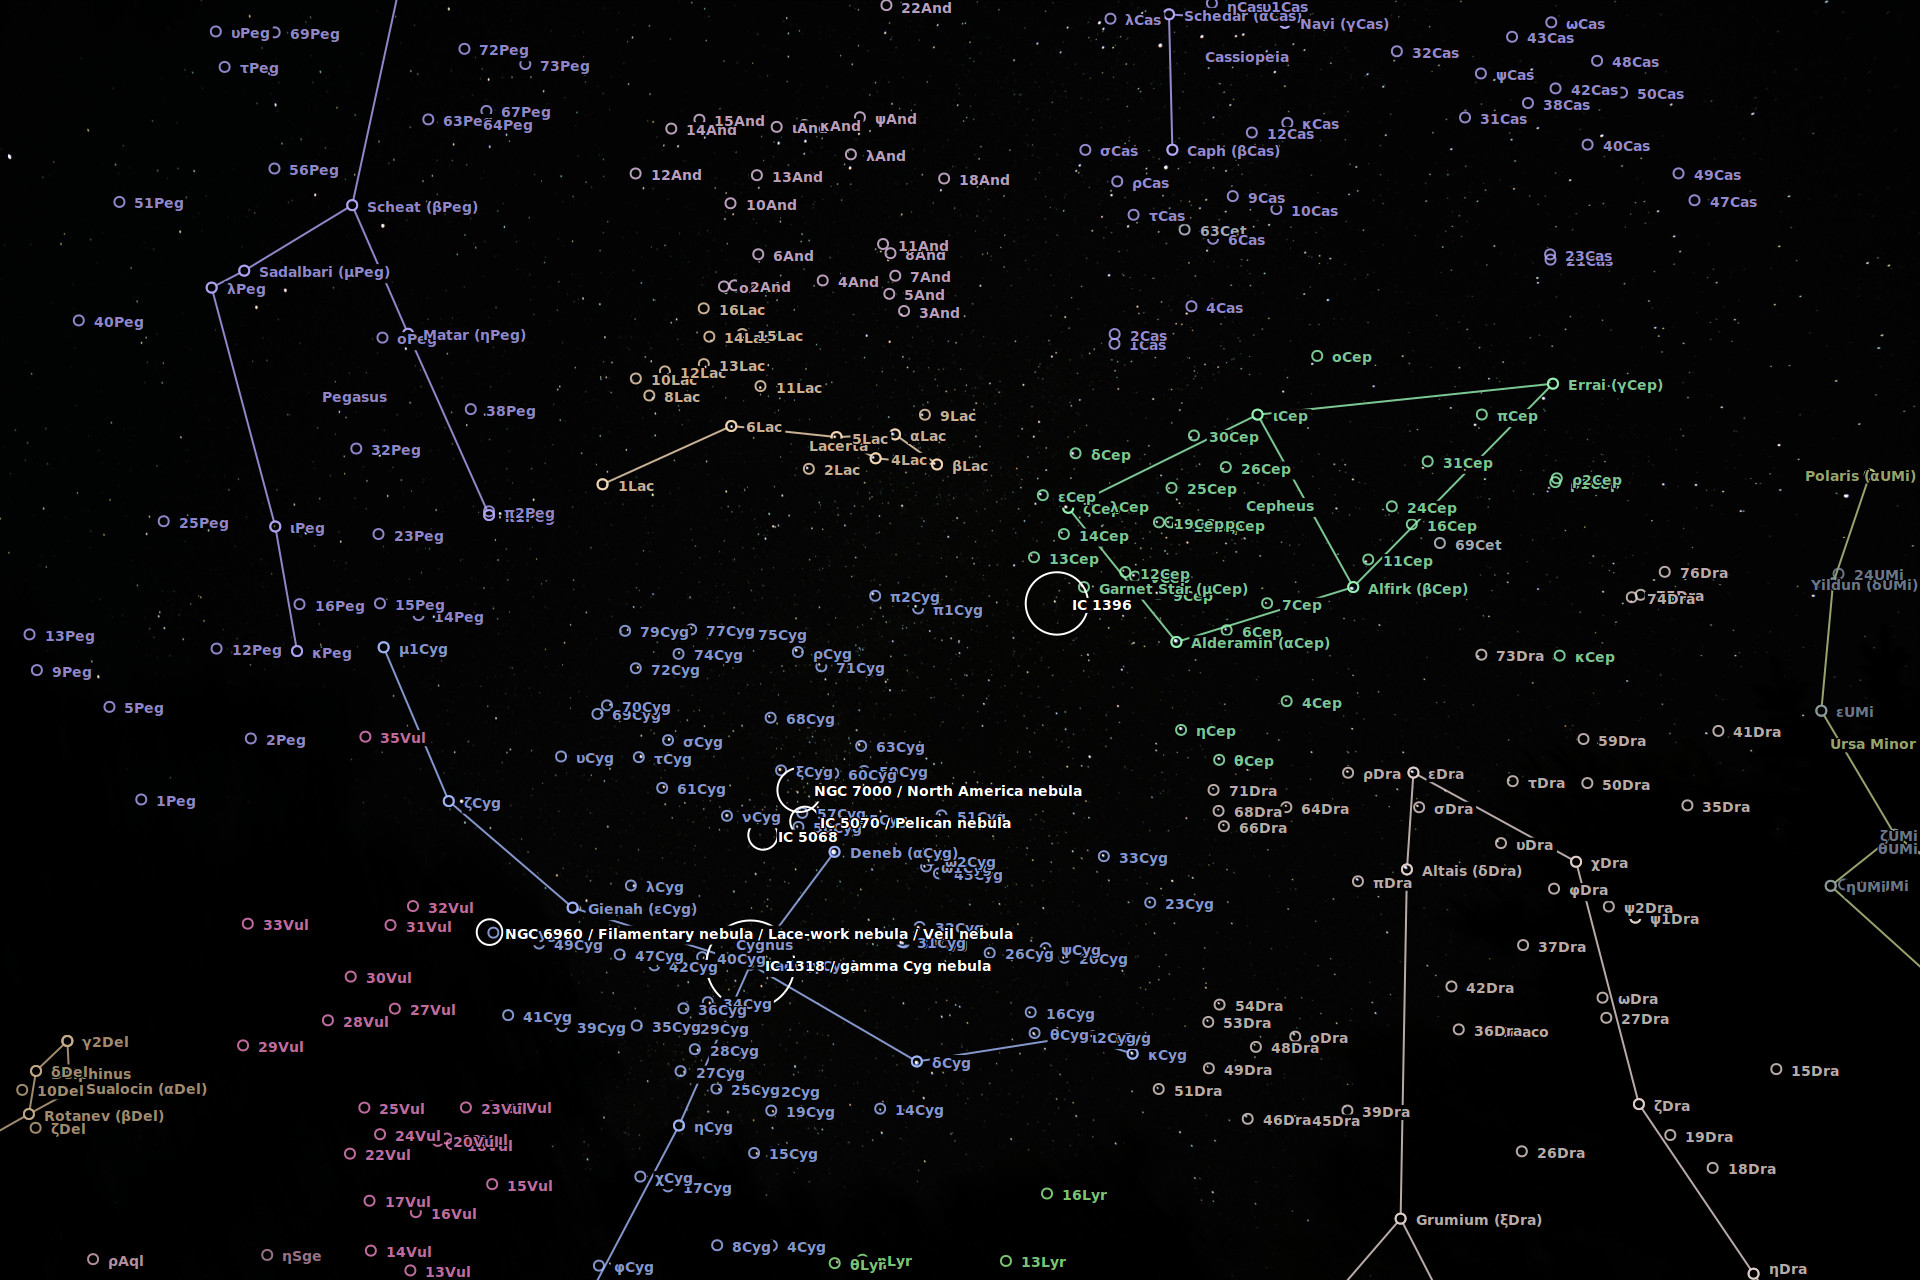
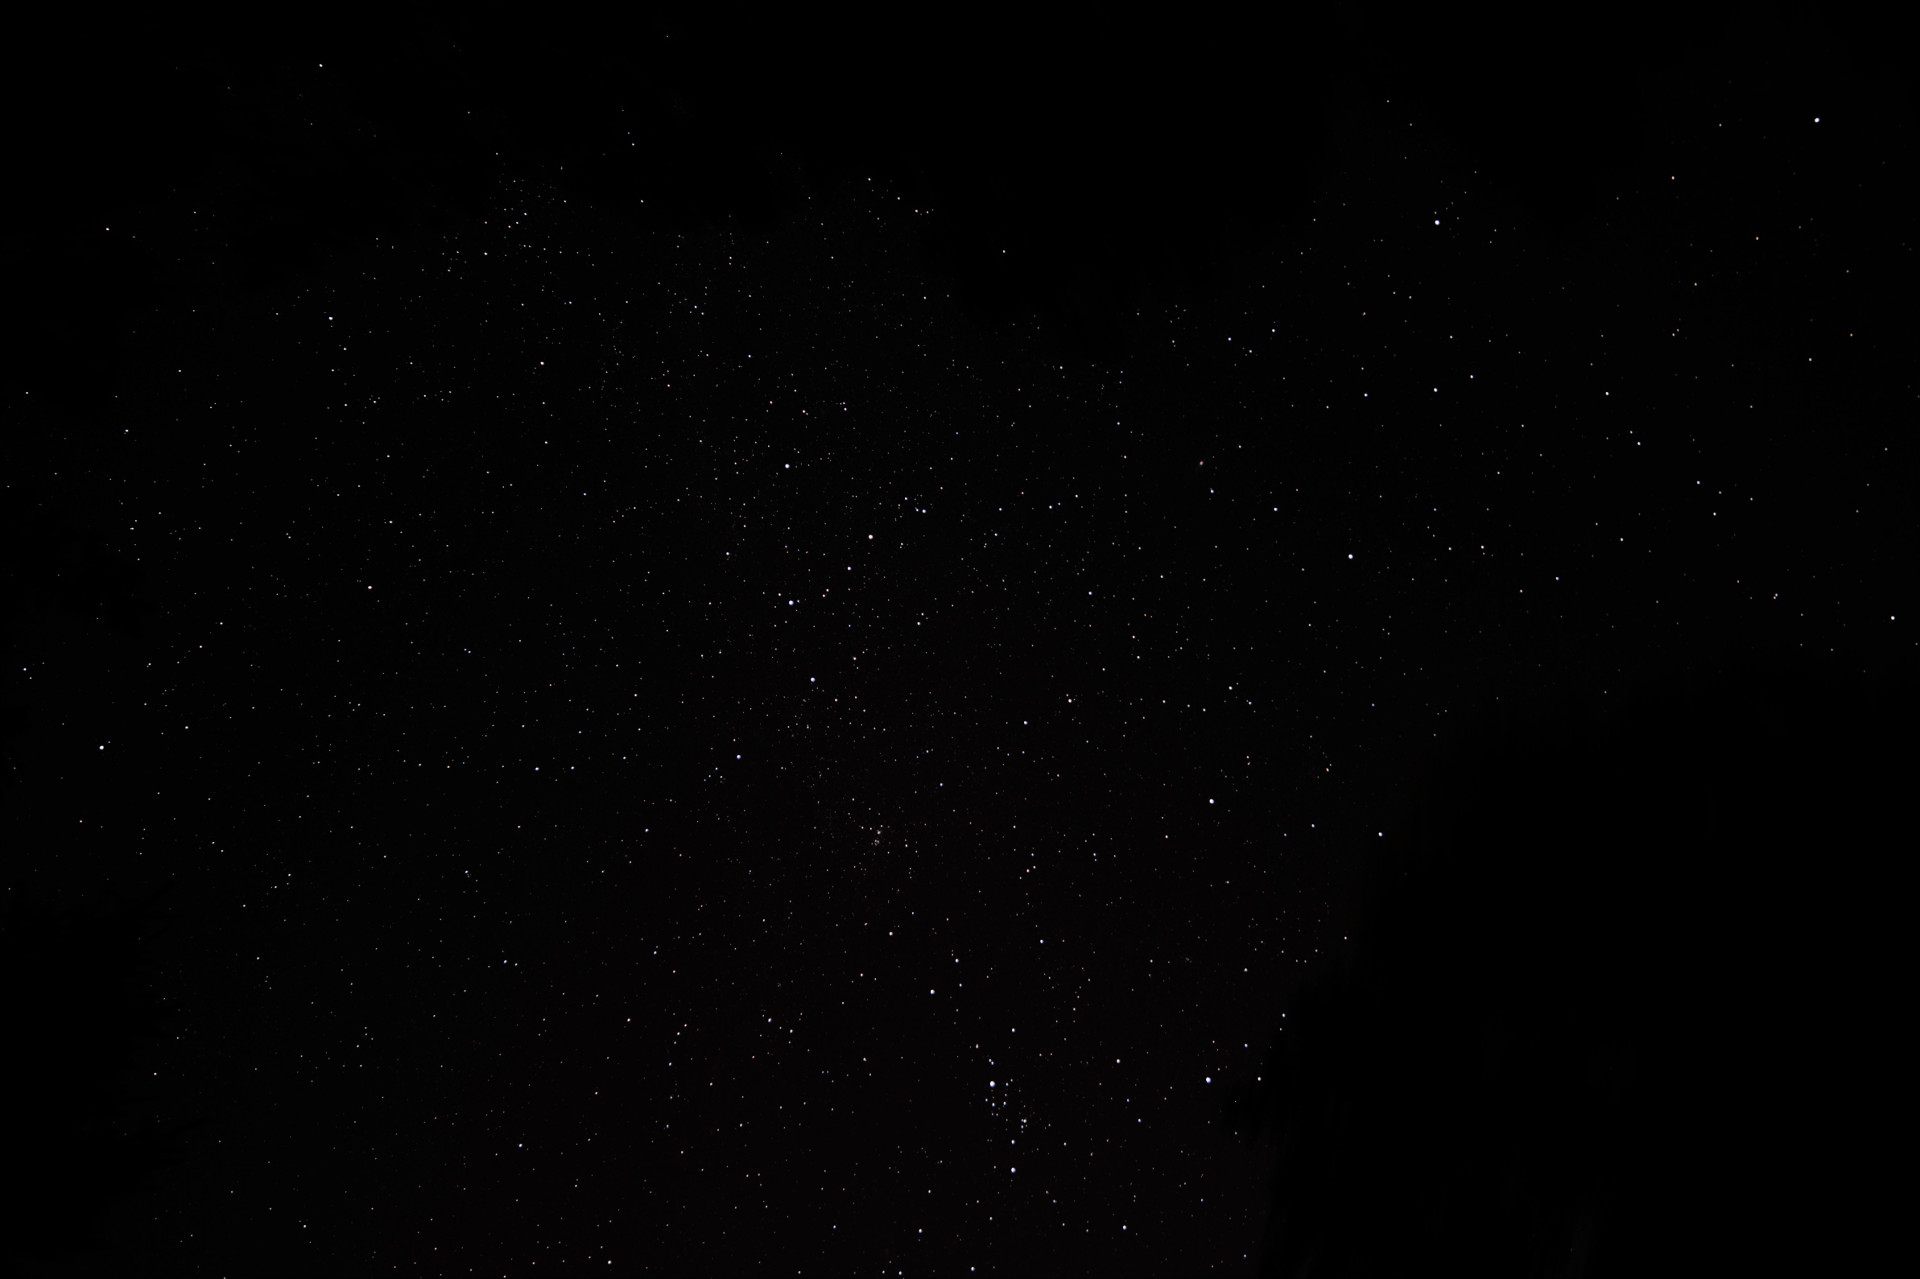
| Having had very little opportunity to do
astronomy in 2016, I took advantage of a moonless night in
early October to use my 'new' used Rokinon 14mm F/2.8 lens
(known for its clarity 'wide open') to grab some
tripod-only wide-angle shots of the sky around my
home. Even 20s at 800 ISO was enough for some star
drift. It was very tricky to achieve focus (as with
all wide-angle lenses). I used Astrometry.net's code
to label the objects in the images. |
||||||||||
|
| This one cost me a lot of time and effort,
and was very close to being a total disaster! :) The
1st attempt took place the night of Oct 18th, and despite
the fact that many hours was devoted to the task, the
Sigma 400mm lens locked the camera after the very first
photo was taken -- without my knowledge. It wasn't
till Oct 22th that the weather was good enough to try
again. Strangely, the Sigma 400mm lens locked up the
camera *again*, for no apparent reason and nothing that I
tried could force it to cooperate. In desperation, I
grabbed my low-quality 400mm achromatic telescope and used
it instead. Many other problems occurred that
night... |
 |
| Canon T2i/550D. 180s @ISO800 with
iOptron R80 400mm f/5 achromatic refractor scope. 16
lights (80% of the best taken), 11 darks. This image
was 3X 'drizzled' by DSS. |
| With all the excitement surrounding the
September 27 'Supermoon' Lunar Eclipse, I made plans for a
fairly eloborate AP session -- which almost resulted in
almost total failure, simply because I had not anticipated
how difficult it would be to focus on the Moon during peak
eclipse -- when being viewed through an f/14 scope!
I had to take some crazy steps to insure that I had at
least a few photos before the eclipse ended... |
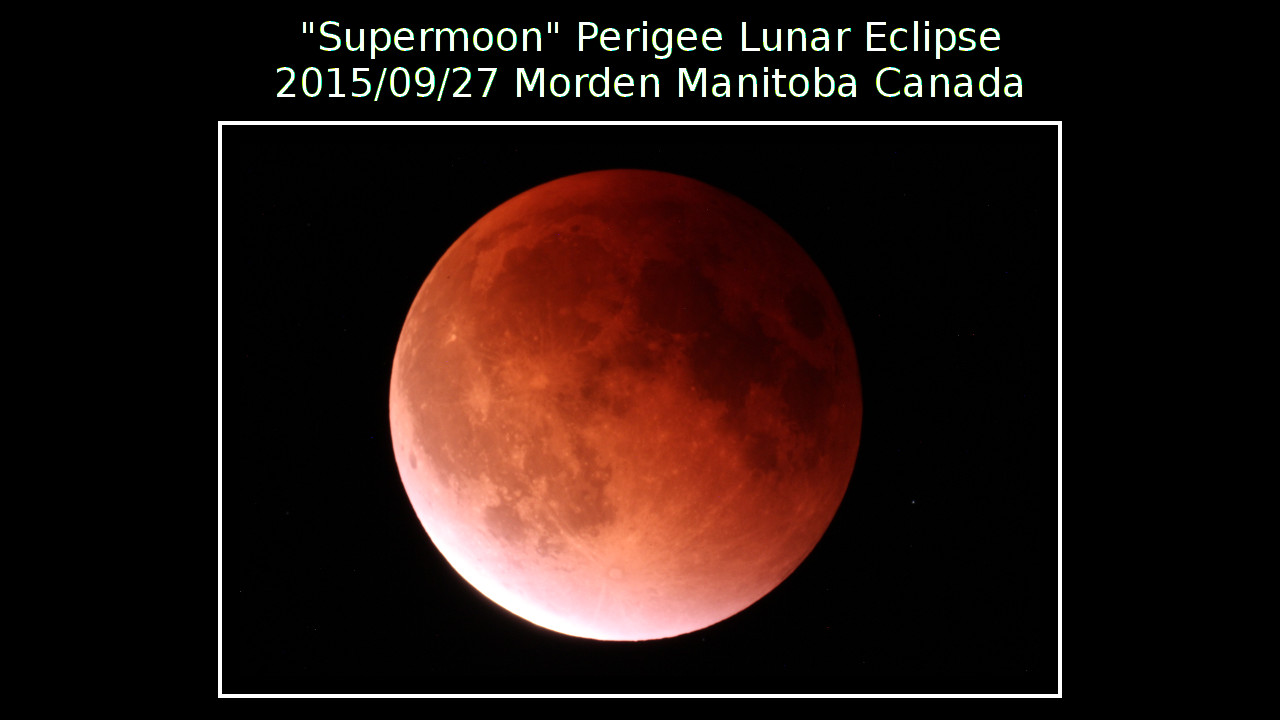 |
| Canon T2i/550D. 6s @ ISO800 with 1250mm
Celestron C90 spotting scope at F/14, on iOptron
SmartStar-A mount in alt/az mode. |
| The temperate on the night of September
12th was well above normal, with a gentle wind to keep
most of the bugs away, a New Moon for dark skies, and
clear skies with a low dewpoint forced to me to try some
old and new subjects over again with my 400mm Sigma
lens. Many hours were lost due to bad polar
alignment (and resultant star trails), but some of the
results were 'not bad' :) |
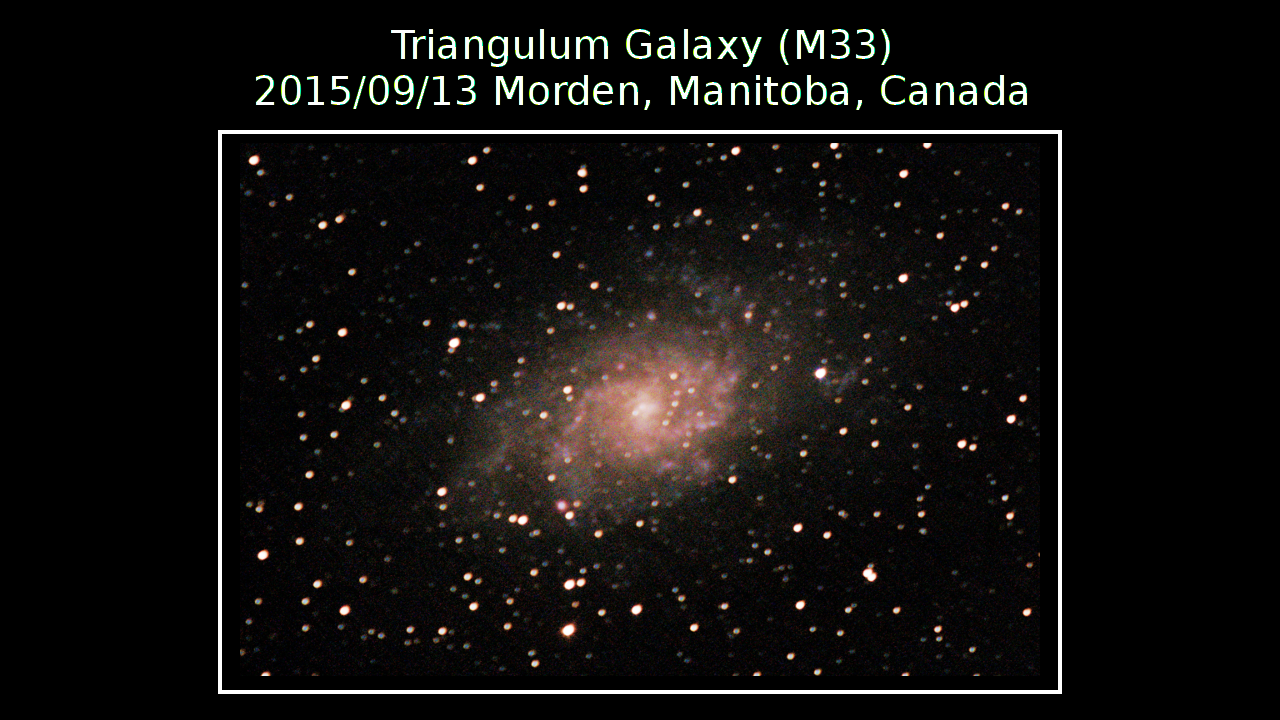 |
| Canon T2i/550D with 29 lights (25% best taken), 9 darks, 10 bias, and 1 master flat frame. Processed using DSS and GIMP. 240 seconds @ ISO800 with 400mm prime lens (Sigma APO Macro) at F/5.6. |
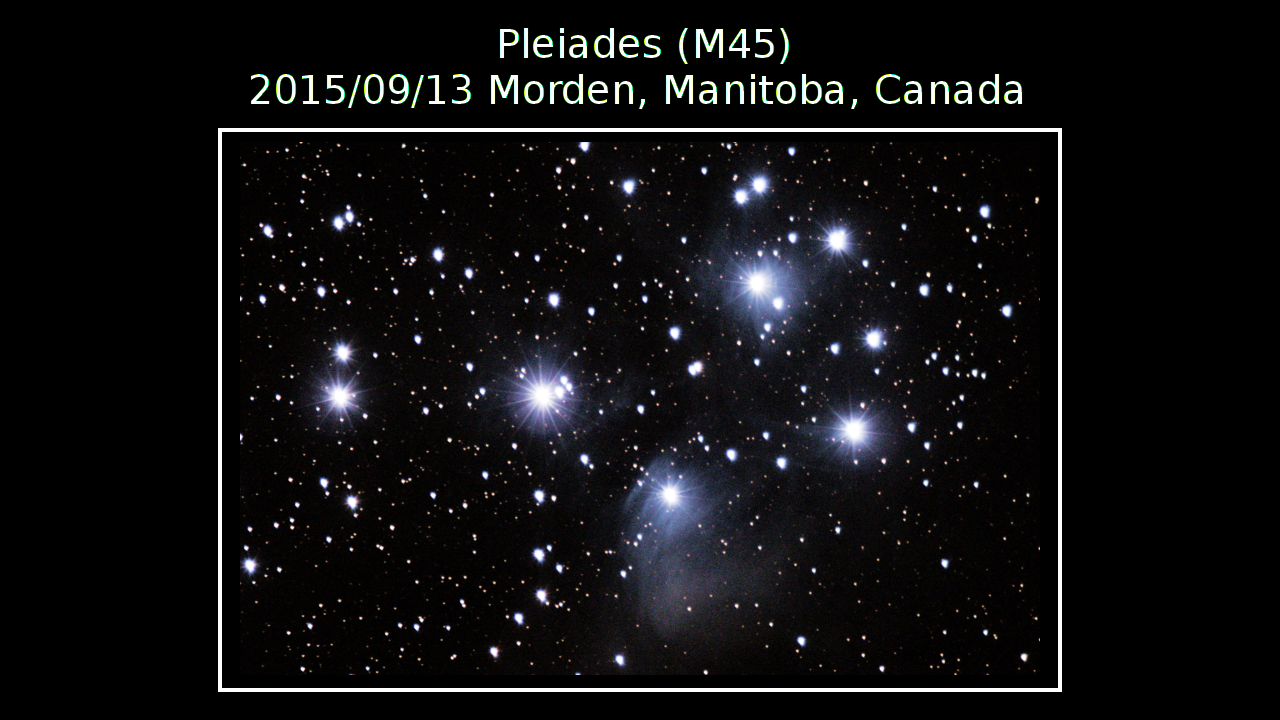 |
| Canon T2i/550D with 26 lights (25% best taken), 9 darks, 10 bias, and 1 master flat frame. Processed using DSS and GIMP. 240 seconds @ ISO800 with 400mm prime lens (Sigma APO Macro) at F/5.6. |
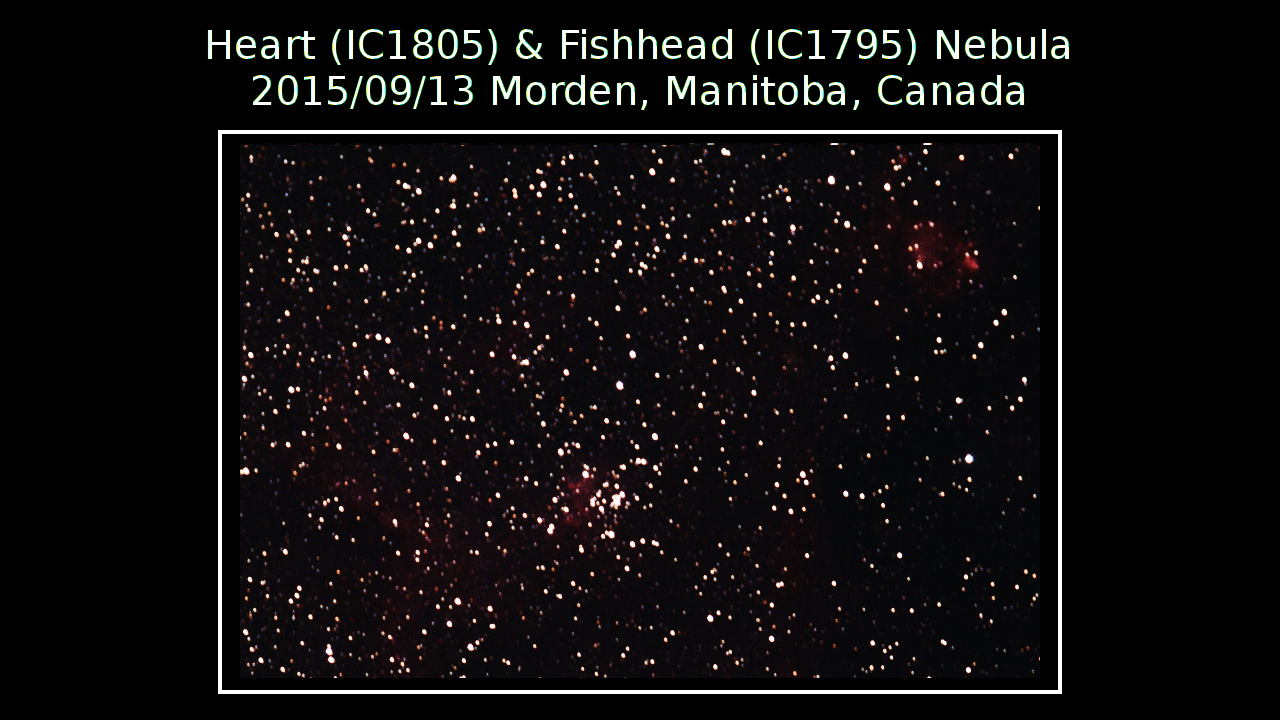 |
| Canon T2i/550D with 9 lights (25% best
taken), 9 darks, 10 bias, and 1 master flat frame.
Processed using DSS and GIMP. 240 seconds @ ISO800
with 400mm prime lens (Sigma APO Macro) at F/5.6.
This one required a LOT of post-processing to bring out
the faint red nebula -- others have done a much better job
with this. Next time I will try to include the
'Soul' nebula in the same frame. |
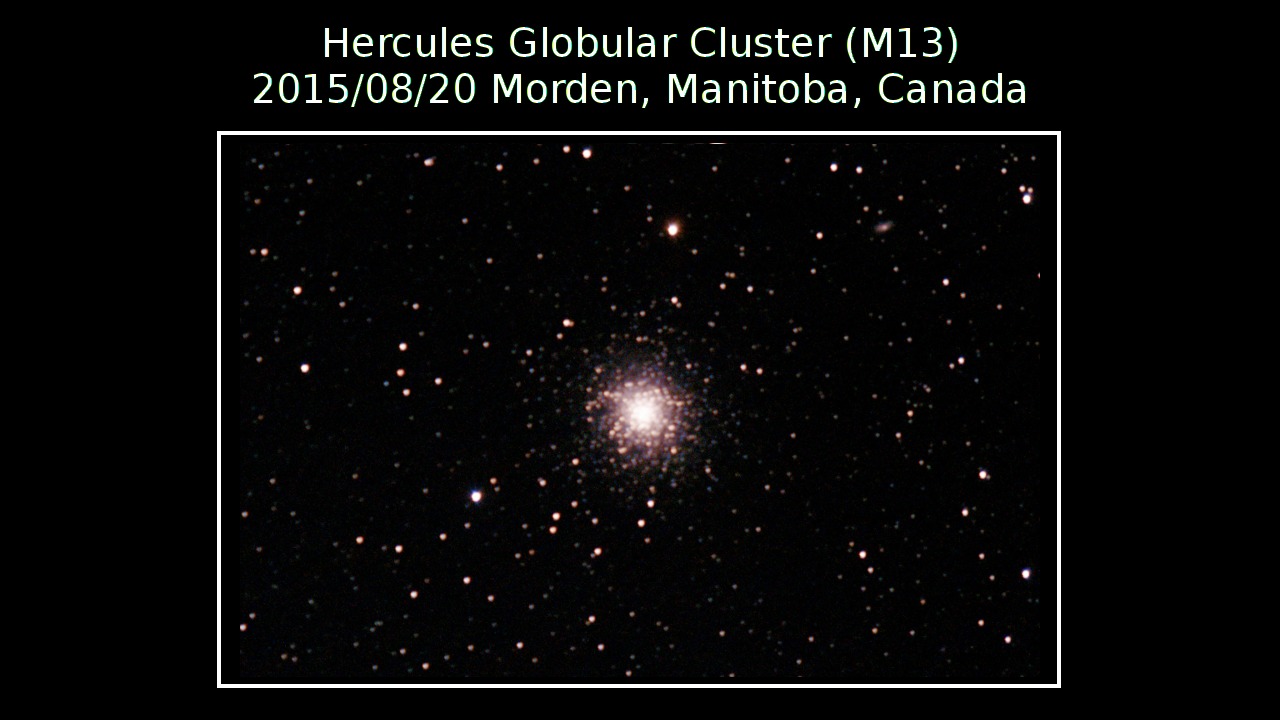
| Weather, insects, and motivation delayed my
astrophotography attempts until the late summer of
2015. On August 19/20, I had intended to try to
capture M51 (Whirlpool Galaxy) and M101 (Pinwheel Galaxy),
but from my backyard tree-bounded site, they were obscured
-- so I had to do a quick re-think. My polar
alignment was not as exact as I wished, but since it was
already midnight and I was very sleepy, I decided to move
ahead. The images below are not the 1:1 pixel images that I would typically show, but they look better slightly scaled down, and this helps to reduce the alignment flaws. :) |
 |
| Canon T2i/550D with 12 lights (25% best taken), 3 darks, 10 flats, and 1 master bias frame. Processed using DSS and GIMP. 240 seconds @ ISO800 with 400mm prime lens (Sigma APO Macro) at F/5.6. |
 |
| Canon T2i/550D with 9 lights (25% best taken), 3 darks, 10 flats, and 1 master bias frame. Processed using DSS and GIMP. 240 seconds @ ISO800 with 400mm prime lens (Sigma APO Macro) at F/5.6. |
 |
| Canon T2i/550D with 25 lights (25% best taken), 3 darks, 10 flats, and 1 master bias frame. Processed using DSS and GIMP. 240 seconds @ ISO800 with 400mm prime lens (Sigma APO Macro) at F/5.6. |
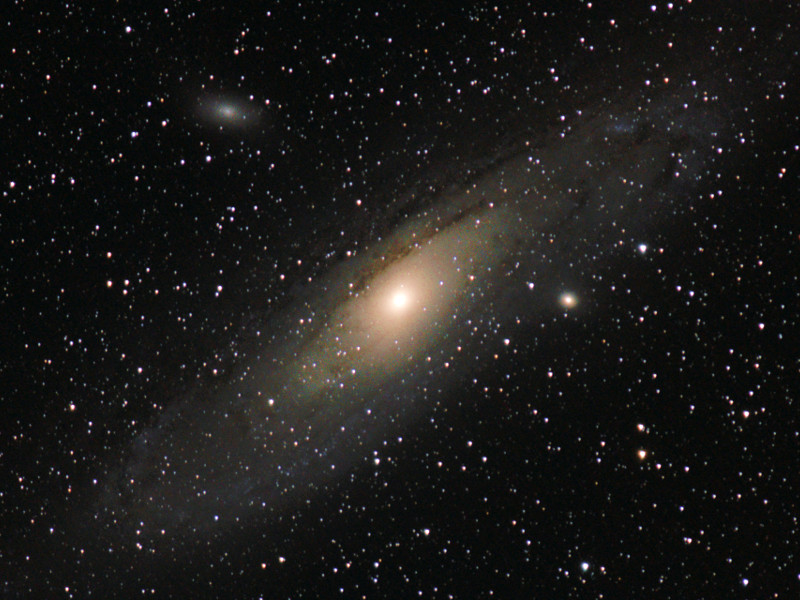
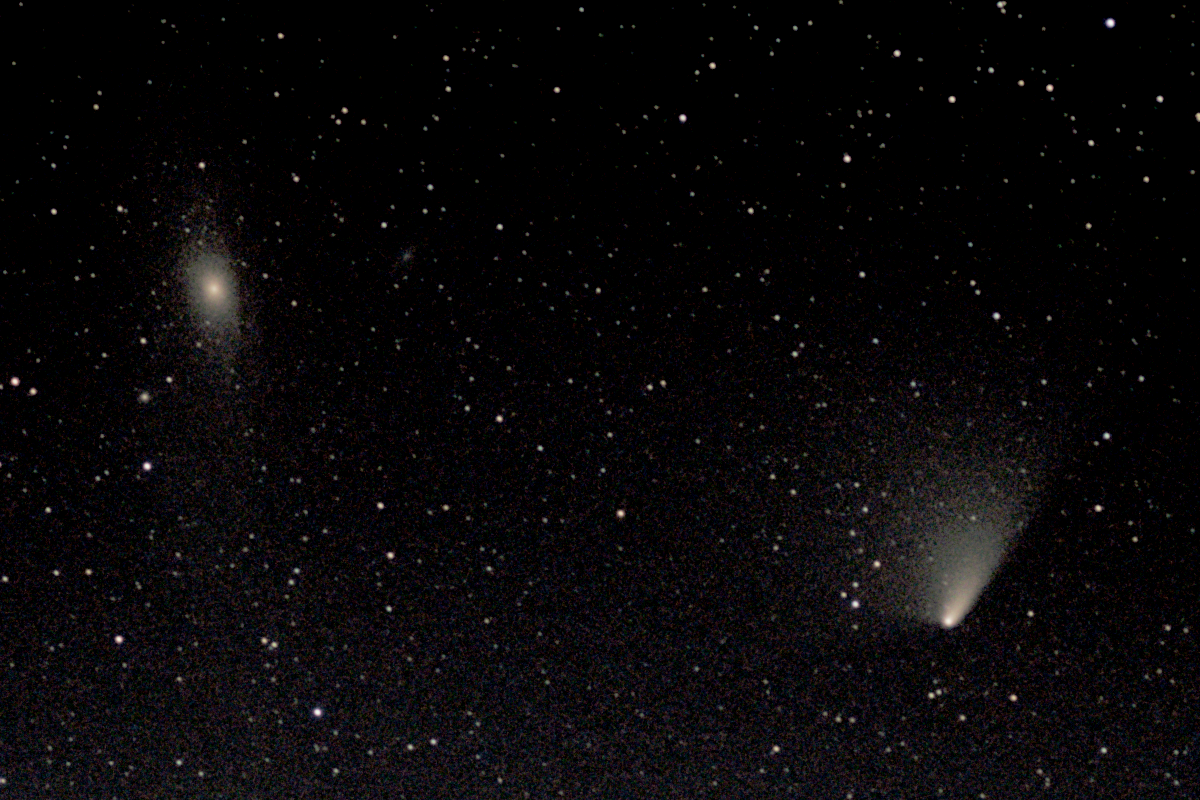
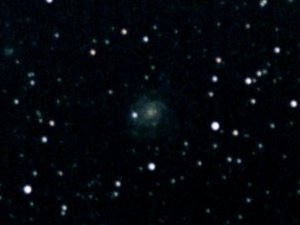
| The last remaining nights
of above-normal 2014 fall temperatures occurred on October
26th, and the recent arrival of my 'new' used telephoto
lens from an eBay auction, I wanted to give M31 another
try... |
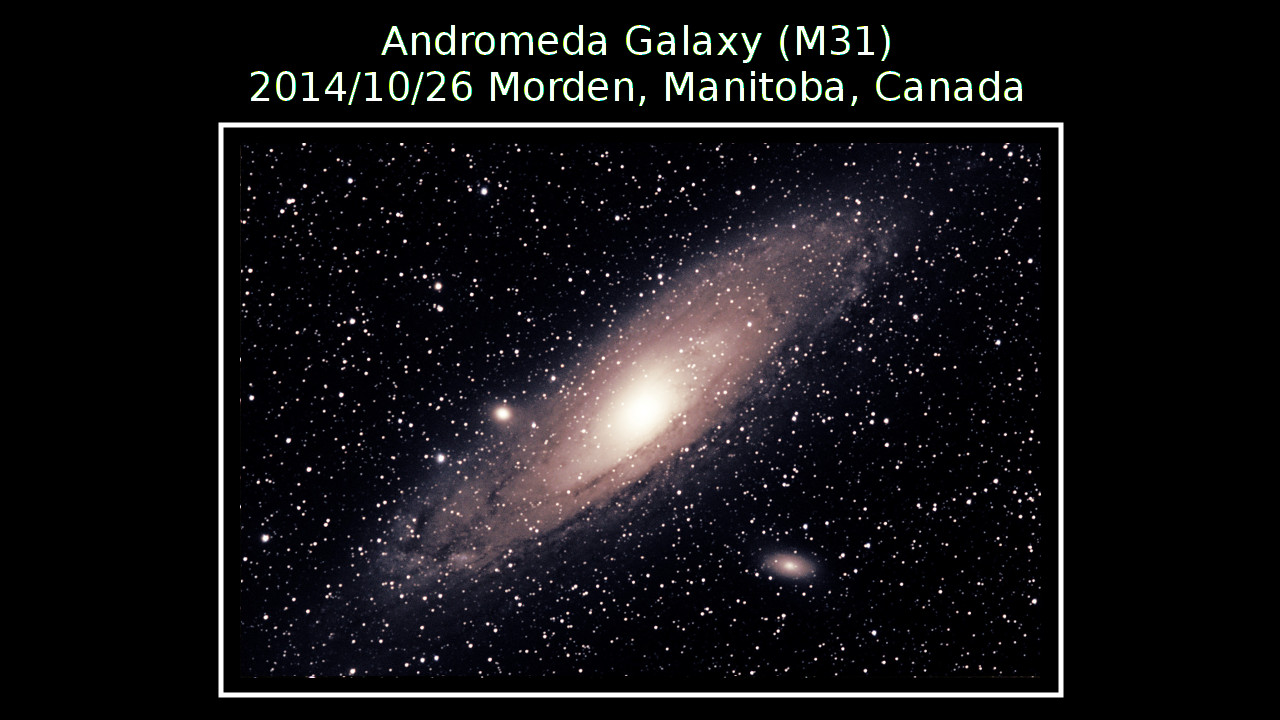 |
| Canon T2i/550D with 43 lights (80% best taken), 11 darks, 10 flats, and 10 bias frames. Processed using DSS and GIMP. 180 seconds @ ISO800 with 400mm prime lens (Sigma APO Macro) at F/5.6. |
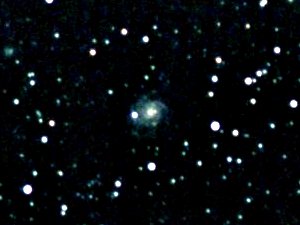
| I had two excellent night
of opportunity (almost new Moon, warm temperatures, low
dew point) for some pics, so I took it -- even though it
resulted in very little sleep :) In hindsight, it
looks like I inadvertently didn't set the maximum zoom
setting of my telephoto i.e. 171mm instead of 250mm :( |
 |
| Canon T2i/550D with 27 lights (80% best taken), 10 darks, 10 flats, and 10 bias frames. Processed using DSS (including 3x drizzle!) and GIMP. 300 (!) seconds @ ISO800 with 55-250mm zoom lens at 171mm setting. |
 |
| Canon T2i/550D with 27 lights (80% best taken), 10 darks, 10 flats, and 10 bias frames. Processed using DSS (including 3x drizzle!) and GIMP. 300 (!) seconds @ ISO800 with 55-250mm zoom lens at 171mm setting. |
 |
| Canon T2i/550D with 12 lights (80% best taken), 11 darks, 10 flats, and 10 bias frames. Processed using DSS (including 3x drizzle!) and GIMP. 240 (!) seconds @ ISO800 with 55-250mm zoom lens at 171mm setting. |
 |
| Canon T2i/550D with 15 lights (80% best taken), 11 darks, 10 flats, and 10 bias frames. Processed using DSS (including 3x drizzle!) and GIMP. 240 (!) seconds @ ISO800 with 55-250mm zoom lens at 171mm setting. |
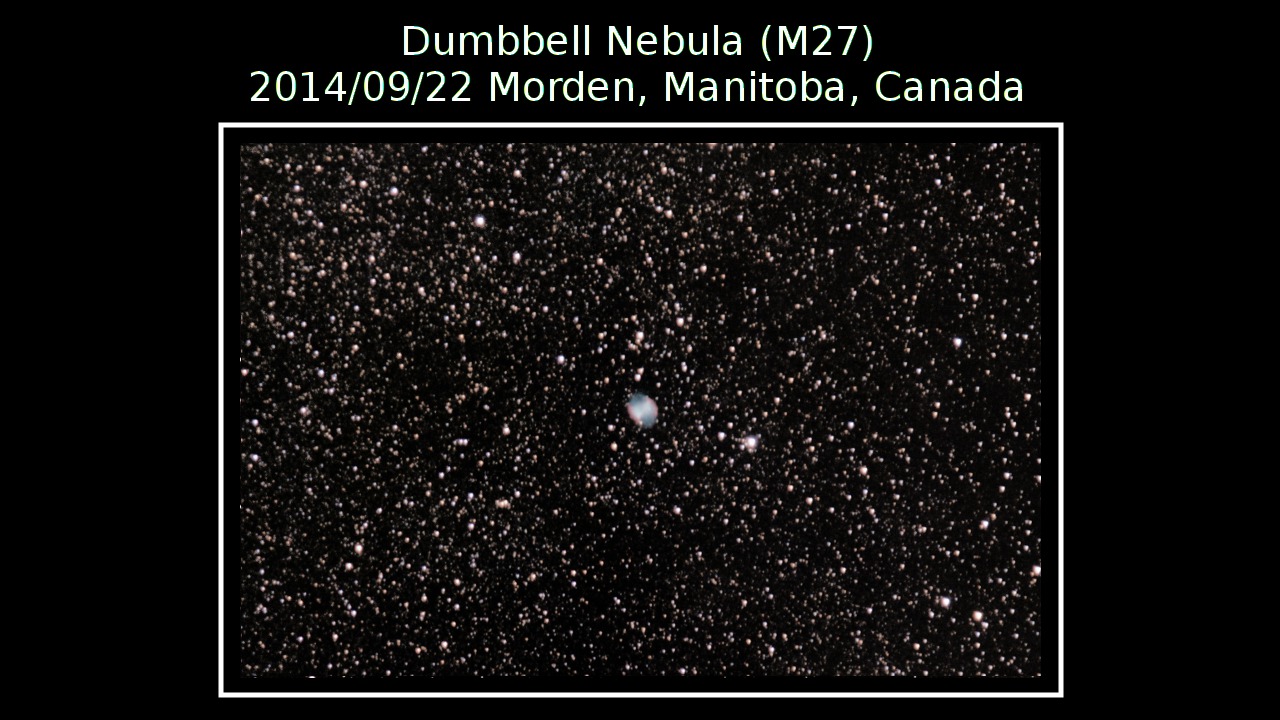
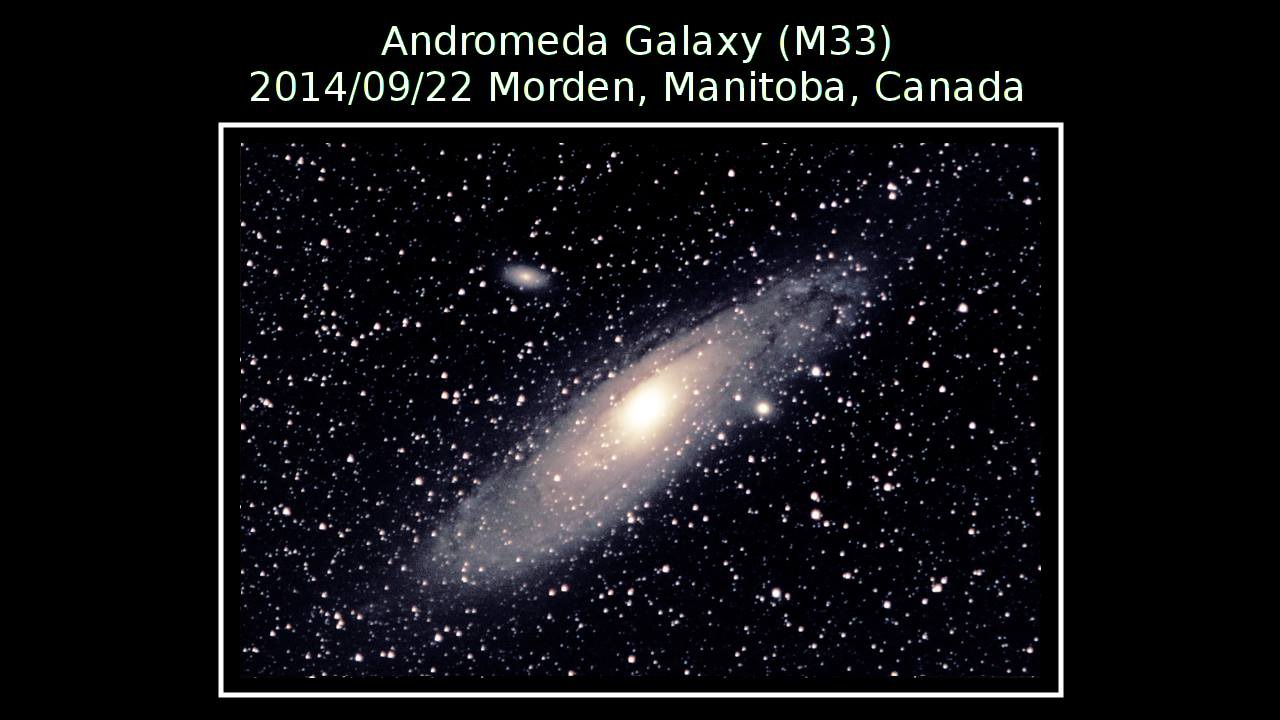
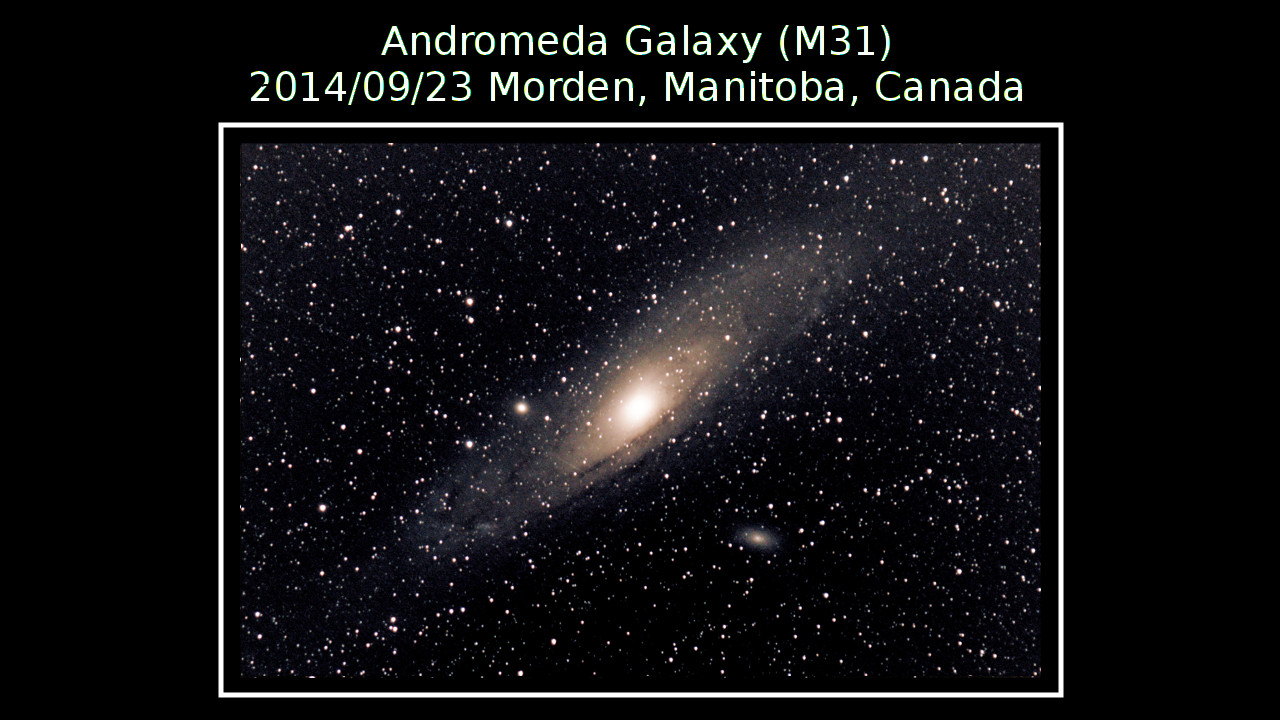
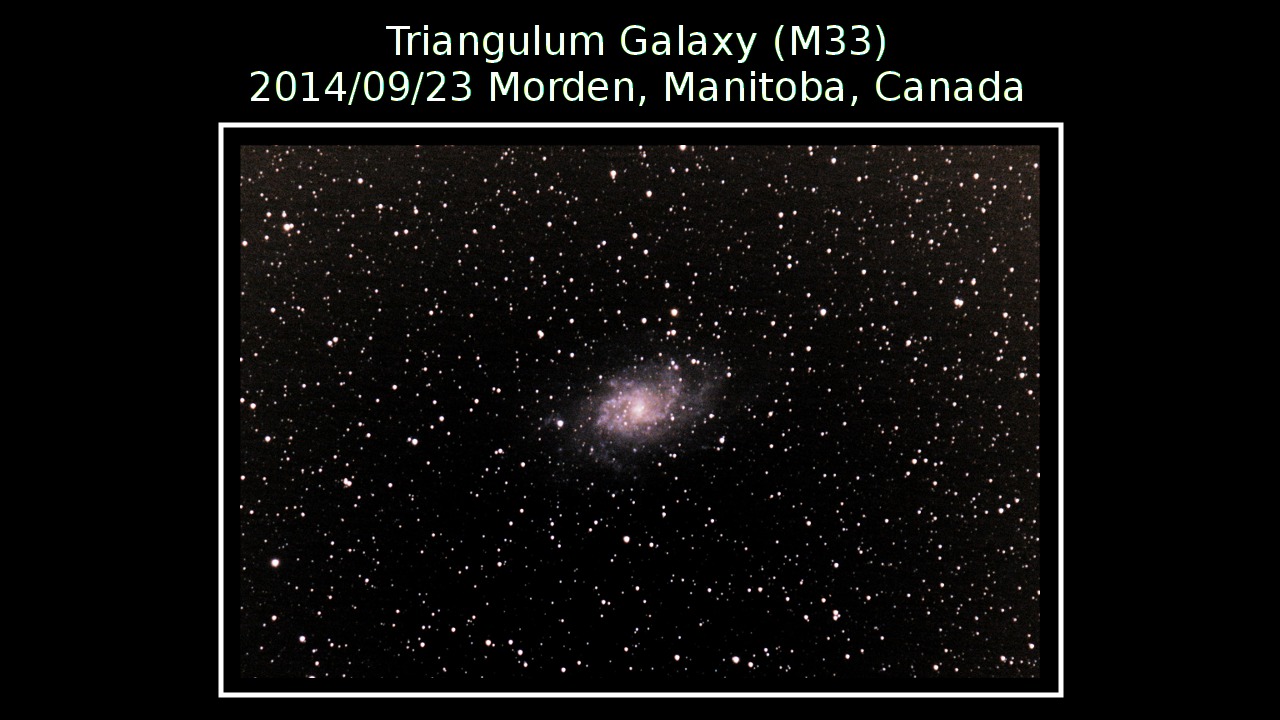
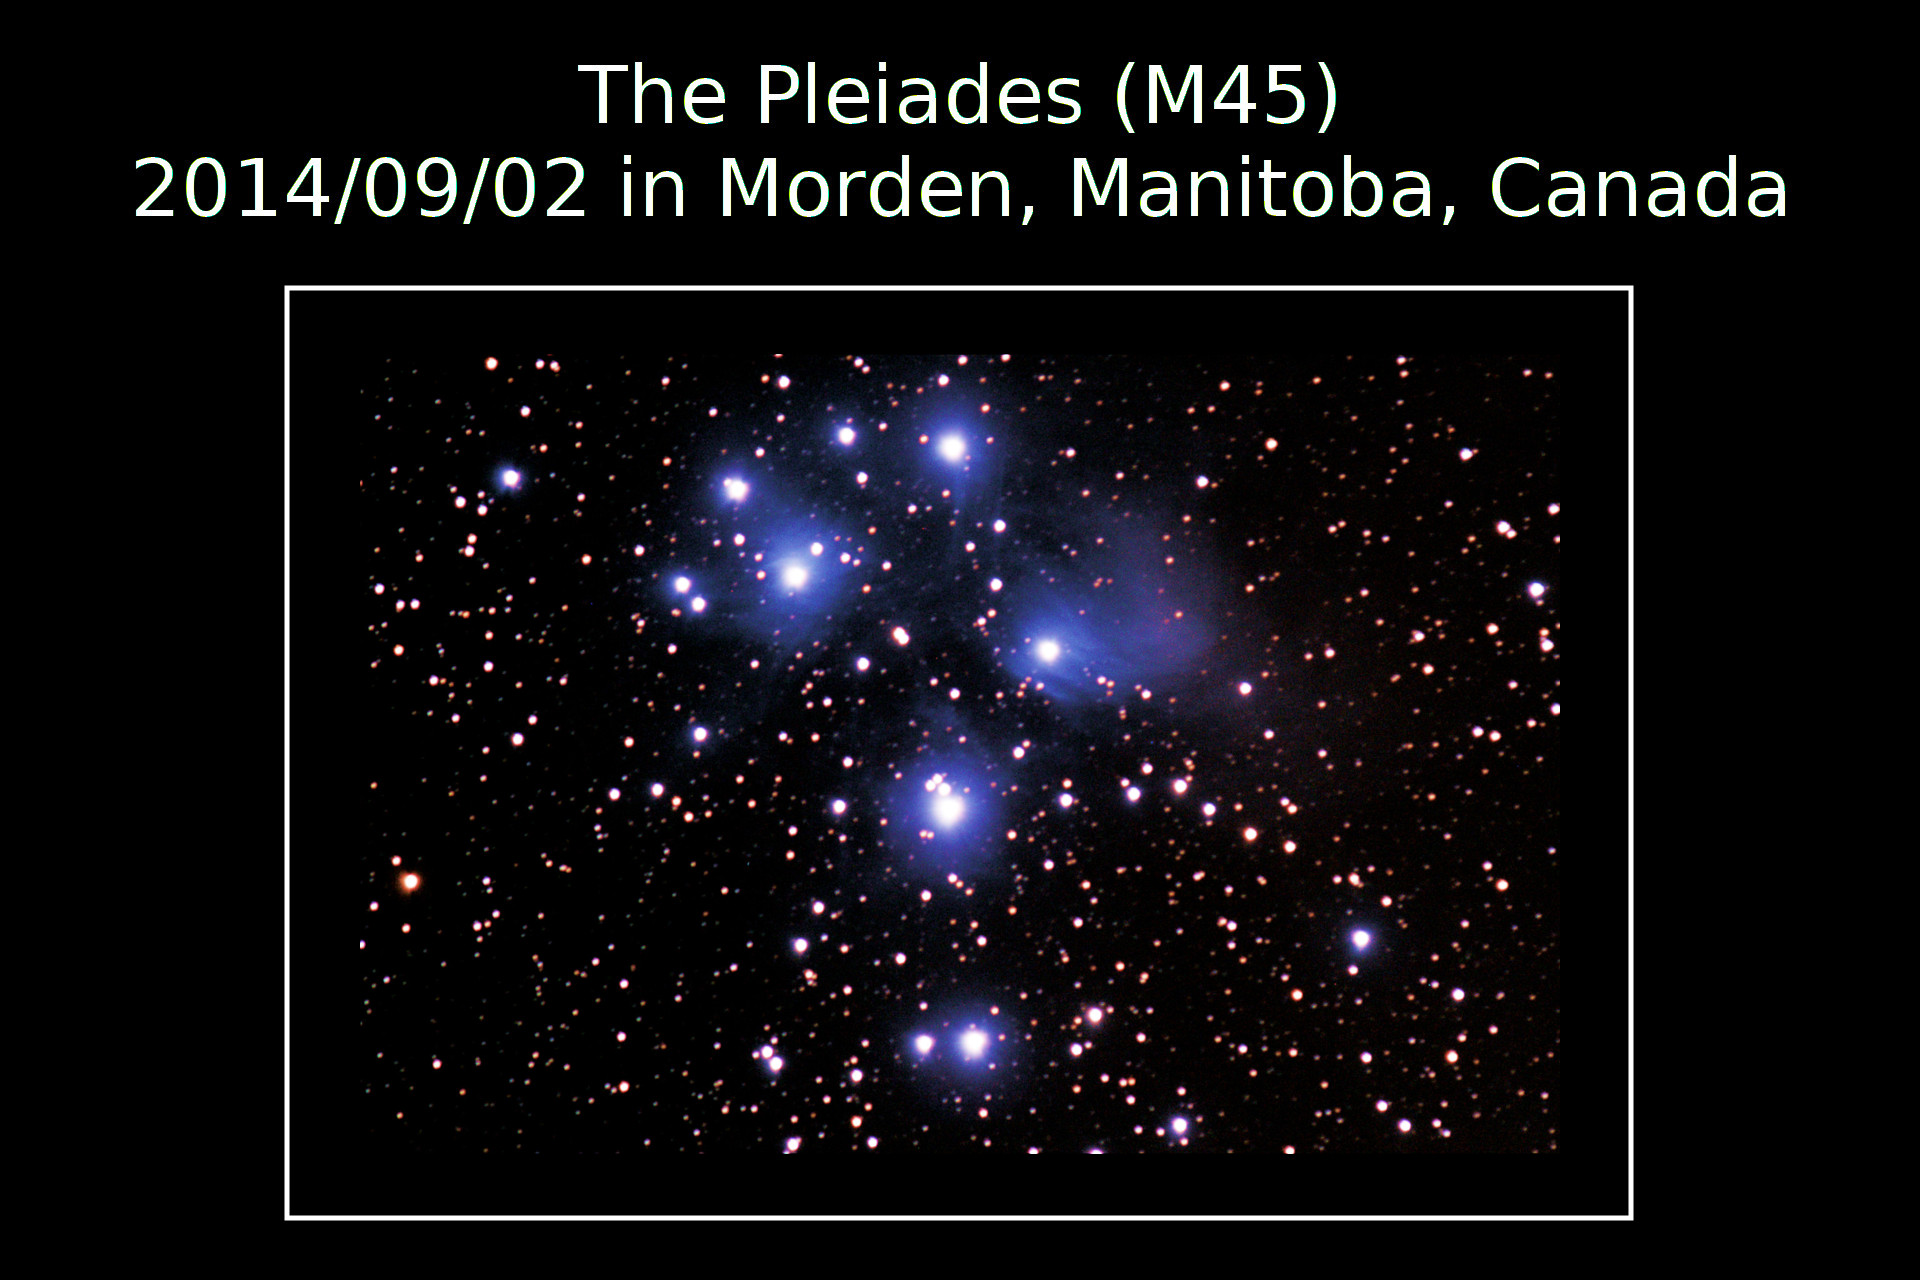
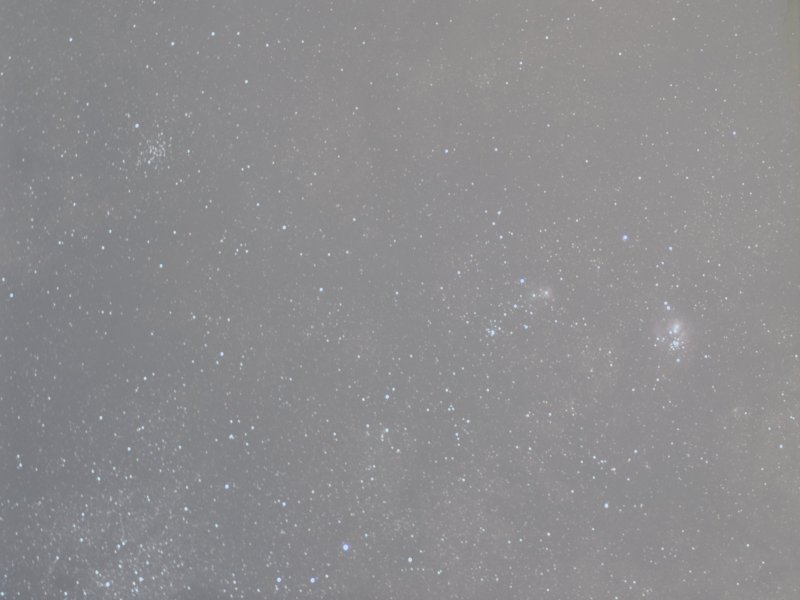
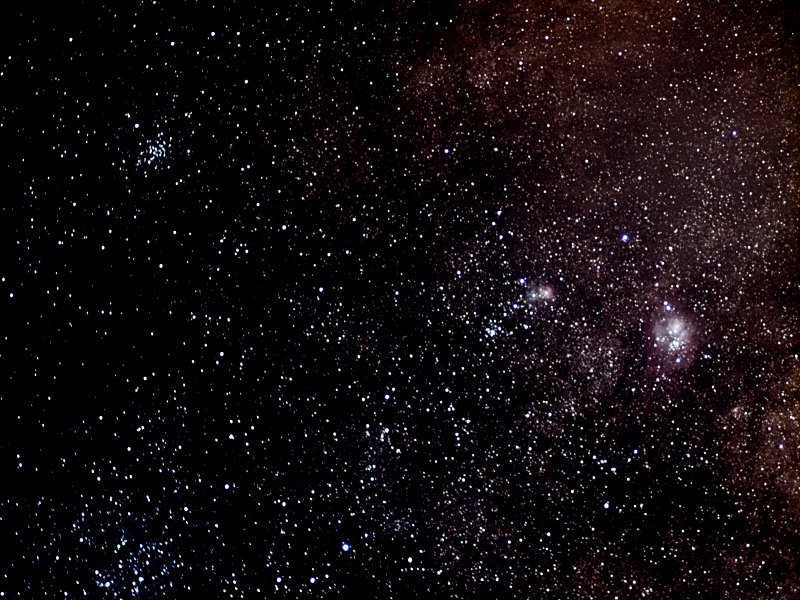
| In late August/early
September 2014, I tried to do as much 'deep sky' shooting
as I could while near the New Moon, temperatures were
reasonable, and bugs were not a problem.
Unfortunately, bad focus and heavy dew killed two
attempts. On my 3rd attempt (2014/09/02) I was ready
with good weather and a new Android app to help with my
focus (DSLR
Controller) :) |
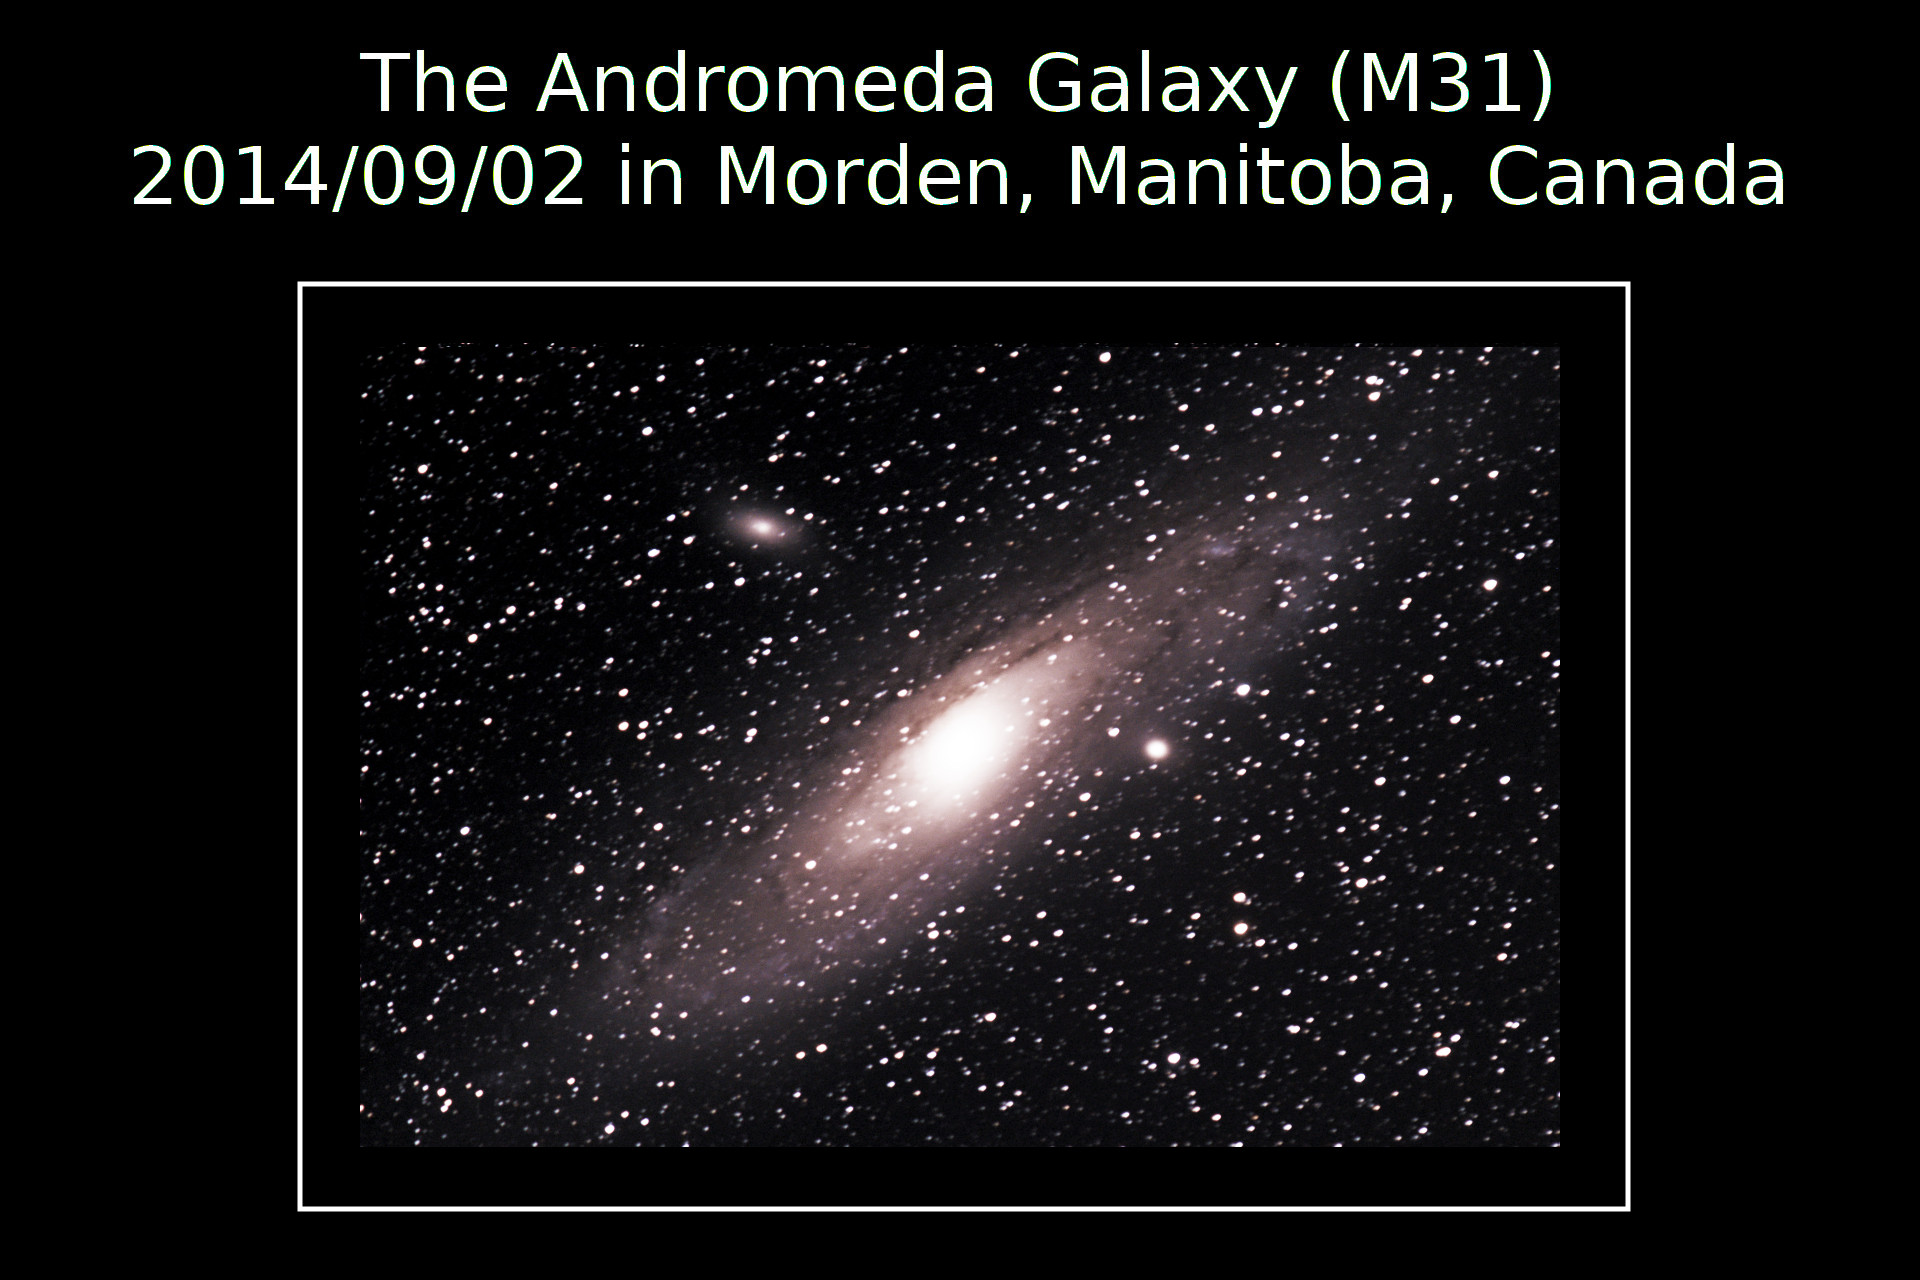 |
| Canon T2i/550D with 62
lights (90% best taken), 12 darks, 10 flats, and 10 bias
frames. Processed using DSS (including 3x drizzle!)
and GIMP. 210 seconds @ ISO800 with 55-250mm zoom
lens at 250mm setting. I should not have been greedy
and limited the exposure to 180 seconds to avoid star
streaking. |
 |
| Canon T2i/550D with 35
lights (90% best taken), 9 darks, 10 flats, and 10 bias
frames. Processed using DSS (including 3x drizzle!)
and GIMP. 180 seconds @ ISO800 with 55-250mm zoom lens at
250mm setting. |
 |
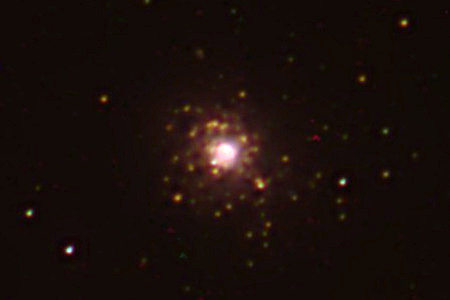 |
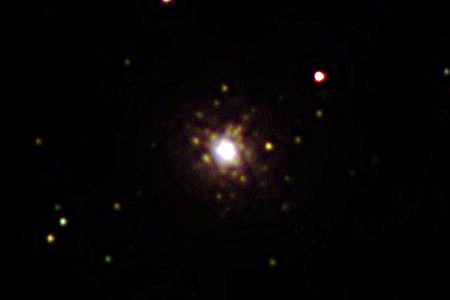
| M3 (poor example) taken
with Canon T2i and 55-250mm lens with iOptron
ZEQ25GT. Stack of 11 lights/5 darks @120s @ISO 800
@F5.6. |
M5 (poor example) taken with Canon T2i and 55-250mm lens with iOptron ZEQ25GT. Stack of 7 lights/5 darks @120s @ISO 800 @F5.6. |
 |
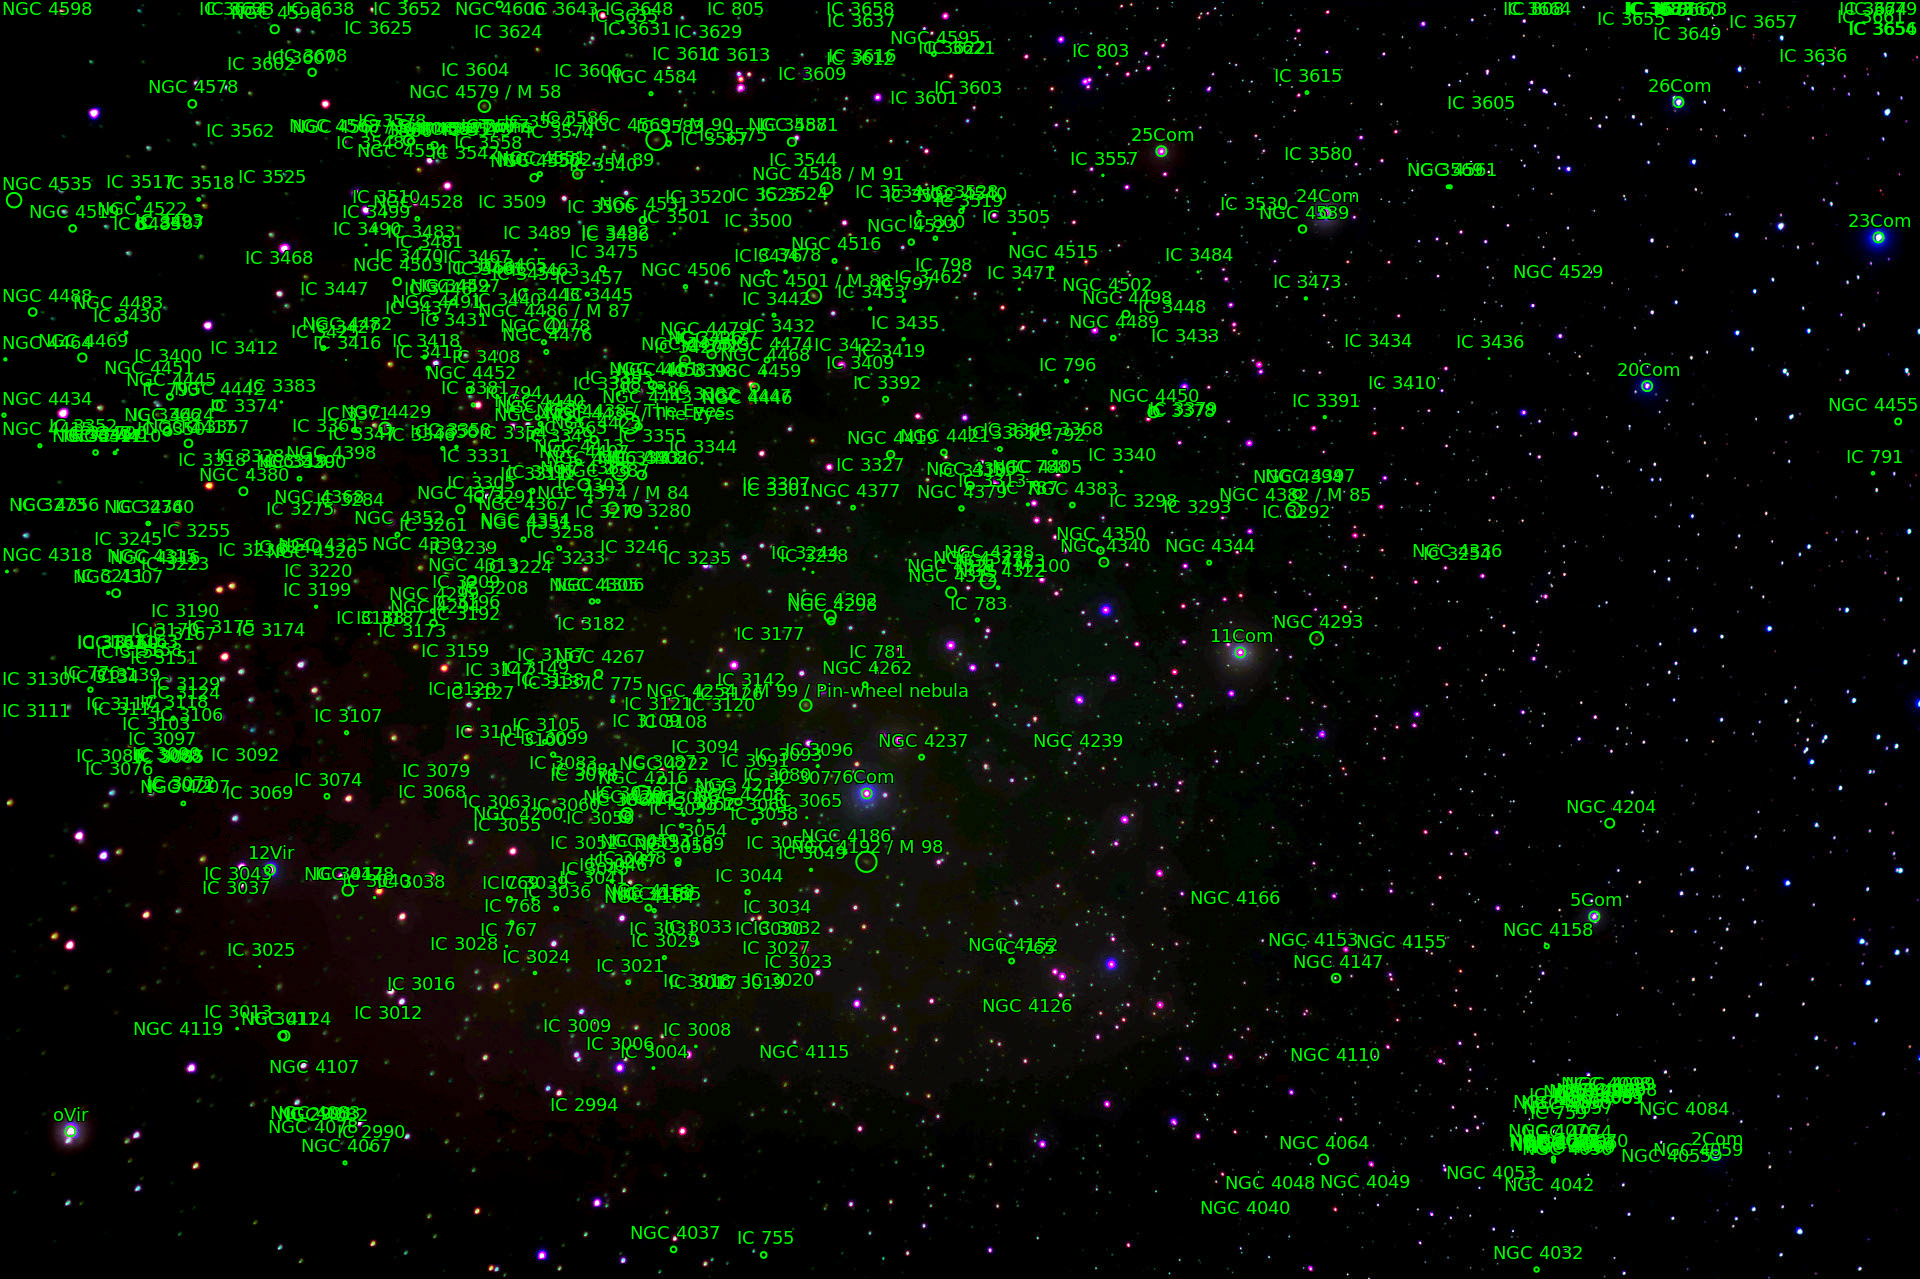 |
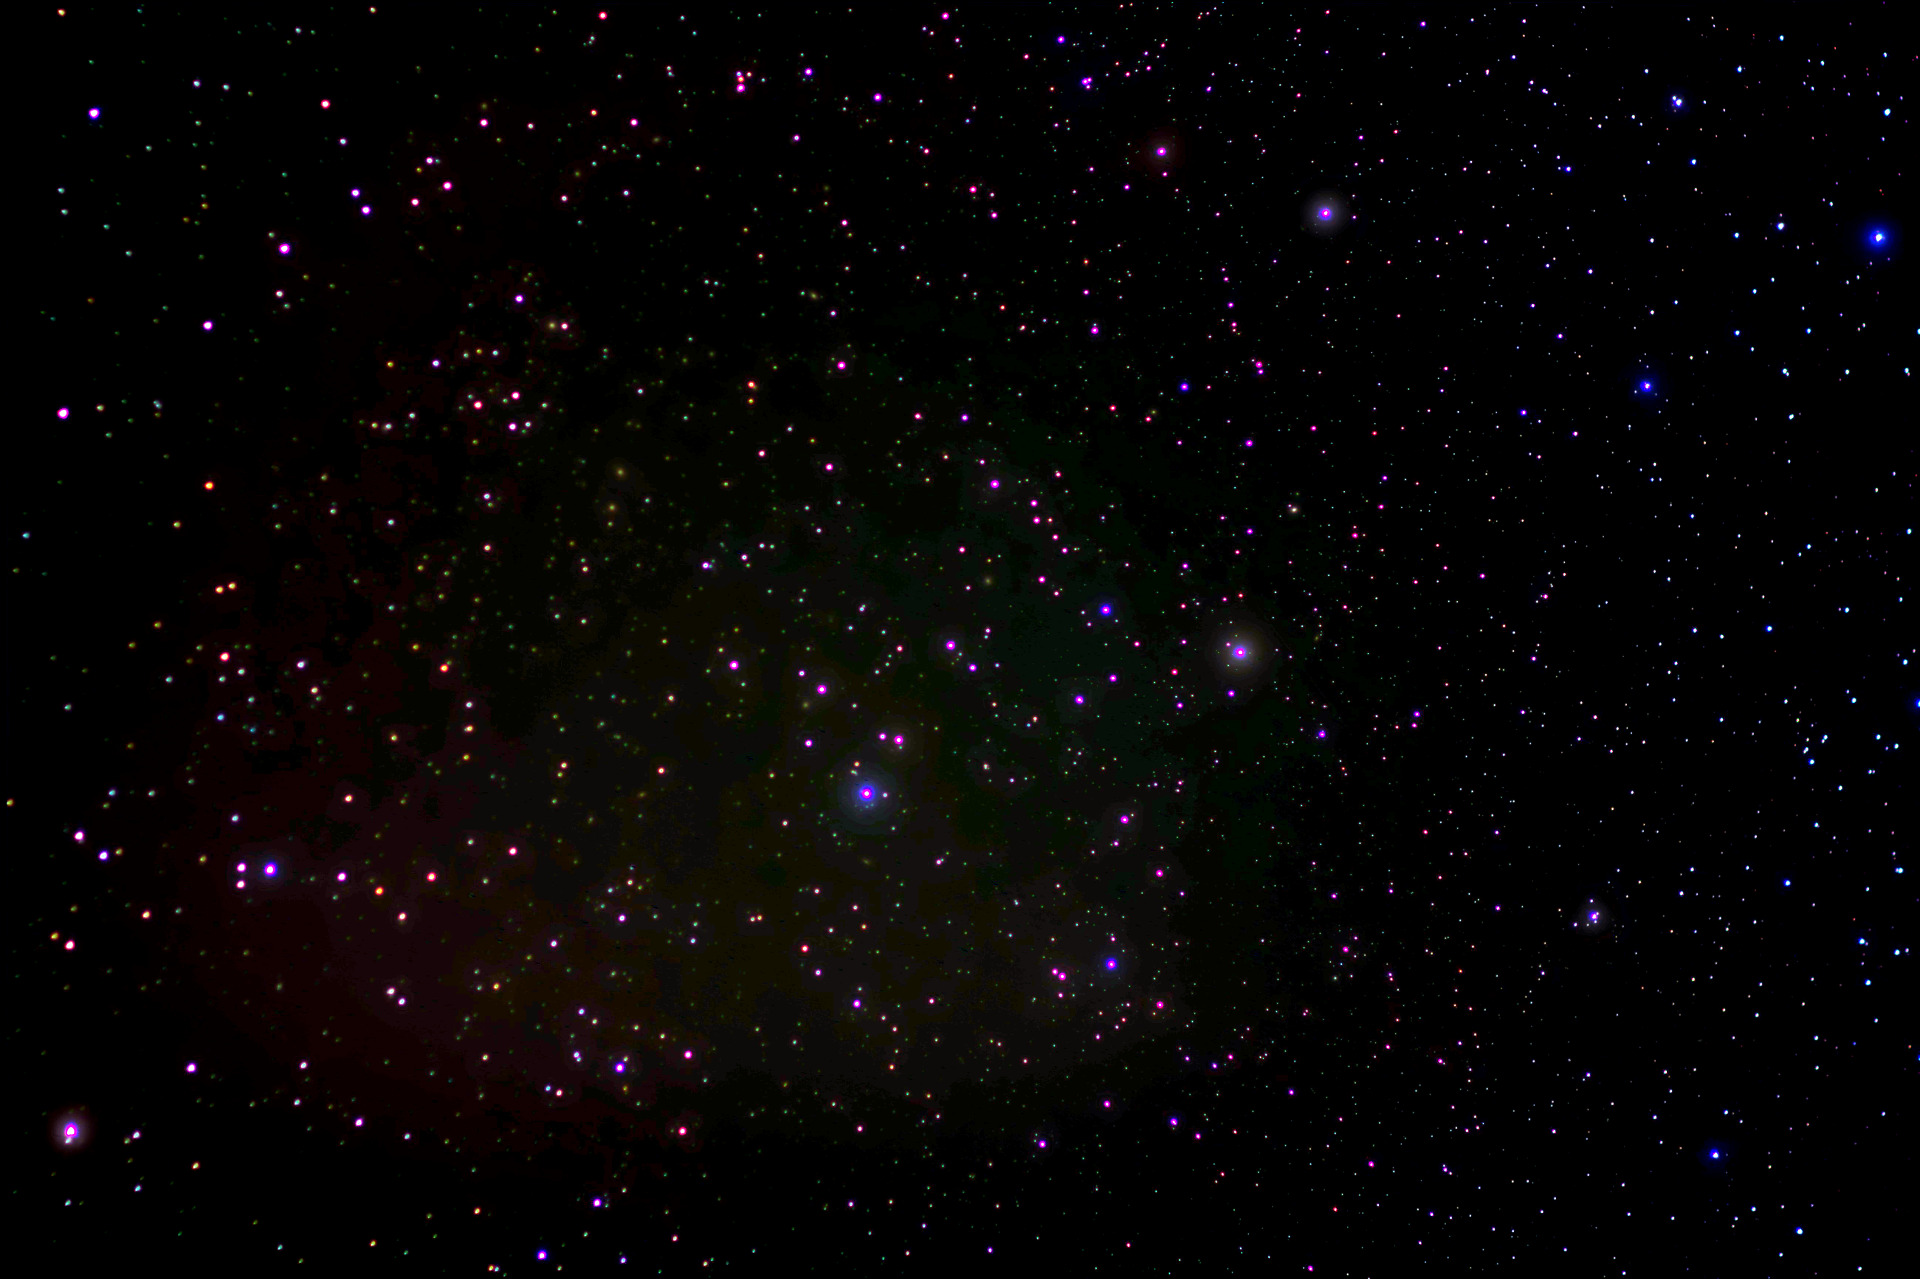
| M100 and surrounding area in Coma Berenices taken with Canon T2i and Samyang 85mm lens with iOptron ZEQ25GT. Stack of 11 lights/5 darks @120s @ISO 800 @F2.0 | Same image annotated by Astrometry.net |
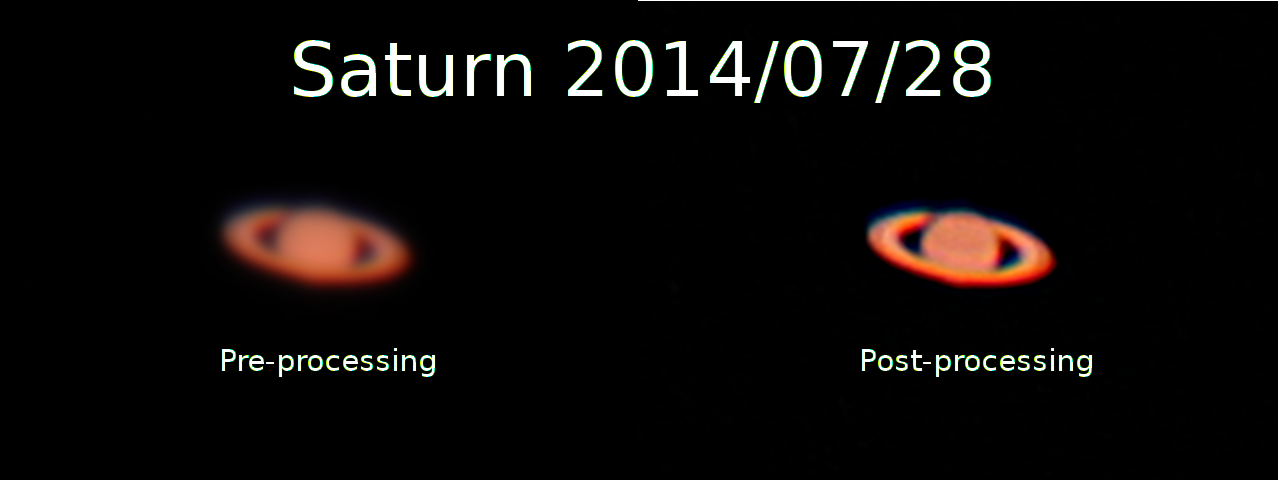 |
| 2014/07/28: Another try at
Saturn, but just not getting the clarity I wanted.
Canon T2i with Celestron C8 scope. 200 frames
stacked with Registax. |
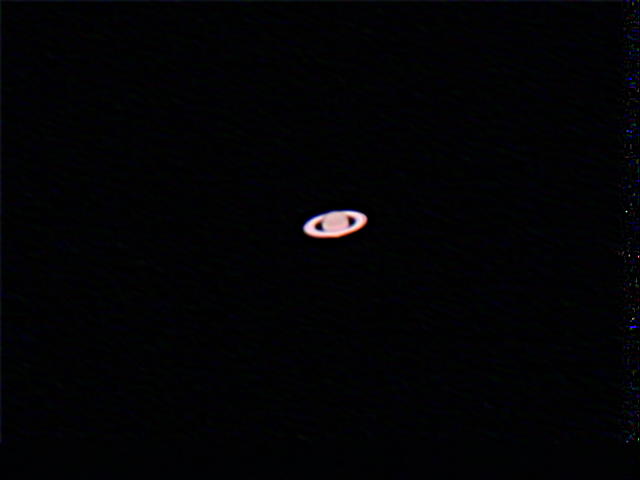 |
| A very tiny Saturn taken on
2014/05/29 using the 640x480 zoom crop video mode on the
Canon T2i attached to Celestron C90 spotting scope.
Approximately 1800 of the best 40% images were stacked in
Registax.
Not sure (yet) while this image is so much smaller than
the older Canon EOS
movrec method! |
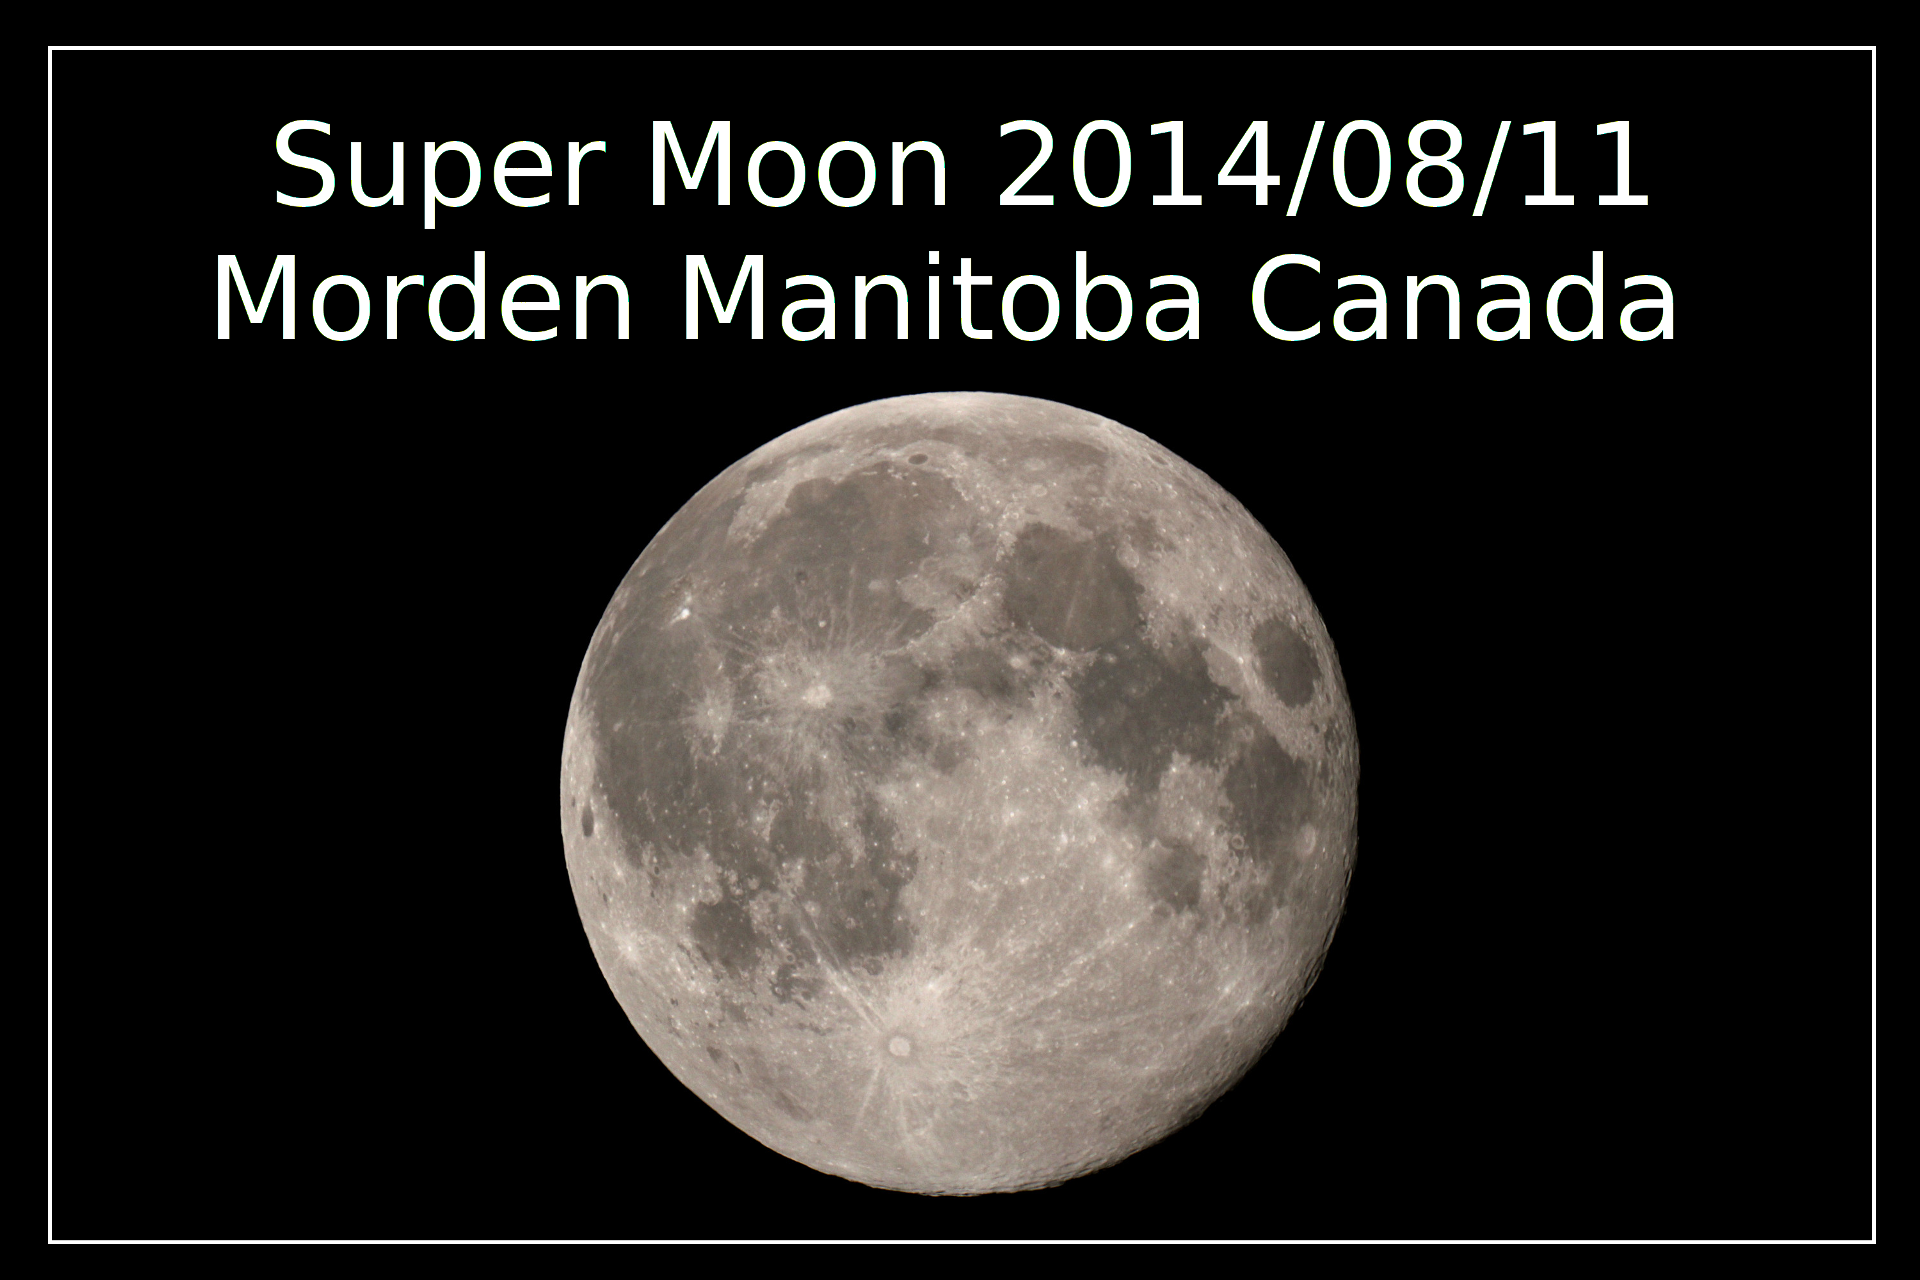
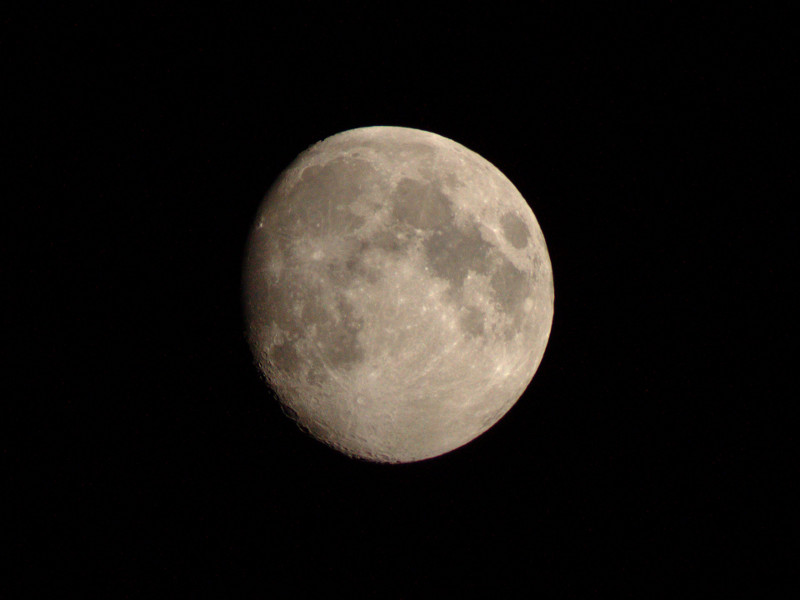
| 2014/08/11: Super Moon with
Canon T2i and Celestron C90 spotting scope. Cloudy
at sunset so woke up around 01:00 to take pics and video. |
 |
| 2014/04/15: Lunar eclipse at much-colder-than-seasonable temperatures (-12�C instead of 1�C), between 02:30 and 03:30. |
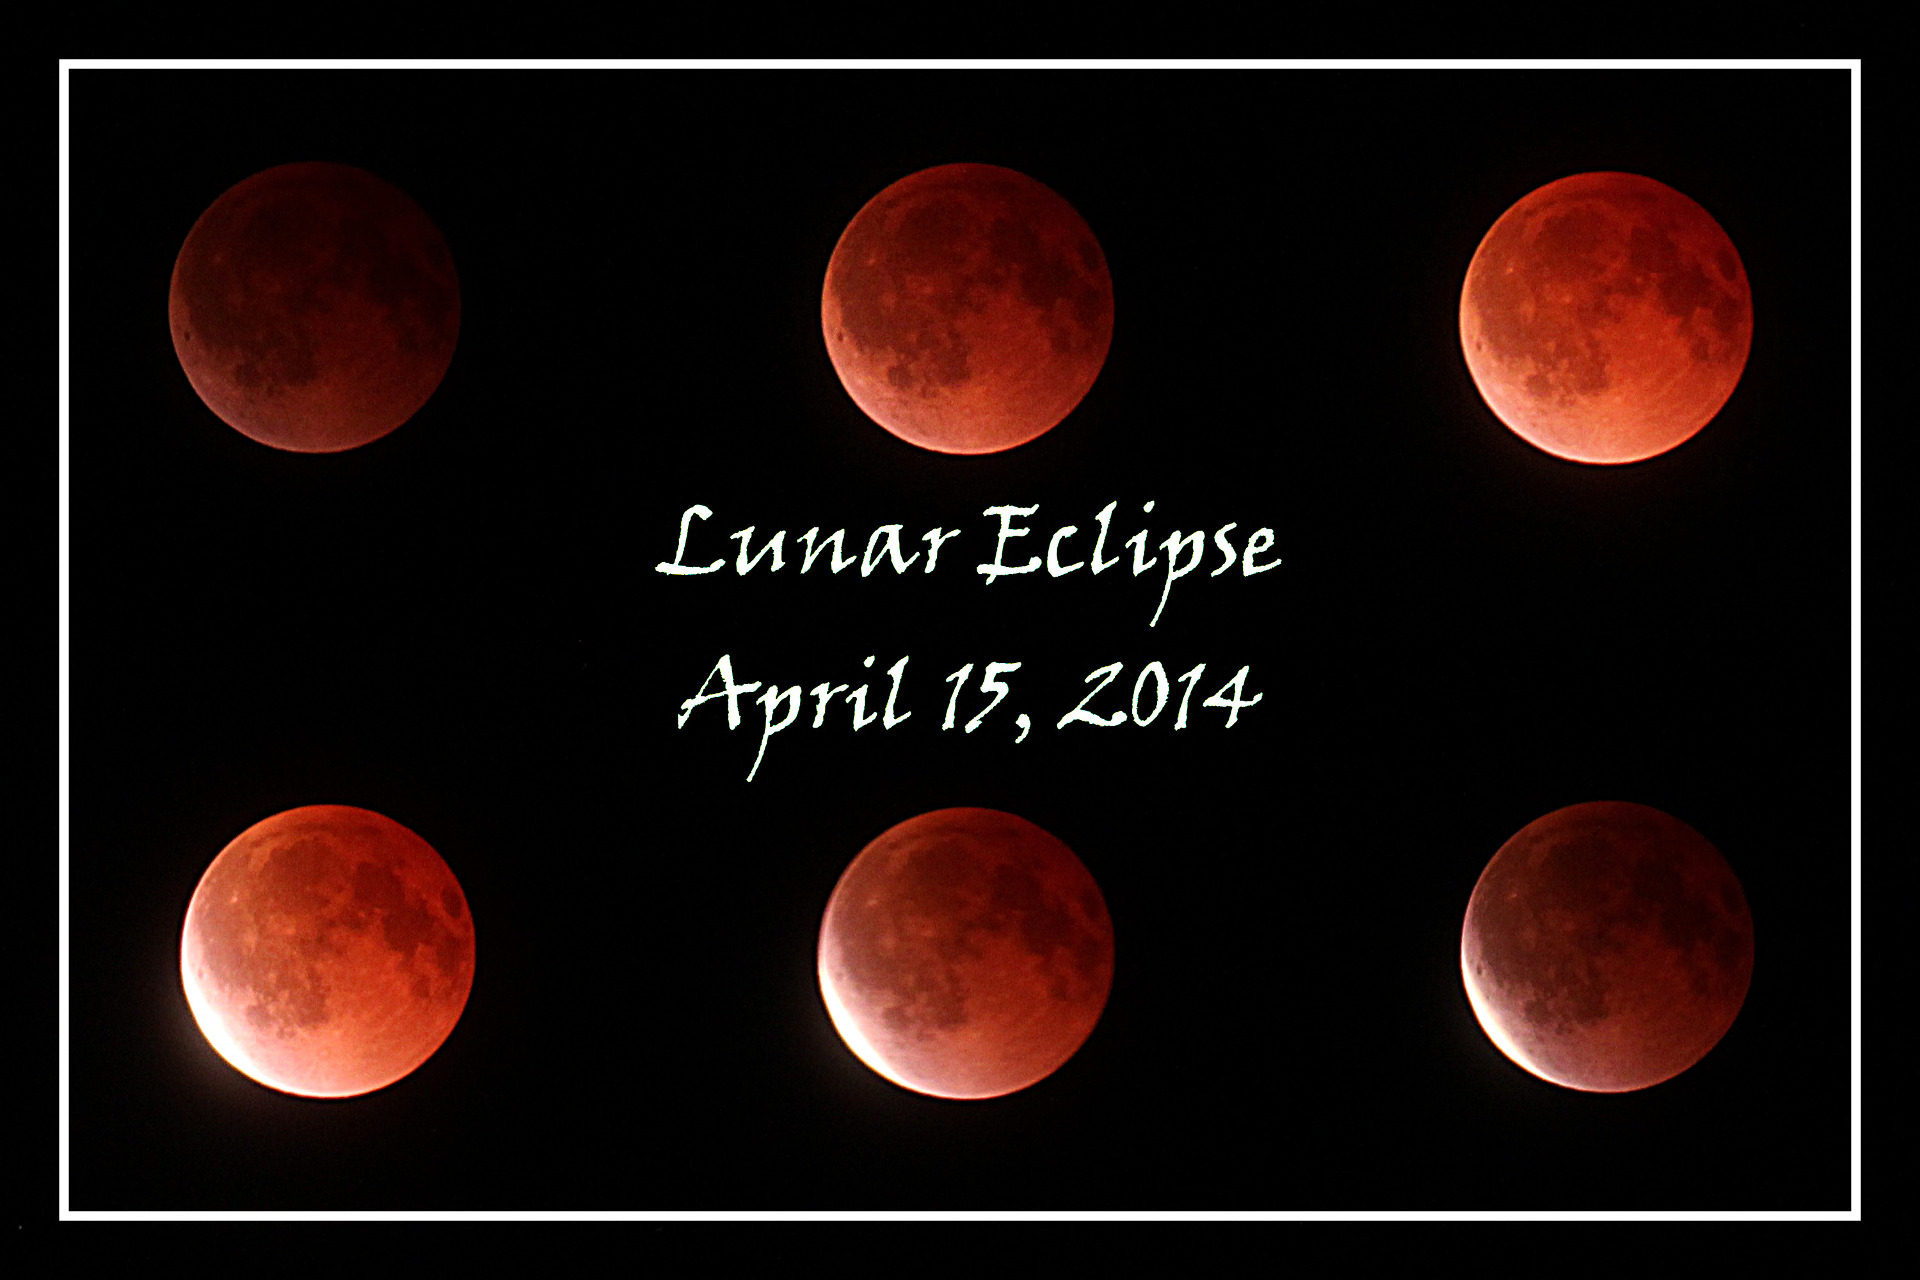 |
| Top images are full 'umbra'
shadow pics, and bottom include start of brighter
'penumbra' light in lower left of the lunar sphere.
Canon T2i with 250mm telephoto lens, at 800ISO/F5.6 and
exposure ranges from 1/8s to 1/2s. |
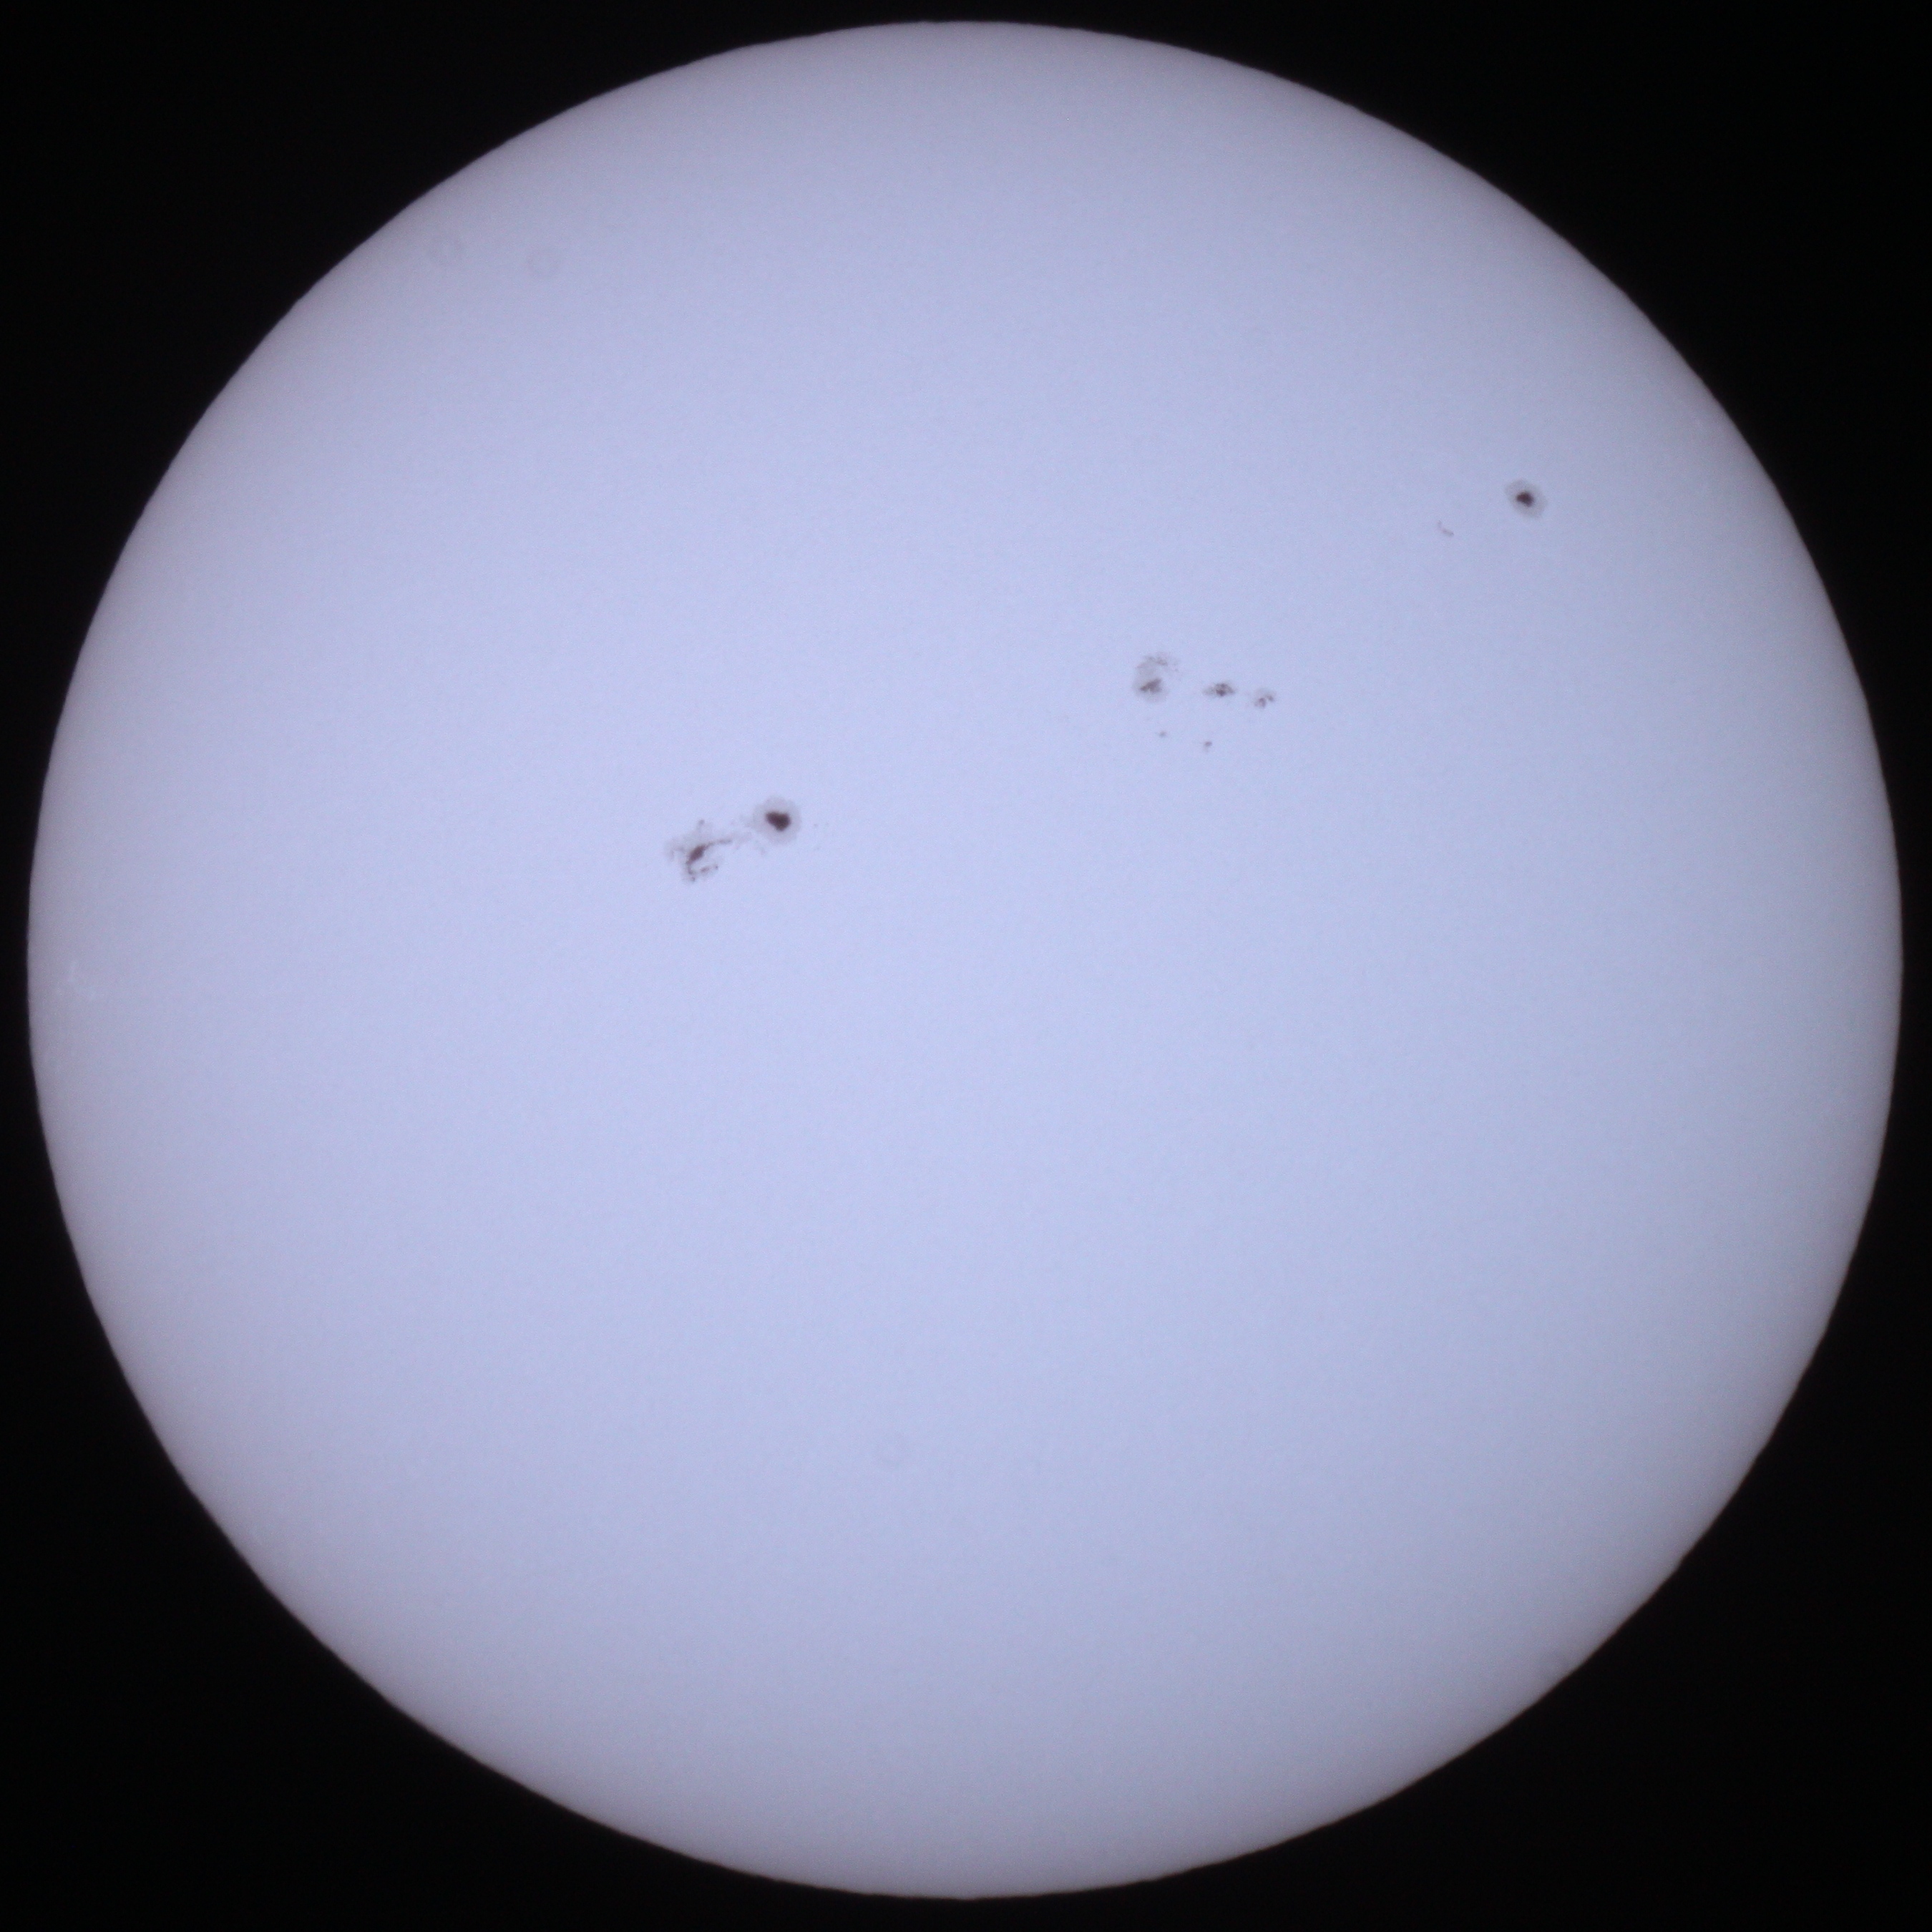
| 2014/01/08: Temperatures
were much below normal at the start of 2014 (-22�C instead
of -11�C), but with the giant sunspot AR1944 showing up I
just had to try doing a bit more 'winter astronomy'.
My fingers kept freezing up, and the laptop I was using
was in 'dim screen' mode since it was running on battery
power. Low angle of the Sun (19�) in the sky meant
that I had to squat with my equipment on the road to avoid
trees blocking the view... |
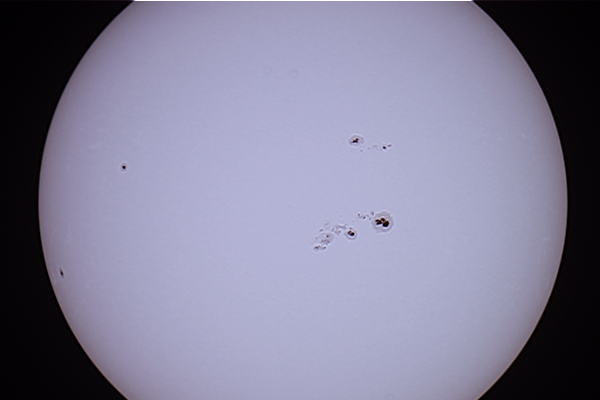 |
| Canon T1i/500D on Celestron C90 scope with Baader solar filter (ND=5.0 for 100000x reduction in light intensity) from Kendrick Astro Instruments. Video file created by EOS movrec. Stacked image of 205 frames (best 20%) with Registax. |
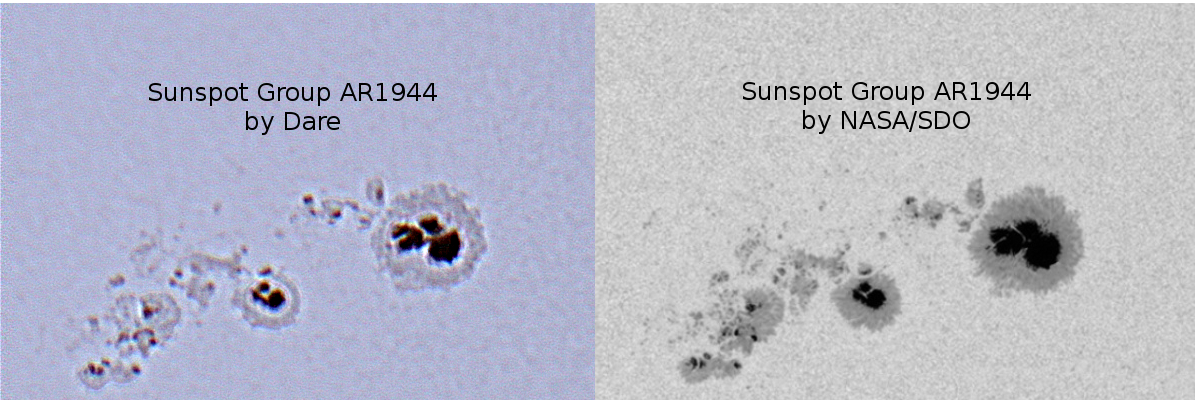 |
| Canon T1i/500D on Celestron C90 scope with Baader solar filter (ND=5.0 for 100000x reduction in light intensity) from Kendrick Astro Instruments. Video file created by EOS movrec. Stacked image of 378 frames (best 20%) with Registax. Compare to NASA SDO (Solar Dynamics Observatory) image at the same time. |
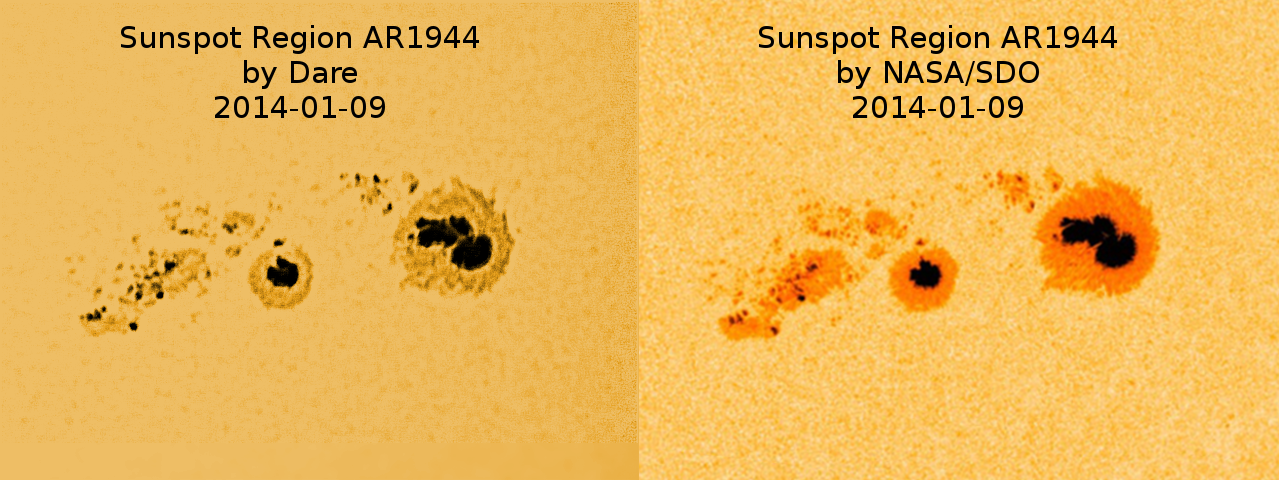
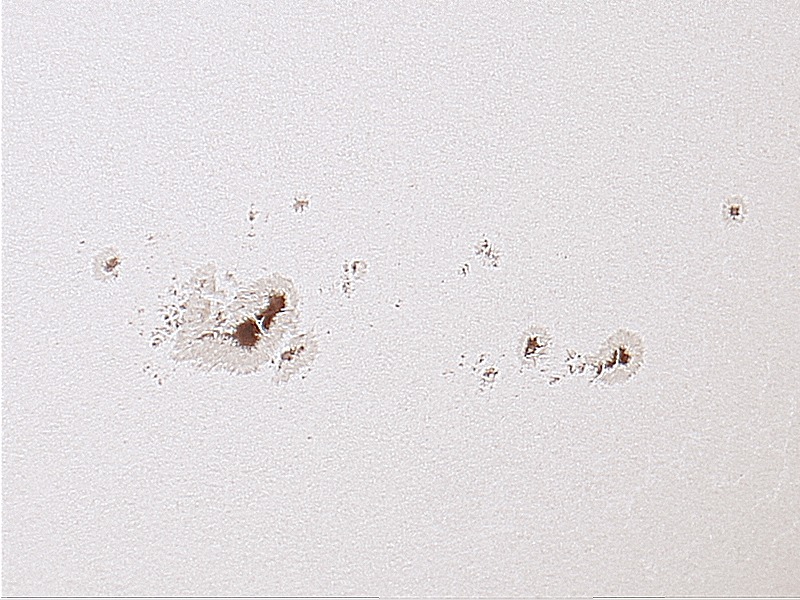
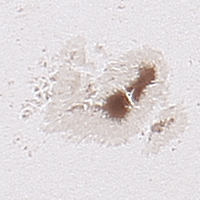
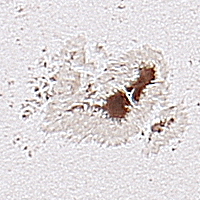
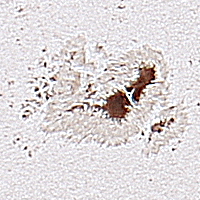
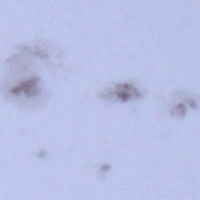
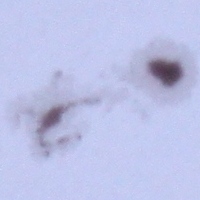
| 2014/01/09: Temperatures the next day were much more reasonable (-5�C instead of average -11�C), and so I took another shot at sunspot AR1944. This time my fingers did not freeze, and I used the 640x480 video crop mode of my Canon T2i/550D instead of a netbook... |
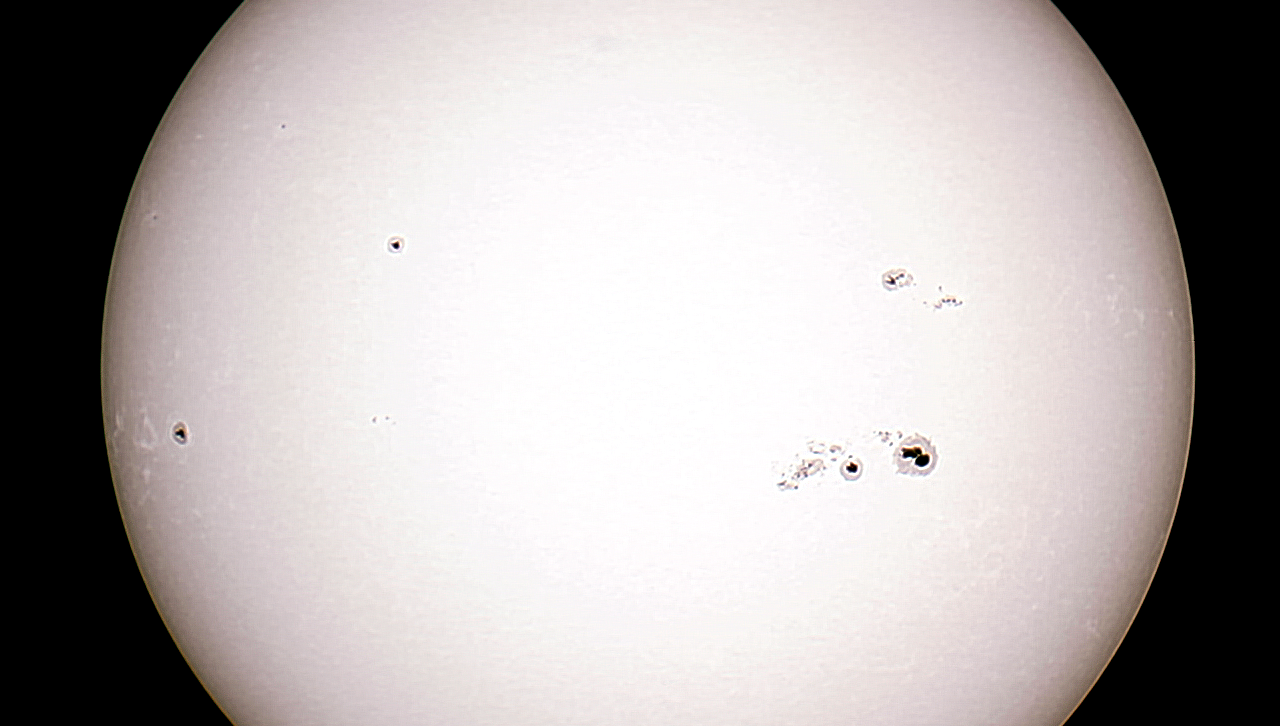 |
|
|
|
 |
|
| Canon T2i/550D on Celestron C90 scope with Baader solar filter (ND=5.0 for 100000x reduction in light intensity) from Kendrick Astro Instruments. Video file created via 640x480 video crop mode. Stacked image of 150 frames (best 10%) with Registax. Compare to NASA SDO (Solar Dynamics Observatory) image at the same time. |
| Sensing that the dropping
temperatures and many weeks till the next New Moon might
end this year's 'comfortable' astronomy and imaging, I
wanted to try for more messier objects on October 12/13th,
but was not entirely successful. |
 |
 |
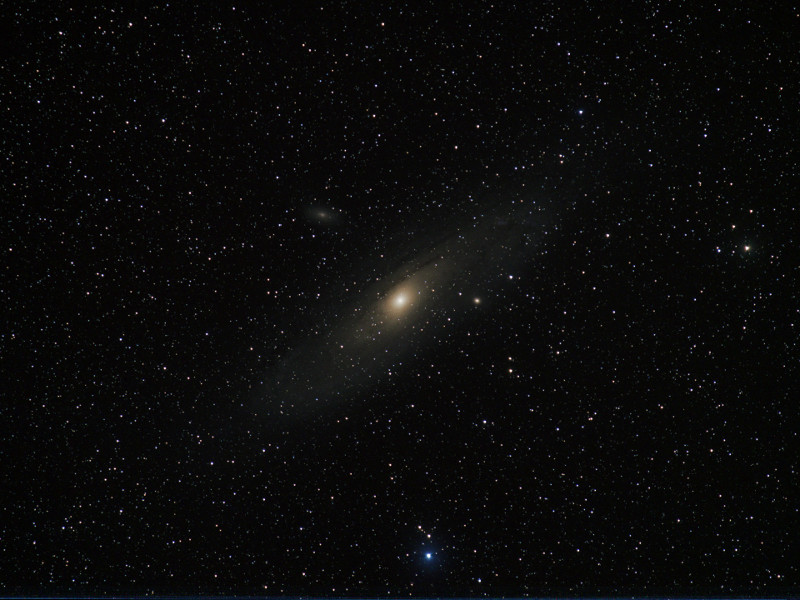
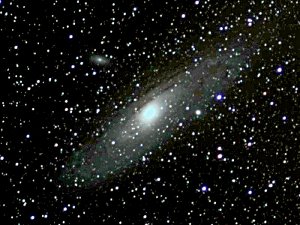
| M31 (Andromeda)
again! This time I wanted to display a wider
view. Canon T1i/500D with 55-250mm zoom lens.
90s @ F5.6 @ ISO800. 77 lights/10 darks/20
lightflats/20 bias frames. |
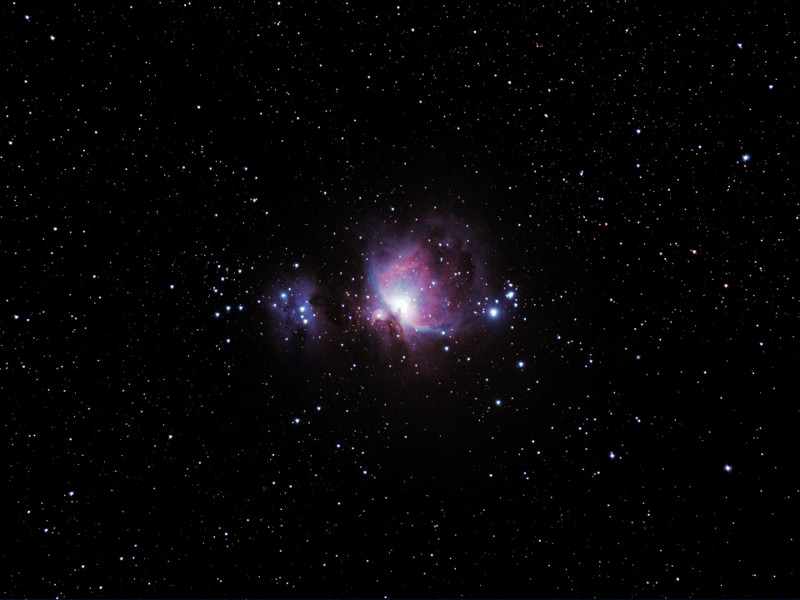
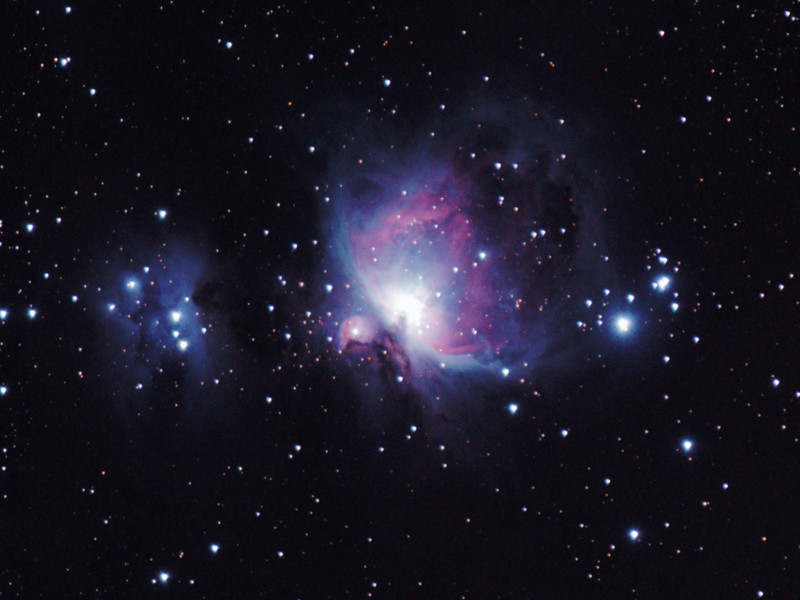
My goal was to capture a
wider field around M42 to include the Horsehead Nebula
(B33/IC 434) near the star Alnitak, but my zoom setting was not
quite good enough. Canon T1i/500D with 55-250mm zoom
lens @ 135mm. 90s @ F5.6 @ ISO800. 46
lights/10 darks/10 light flats/10 dark flats/10 bias
frames. |
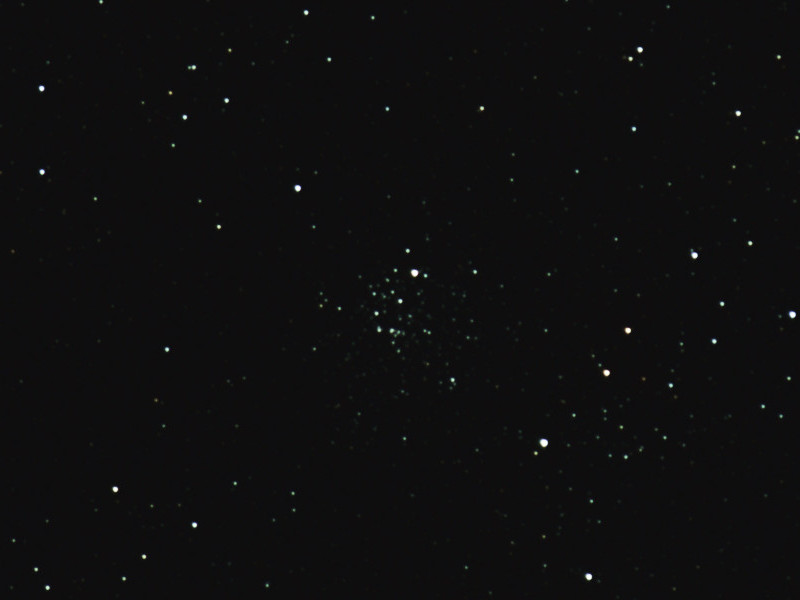 |
| M52 (NGC 7654) was conveniently overhead while I was waiting for Orion, so I wanted to capture it. Very small! Canon T1i/500D with 55-250mm zoom lens. 60s @ F6.3 @ ISO800. 33 lights/10 darks. |
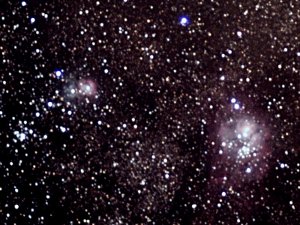
| With temperatures getting
uncomfortably cold at the start of October 2013 (near 0�C), I decided to take advantage as much as
possible of the remaining Moonless nights. I very
much wanted to try capturing M42 (Orion Nebula) before
the cold and snow ended my outdoor astronomy for
2013. While waiting for M42 to rise, I decided to
re-try M31 and M45, but also M1 (which is much tougher
than all the rest!). I also included light and
dark flats in the image processing sequence. |
 |
 |
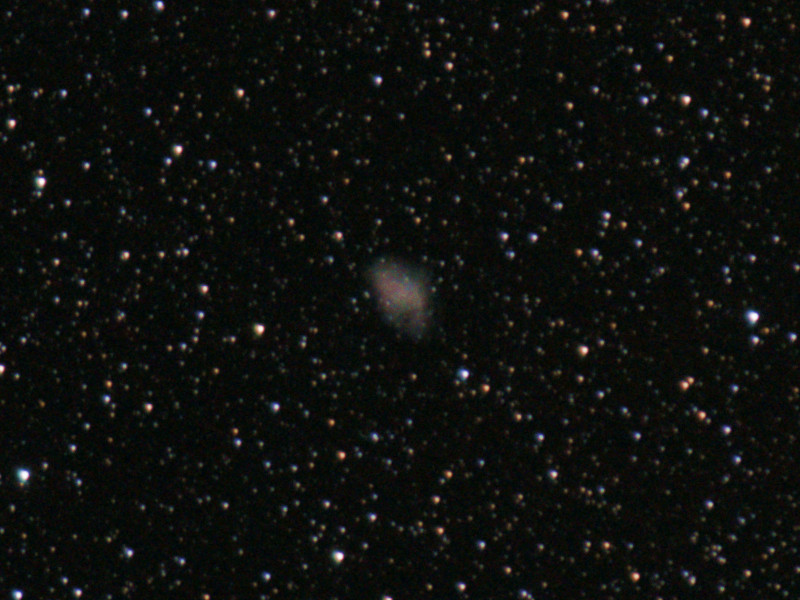
| M1 (Crab Nebula) on Canon
T1i/500D with 55-250mm zoom lens. 90s @ F5.6 @
ISO800. 32 lights/21 darks/20 light flats/20 dark
flats. |
M31 (Andromeda) on Canon T1i/500D with 55-250mm zoom lens. 90s @ F5.6 @ ISO800. 80 lights/21 darks/20 light flats/20 dark flats. |
 |
 |
| M45 (Pleiades) on Canon T1i/500D with 55-250mm zoom lens. 90s @ F5.6 @ ISO800. 34 lights/21 darks/20 light flats/20 dark flats. | M42 (Orion Nebula) on Canon T1i/500D with 55-250mm zoom lens. 90s @ F5.6 @ ISO800. 23 lights/21 darks/20 light flats/20 dark flats. |
| After receiving a Celestron
93625 Universal 1.25-inch Camera T-Adapter, I was
finally able to attach my Canon 500D onto my new
inexpensive
iOptron R80 refractor telescope. I then used
my new ZEQ25GT
mount so as to be able to compare M31 images to the ones
taken earlier with the Canon 55-250mm zoom lens.
Conclusion? Not bad, but not as good as the Canon
55-250mm zoom :) |
 |
 |
| M31 (Andromeda) on Canon T1i/500D with 80mm iOptron R80 scope. 90s @ F5.0 @ ISO800. 100 lights/10 darks. | Moon on Canon T1i/500D with 80mm iOptron R80 scope. 1/1000s @ F5.0 @ ISO800. |
| On the night of 2013/09/17,
I was better prepared for using my new iOptron
ZEQ25GT mount, along with the intervalometer feature
of Magic Lantern on my Canon 500D, and I focused on
M31/Andromeda i.e. that which had let me down 4 days
earlier. |
 |
 |
| M31 (Andromeda) on Canon T1i/500D with 55-250mm zoom lens. 60s @ F5.6 @ ISO800. 23 lights/17 darks. | M31 (Andromeda) on Canon T1i/500D with 55-250mm zoom lens. 120s @ F5.6 @ ISO800. 71 lights/20 darks. |
| The night of 2013/09/13 was
the test of my new iOptron ZEQ25GT mount. In the
restricted view of my backyard, a only a very simplistic
polar alignment was possible. Intended for many
hours of images of M31 and M45, but camera malfunction
prevented most of this. Nevertheless, sufficient to
prove the new mount as wonderful :) |
 |
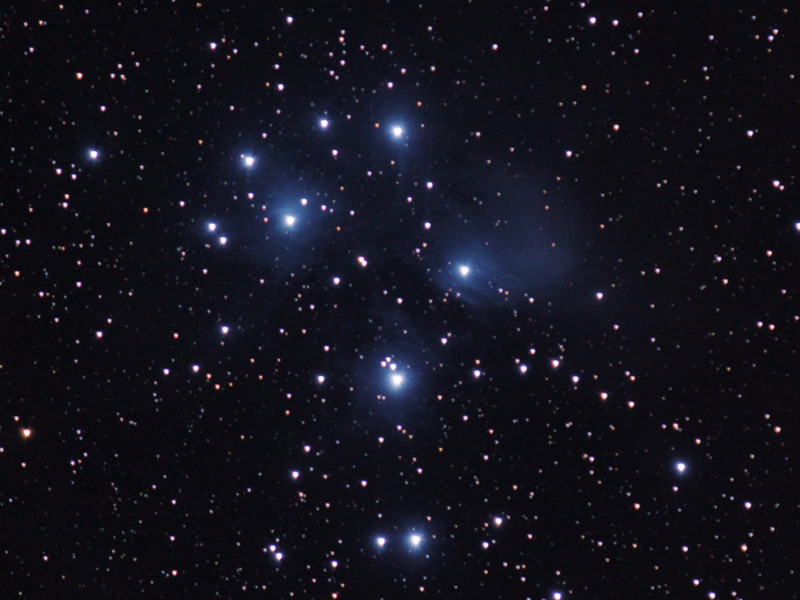
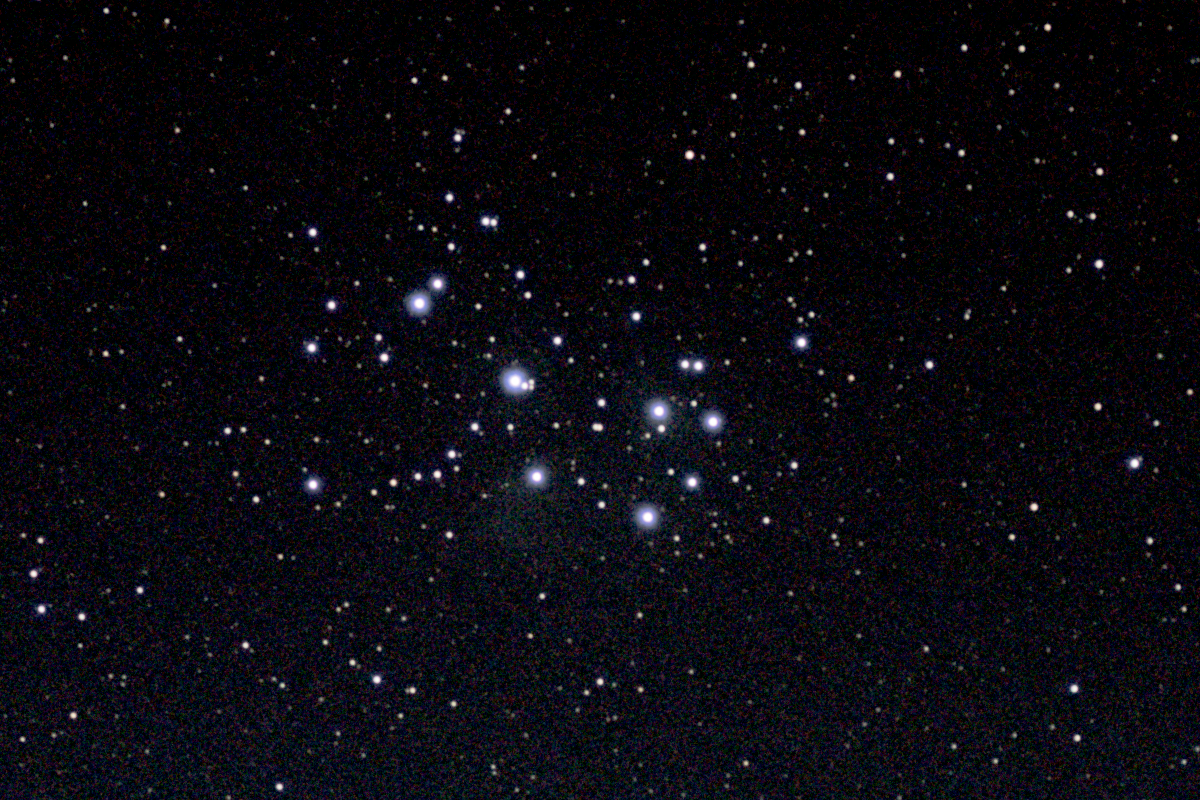
| M45 (Pleiades) using
55-250mm zoom @ F5.6 @ ISO800 @ 30s. Stack 21
lights/12 darks. Fully intended for 60s+ shots, but
camera software reverted to default 30s for unknown
reasons (!). I did manage to get some nebulosity out
of this Messier object :) |
| Traveled to two parks
outside of my small city to escape light pollution, but
need to go even further... |
 |
| Samyang 8mm on Canon
T1i/500D. 30s @ 3200ISO @ F5.6. Stacking of 5
lights/20 darks and post-processing. |
| A long winter and cold
spring was an obstacle to pleasant viewing early in 2013,
but Comet
C/2011 L4 "Panstarrs" would not wait, and so this
became my first 'cold' adventure. |
 |
 |
|
Comet C/2011 L4 "Panstarrs"
First try! Samyang 85mm on Canon T1i/500D. 1s exposure @ 1600ISO @ F2.0 with no stacking. |
Comet C/2011 L4 "Panstarrs" & M31
Next try! Panstarrs in lower right corner. Samyang 85mm on Canon T1i/500D. 2s exposure @ 1600ISO @ F2.0 with stack of 30 lights/10 darks and post-processing. Notice M31 (Andromeda Galaxy) is upper left corner. 5 seconds was enough to cause star motion blur with no tracking mount. |
 |
|
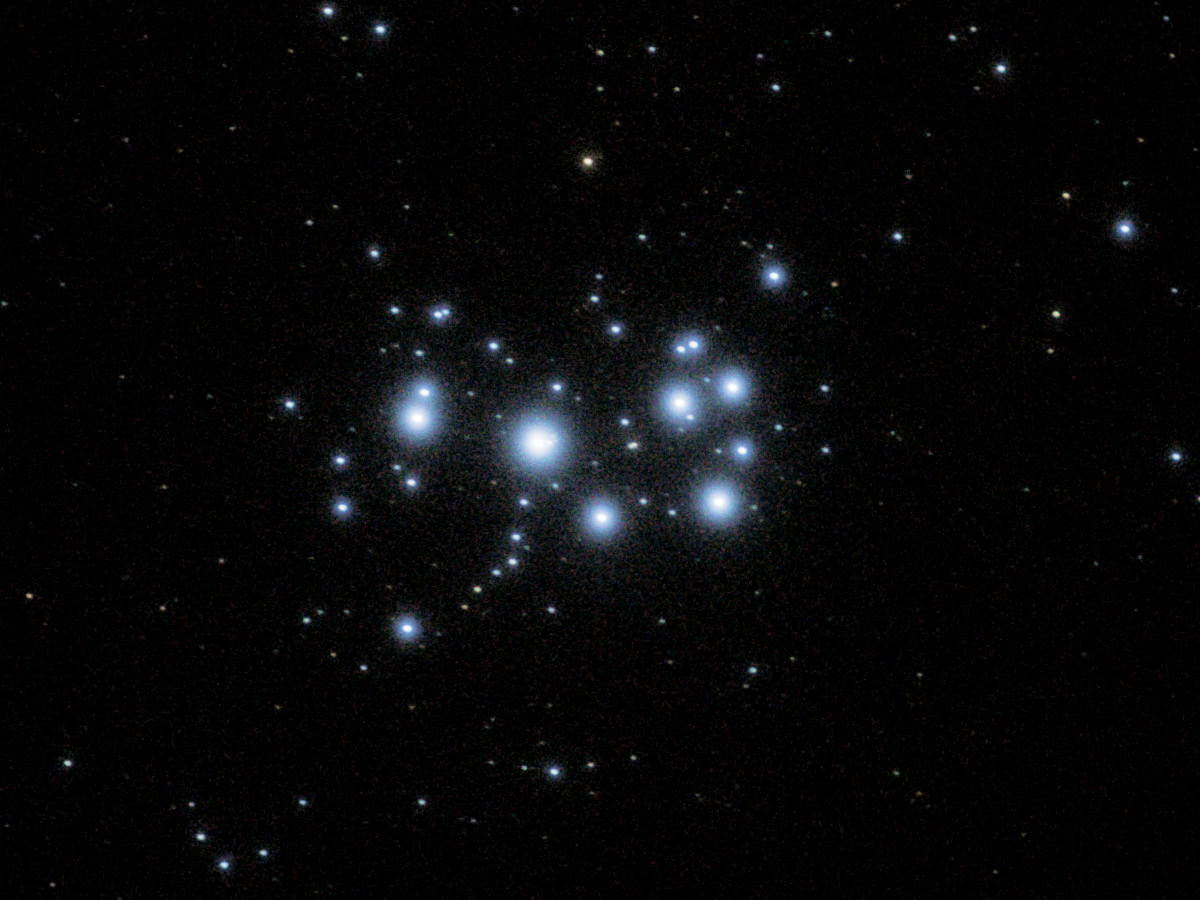
Pleiades (M45)
Since I was out in the cold anyways, decided to try M45 again. 85mm on Canon T1i/500D. 2s exposure @ 1600ISO @ F2.0 with stack of 30 lights/10 darks and post-processing. 5 seconds was enough to cause star motion blur with no tracking mount. |
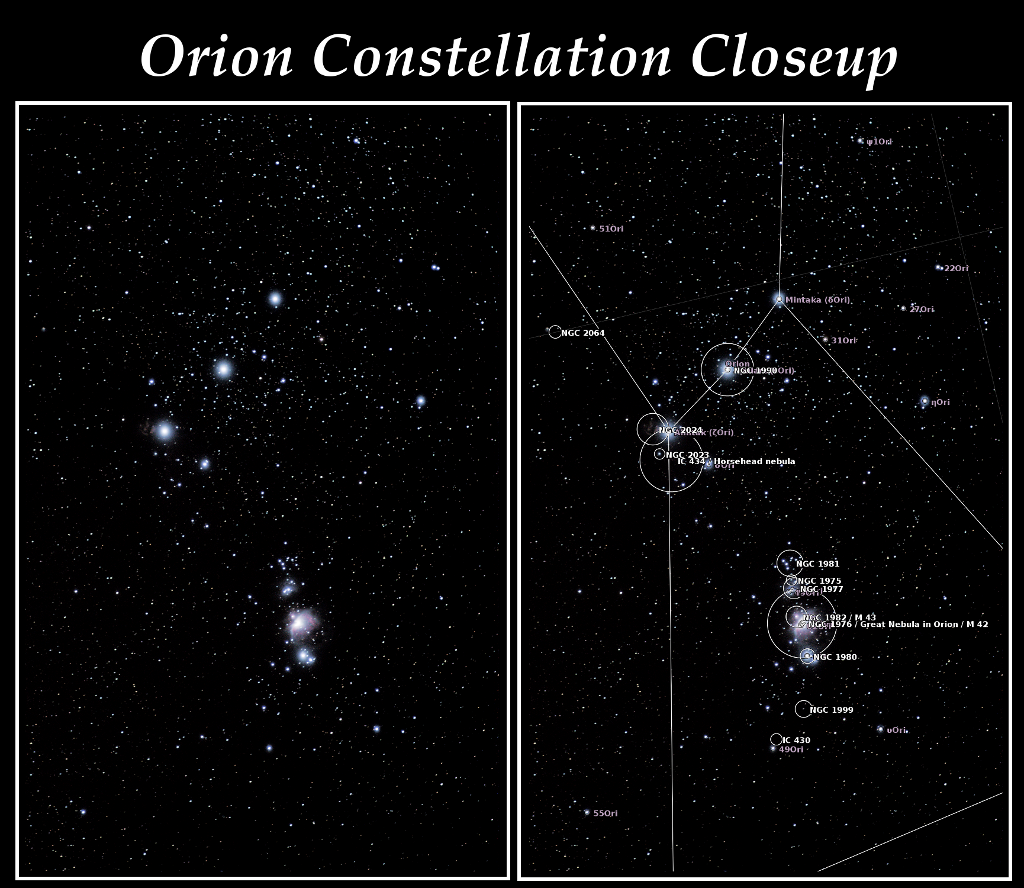
| With my iOptron telescope
mount damaged beyond repair, I have to rely on simple
camera/tripod astrophotography more heavily. In the
wee hours of the morning (04:00 CDT Oct 22) I set up my
Canon T1i and Samyang 85mm fisheye. Using 'Magic Lantern' to
do the intervalometer work for me, and DeepSkyStacker
for stack work, I captured a closeup of Orion (e.g. M42)
and the Pleiades (M45). |
 |
 |
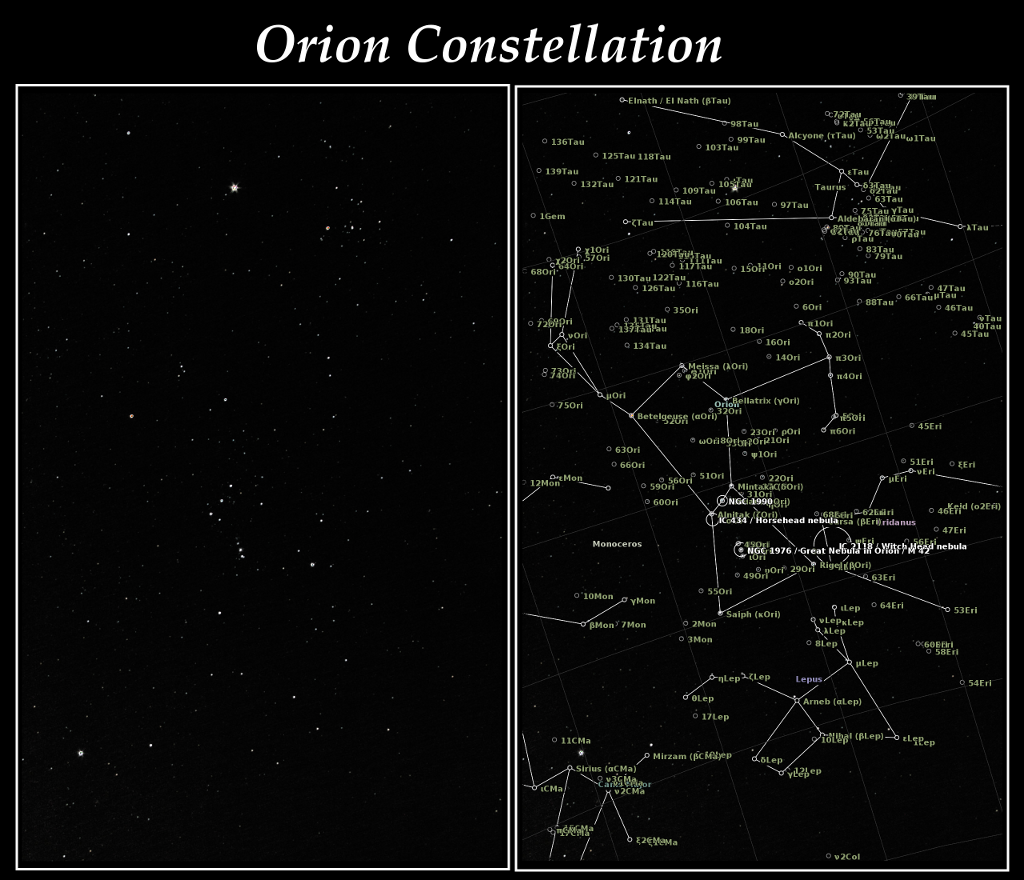
| Here is an Orion from the
morning (04:00 CDT Oct 18) I set up my Canon T1i and
Samyang 8mm fisheye, with an annotated version from Astrometry. |
 |
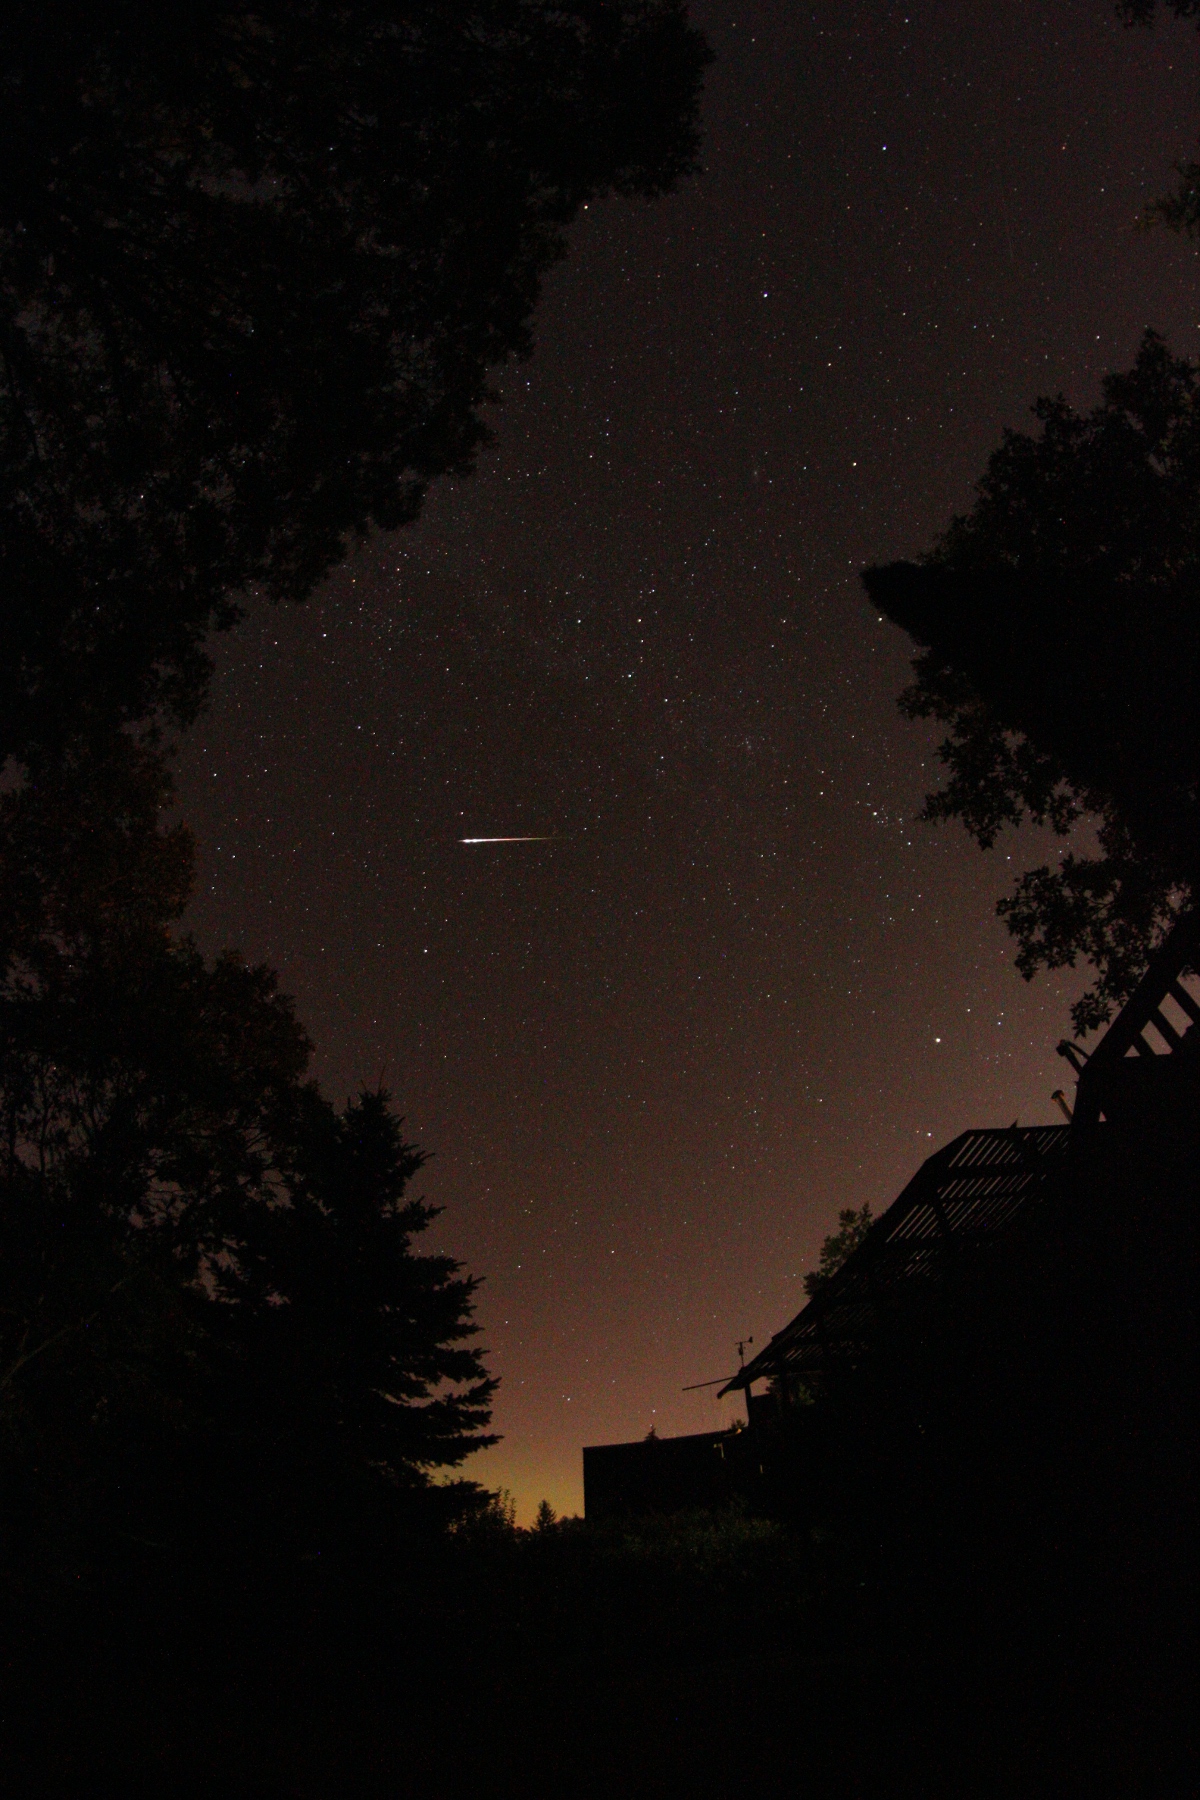
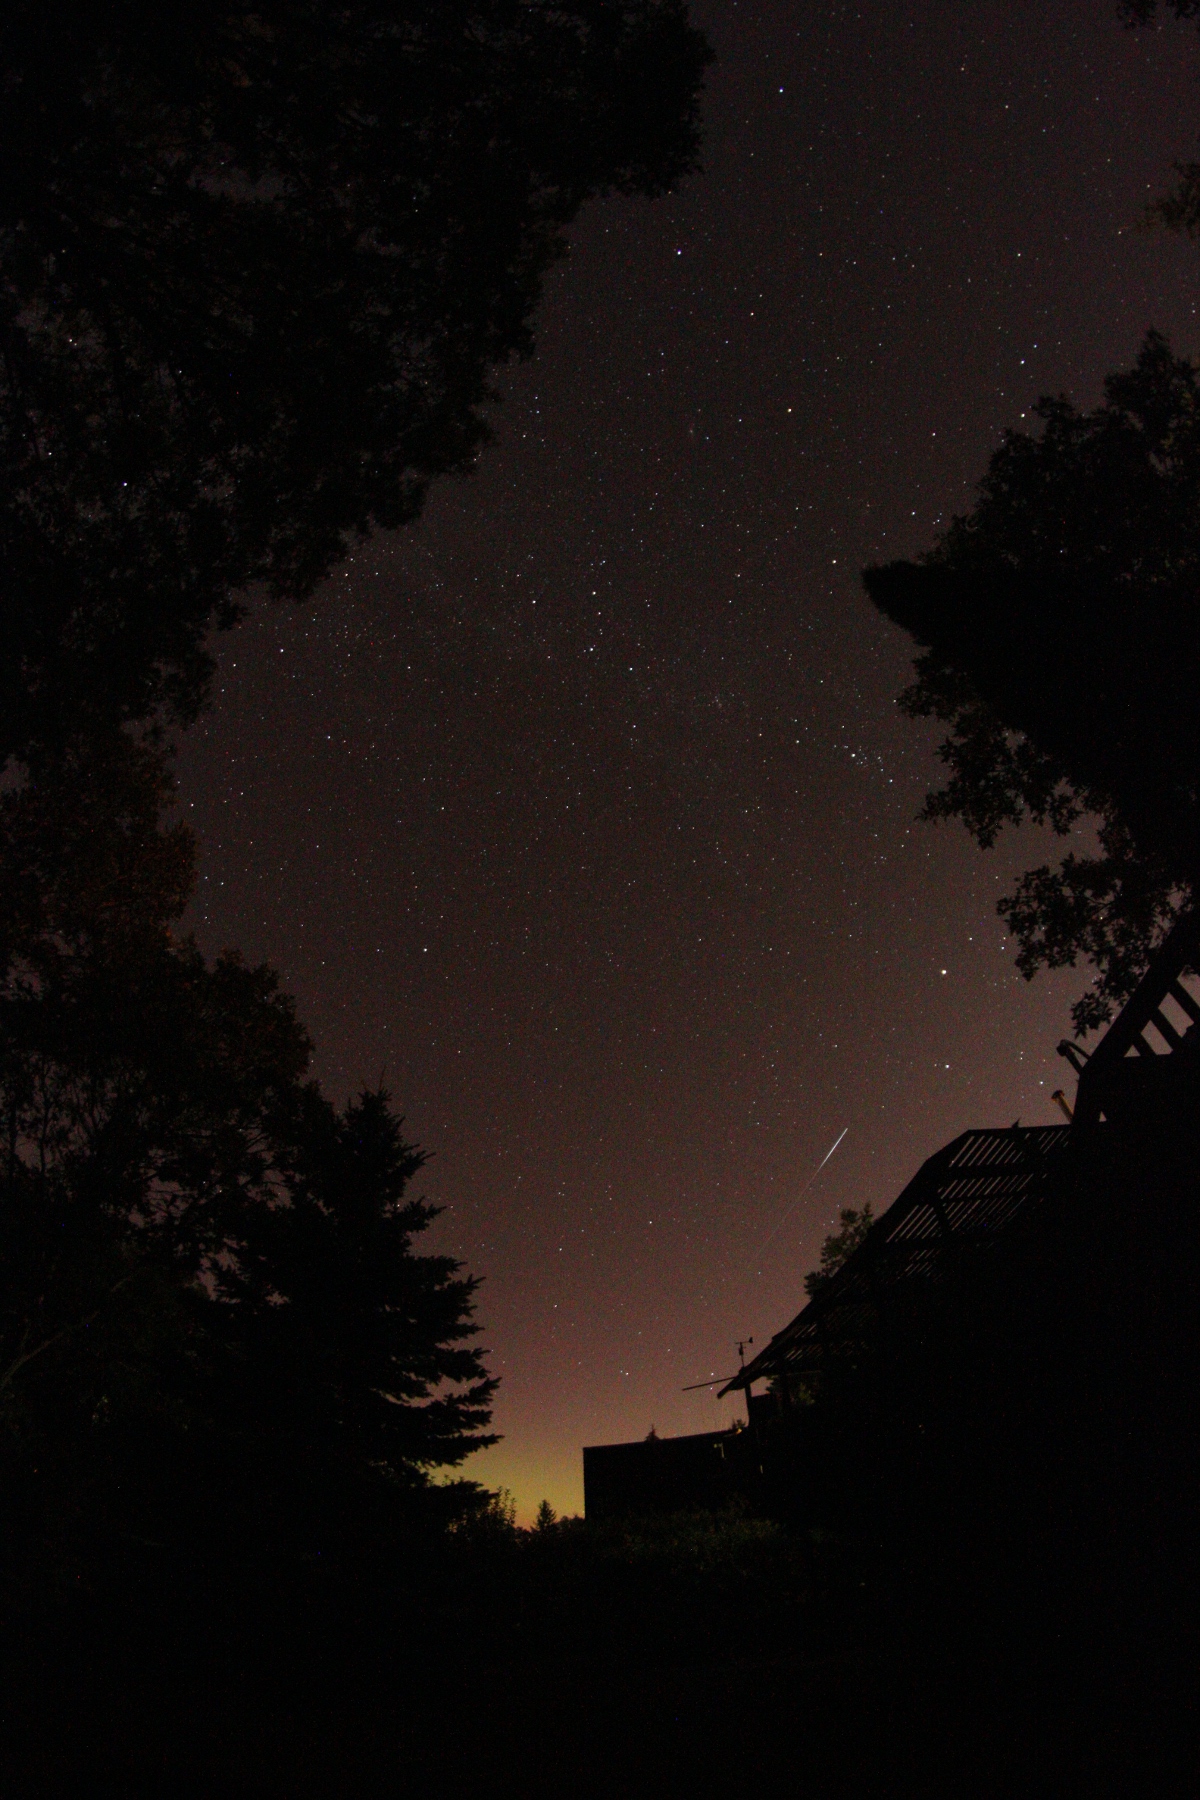
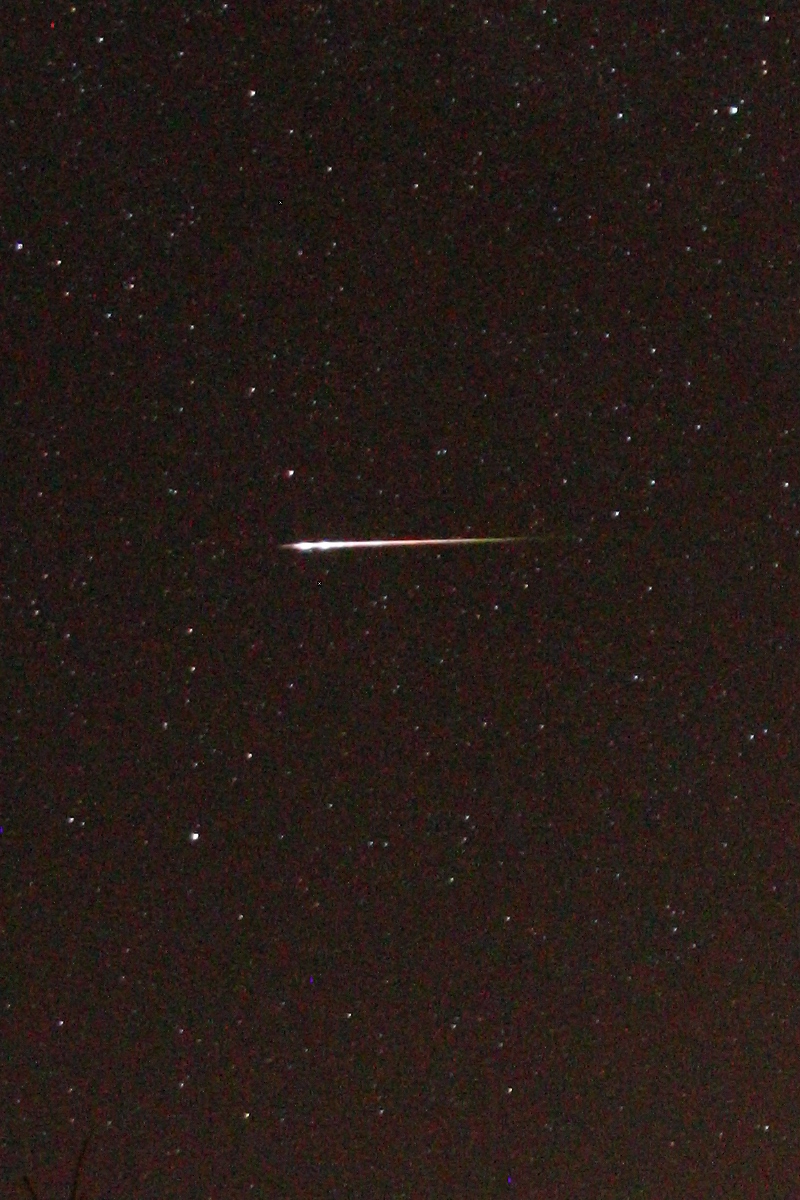
| Decided to attempt capture
of some of the 2012 Perseid Meteor shower. Best
predicted night was August 11/12, but that night was
cloudy. Next best was August 12/13, and even though
thunderstorms threatened the evening, by the wee hours of
the morning (03:00 CDT) I set up my Canon T1i and Samyang
8mm fisheye. This time I used the newest version of
'Magic Lantern'
to do the intervalometer work for me. |
 |
 |
|
Perseid Meteor shower single capture.
Samyang 8mm on Canon T1i/500D. 30s exposure @ 3200ISO @ F5.6. |
Perseid Meteor shower single capture.
Samyang 8mm on Canon T1i/500D. 30s exposure @ 3200ISO @ F5.6. |
 |
 |
|
Perseid Meteor shower single capture (crop)
Samyang 8mm on Canon T1i/500D. 30s exposure @ 3200ISO @ F5.6. |
Perseid Meteor shower single capture (crop)
Samyang 8mm on Canon T1i/500D. 30s exposure @ 3200ISO @ F5.6. |
| Decided to experiment with using my old/heavy/non-computerized Celestron Ultima 8 telescope mount as a platform for unguided astrophotography shots, to capture a few Messier objects. Not too bad, but lots of room for improvement :) |
 |
 |
|
Cygnus
Attempt to capture M39/NGC 7092. Samyang 85mm on Canon T1i/500D. Piggyback on Celestron C8 Ultima mount (no GOTO). 30s exposures @ 1600ISO @ F1.4. Stacked in DSS with 32 lights/12 darks. |
Lyra
Attempt at M57/NGC 6720 ("Ring Nebula"). Samyang 85mm on Canon T1i/500D. Piggyback on Celestron C8 Ultima mount (no GOTO). 30s exposures @ 1600ISO @ F1.4. Stacked in DSS with 34 lights/12 darks. |
 |
 |
| M39/NGC 7092 crop. |
M57/NGC 6720 crop. |
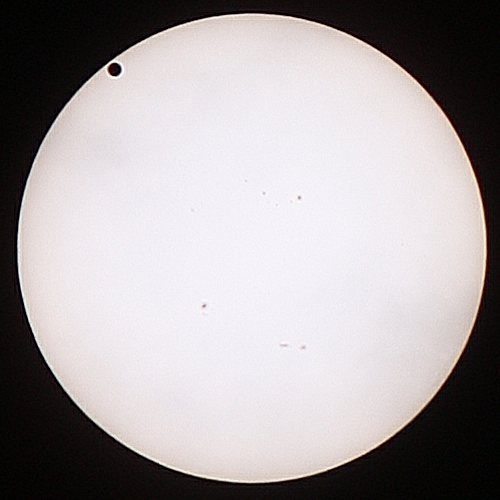
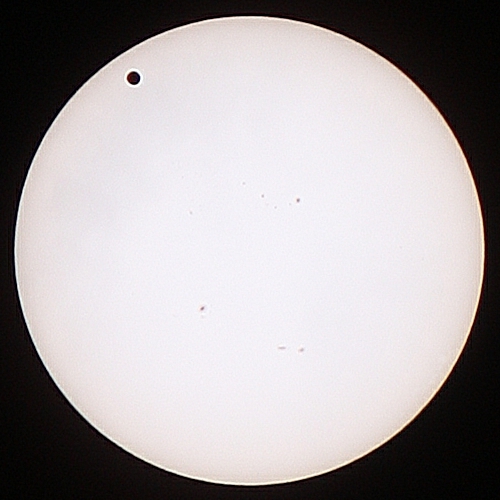
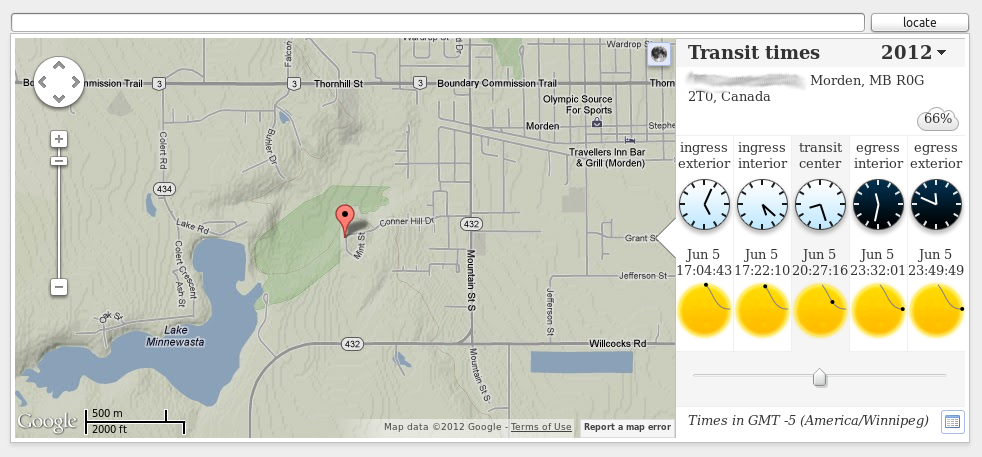
| Here are some Venus transit
pics taken on June 5/2012 again using Baader
solar filter (ND=5.0 for 100000x reduction in light
intensity) from Kendrick
Astro
Instruments. I used a 55-255mm zoom lens on my
Canon T1i DSLR at full magnification, running on top of my
iOptron mount.
The mostly-cloudy weather, trees on the horizon, and early
sunset, prevented the full transit from being
recorded. The images are stacks from Registax
of 4 frames each (15s x 4 = 60s). |
 |
 |
 |
| 17:24 Venus transit near beginning [8x (250mm) ISO200 @ 1/1000s @ F5.6] | 17:46 Venus transit 20 approximately minutes later [8x (250mm) ISO200 @ 1/1000s @ F5.6] | 18:09 Venus transit last good series [8x (250mm) ISO200 @ 1/1000s @ F5.6] |
 |
 |
|
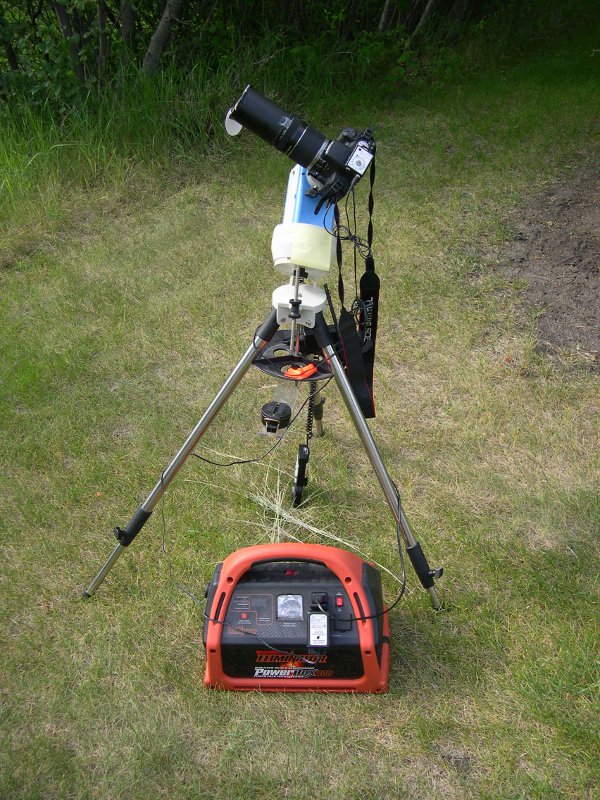
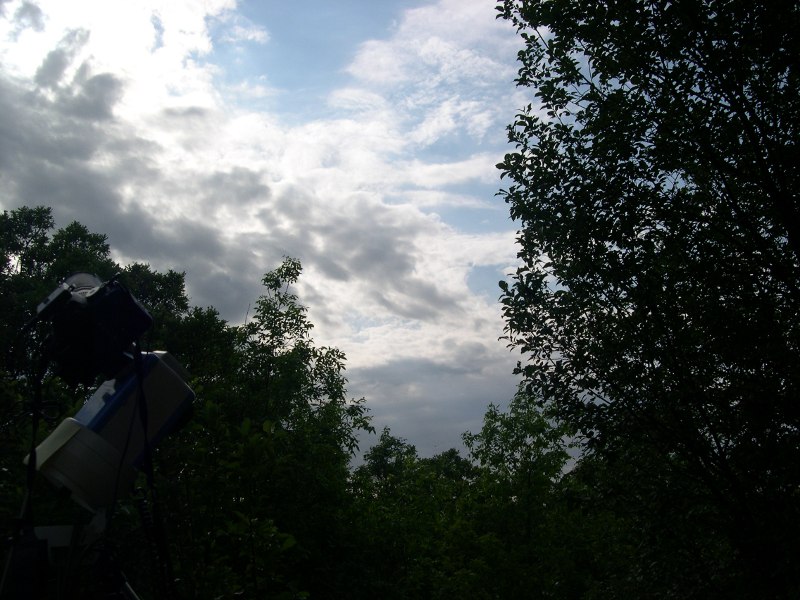
| Equipment used: Canon T1i, 255mm zoom, iOptron mount, Baader Film, SmaTrig2, PowerBox800 | View of some of the 'holes'
in the clouds that I managed to grab some pics of the
transit. Notice my camera in the lower left corner. |
Mini time lapse of the transit -- created with FFmpeg |
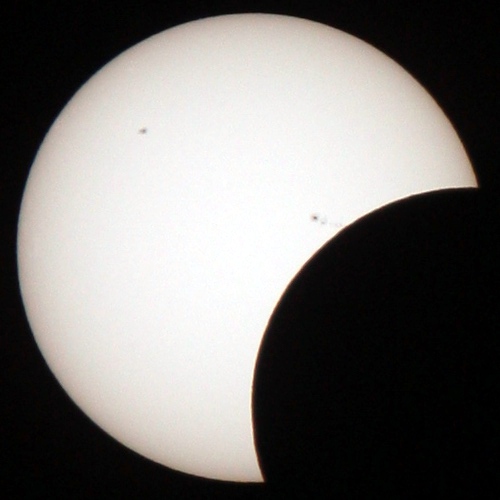
| Here are some partial
annular solar eclipse pics taken on May 20/2012 again
using Baader
solar filter (ND=5.0 for 100000x reduction in light
intensity) from Kendrick
Astro
Instruments. I used a 55-255mm zoom lens on my
Canon T1i DSLR at full magnification, running on top of my
iOptron mount. The trees on
the horizon, and early sunset, prevented the full eclipse
from being recorded. |
 |
 |
 |
| 19:14 Partial annular solar
eclipse starting [8x (250mm) ISO100 @ 1/1000s @ F5.6] |
19:44 Partial annular solar eclipse 25% done 8x (250mm) ISO100 @ 1/1000s @ F5.6] | 20:15 Partial annular solar eclipse 50% done 8x (250mm) ISO100 @ 1/1000s @ F5.6] |
 |
 |
|
| Equipment used: Canon T1i,
255mm zoom, iOptron mount, Baader Film, SmaTrig2,
PowerBox800 |
Simple shot through Nikon
Coolpix 4300 camera at full zoom (24mm = 2.28x) [ISO100 @
1/60s @ F4.9] with Baader Safety Film |
Mini time lapse of the
eclipse -- created with Hugin "align_image_stack" and
FFmpeg |
 |
 |
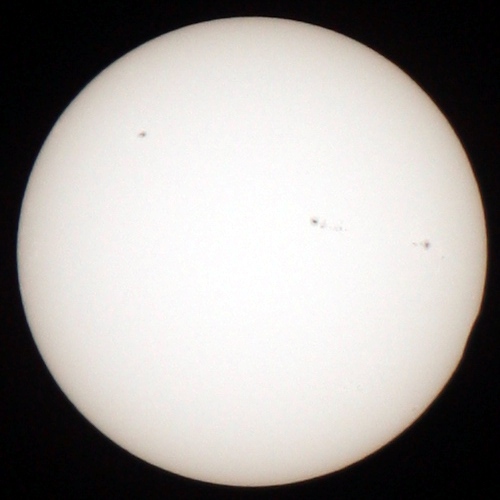
| July 13/2012: Full sun disk using Celestron C90 captured on video from Canon T1i with EOS movrec and stacked with Registax freeware. Video was ISO800 @ 1/25s @ 1232 frames (10% used) frames. | July 13/2012: Full sun disk
using Celestron C90 captured on video from Canon T1i with
EOS
movrec and stacked with Registax
freeware. Video was ISO800 @ 1/20s @ 3663 frames (5%
used) frames. For comparison to below, the Registax
'sharpen' wavelet setting was 0.15. |
 |
 |
 |
 |
 |
| Closeup of Sunspot Group
1520 with Registax sharpen set at 0.10 |
Closeup of Sunspot Group 1520 with Registax sharpen set at 0.11 | Closeup of Sunspot Group 1520 with Registax sharpen set at 0.12 | Closeup of Sunspot Group 1520 with Registax sharpen set at 0.13 | Closeup of Sunspot Group 1520 with Registax sharpen set at 0.14 |
 |
 |
 |
 |
 |
| Closeup of Sunspot Group 1520 with Registax sharpen set at 0.16 | Closeup of Sunspot Group 1520 with Registax sharpen set at 0.17 | Closeup of Sunspot Group 1520 with Registax sharpen set at 0.18 | Closeup of Sunspot Group 1520 with Registax sharpen set at 0.19 | Closeup of Sunspot Group 1520 with Registax sharpen set at 0.20 |
| Here is a sunspot group
image taken on June 14/2012 (Celestron C90) and June
15/2012 (Celestron C8) again using Baader
solar filter (ND=5.0 for 100000x reduction in light
intensity) from Kendrick
Astro
Instruments, comparing my two scopes. Even
though the C8 magnification is 1.6x greater than the C90,
with increased resolution, the smaller C90 actually does a
very good job -- and has the added benefit of showing the
entire disk of the Sun :) |
 |
 |
| June 14/2012: Full sun disk using Celestron C90 captured on video from Canon T1i with EOS movrec and stacked with Avistack freeware. Video was ISO400 @ 1/160s @ 1332 frames (5% used) frames. | Sunspot group 1504 captured using Celestron C90 on video from Canon T1i with EOS movrec and stacked with Avistack freeware. Video was ISO1600 @ 1/800s @ 1870 frames (10% used) frames. |
 |
 |
| June 15/2012: Partial sun disk using Celestron C8 Ultima captured on video from Canon T1i with EOS movrec and stacked with Avistack freeware. Video was ISO1600 @ 1/800 @ 1811 frames (10% used) frames. | Sunspot group 1504 captured using Celestron C8 on video from Canon T1i with EOS movrec and stacked with Avistack freeware. Video was ISO800 @ 1/640s @ 1882 frames (10% used) frames. |
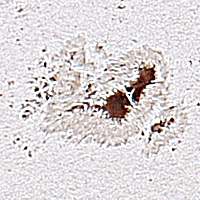
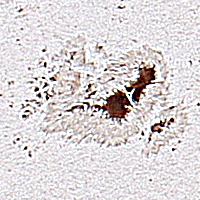
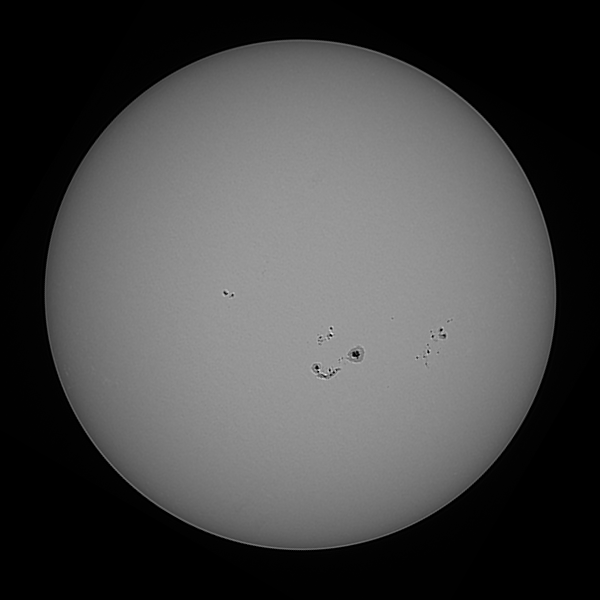
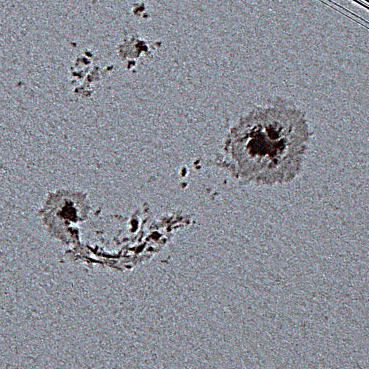
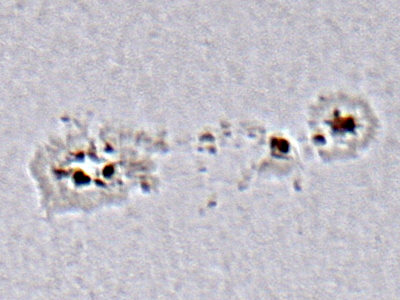
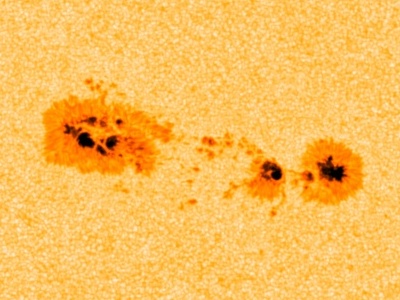
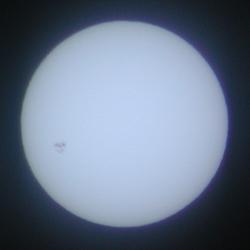
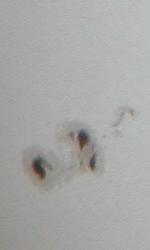
| Here is a sunspot group image taken on May 10/2012 again using Baader solar filter (ND=5.0 for 100000x reduction in light intensity) from Kendrick Astro Instruments, again using my larger 8" Celestron Ultima scope attached to my Canon T1i DSLR. |
 |
 |
| Sunspot group 1476 using
Celestron C8 Ultima captured on video from Canon T1i with
EOS
movrec and stacked with Avistack
freeware. Video was ISO400 @ 1/160s @ 1332 (5% used)
frames. |
Same sunspot from NASA SDO (Solar Dynamics
Observatory) for comparison. |
| Here is a sunspot group image taken on April 20/2012 again using Baader solar filter (ND=5.0 for 100000x reduction in light intensity) from Kendrick Astro Instruments. This time I used my larger 8" Celestron Ultima scope attached to my Canon T1i DSLR. |
 |
 |
| Sunspot group 1460 using
Celestron C8 Ultima captured on video from Canon T1i with
EOS
movrec and stacked with Registax
freeware. Video was ISO800 @ 1/320s @ 1350 frames. |
Same sunspot from NASA SDO (Solar Dynamics
Observatory) for comparison. |
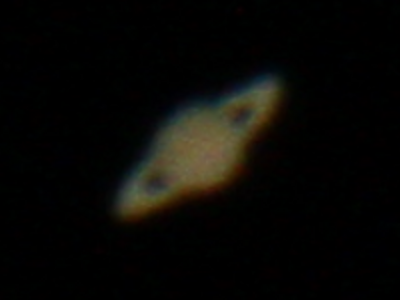
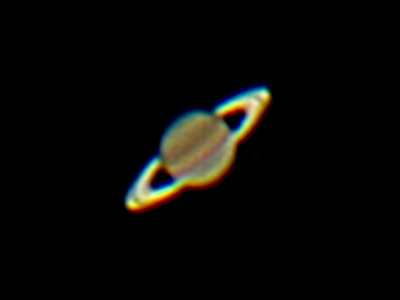
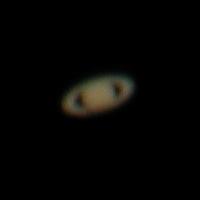
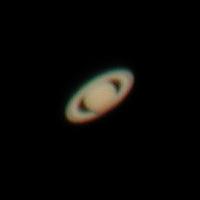
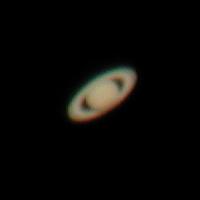
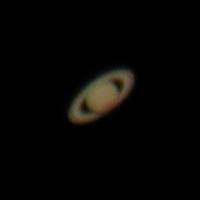
| Here are my attempt, on
2012/04/16, at using a astronomical 'video' with Registax
freeware to see what stacking and wavelet image
enhancement can do a fuzzy Saturn video -- one day after
'opposition' with Earth occurred. I captured the
videos using EOS
movrec, which I could then zoom by 5x. |
 |
 |
|
| Saturn
2032mm-1600iso-1/8s-f/14 before using Registax |
Saturn
2032mm-1600iso-1/8s-f/14 before using Registax
(1056 frames) |
Saturn video
crop 300x200 (1320 frames) |
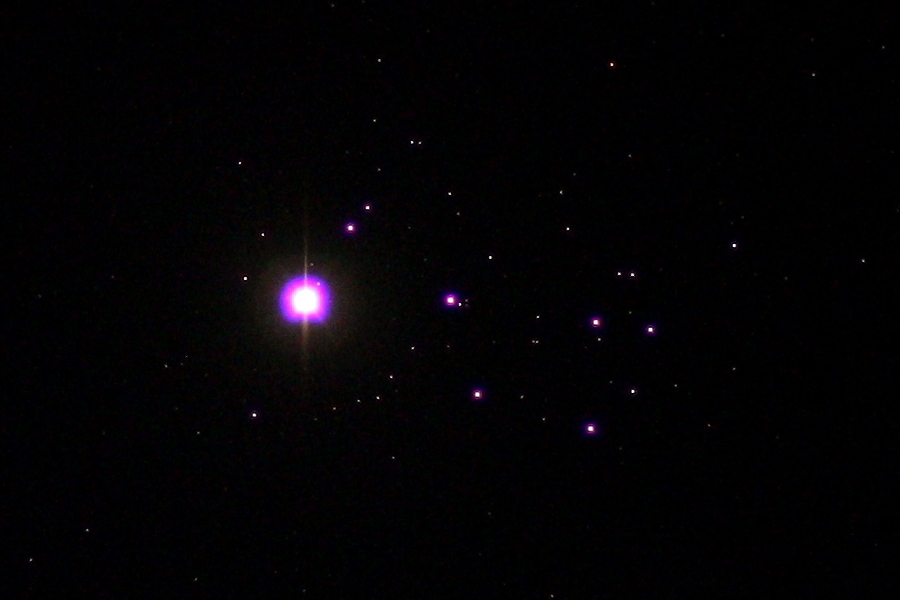
| Here are some quick
one-shot images of the 2012 Venus/Pleiades encounter on
April 3rd: |
 |
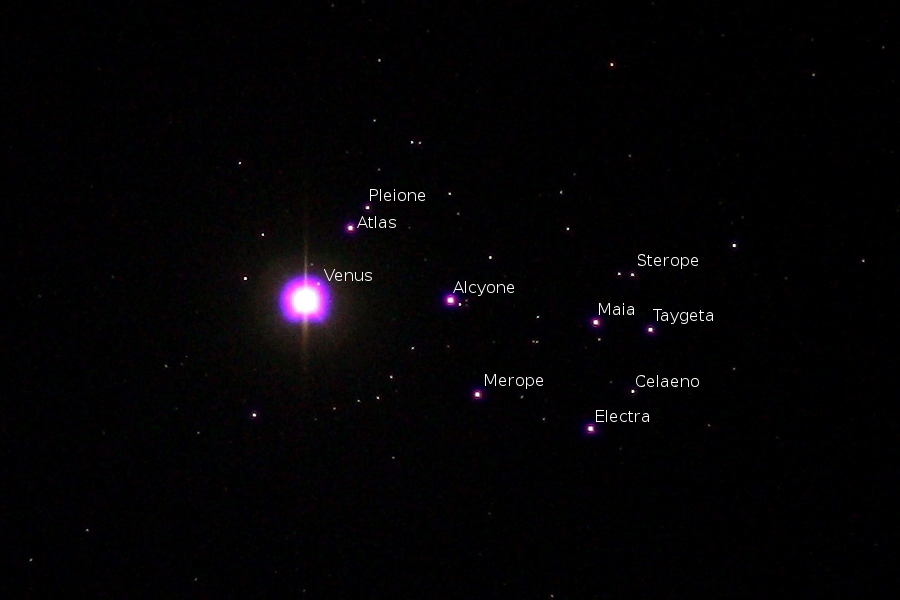 |
| Venus and
M45
(Pleiades/Seven
Sisters) 85mm-800iso-1/2s-f1.4 |
Venus and
M45
(Pleiades/Seven
Sisters) 85mm-800iso-1/2s-f1.4 with captions |
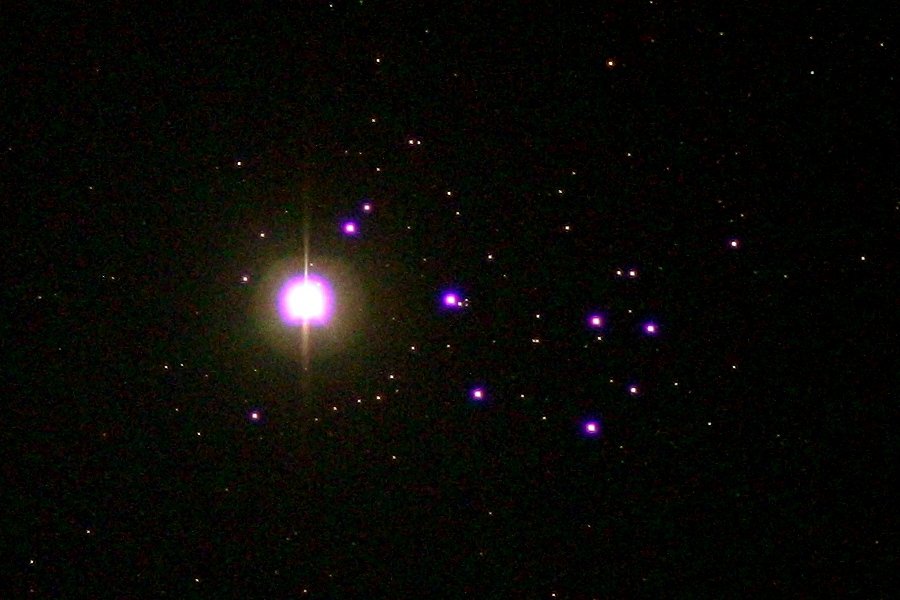 |
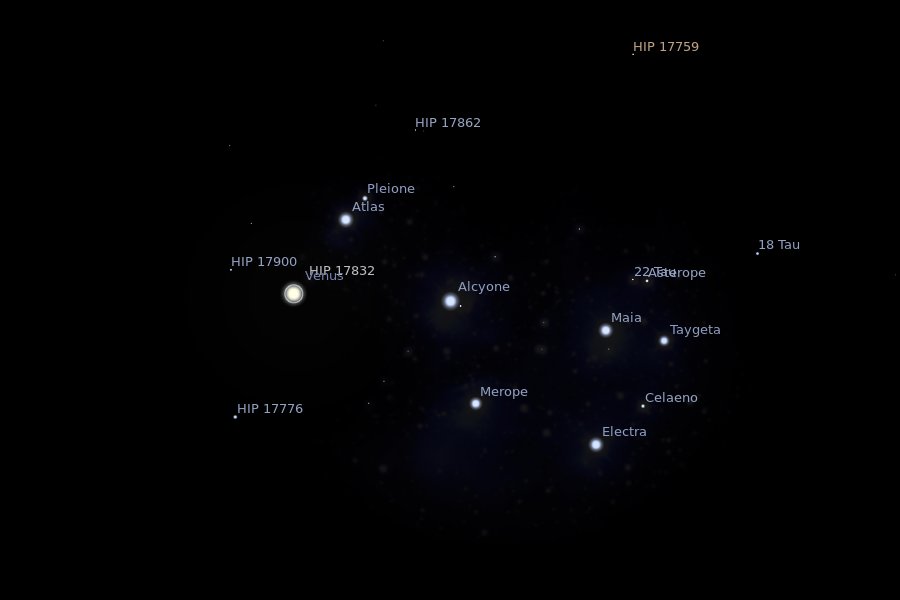 |
| Venus and M45 (Pleiades/Seven Sisters) 85mm-1600iso-1s-f1.4 | Venus and M45 (Pleiades/Seven Sisters) at same time in Stellarium software |
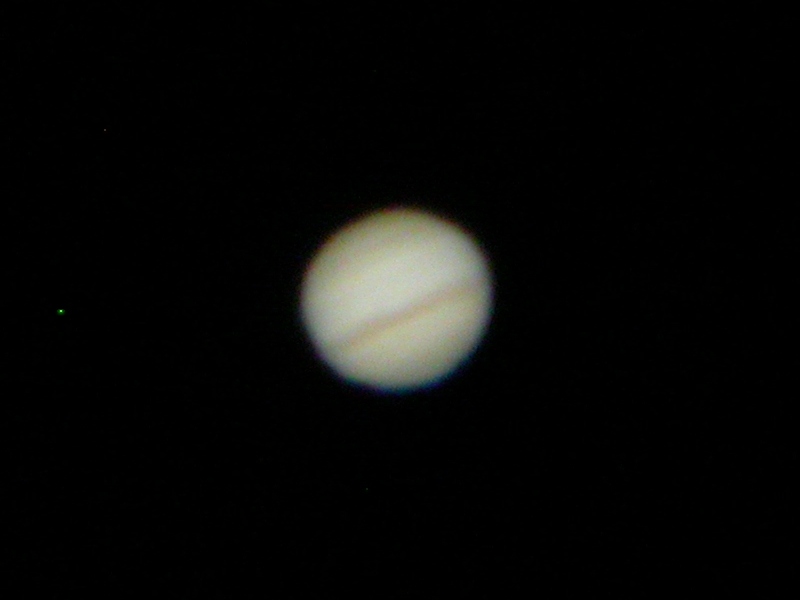
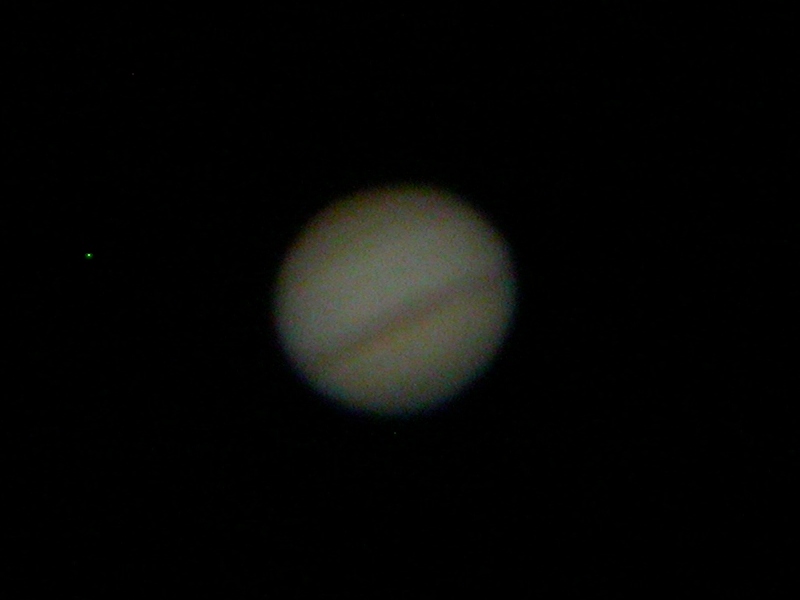
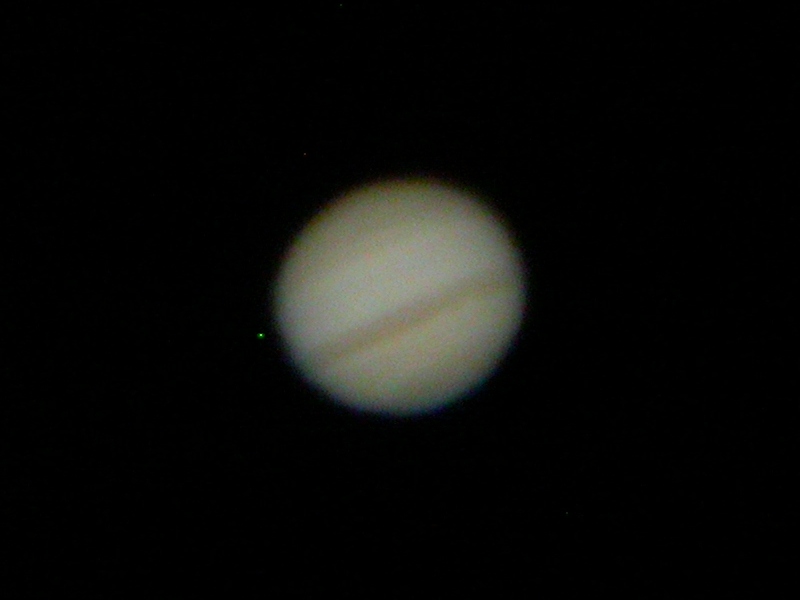
| Here are my first attempt,
on 2011/09/27, at using a astronomical 'video' with Registax
freeware to see what stacking and wavelet image
enhancement can do a fuzzy Jupiter video: |
 |
 |
|
| Jupiter 1250mm-1600iso-1/30s-f/14
before
using
Registax |
Jupiter 1250mm-1600iso-1/30s-f/14
after
using
Registax
(668 frames) |
Jupiter video
crop 200x200 (668 frames) |
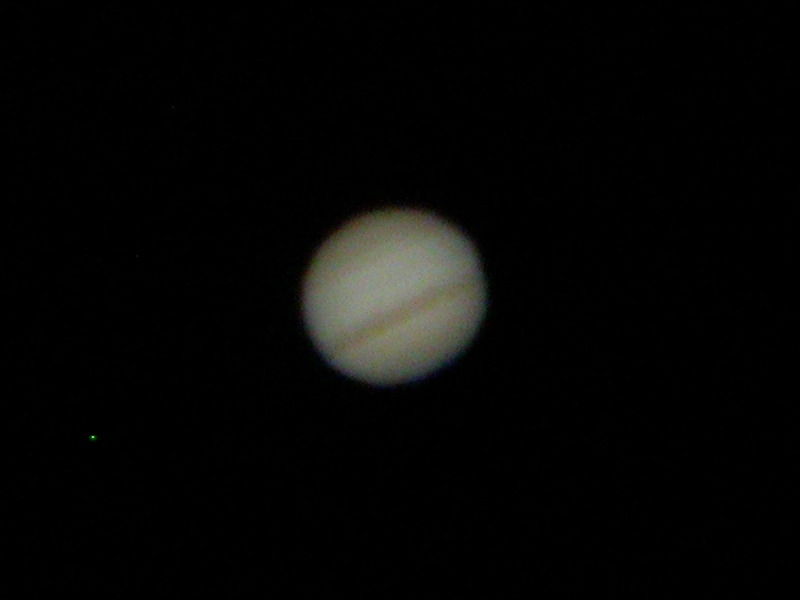
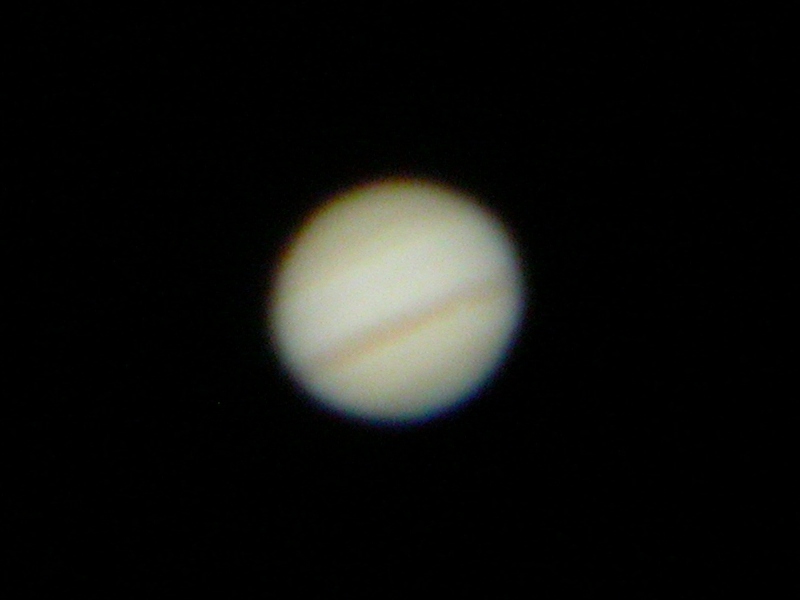
| On the evening of 2011/11/24, temperatures were extremely mild (4.5C) and so I tried again for Jupiter on the C90 scope, comparing the same view to that of Stellarium. |
 |
 |
| Jupiter
1250mm-800iso-1/10s-f/14 after Registax |
Jupiter
at same time in Stellarium
software |
| Here are my first attempt,
on 2011/08/14, at using a astronomical 'video' with Avistack
freeware to see what stacking and wavelet image
enhancement can do a simple Moon video (which can be found
on YouTube): |
 |
 |
| Moon 1250mm before using Avistack (18 frames) | Moon 1250mm
after using Avistack
(18 frames) |
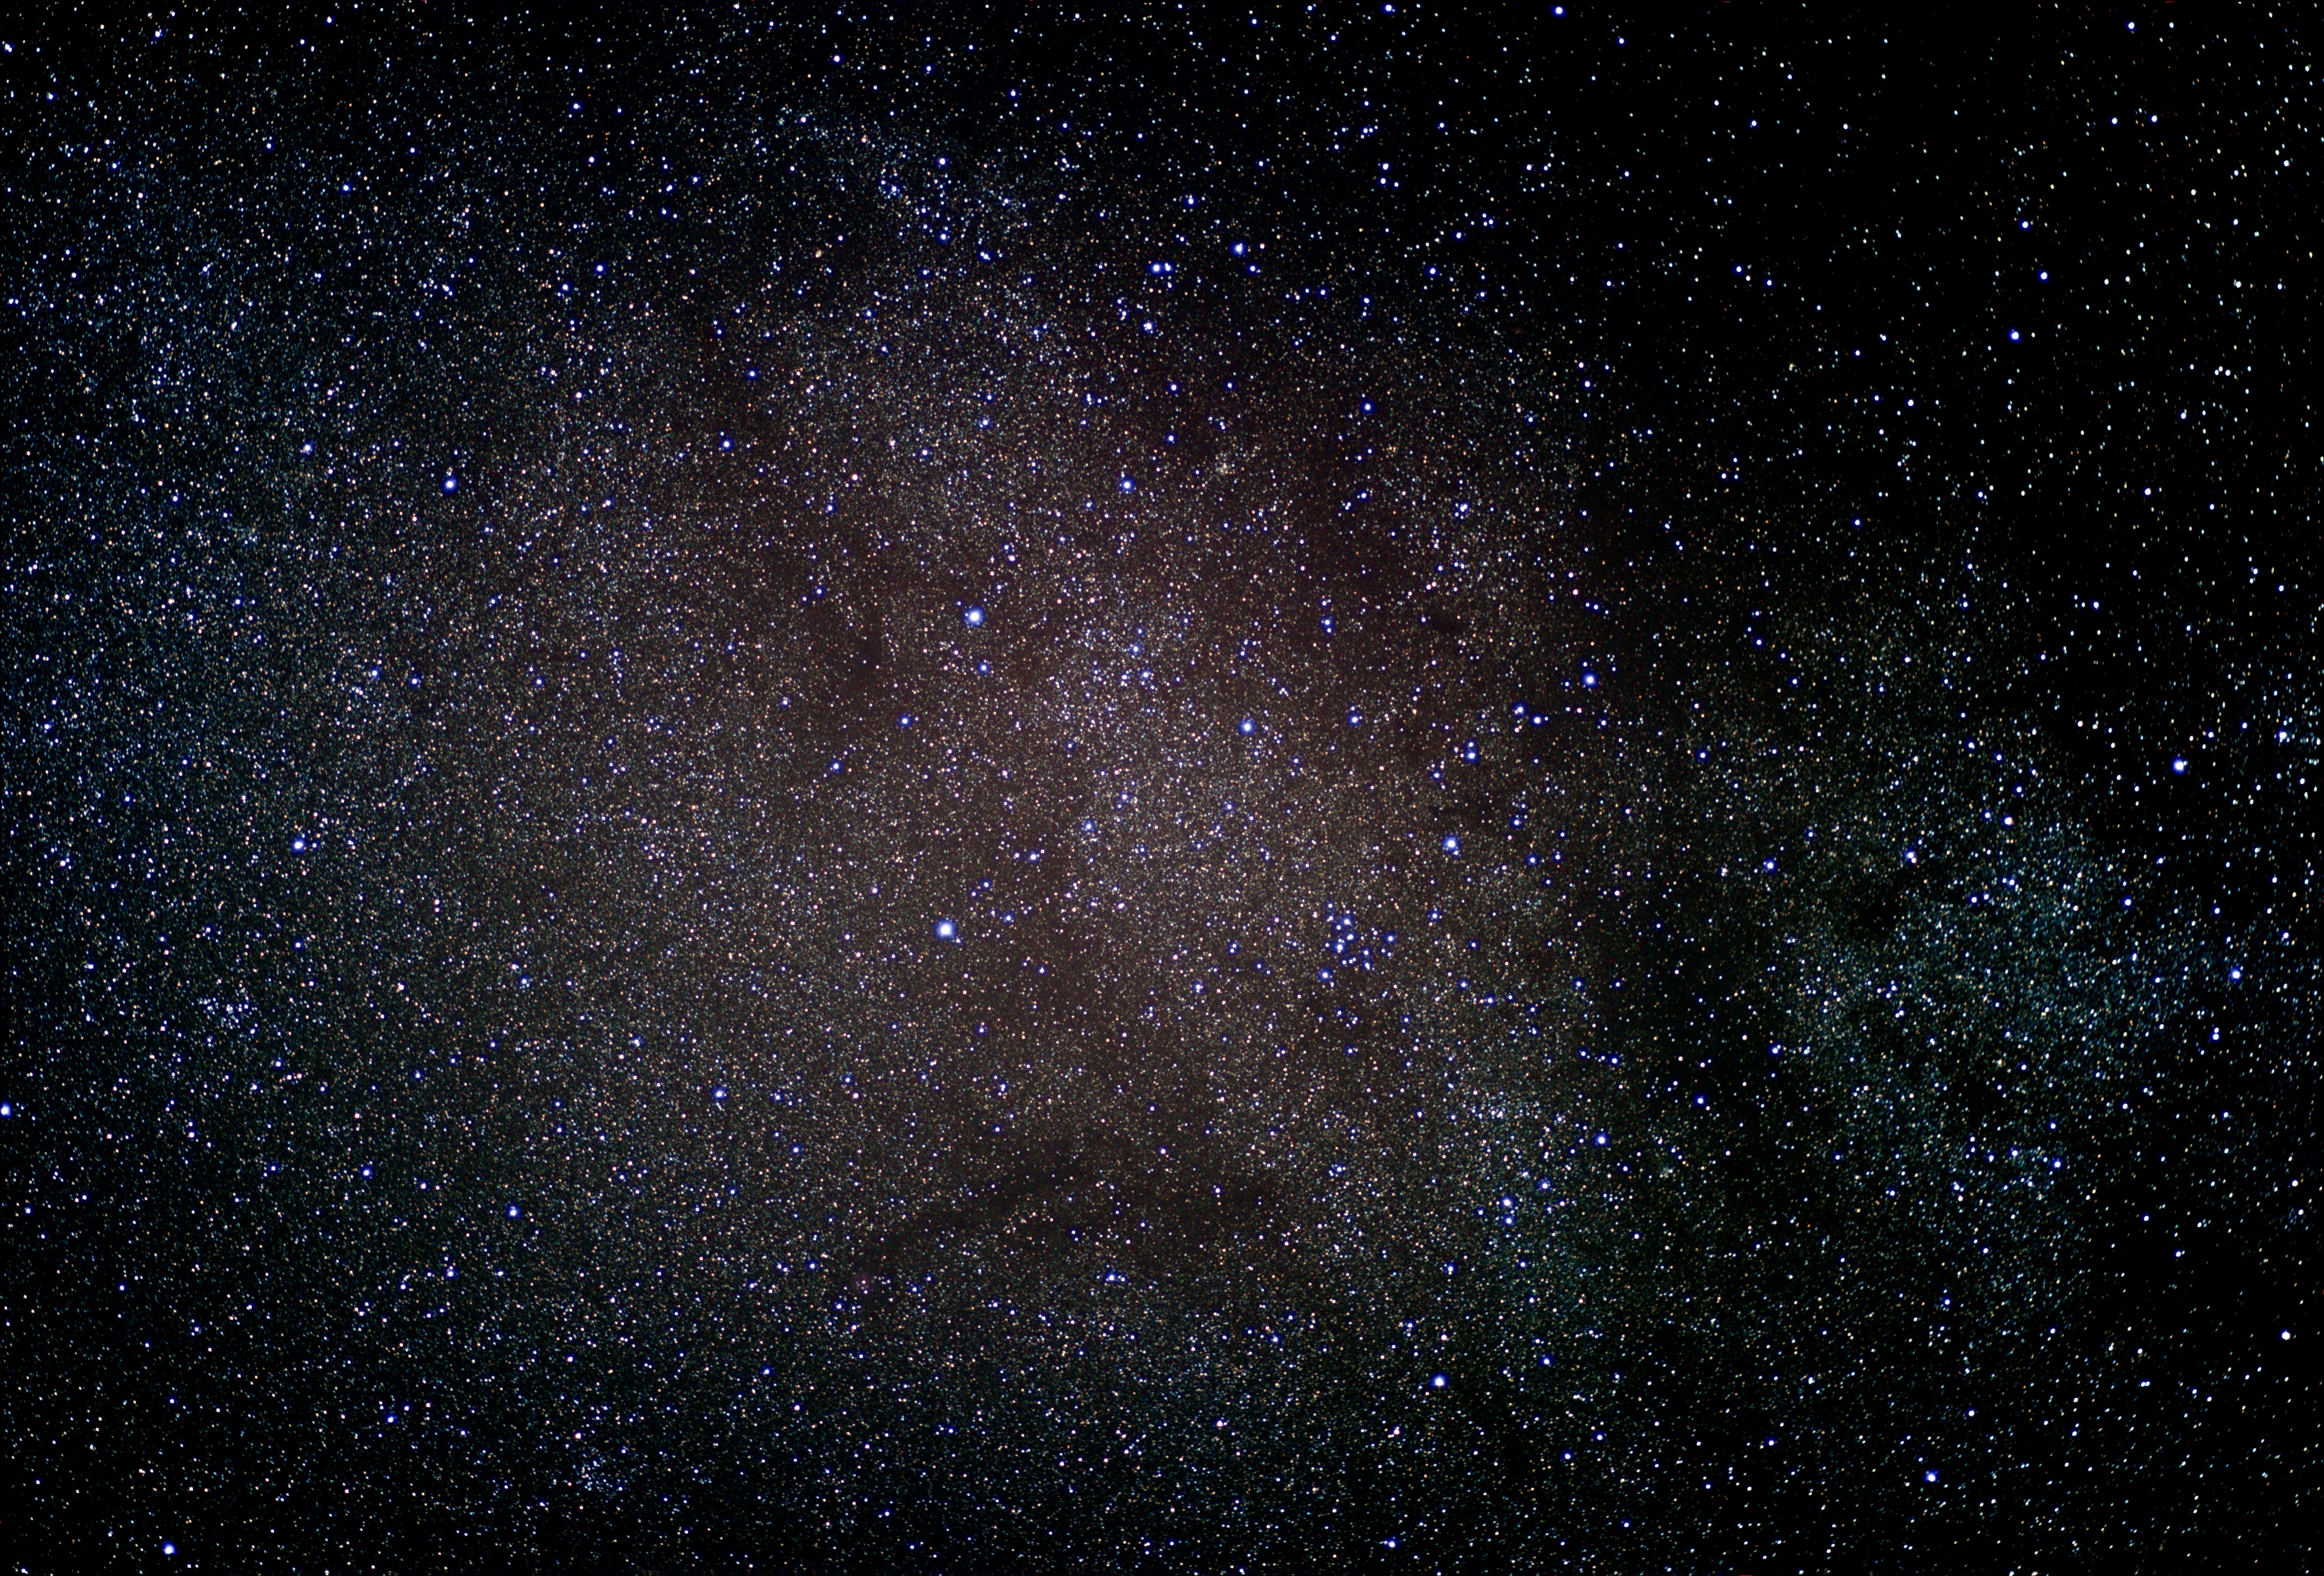
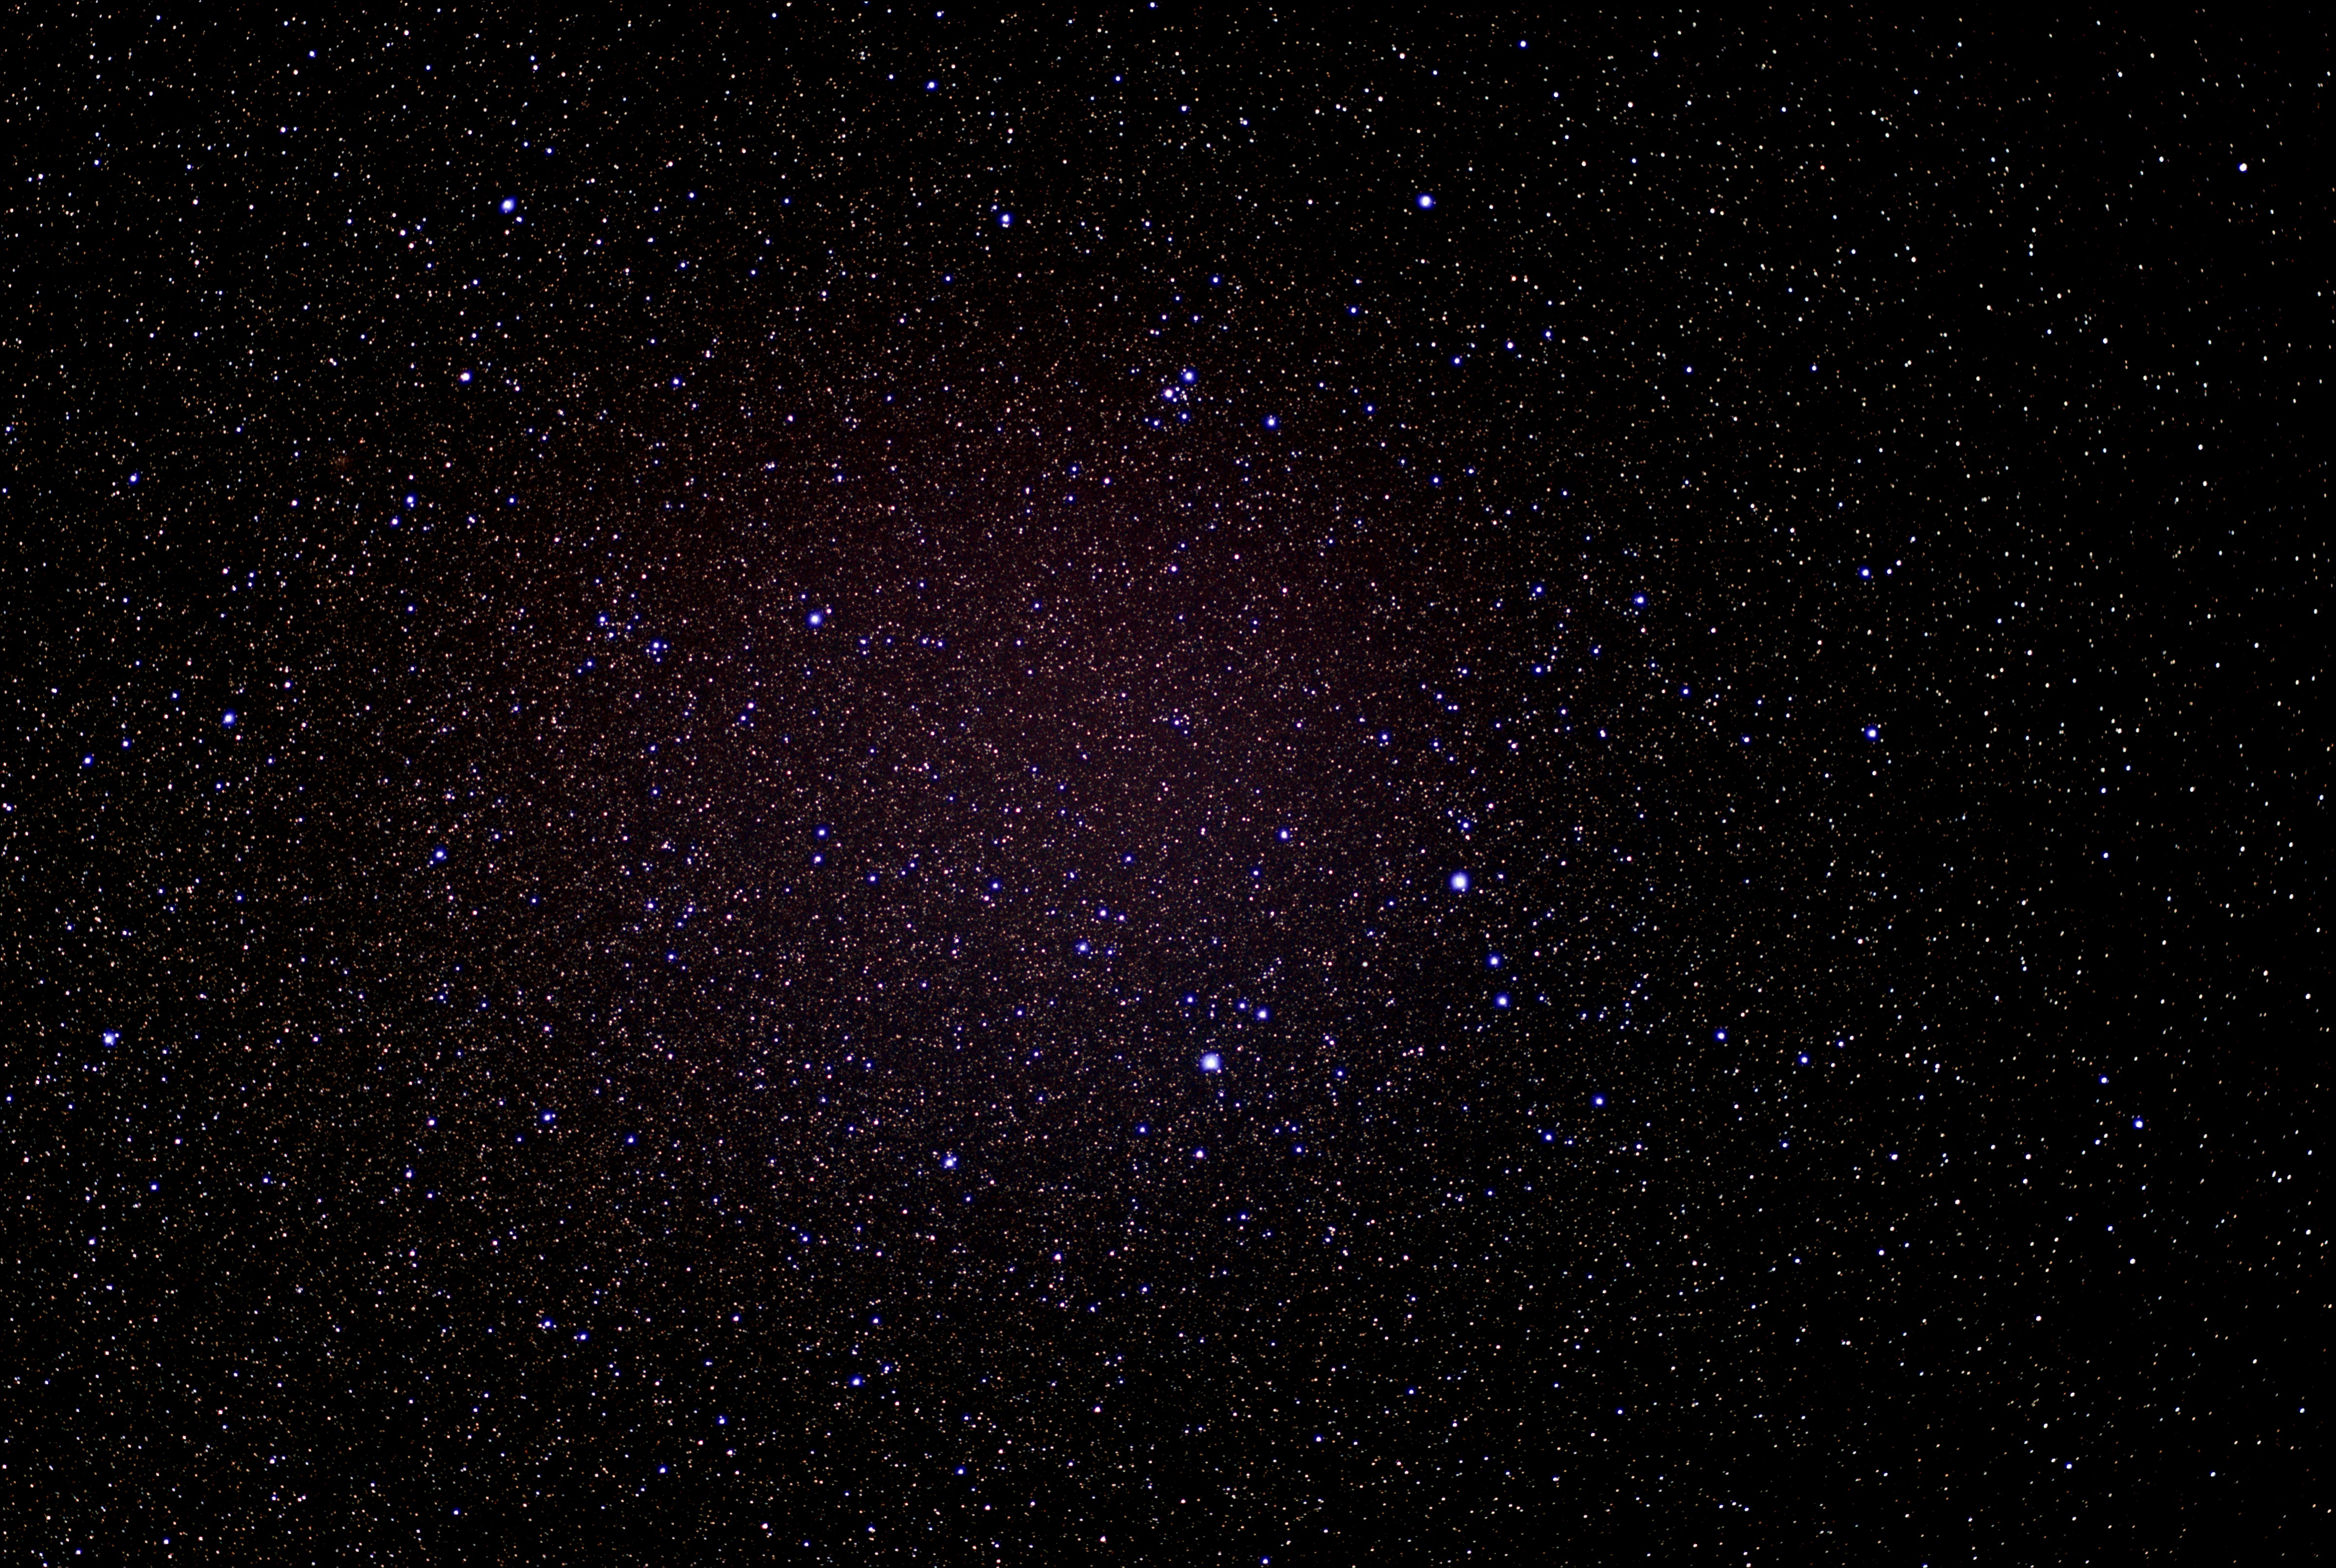
| Here are my first serious
astrophotography experiments with 'stacking'
multiple exposures of the same sky images to increase
contrast and reduce exposure noise. |
 |
 |
 |
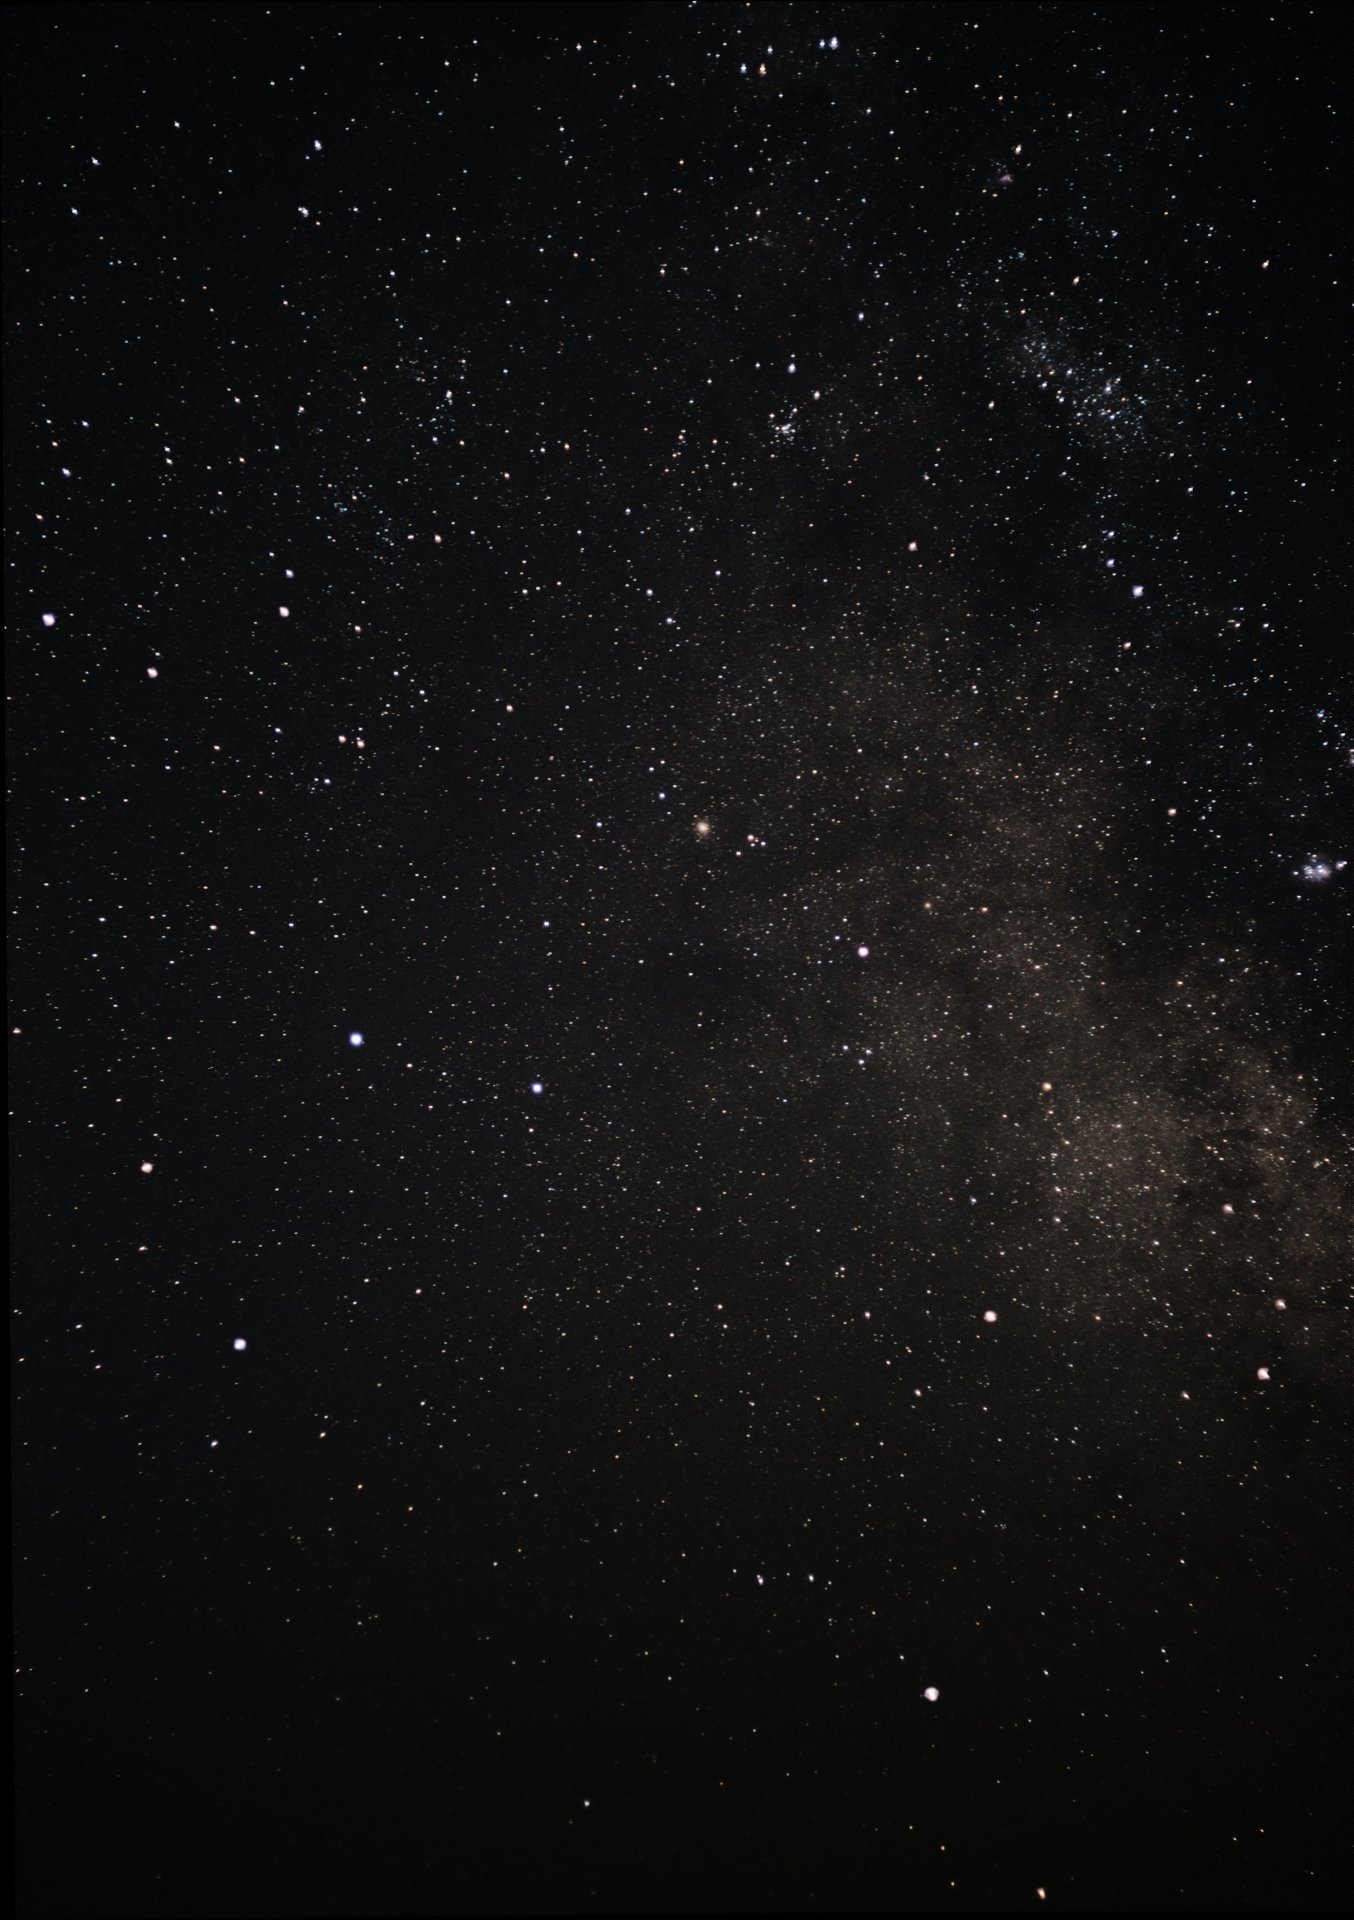
| Cassiopeia
50mm-3200iso-8s-f/1.7 |
Cygnus/Sagitta 50mm-3200iso-8s-f/1.7 | Milky Way
at Sagittarius
8mm-3200iso-30s-f/5.6 |
 |
 |
 |
| Sagittarius 55mm-3200iso-8s-f/1.8 | Sagittarius
55mm-3200iso-8s-f/1.8 |
Ursa Major 55mm-3200iso-8s-f/1.8 |
 |
 |
 |
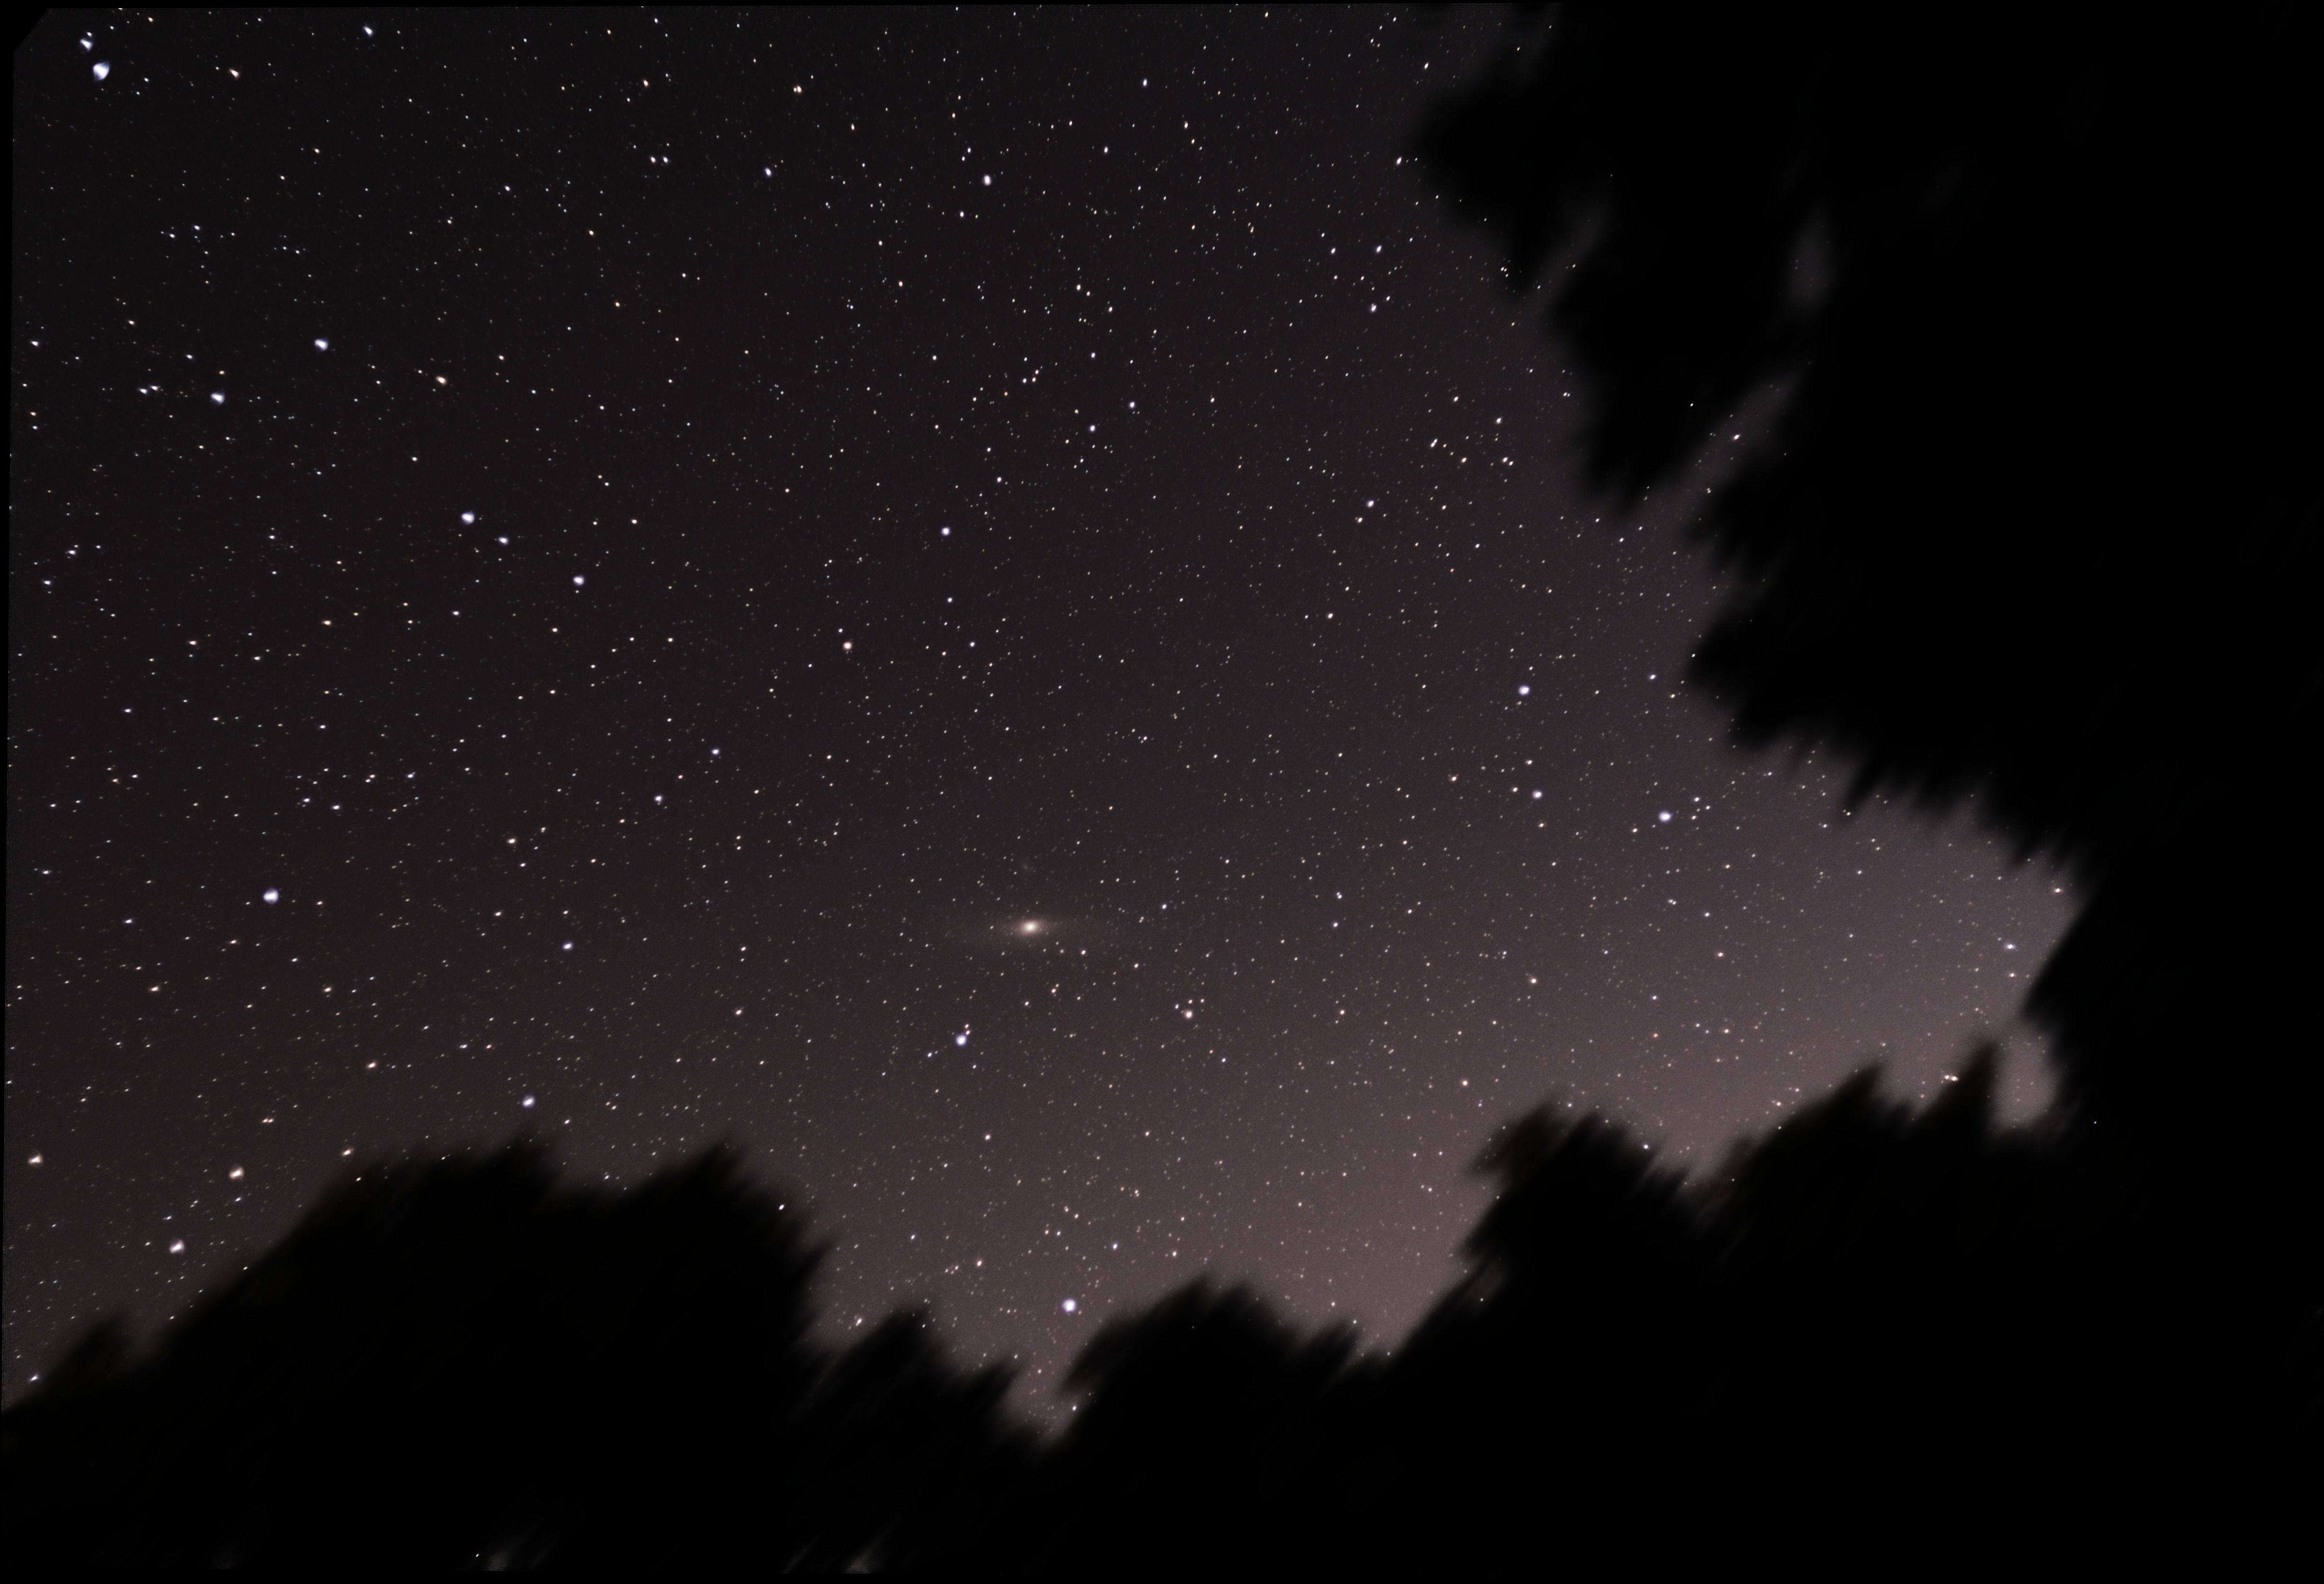
| Andromeda
55mm-3200iso-8s-f/1.8 |
Andromeda 100mm-3200iso-8s-f/5.0 | Andromeda
55mm-3200iso-4s-f/1.8 |
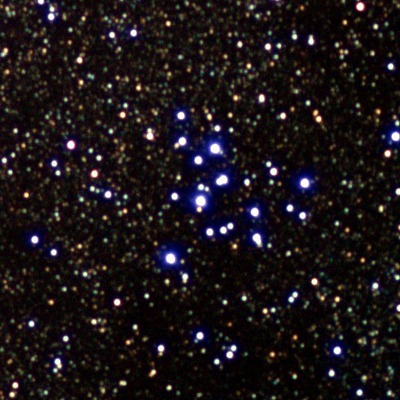
| Here are my first serious
astrophotography experiments with 'stacking'
multiple exposures of the same sky images to increase
contrast and reduce exposure noise and 'tracking'
to reduce star trailing using a motorized telescope mount
(in this case, the iOptron SmartStar-A). |
 |
 |
 |
| Cygnus 55mm-3200iso-30s-f/1.8 | Cygnus
55mm-3200iso-30s-f/1.8 zoom (M39!) |
Cygnus
55mm-3200iso-30s-f/1.8 zoom unsharp mask (M39!) |
 |
 |
 |
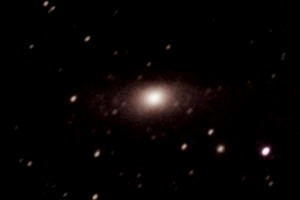
| Andromeda 55mm-800iso-60s-f/1.8 | Andromeda
55mm-800iso-60s-f/1.8 zoom (M31
& M32
& M110!) |
Andromeda 55mm-800iso-60s-f/1.8 zoom unsharp mask (M31 & M32 & M110!) |
 |
 |
 |
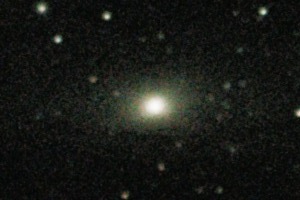
| Andromeda 55mm-1600iso-60s-f/1.7 | Andromeda
55mm-1600iso-60s-f/1.7 zoom (M31
& M32
& M110!) |
Andromeda 55mm-1600iso-60s-f/1.7 zoom unsharp mask (M31 & M32 & M110!) |
 |
 |
 |
| Ursa
Major 55mm-1600iso-60s-f/1.7 |
Ursa
Major 55mm-1600iso-60s-f/1.7 zoom (M101
& Supernova
2011fe!) |
Ursa Major 55mm-1600iso-60s-f/1.7 zoom unsharp mask (M101 & Supernova 2011fe!) |
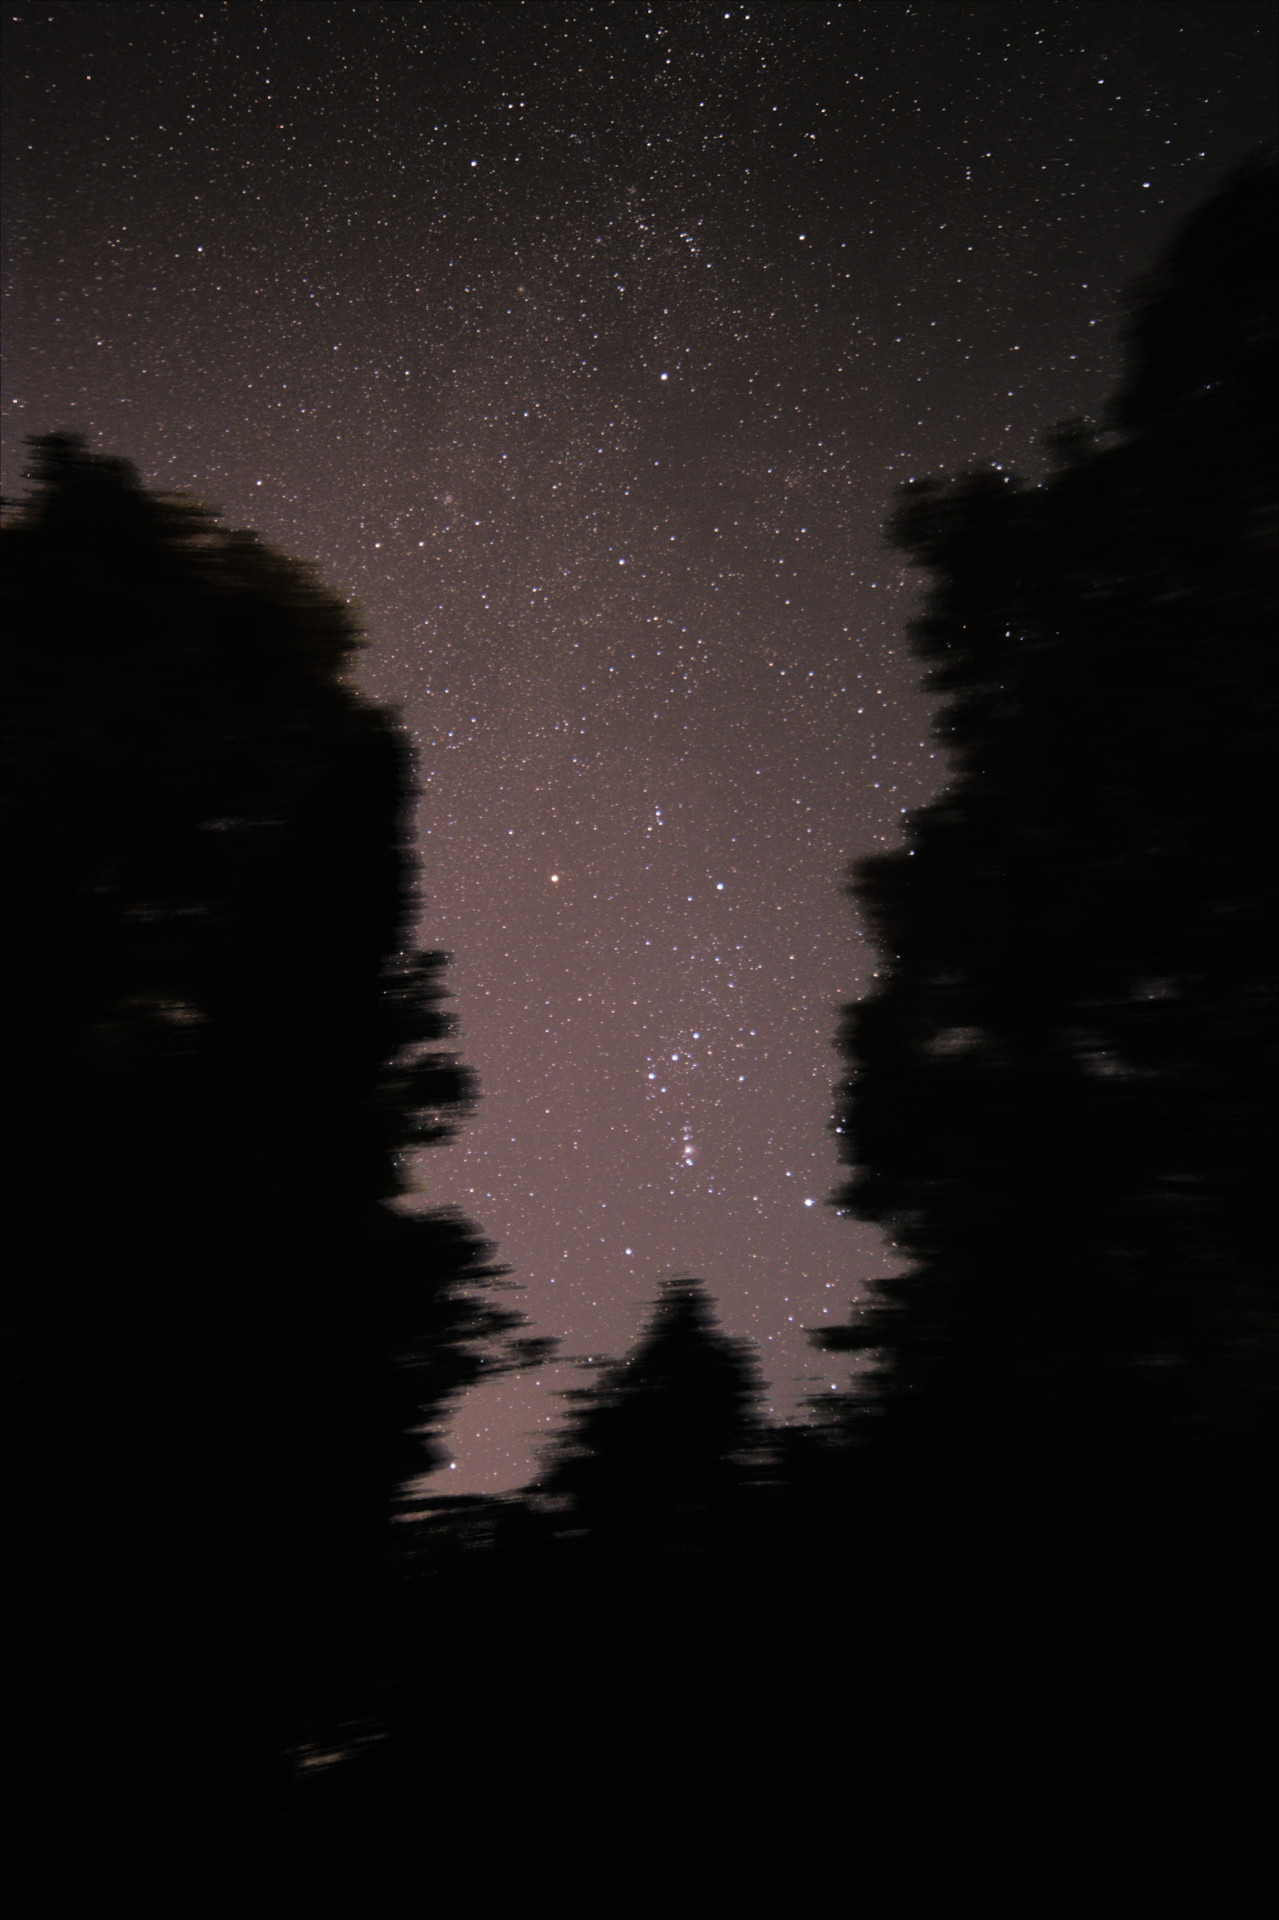
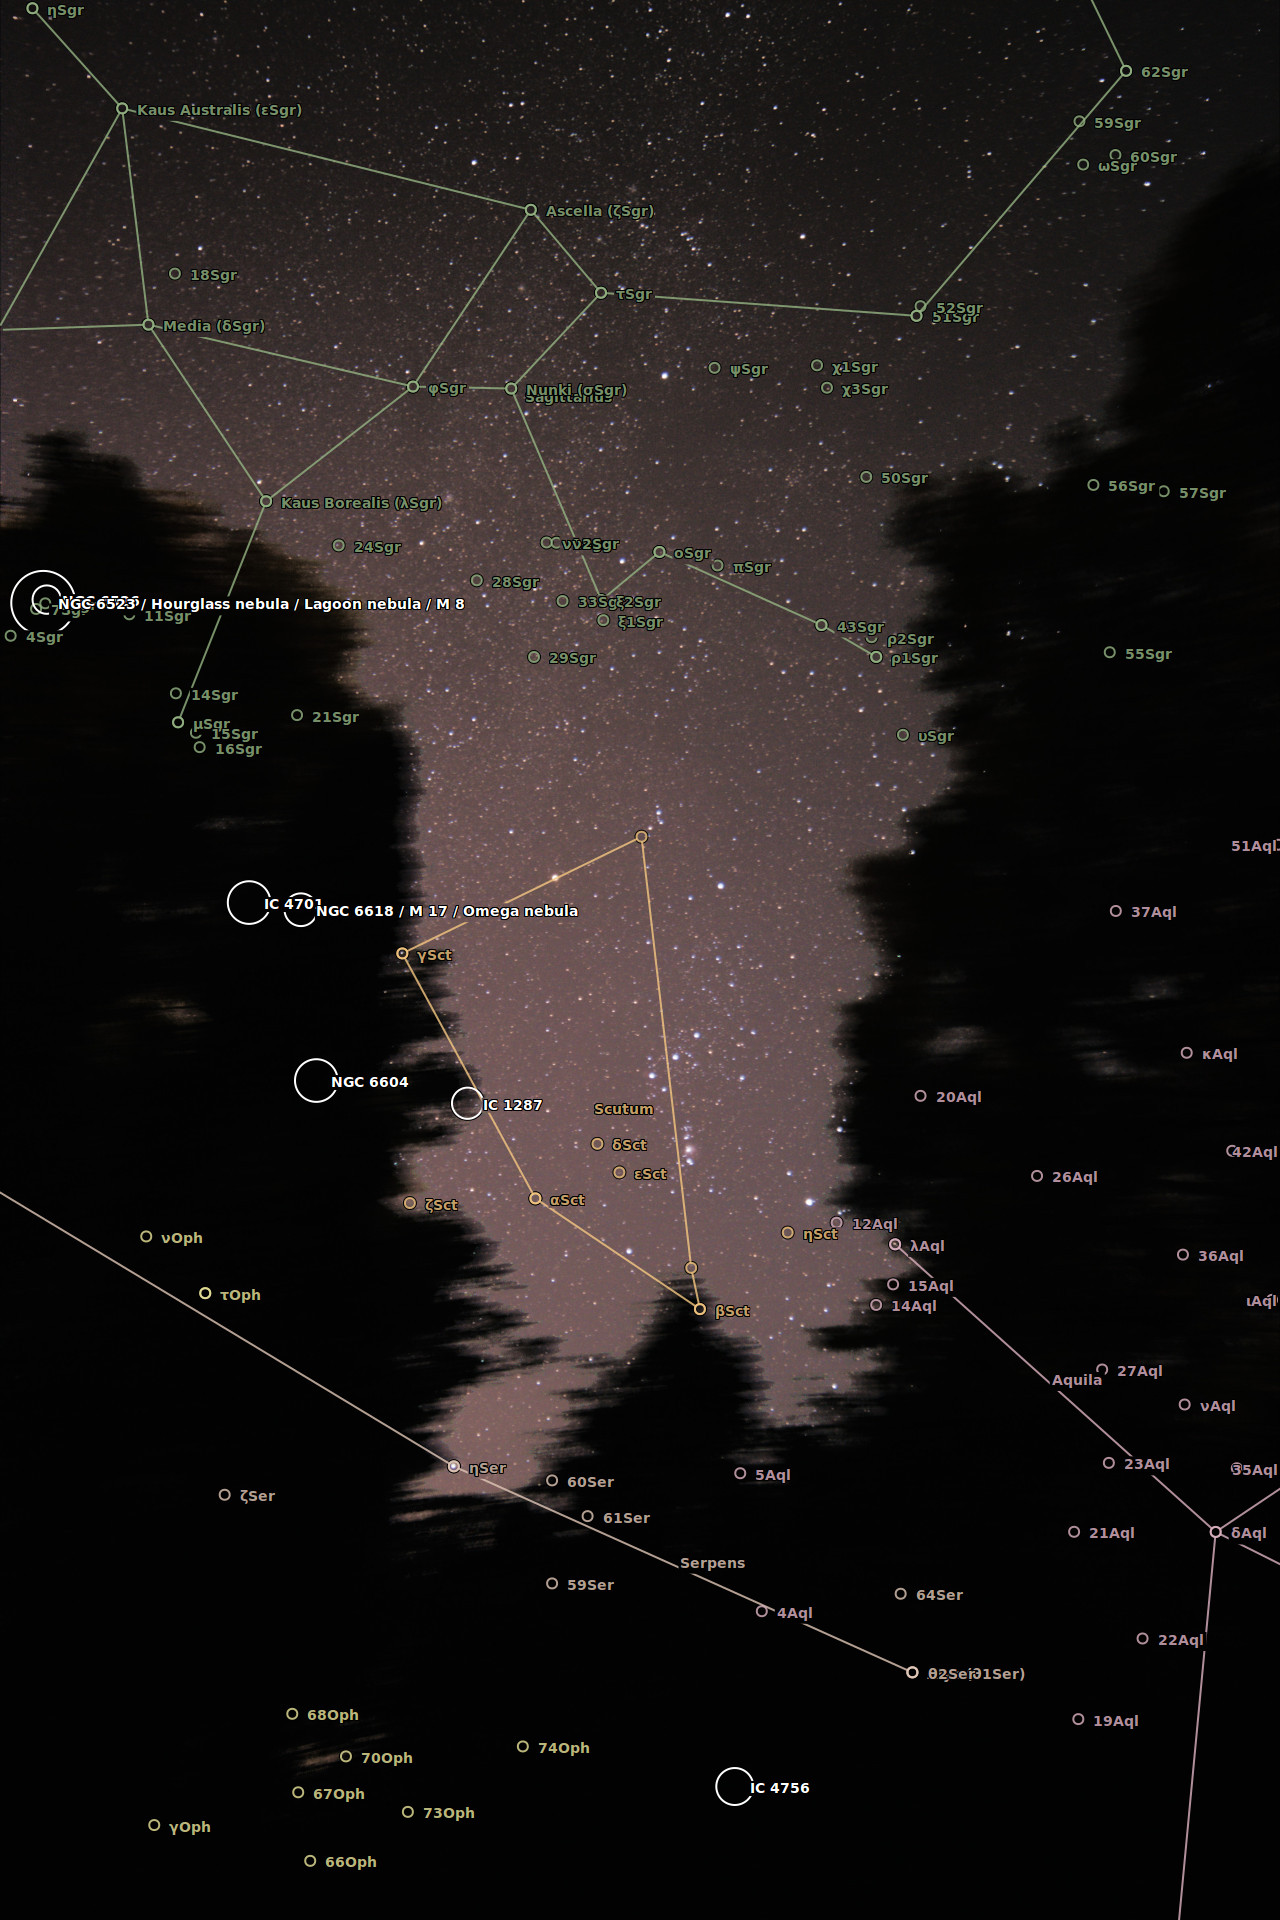
| Here are some images showing the progression of image edits on a 2011/09/22 astrophoto of M8 (Lagoon Nebula), M20 (Trifid Nebula), and M21 (NGC 6351) using my new Samyang 85mm F/1.4 prime lens: |
 |
 |
 |
| Sagittarius
85mm-1600iso-60s-f/1.4 after stacking and basic
RGB/saturation adjustments but before any other processing |
Sagittarius
85mm-1600iso-60s-f/1.4 after levels/curves adjusting in
GIMP |
Sagittarius 85mm-1600iso-60s-f/1.4 after levels/curves adjusting in GIMP crop for just M8 (Lagoon Nebula) and M20 (Trifid Nebula) |
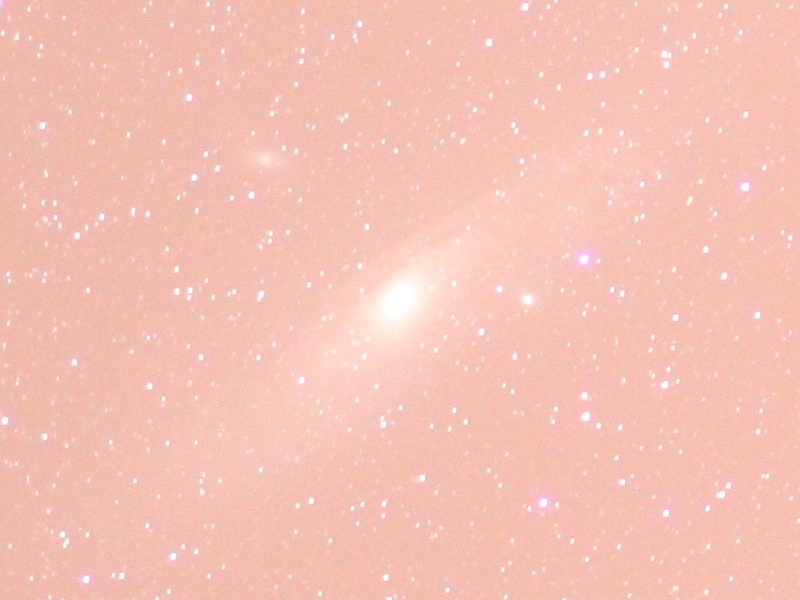
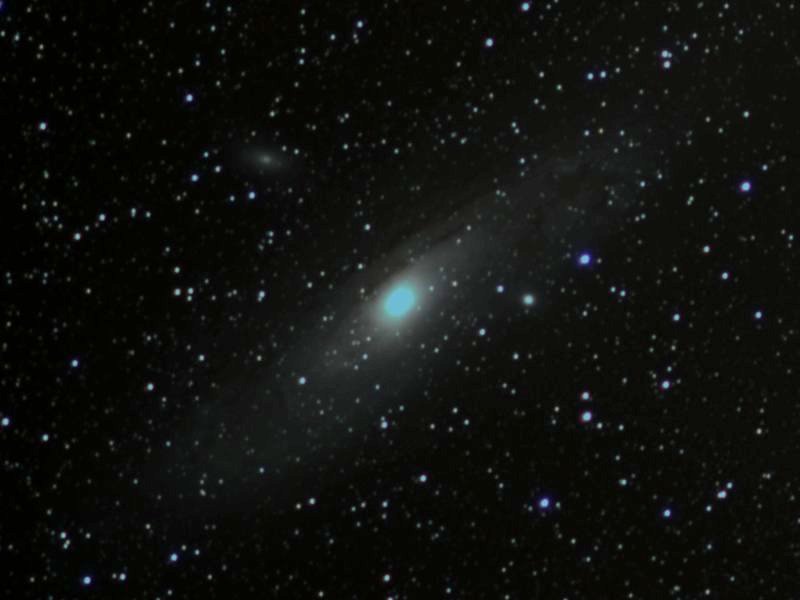
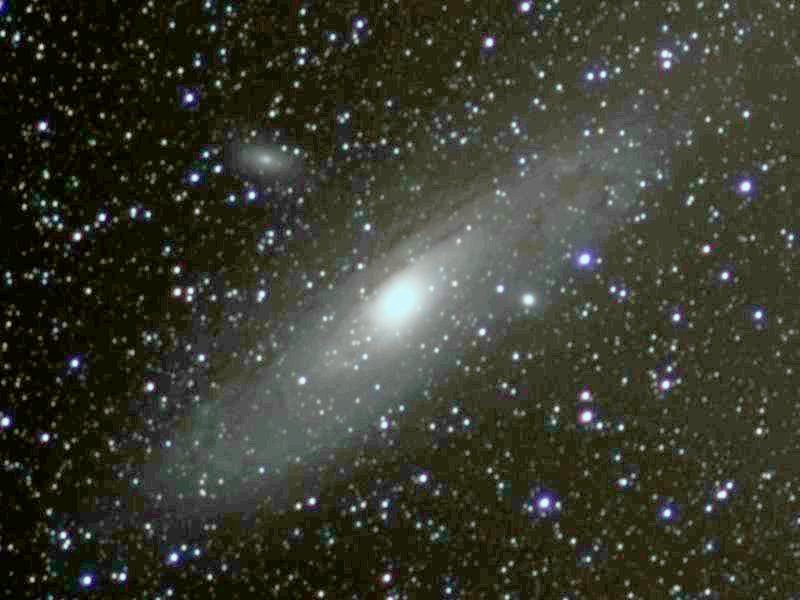
| Here are some images showing the progression of image edits on a 2011/09/22 astrophoto of M31 (Andromeda Galaxy) using my new Samyang 85mm F/1.4 prime lens: |
 |
 |
 |
| Single image of M31
85mm-1600iso-60s-f/1.4 (note intentional overexposure). |
Stacked image (90 light/30
dark) of M31
85mm-1600iso-60s-f/1.4 after RGB color alignment (note
shift to grey hue). |
Stacked image (90 light/30
dark) of M31
85mm-1600iso-60s-f/1.4 after color level shift on dark
side (note increased contrast). |
 |
 |
 |
| Stacked image (90 light/30
dark) of M31
85mm-1600iso-60s-f/1.4 after color curves adjustment (note
nebulosity increase). |
Stacked image (90 light/30
dark) of M31
85mm-1600iso-60s-f/1.4 after(again) a color level shift on
dark side (note increased contrast). |
Stacked image (90 light/30
dark) of M31
85mm-1600iso-60s-f/1.4 after unsharp filter tweaking (note
artificial sharpness increase). |
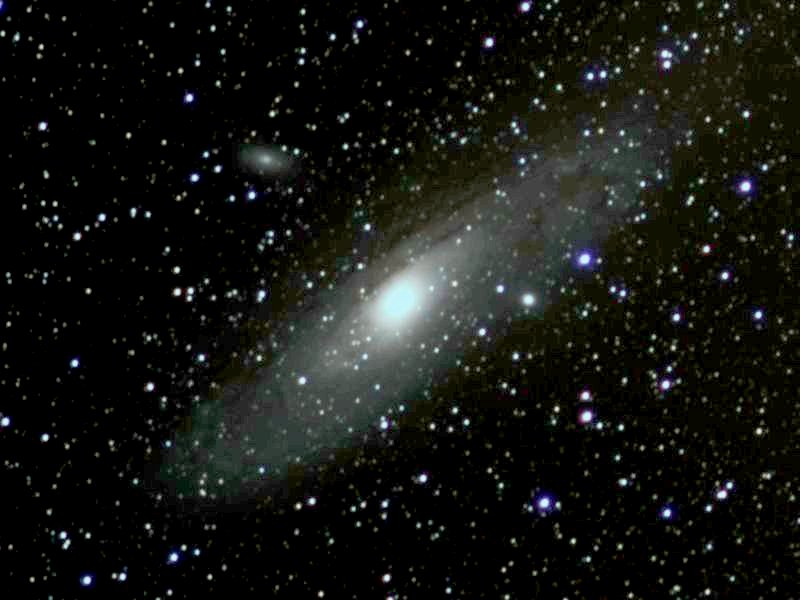
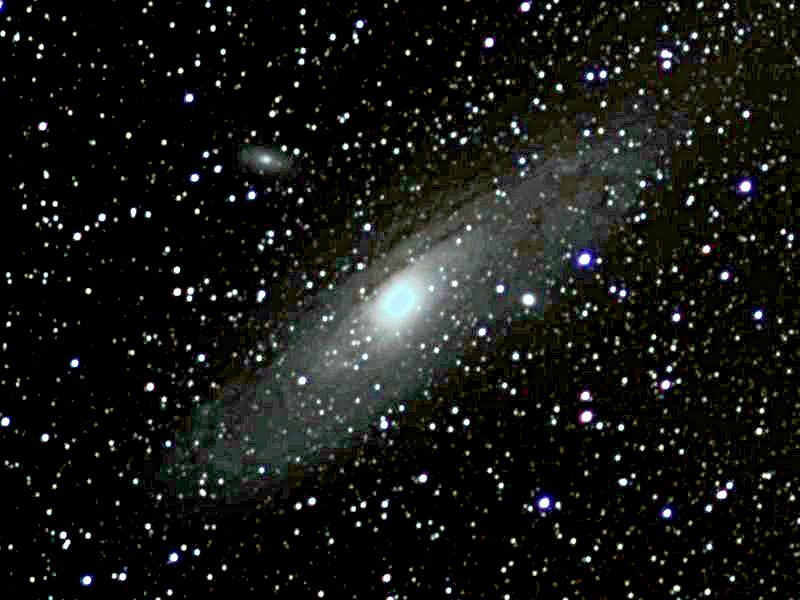
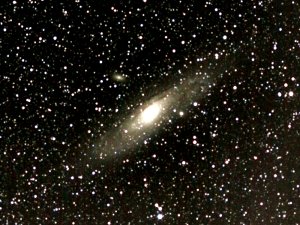
| The progression (so far) with my ability to image M31 (Andromeda Galaxy): |
|
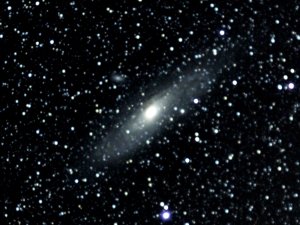 |
| M31
3200iso 55mm 8s single shot |
M31
800iso 55mm 60s stacked shot |
 |
 |
| M31 1600iso 55mm 60s stacked shot | M31 1600iso 85mm 60s stacked shot |
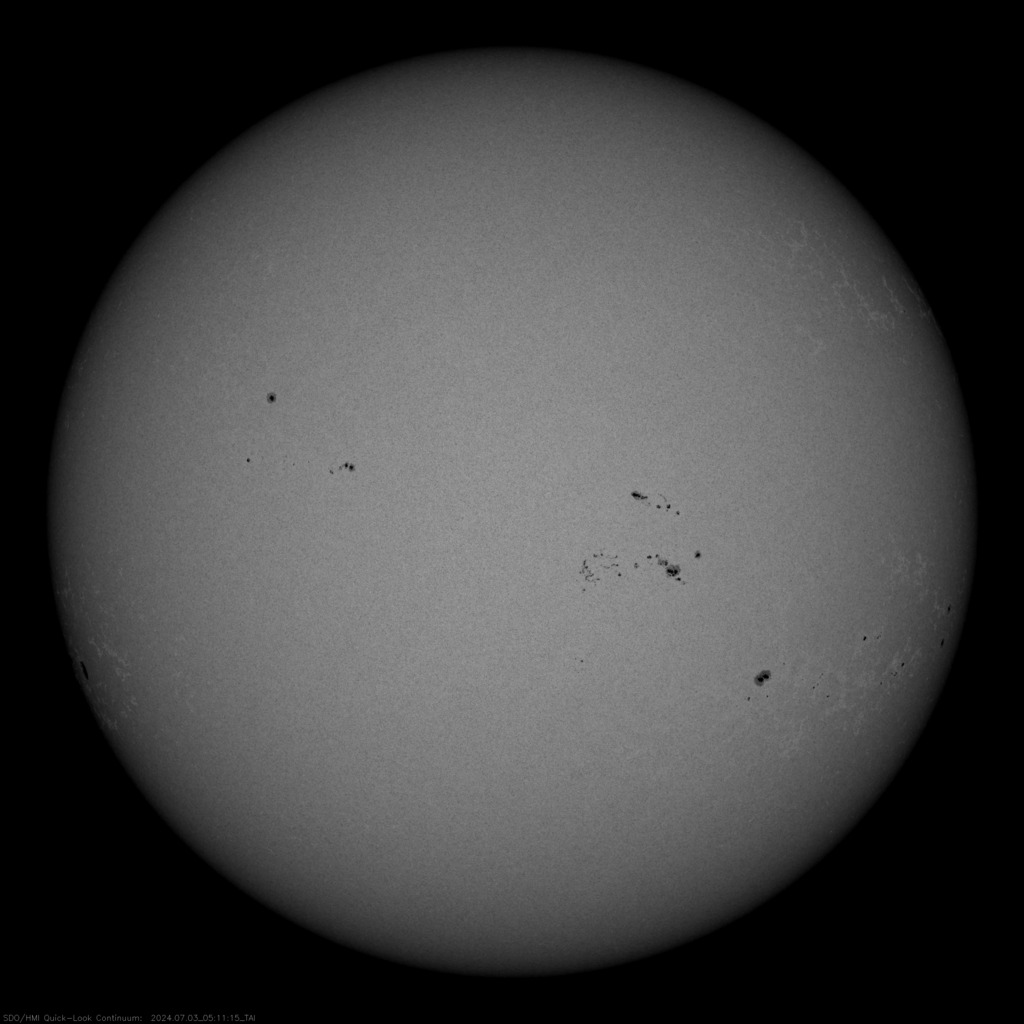
| Here is an image of the Sun
taken on August 2/2011 again using Baader
solar filter (ND=5.0 for 100000x reduction in light
intensity) from Kendrick
Astro
Instruments. However, this time I used my
smaller 90mm Celestron C90 scope attached to my Canon T1i
DSLR. |
 |
 |
 |
| Sun 40x 1250mm-400iso-1/800s-f/13.89 | Closeup of sunspot group
1261 |
Closeup of sunspot group 1263 |
| Here is a newer image of the Sun taken on September 26/2011 again using Baader solar filter (ND=5.0 for 100000x reduction in light intensity) from Kendrick Astro Instruments. This time I used captured a video using EOS movrec, and did some image processing enhancement using Registax: |
 |
 |
|
| Sun 40x 1250mm-1600iso-1/500s-f/13.89 before using Registax | Sun 40x 1250mm-1600iso-1/500s-f/13.89 after using Registax (1757 frames) | Sun video (1757 frames) |
 |
 |
|
| Closeup of sunspot group
1302 1250mm-400iso-1/125s-f/13.89 before using Registax |
Closeup of sunspot group
1302 1250mm-400iso-1/125s-f/13.89 after Registax (1843
frames) |
Sunspot 1302 video (1843
frames) |
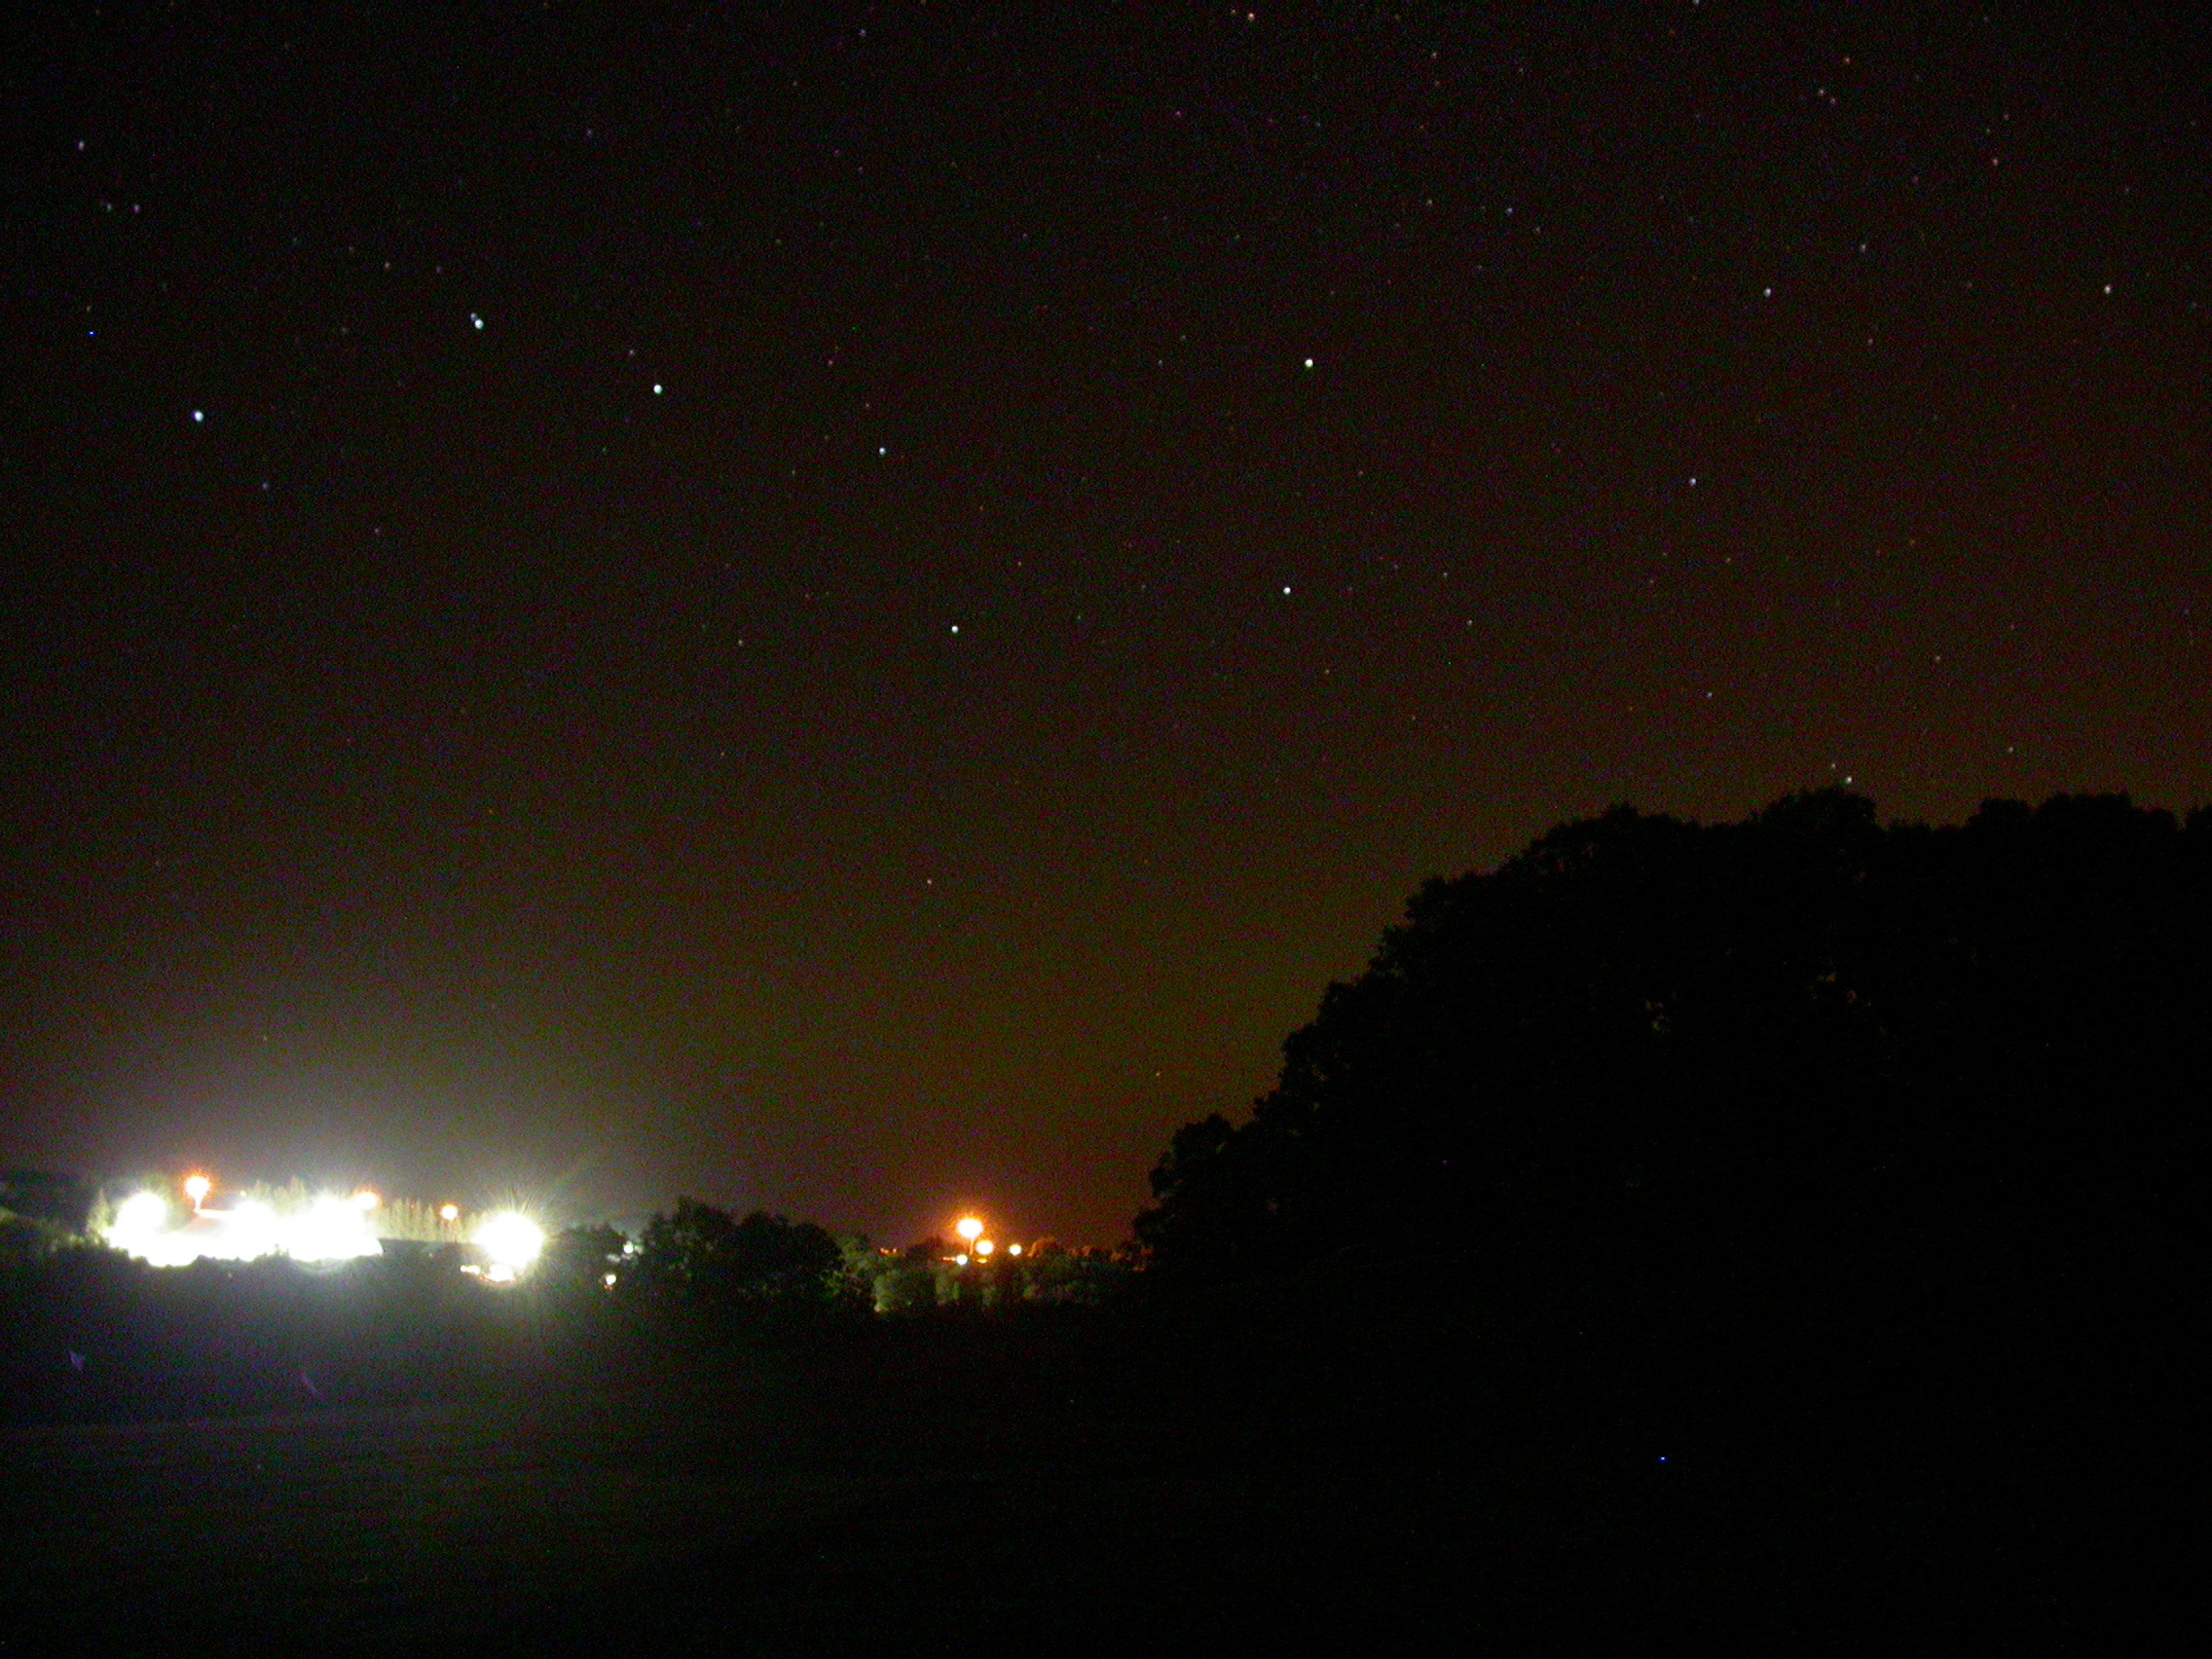
| Here are some fisheye 'time
lapse' videos that I created during the summer of 2010
using both my older Nikon Coolpix 4300 and newer Canon T1i
camera: |
| Here are some pictures that
I took of the planet Uranus (for the 1st time in my life!)
on the evening of September 27th. Uranus was 19.096 AU (2856723408 km) from the Earth. |
 |
 |
 |
| Uranus 1/8 s f2.6 ISO 400
8mm (112x magnification) |
Uranus 1/4 s f2.6 ISO 400
8mm (112x magnification) |
Uranus 1/4 s f4.4 ISO 400
25mm (350x magnification) |
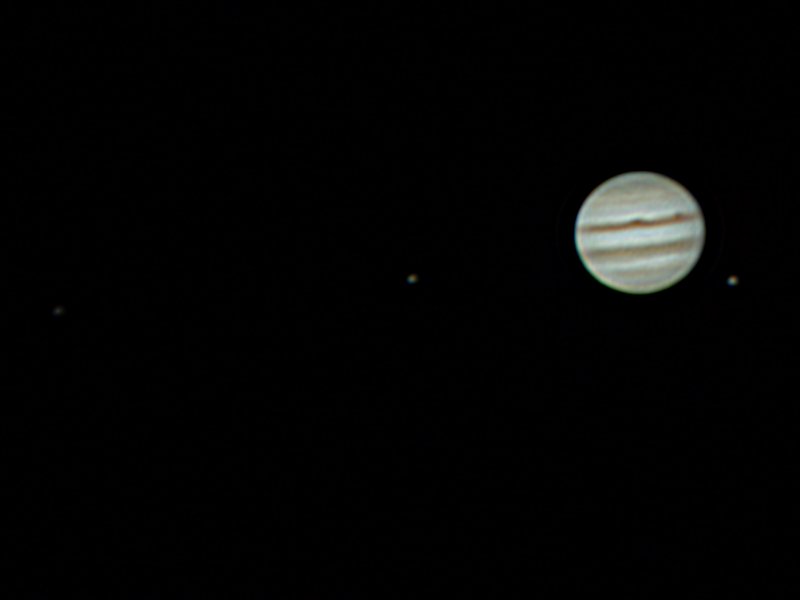
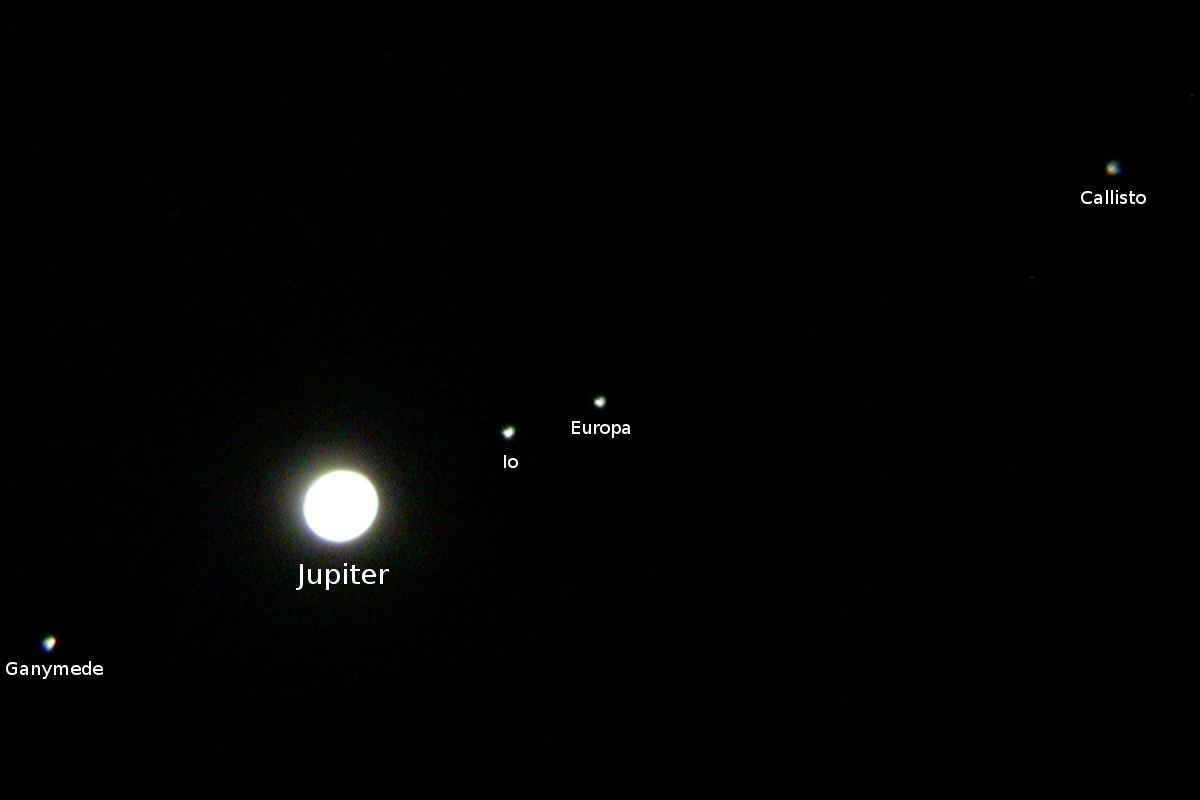
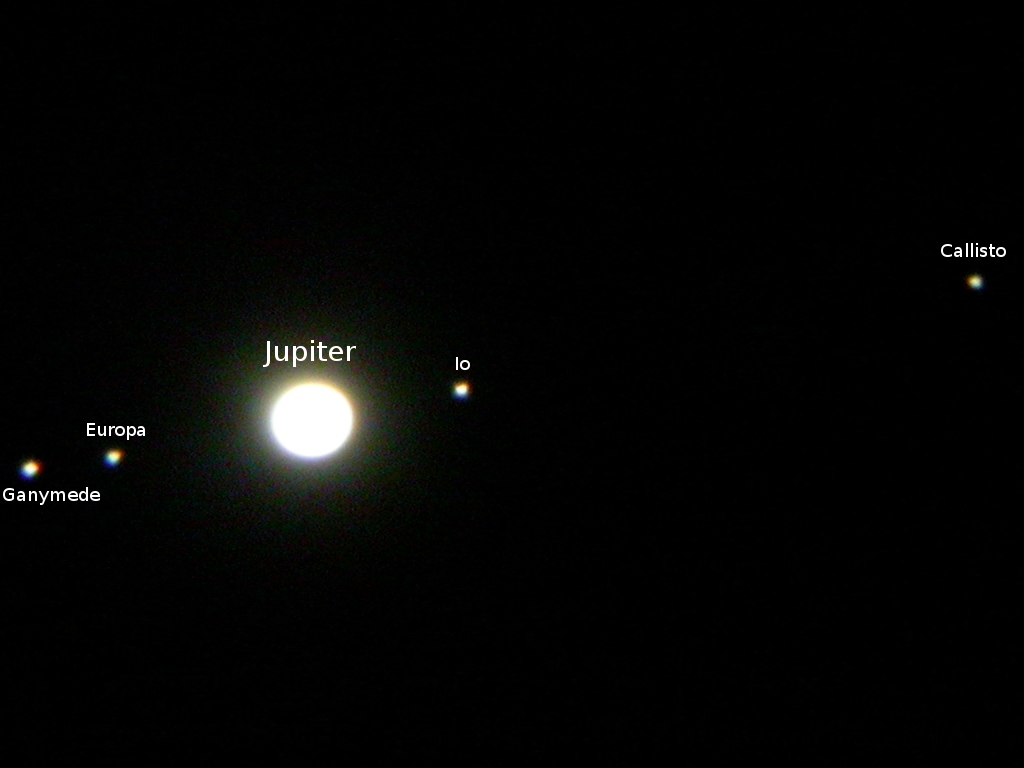
| Here are some pictures that
I took of the planet Jupiter on the evening of September
27th. Jupiter was 3.962 AU (592707276 km) from the Earth. A few days before, on September 20th, Jupiter was the closest it has been to Earth since 1963: it was 3.953 AU (591360894 km) |
 |
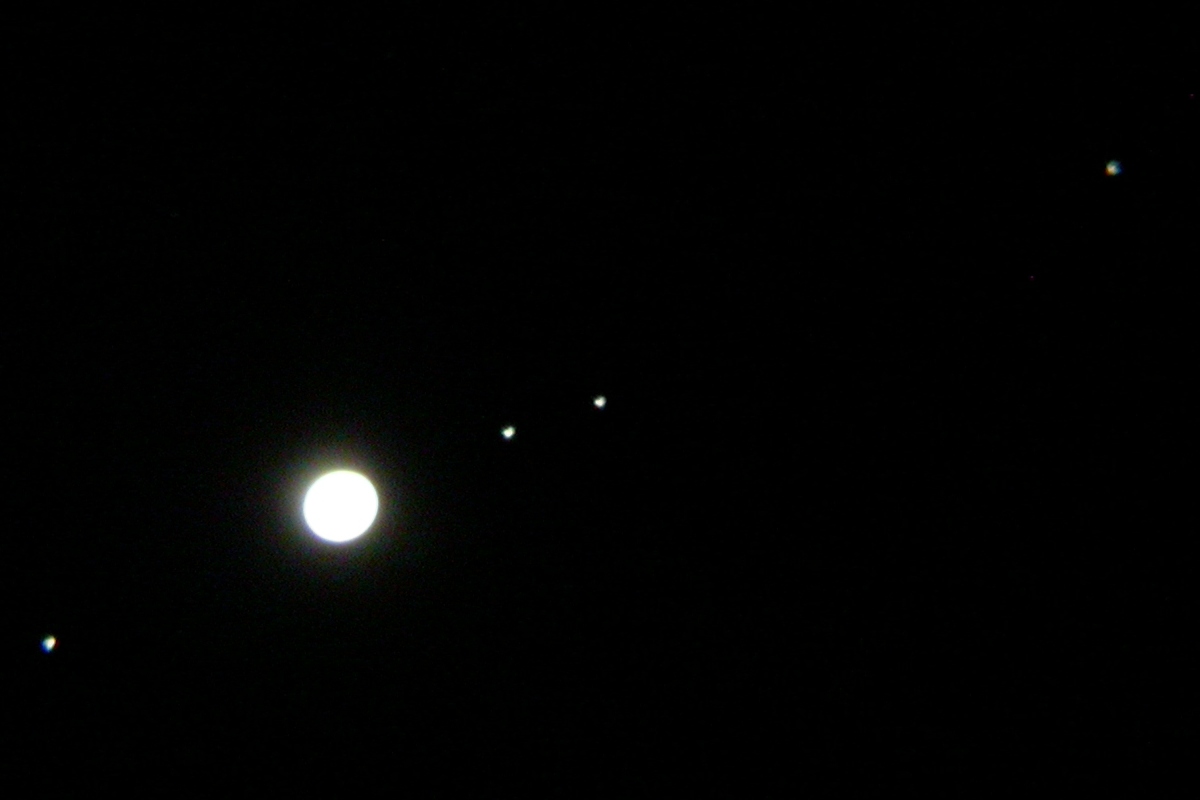 |
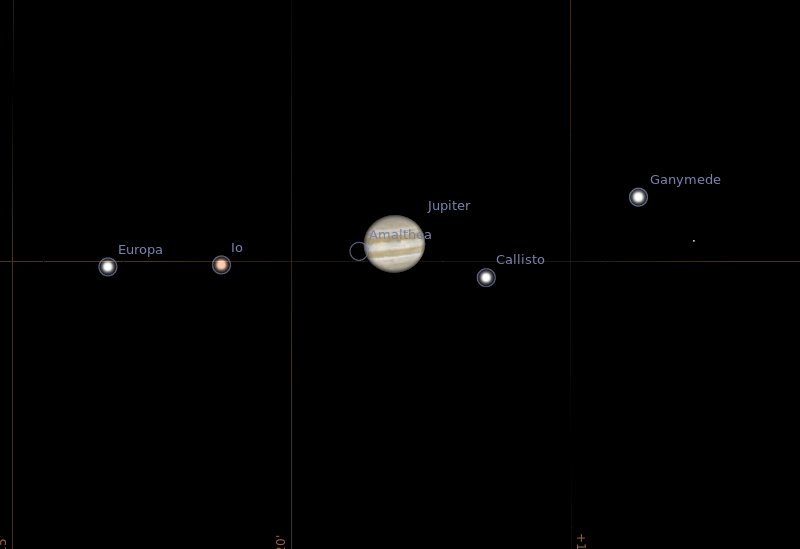
| Jupiter and Galileon moons
1/8s f2.6 ISO 400 8mm (112x magnification) with labels |
Jupiter and Galileon moons 1/8s f2.6 ISO 400 8mm (112x magnification) |
 |
 |
 |
| Jupiter 1/125s F4.3 ISO 400
25mm (350x magnification) |
Jupiter 1/60s F4.3 ISO 400
25mm (350x magnification) |
Jupiter 1/30s F4.3 ISO 400
25mm (350x magnification) |
 |
 |
 |
| Jupiter 1/125s F5.1 ISO 400
8mm (451x magnification) |
Jupiter 1/60s F5.1 ISO 400
32mm (451x magnification) |
Jupiter 1/30s F5.1 ISO 400
32mm (451x magnification) |
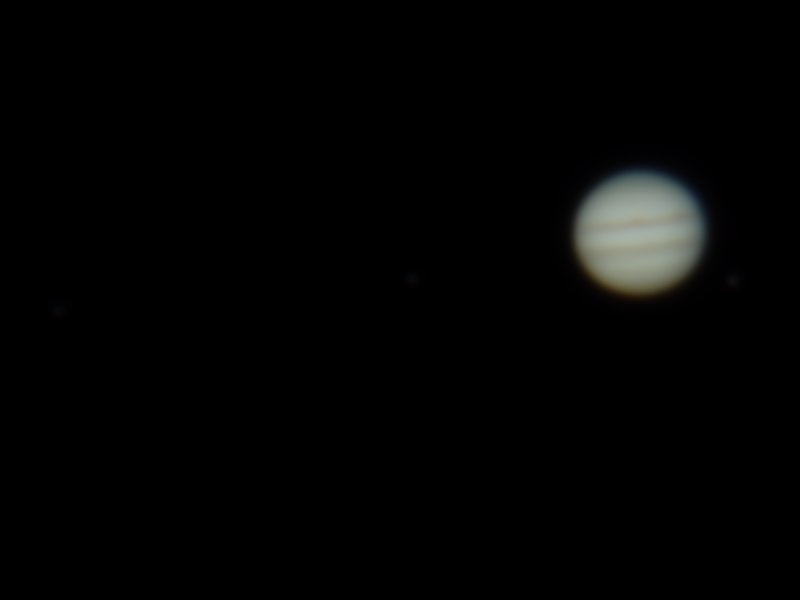
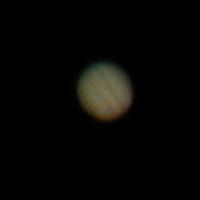
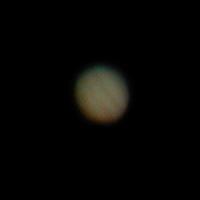
| Here are some pictures that
I took of the planet Jupiter on the evening of September
25th. Jupiter was 3.958 AU (592108884 km) from the Earth. A few days before, on September 20th, Jupiter was the closest it has been to Earth since 1963: it was 3.953 AU (591360894 km) |
 |
 |
| Jupiter 1/4s F2.6 ISO 400
8mm (112x magnification) |
Jupiter 1/4s F2.6 ISO 400
8mm (112x magnification) |
 |
 |
| Jupiter 1/250s F3.0 ISO 400
8mm (112x magnification) |
Jupiter 1/15s F4.8 ISO 400
32mm (451x magnification) |
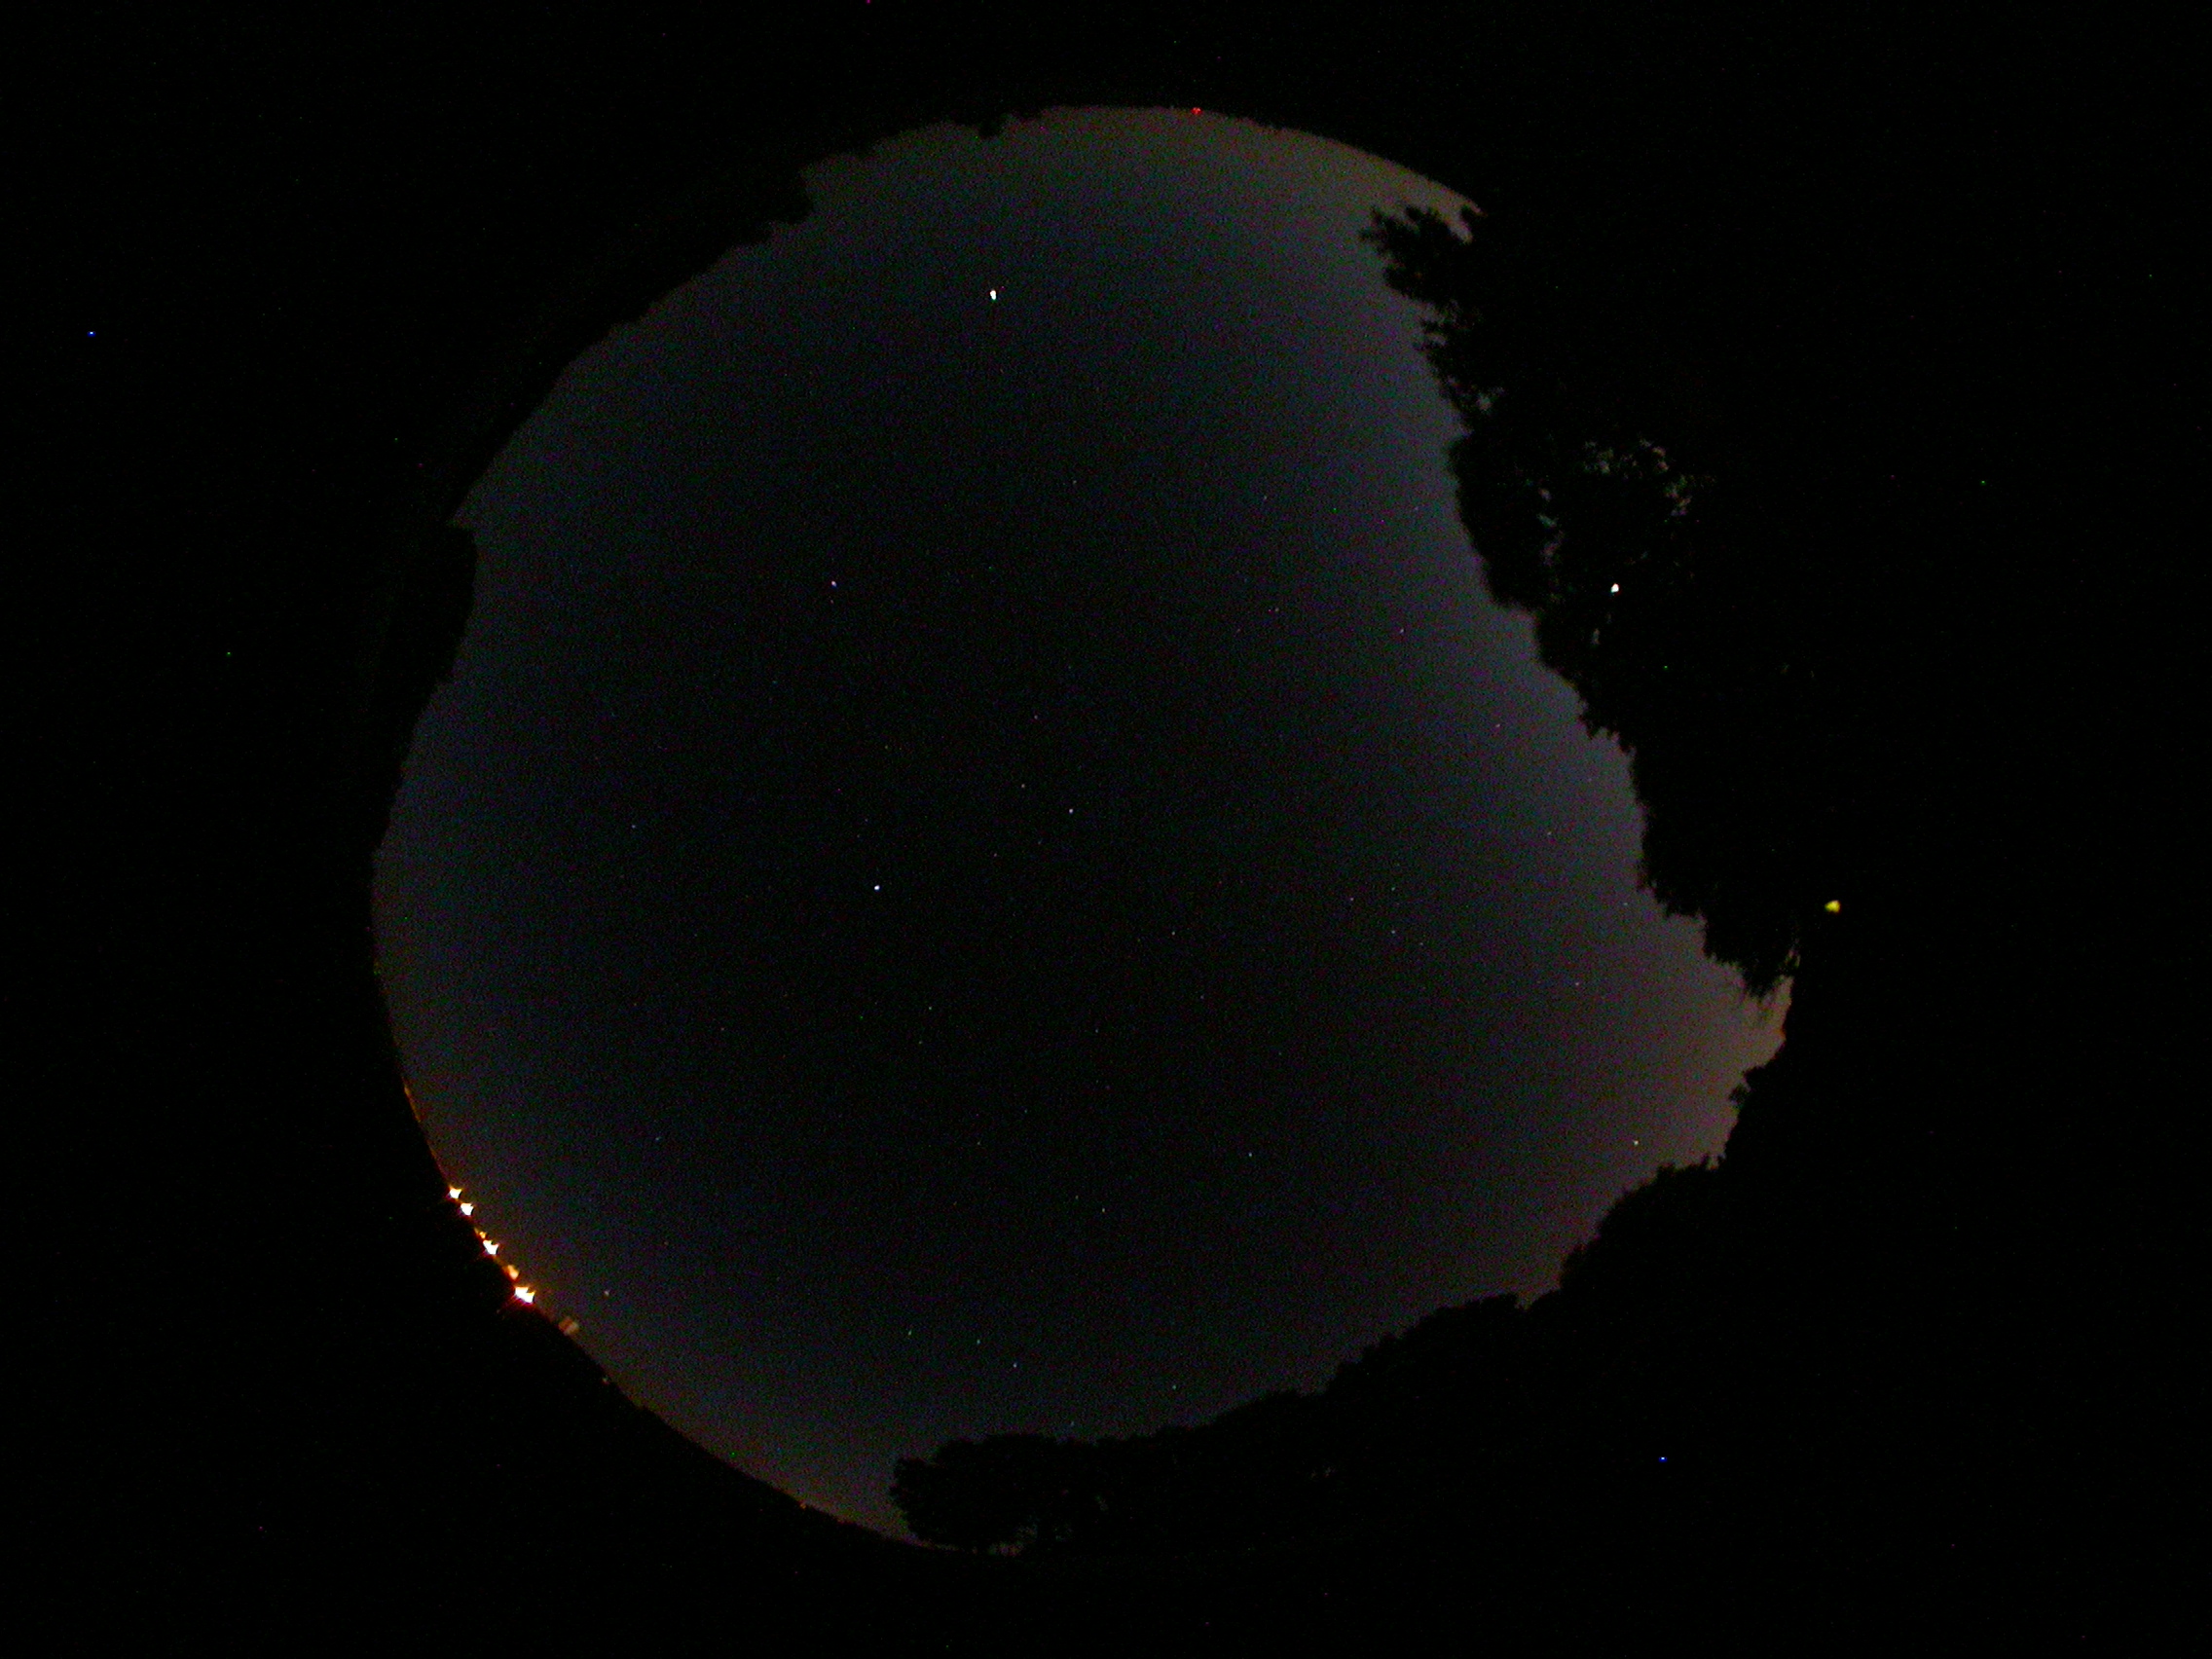
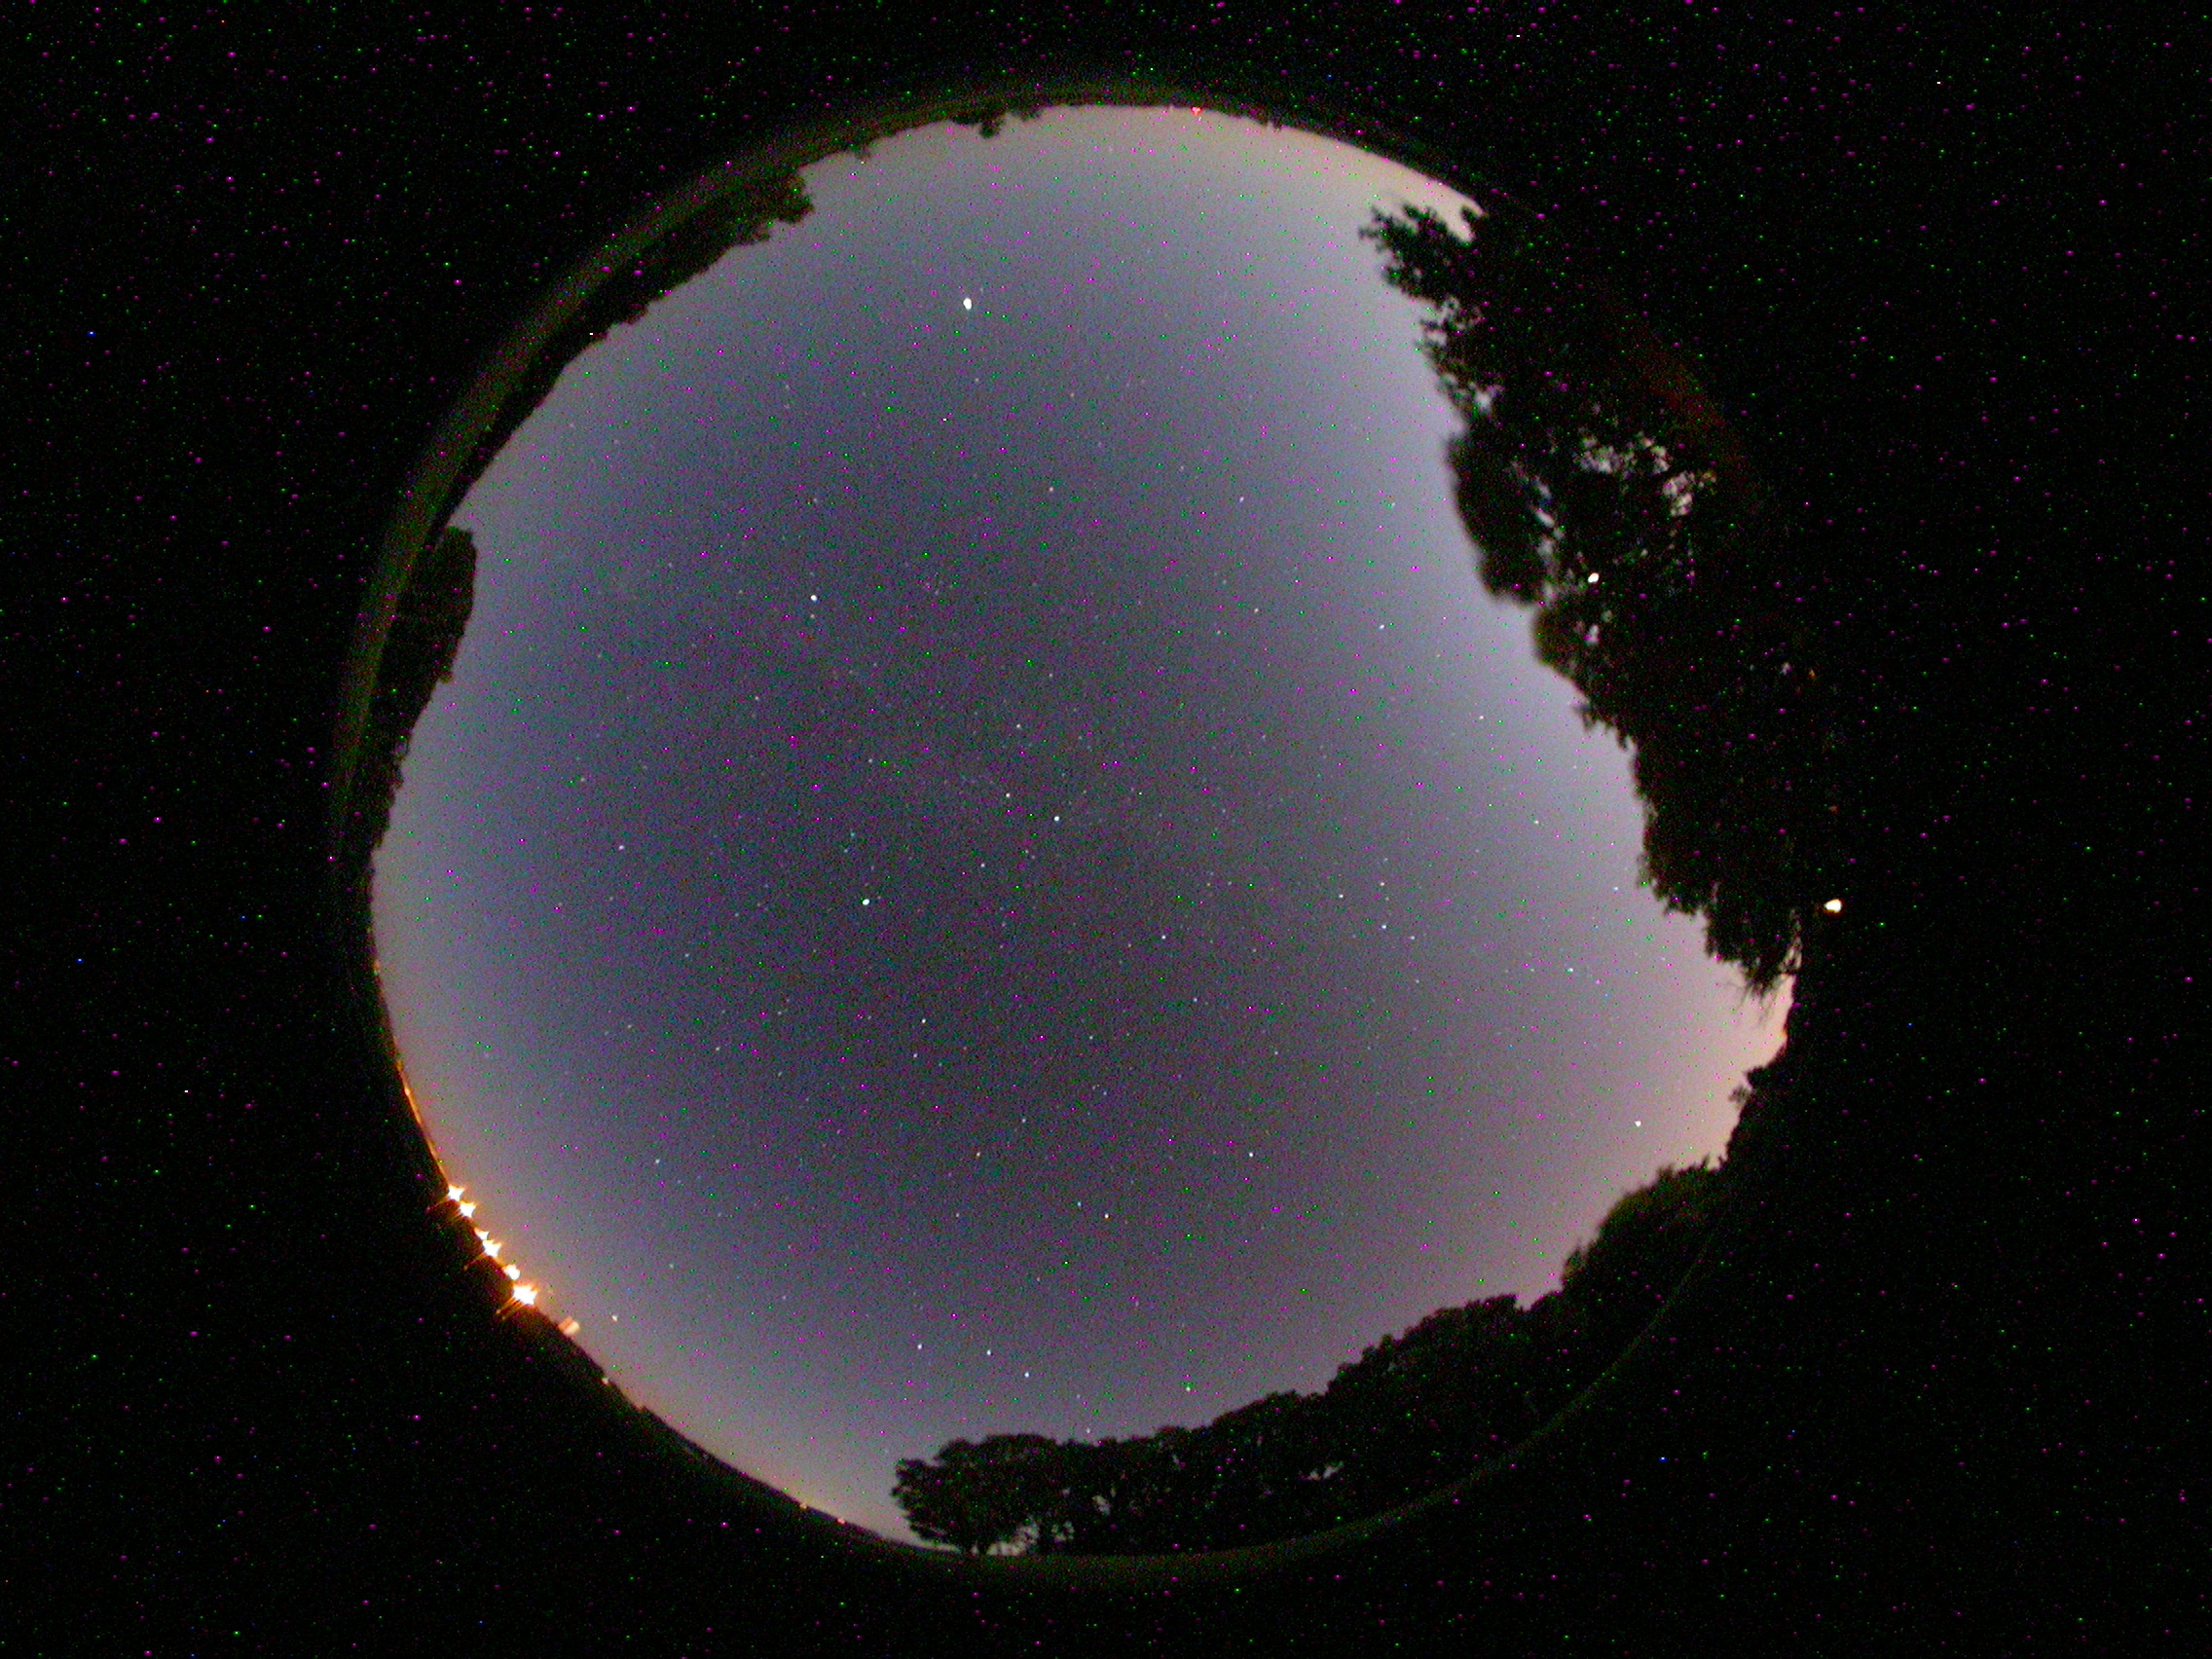
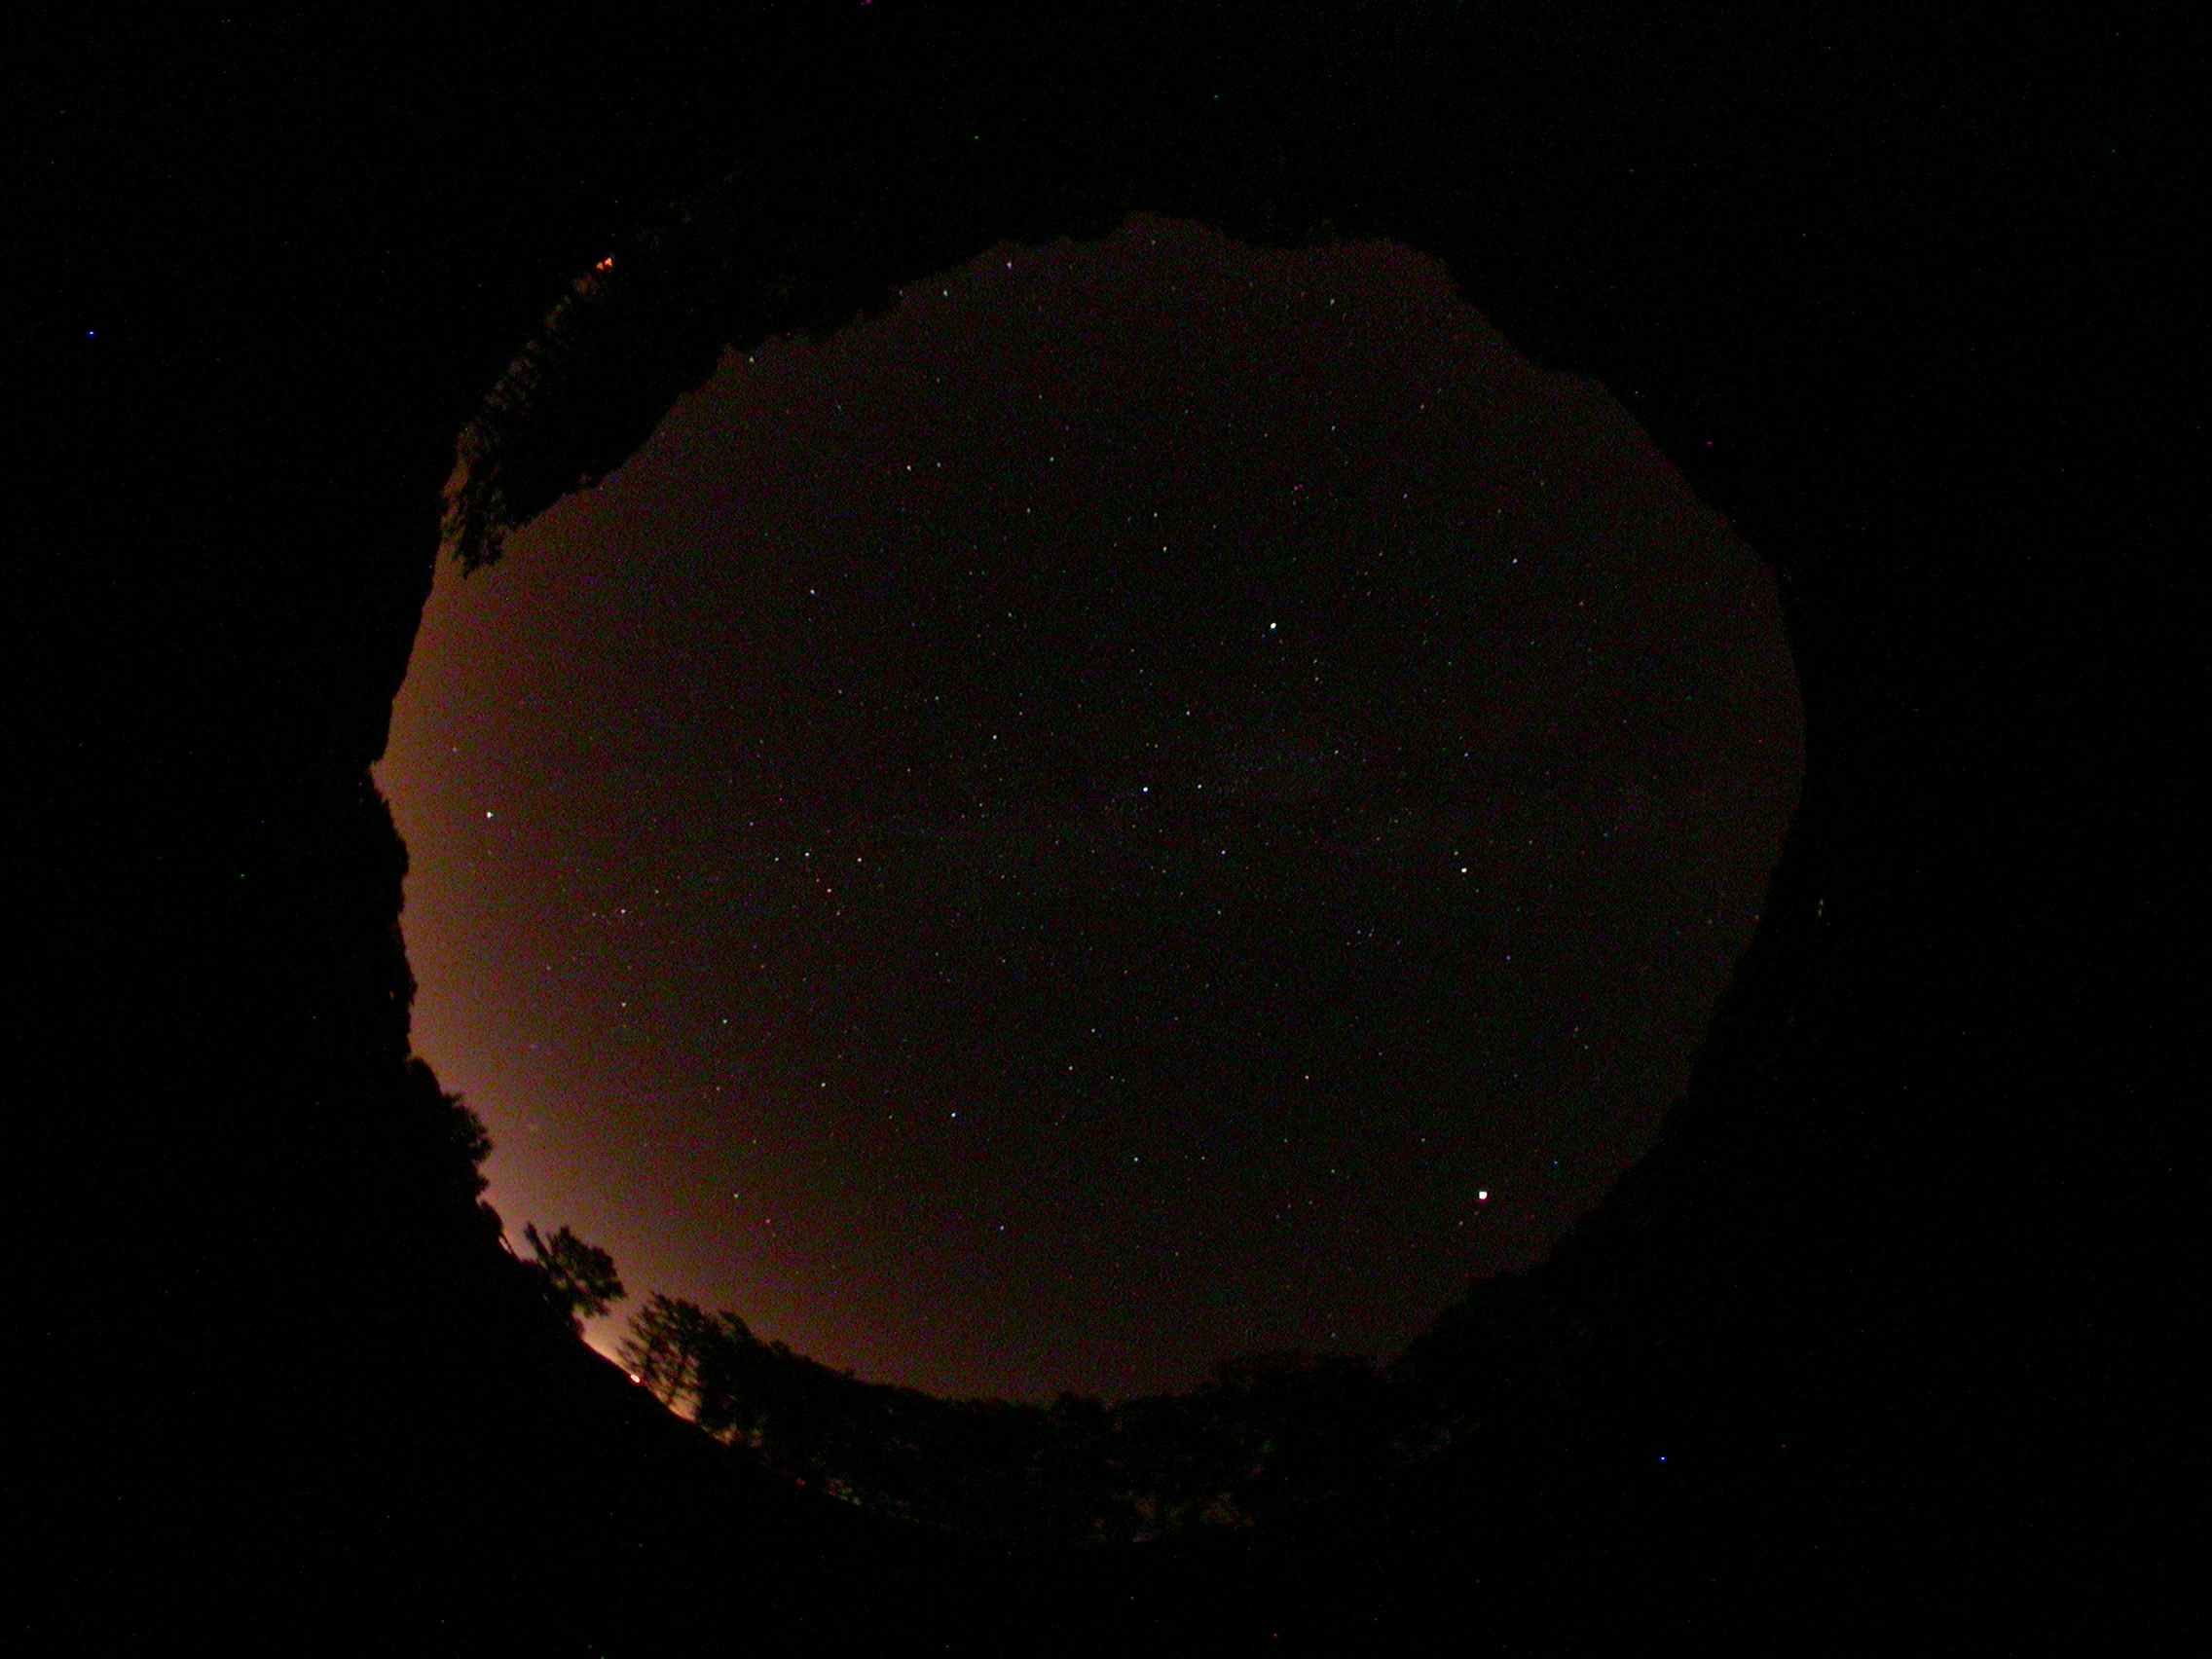
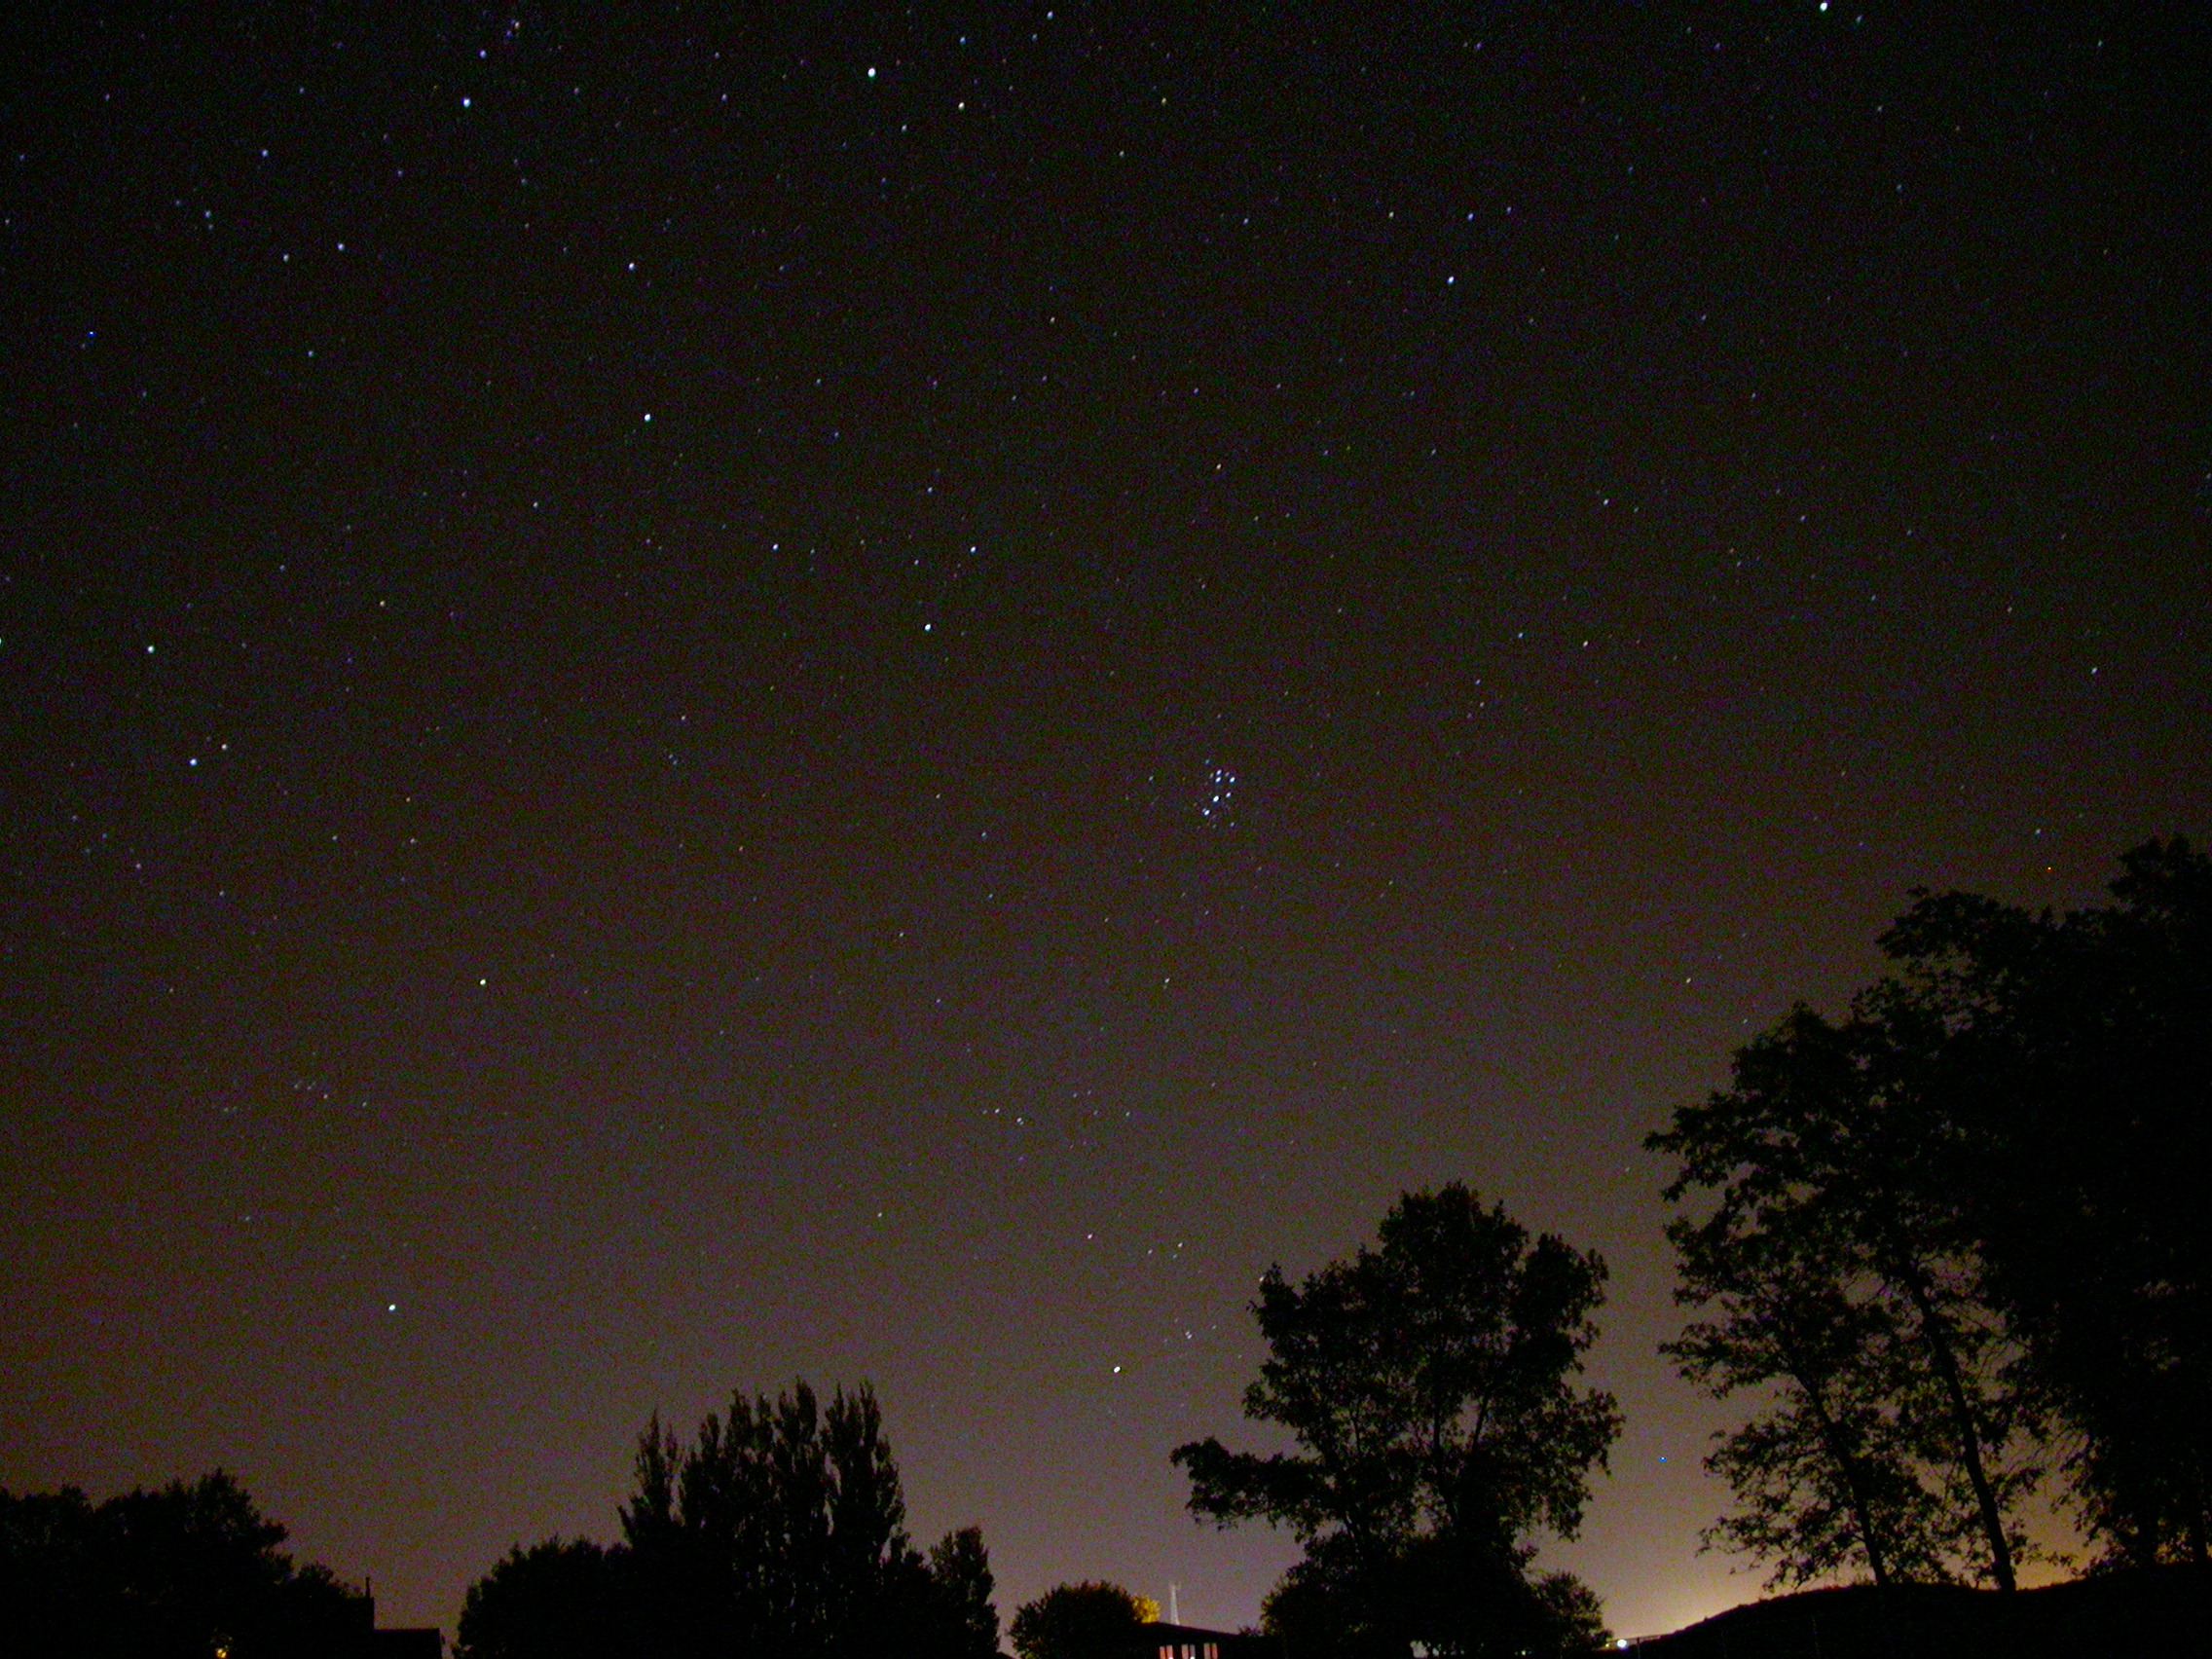
| Here are some fisheye
(180�) pics I took early on the morning of 2009/08/12,
during the Perseid
meteor shower, with my Nikon
Coolpix 4500 and the 0.21x
Nikon FC-E8 fisheye lens. No meteorites were
captured, but it gave me a chance to do long-exposure
fisheye shots. The moon was just past full, so it
washed out the sky a bit. The 'noise reduction'
feature was active during this time, but even then 'hot
pixels' are extreme at 60 second exposures. Click on
an image for the full-size version. |
 |
 |
 |
| Sky Fisheye 10s F2.6 ISO 400 8mm |
Sky Fisheye 20s F2.6 ISO 400 8mm |
Sky Fisheye 30s F2.6 ISO 400 8mm |
 |
 |
 |
| Sky Fisheye 40s F2.6 ISO 400 8mm |
Sky Fisheye 50s F2.6 ISO 400 8mm |
Sky Fisheye 60s F2.6 ISO 400 8mm |
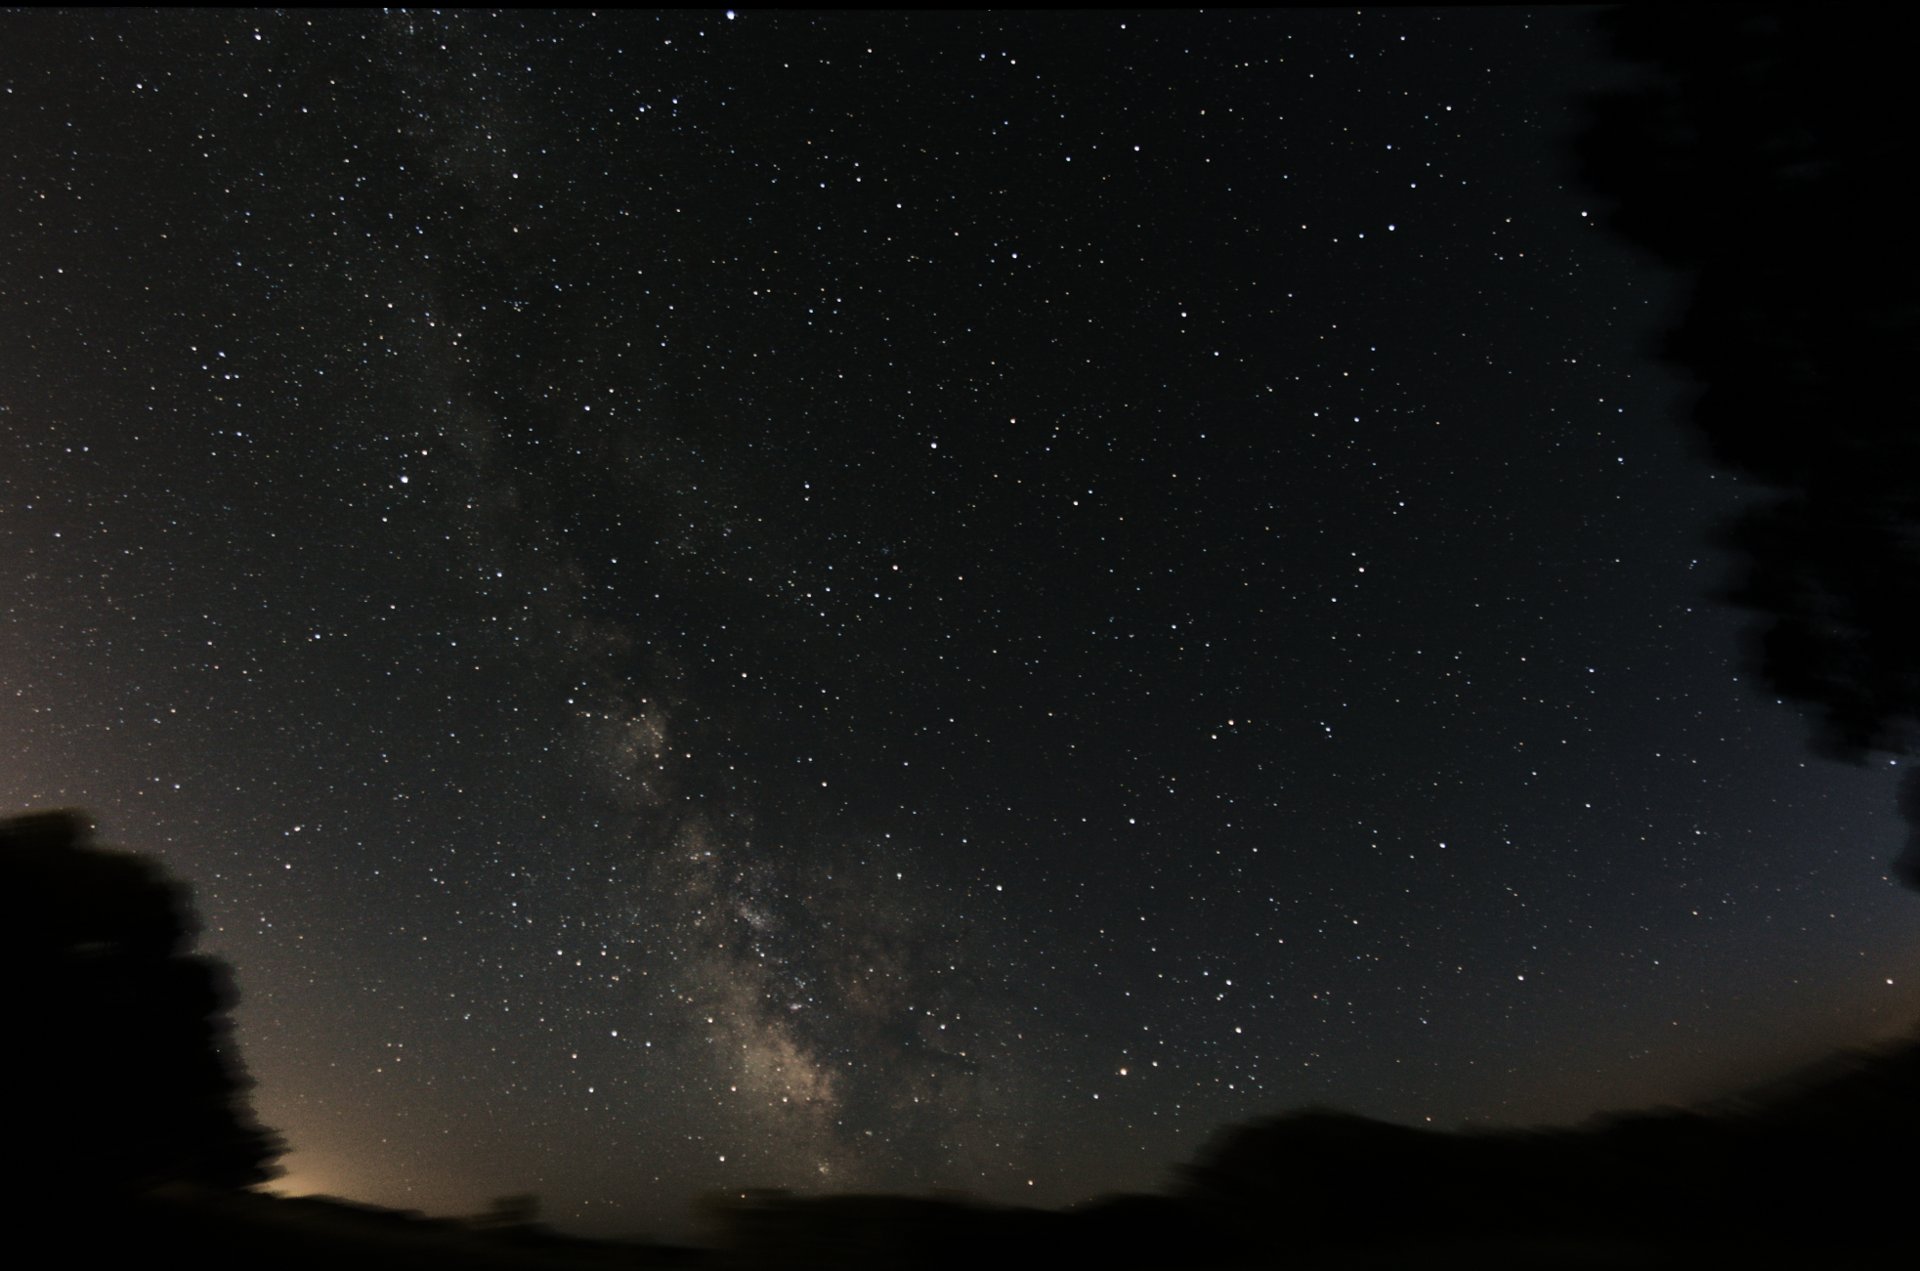
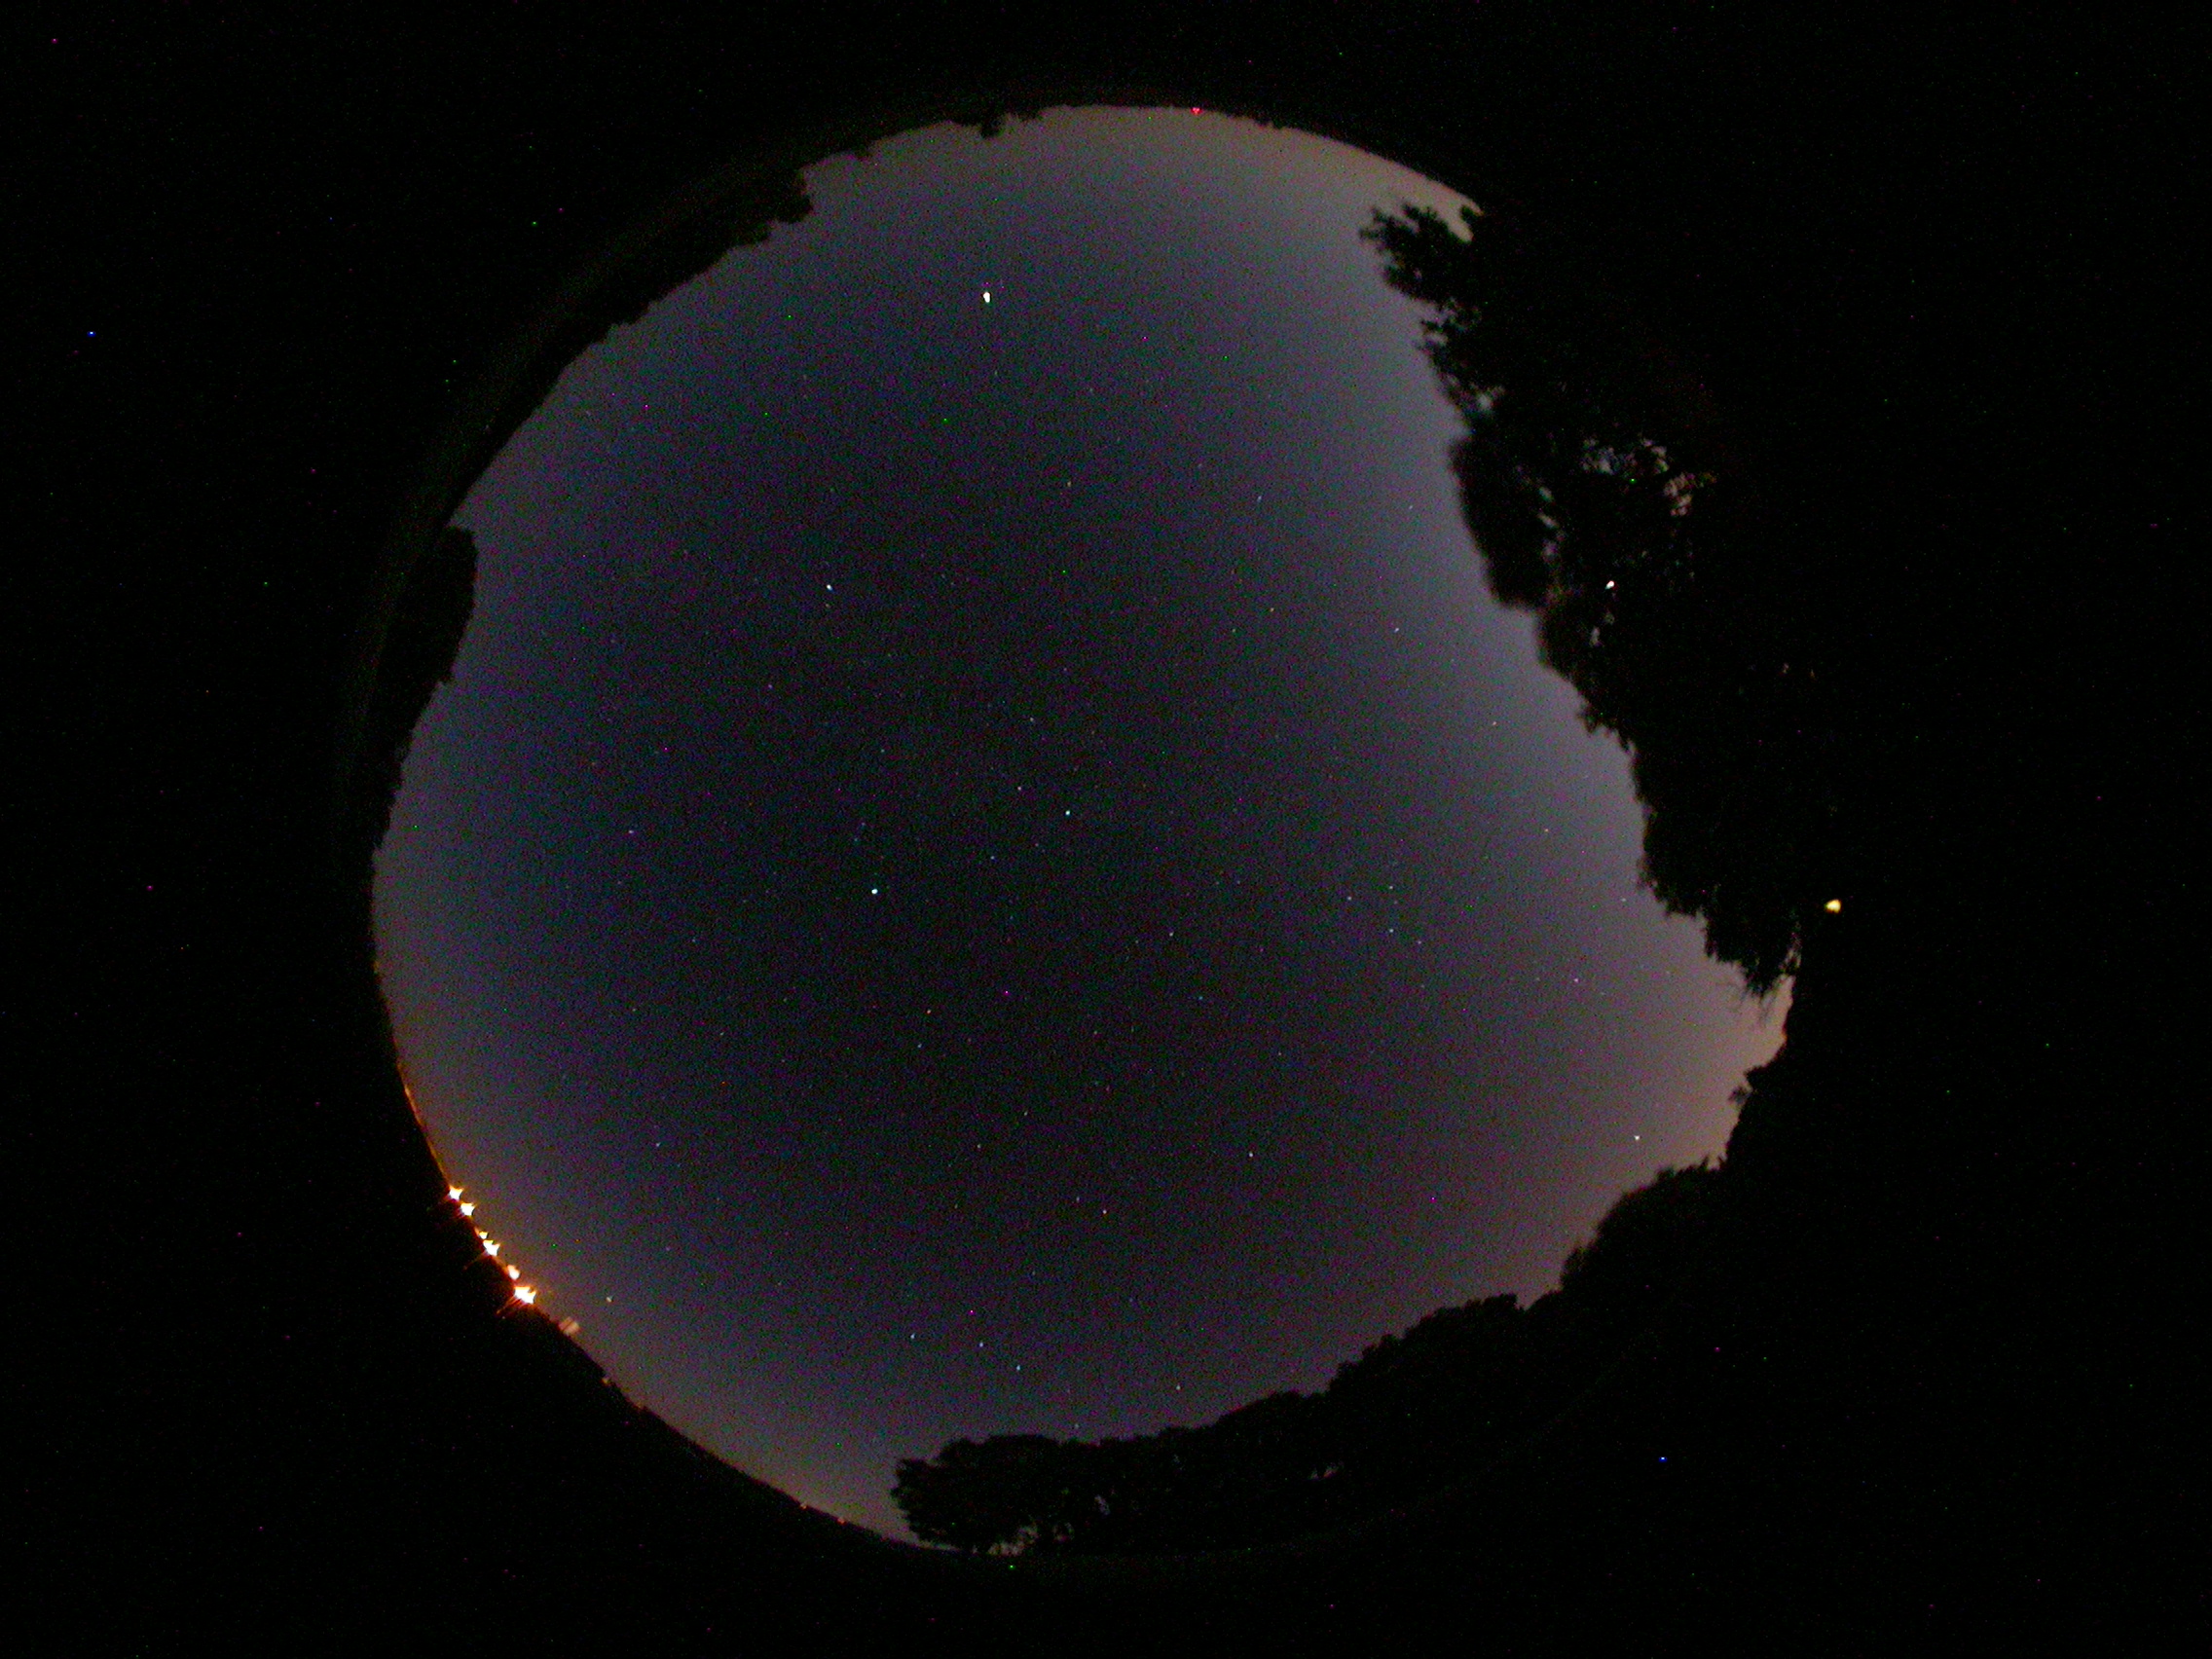
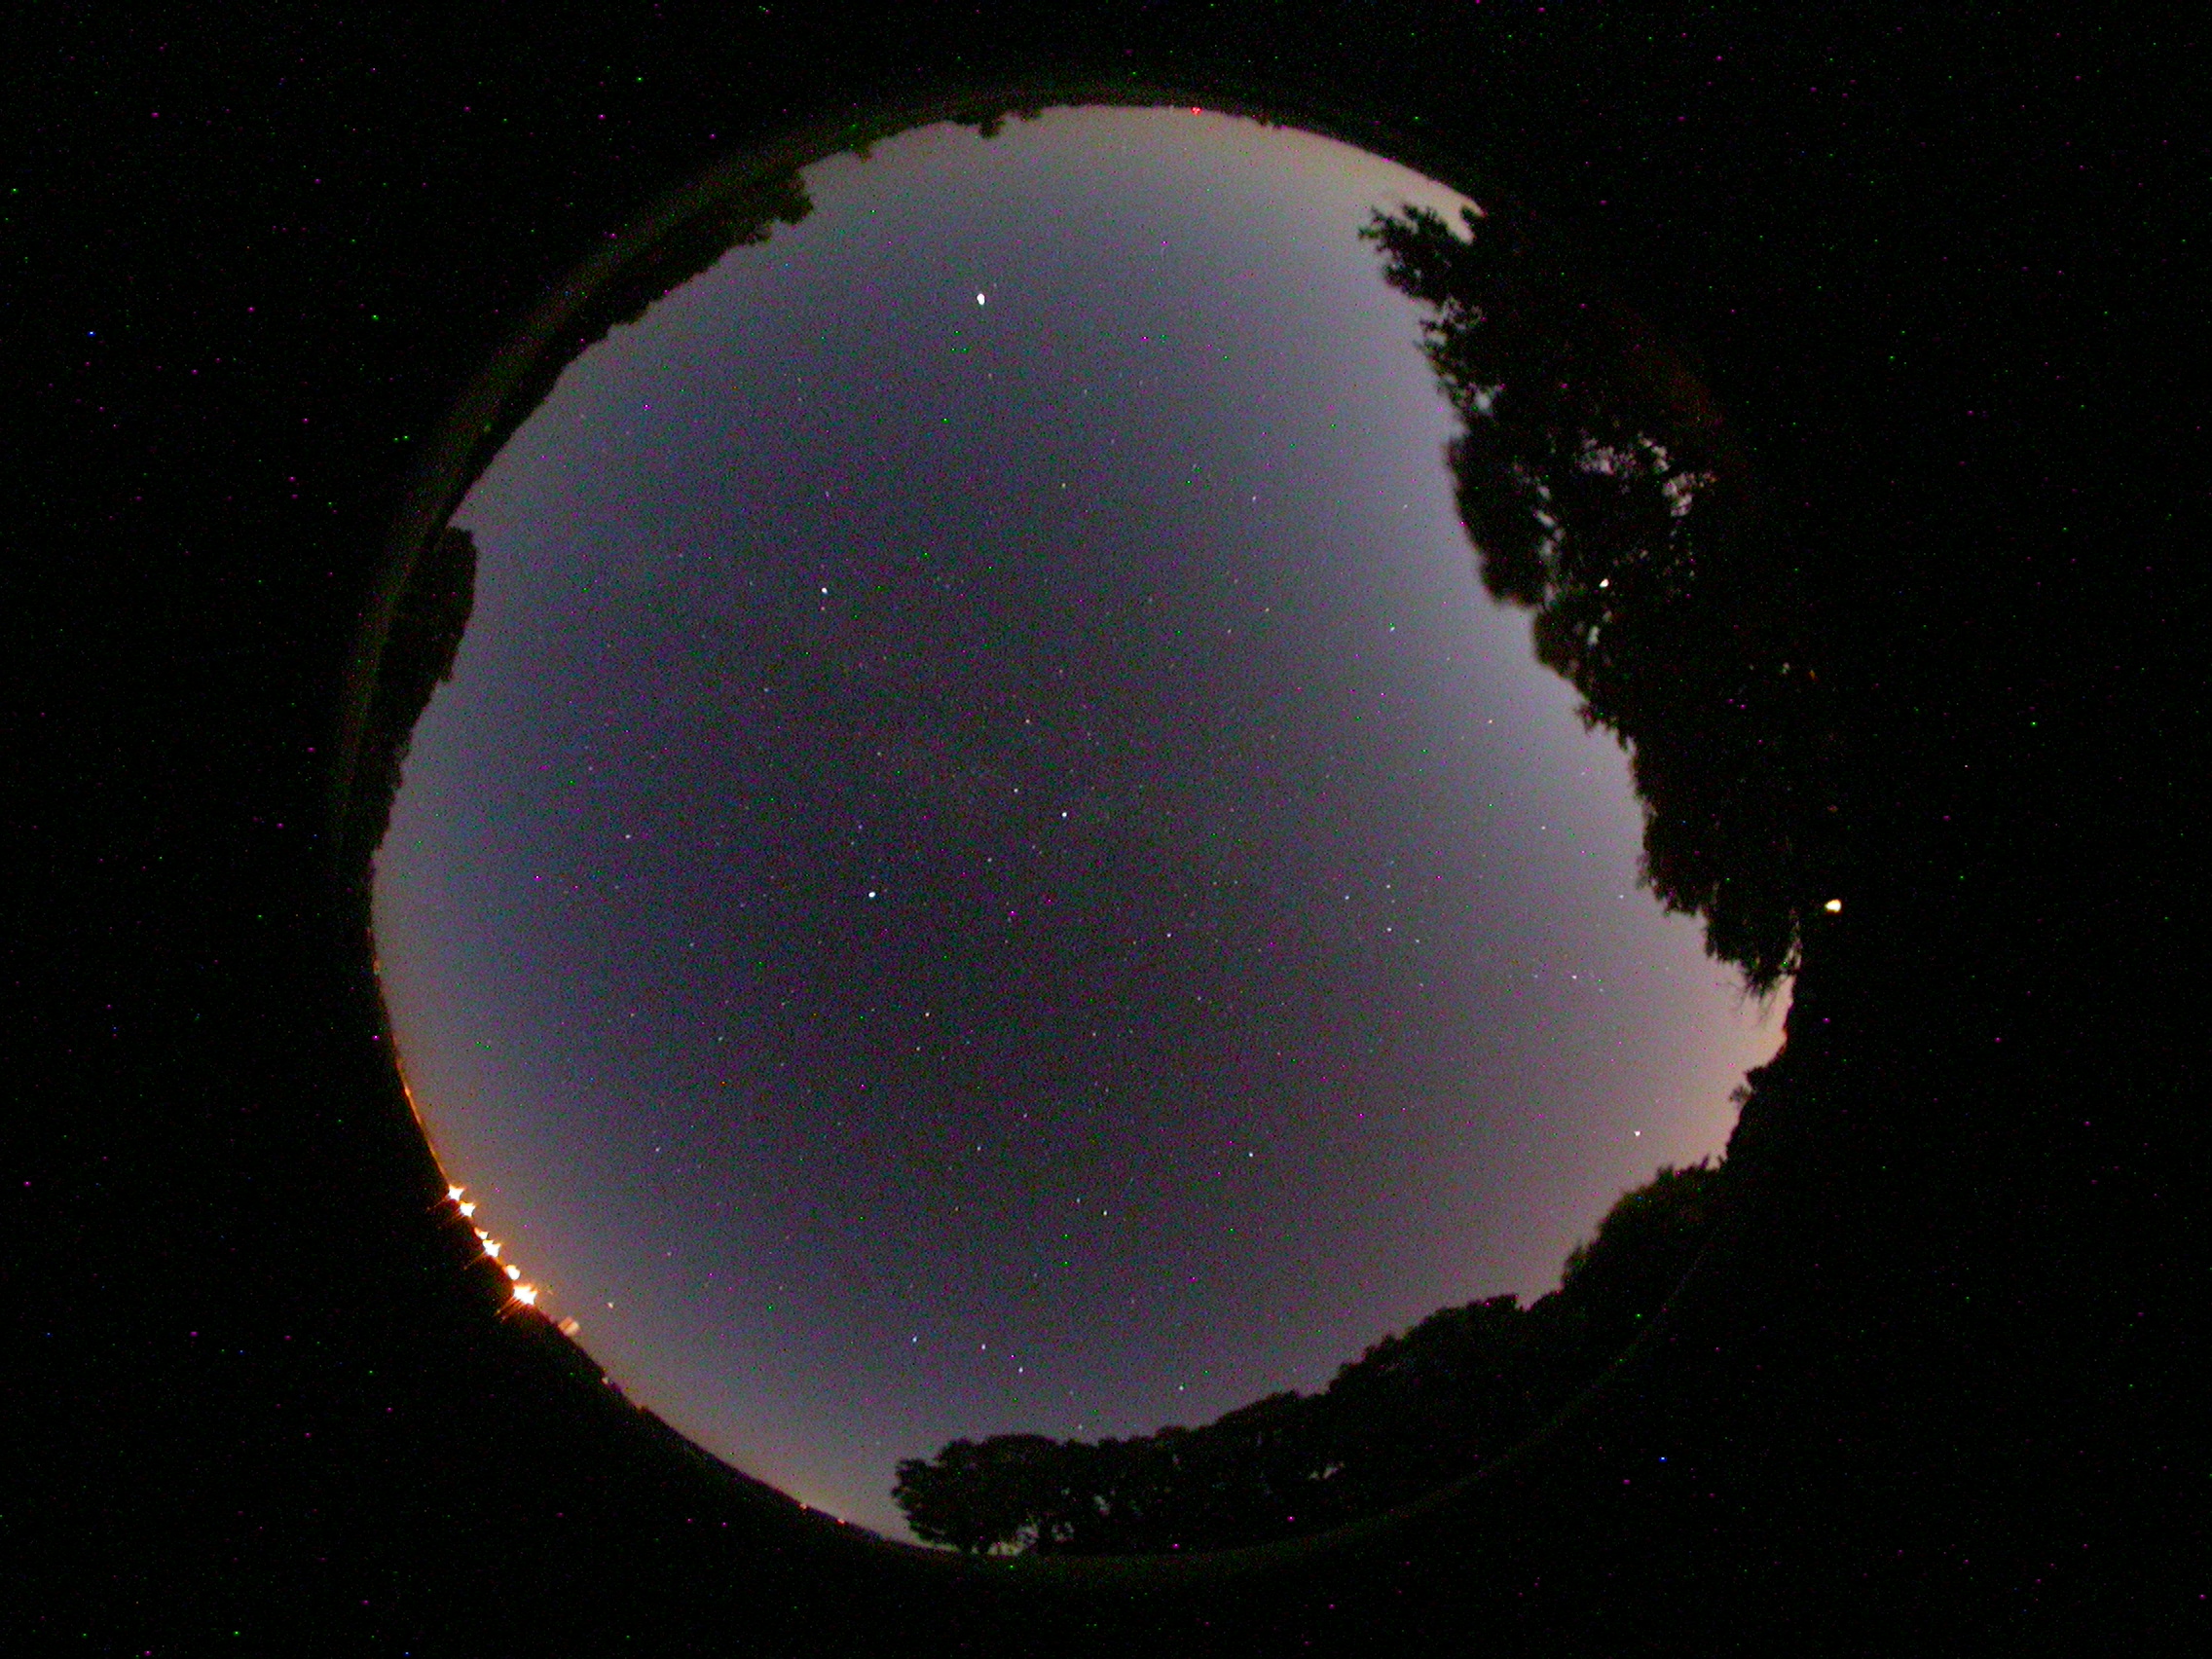
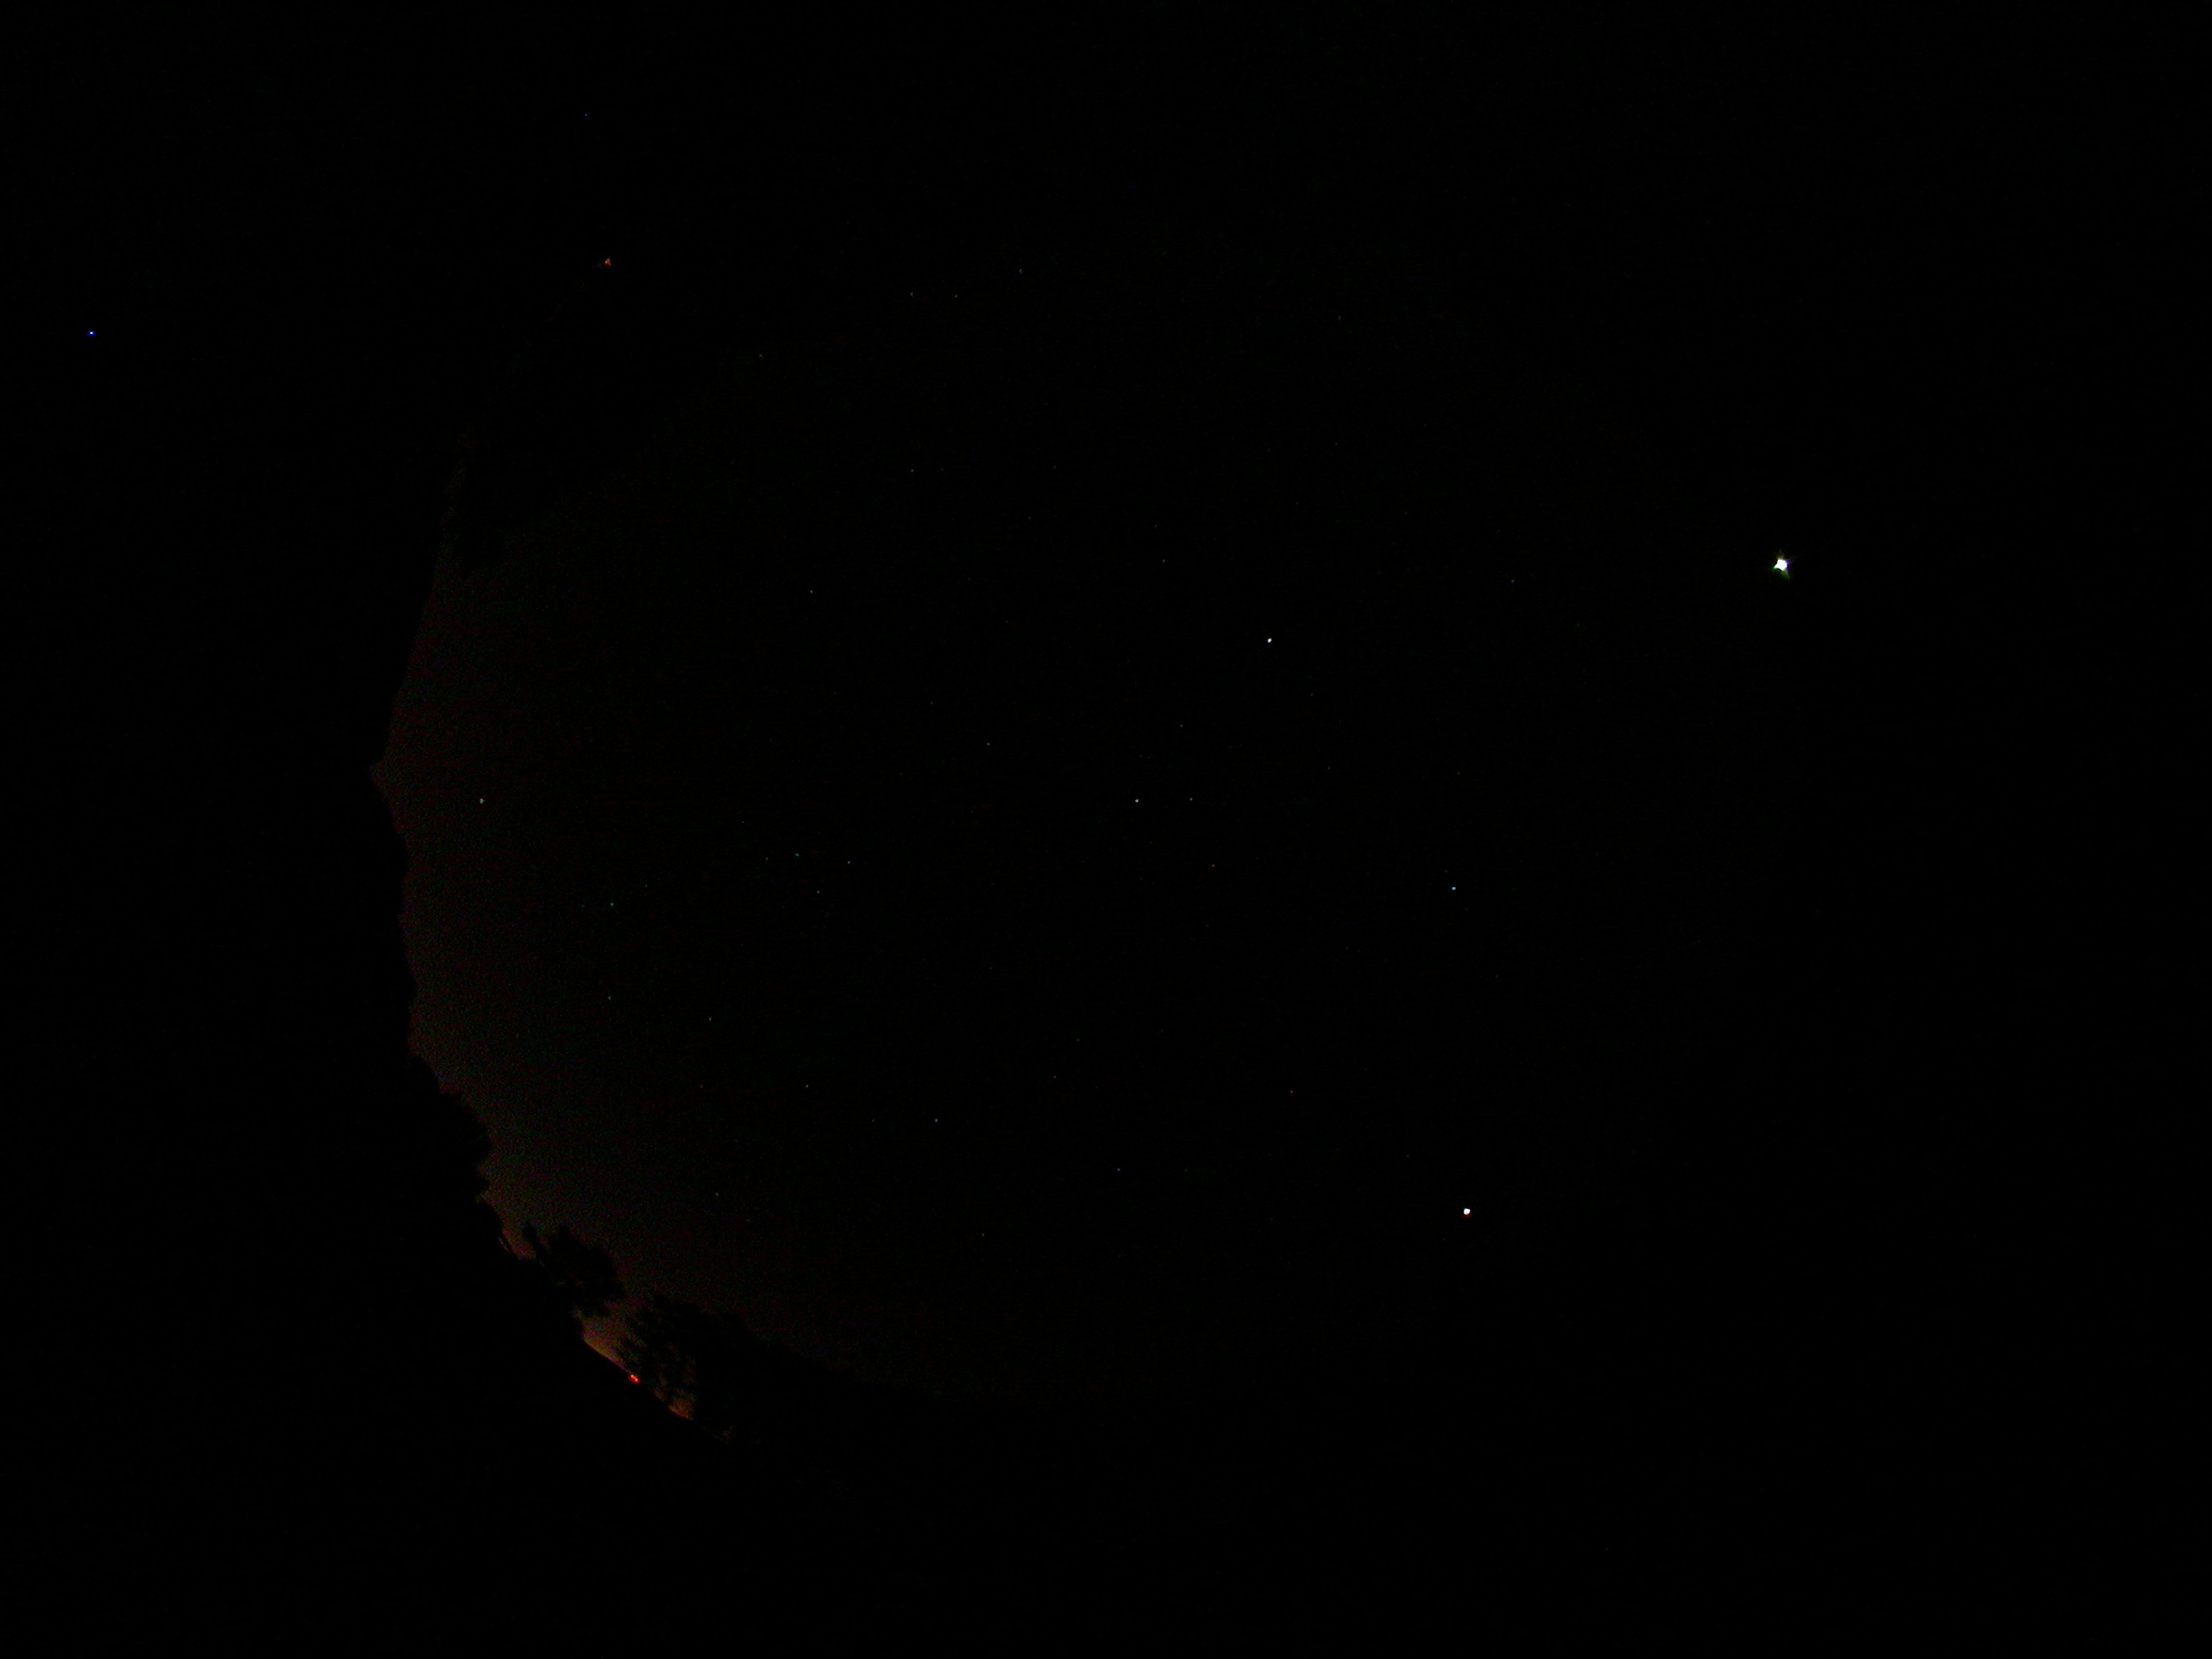
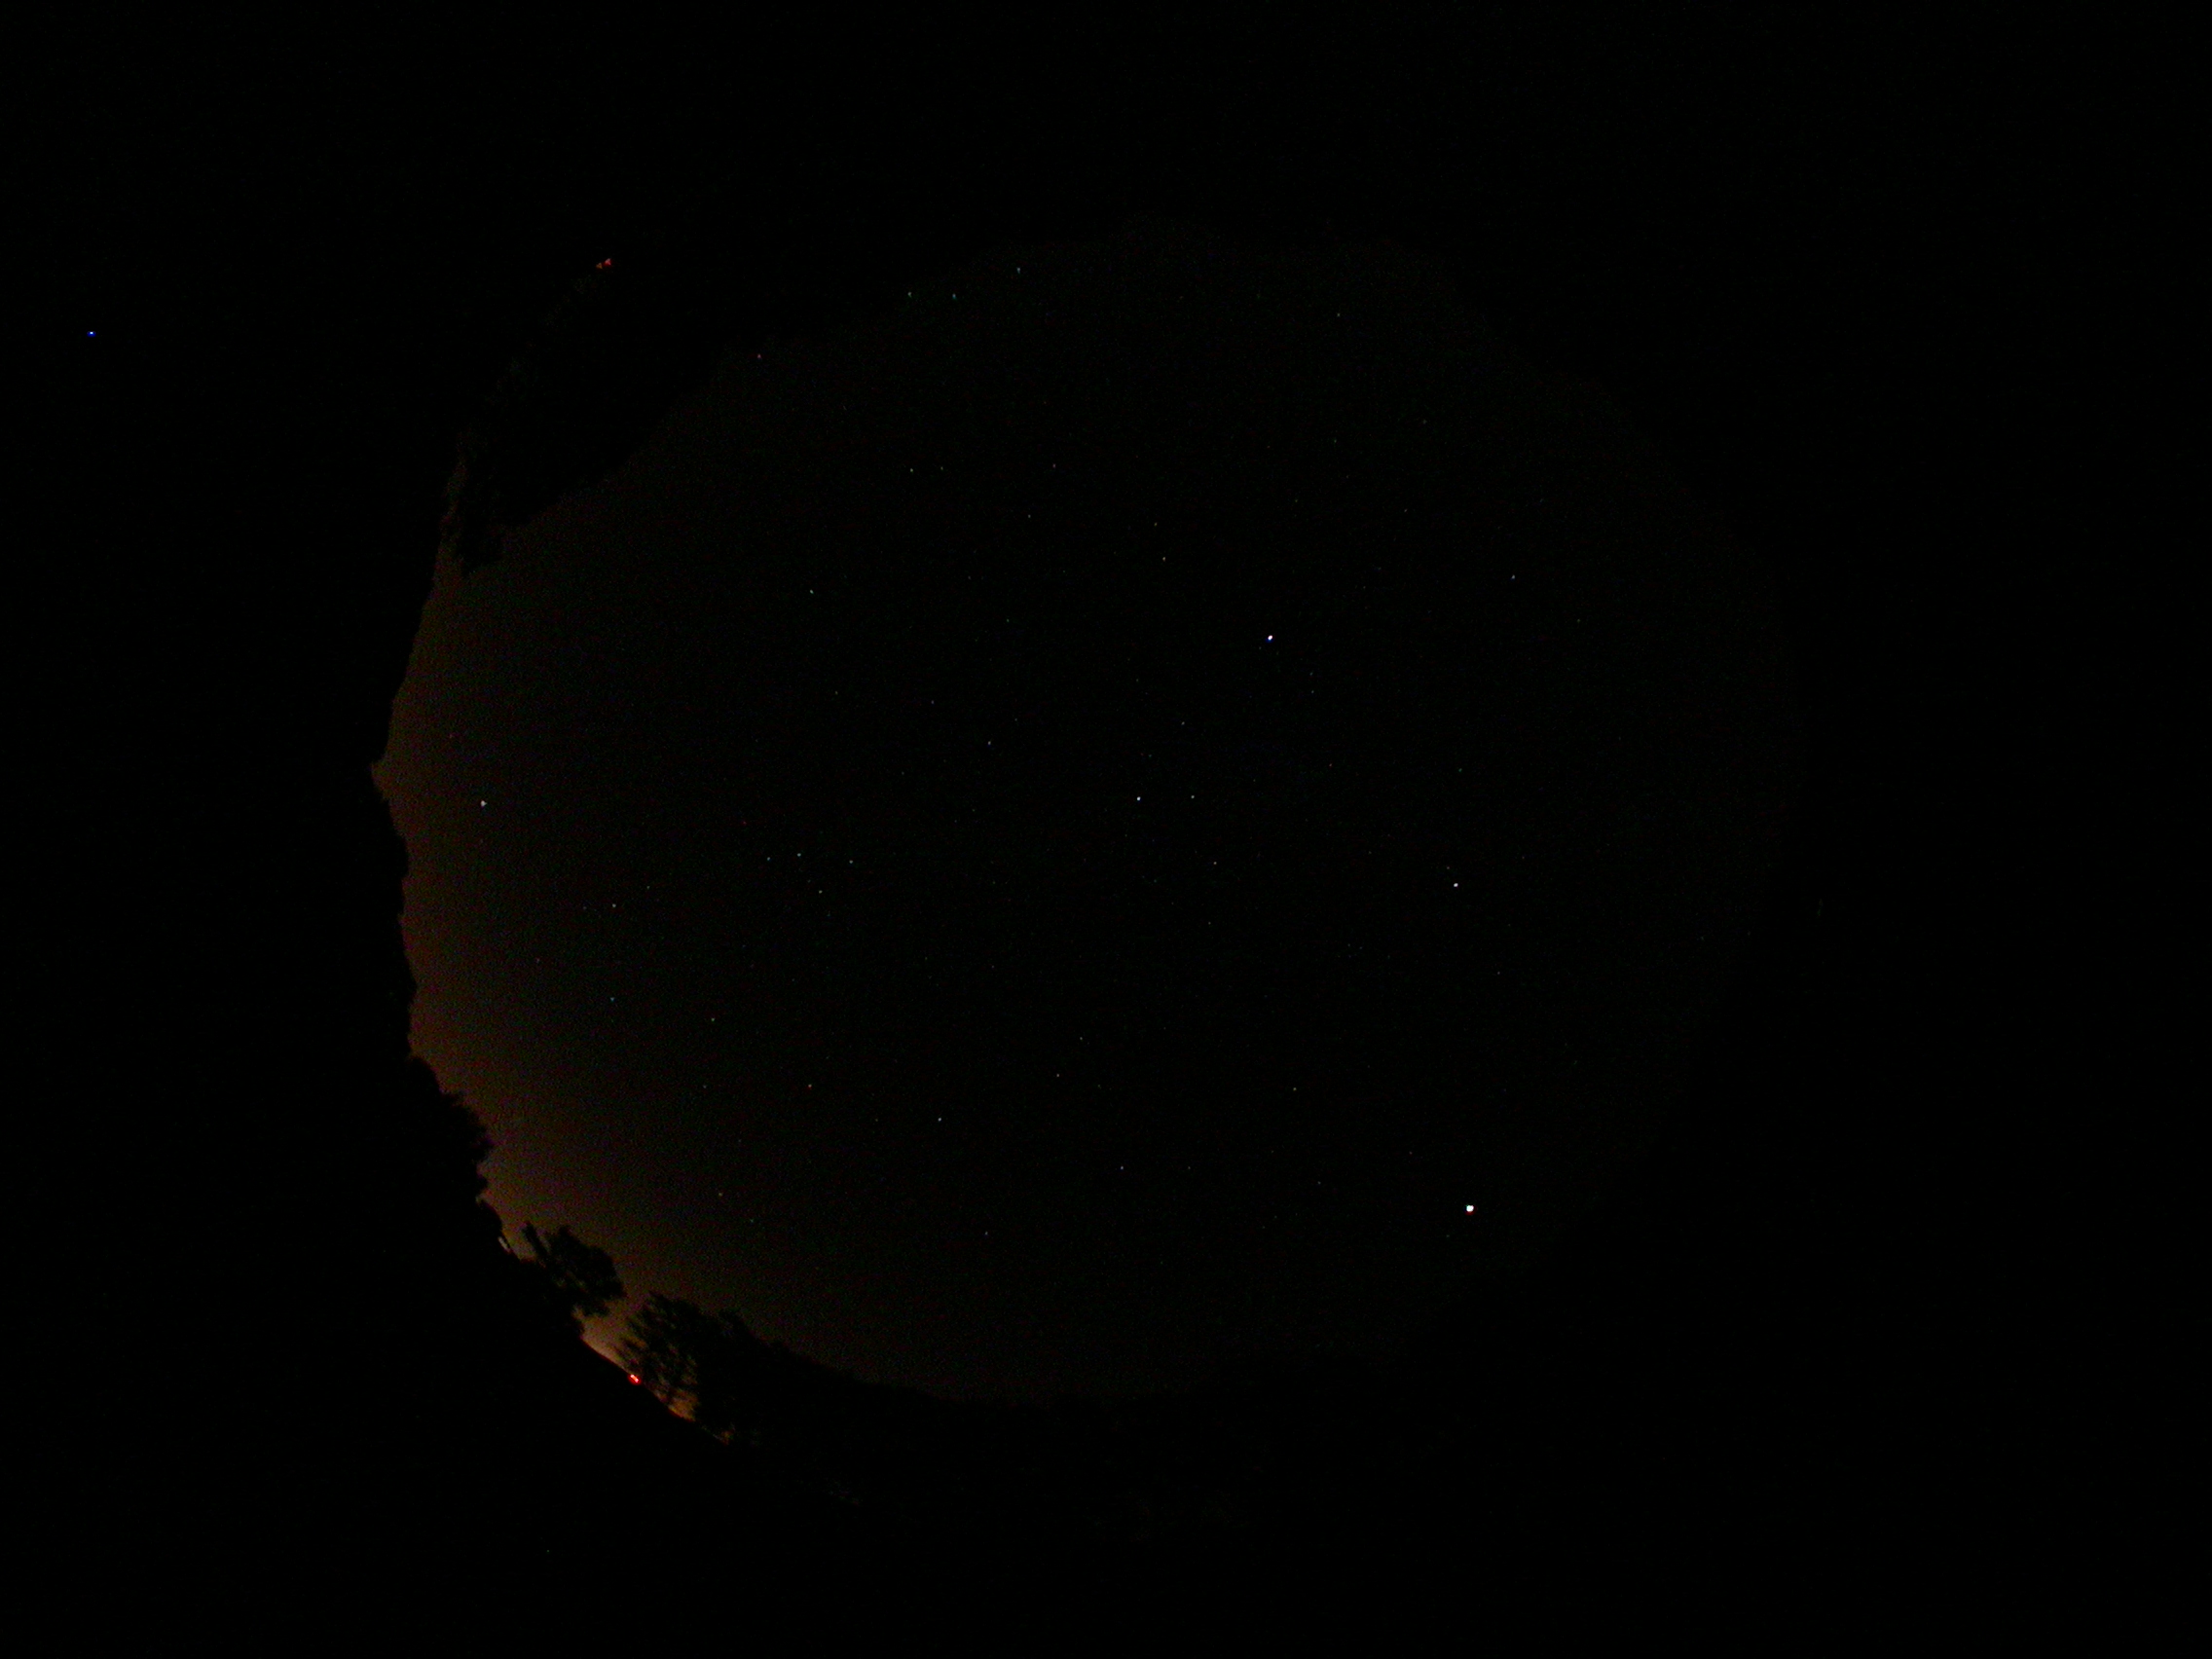
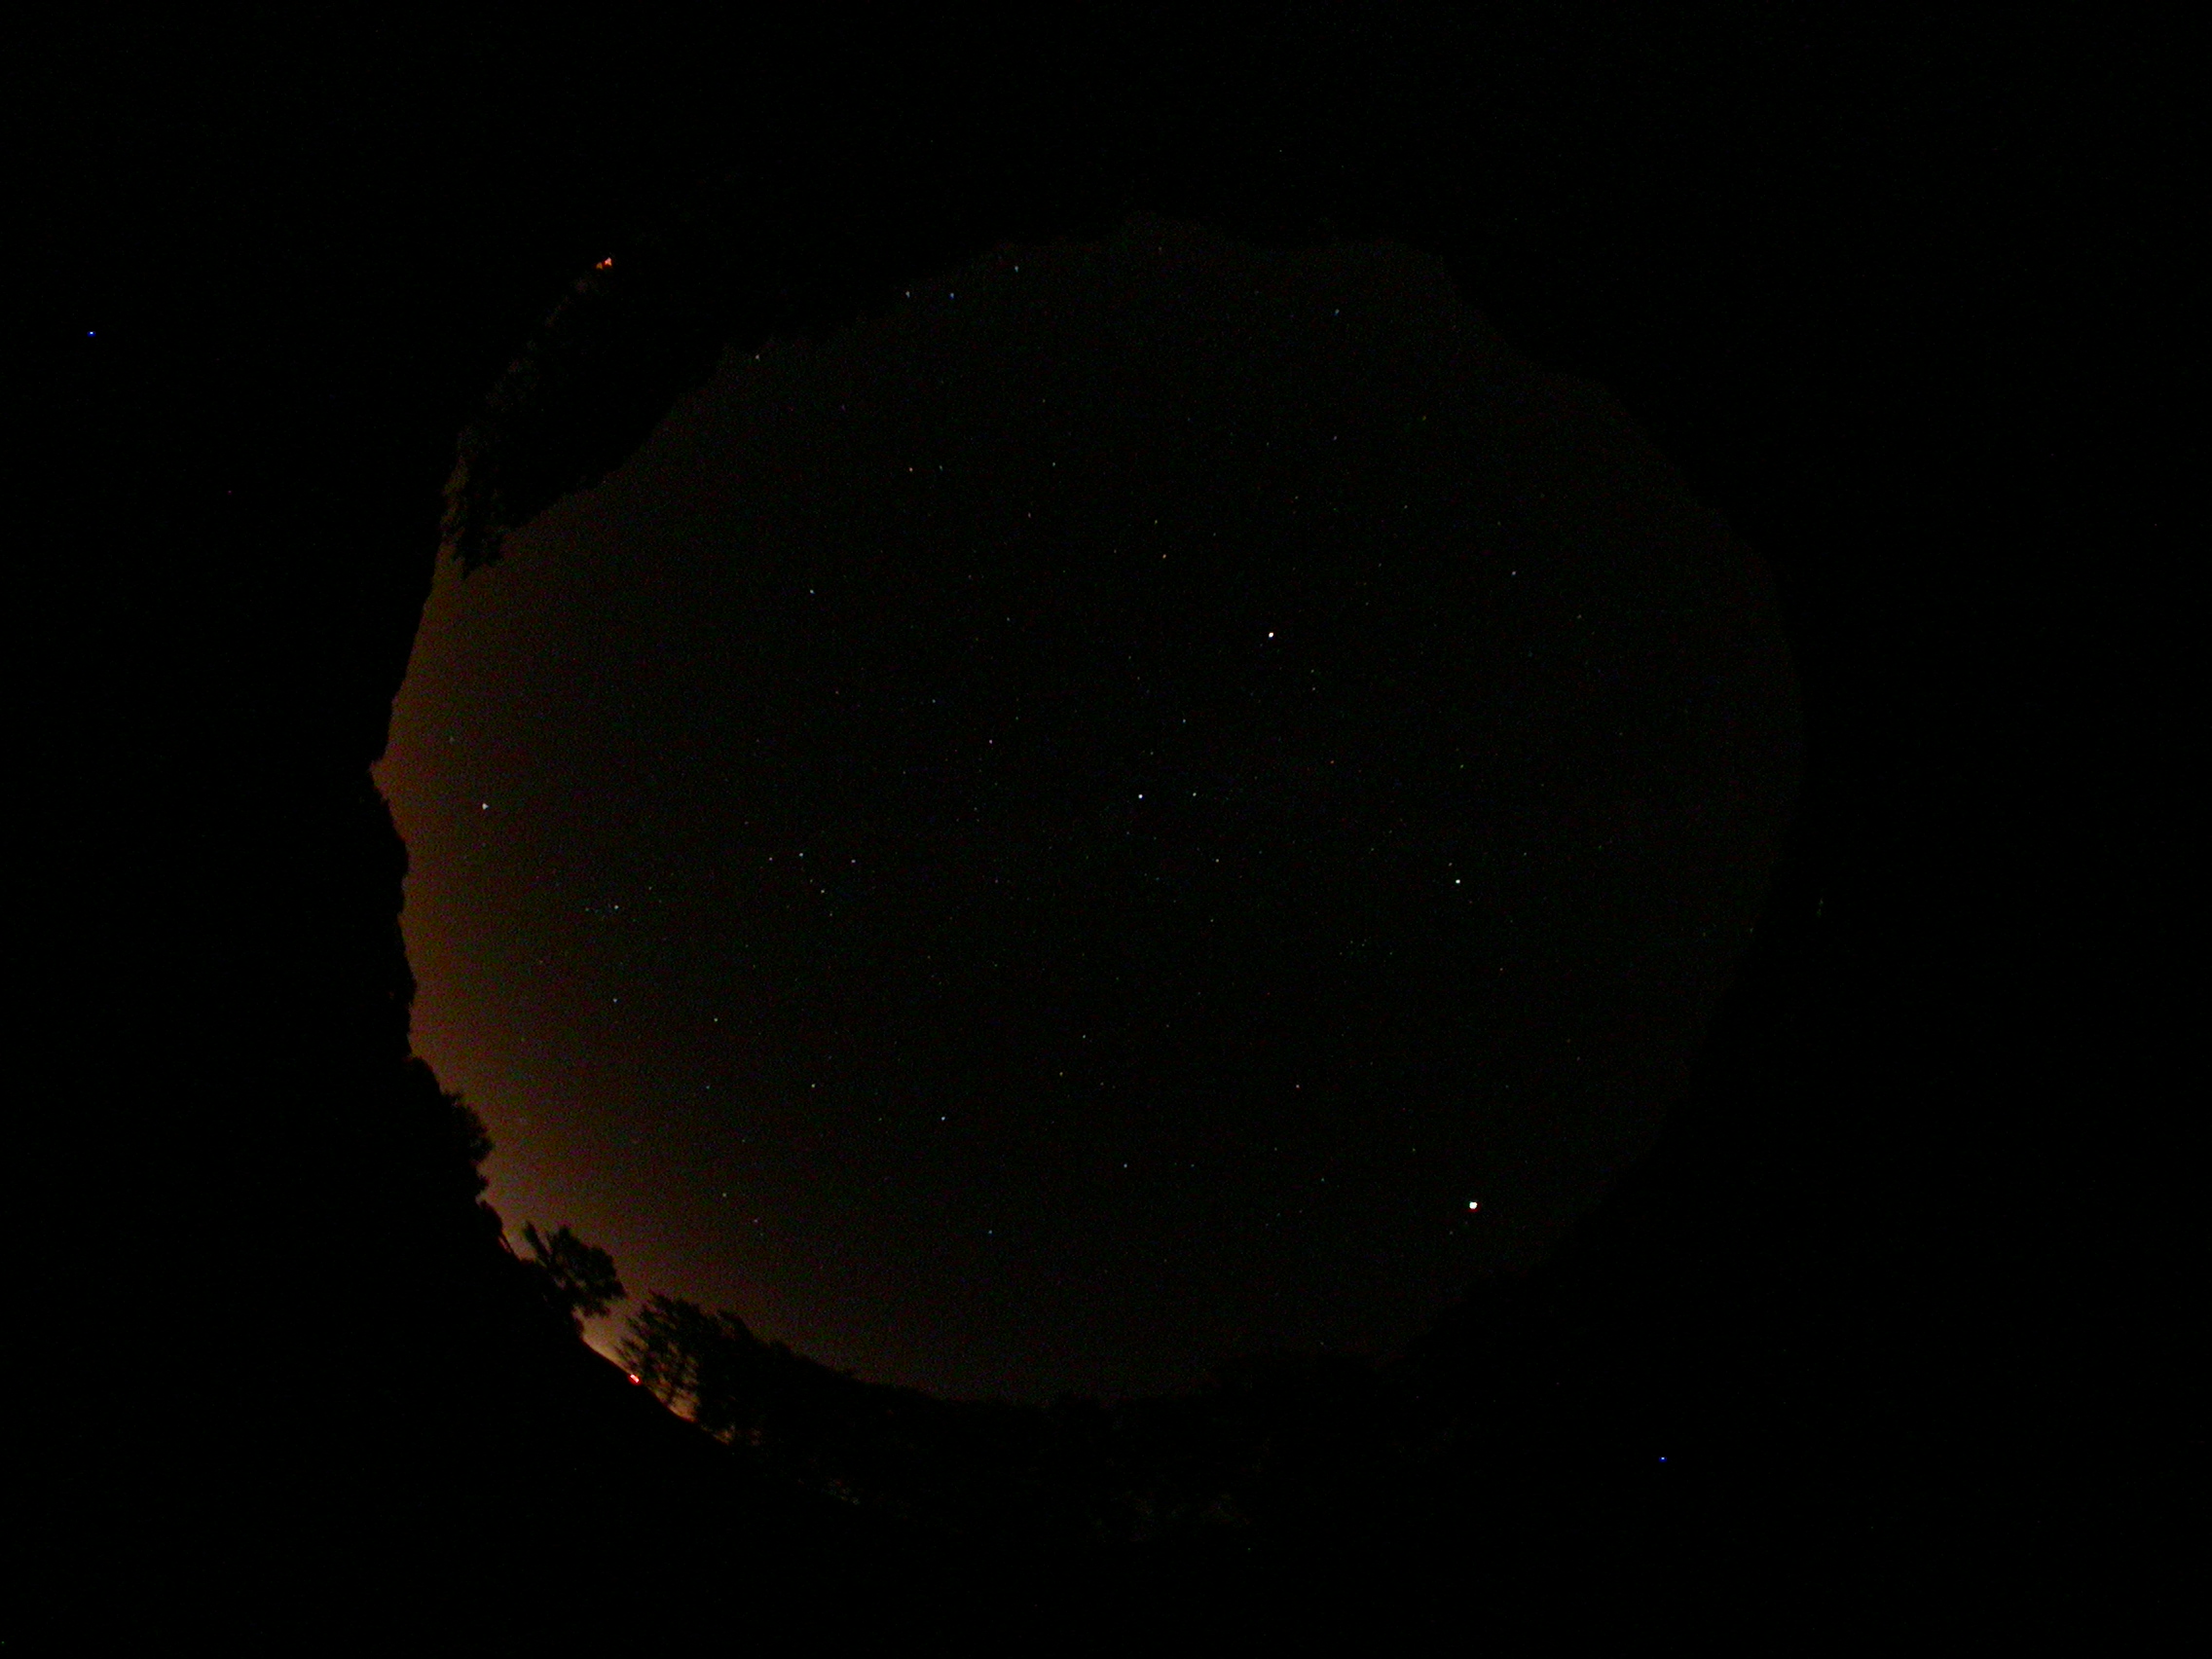
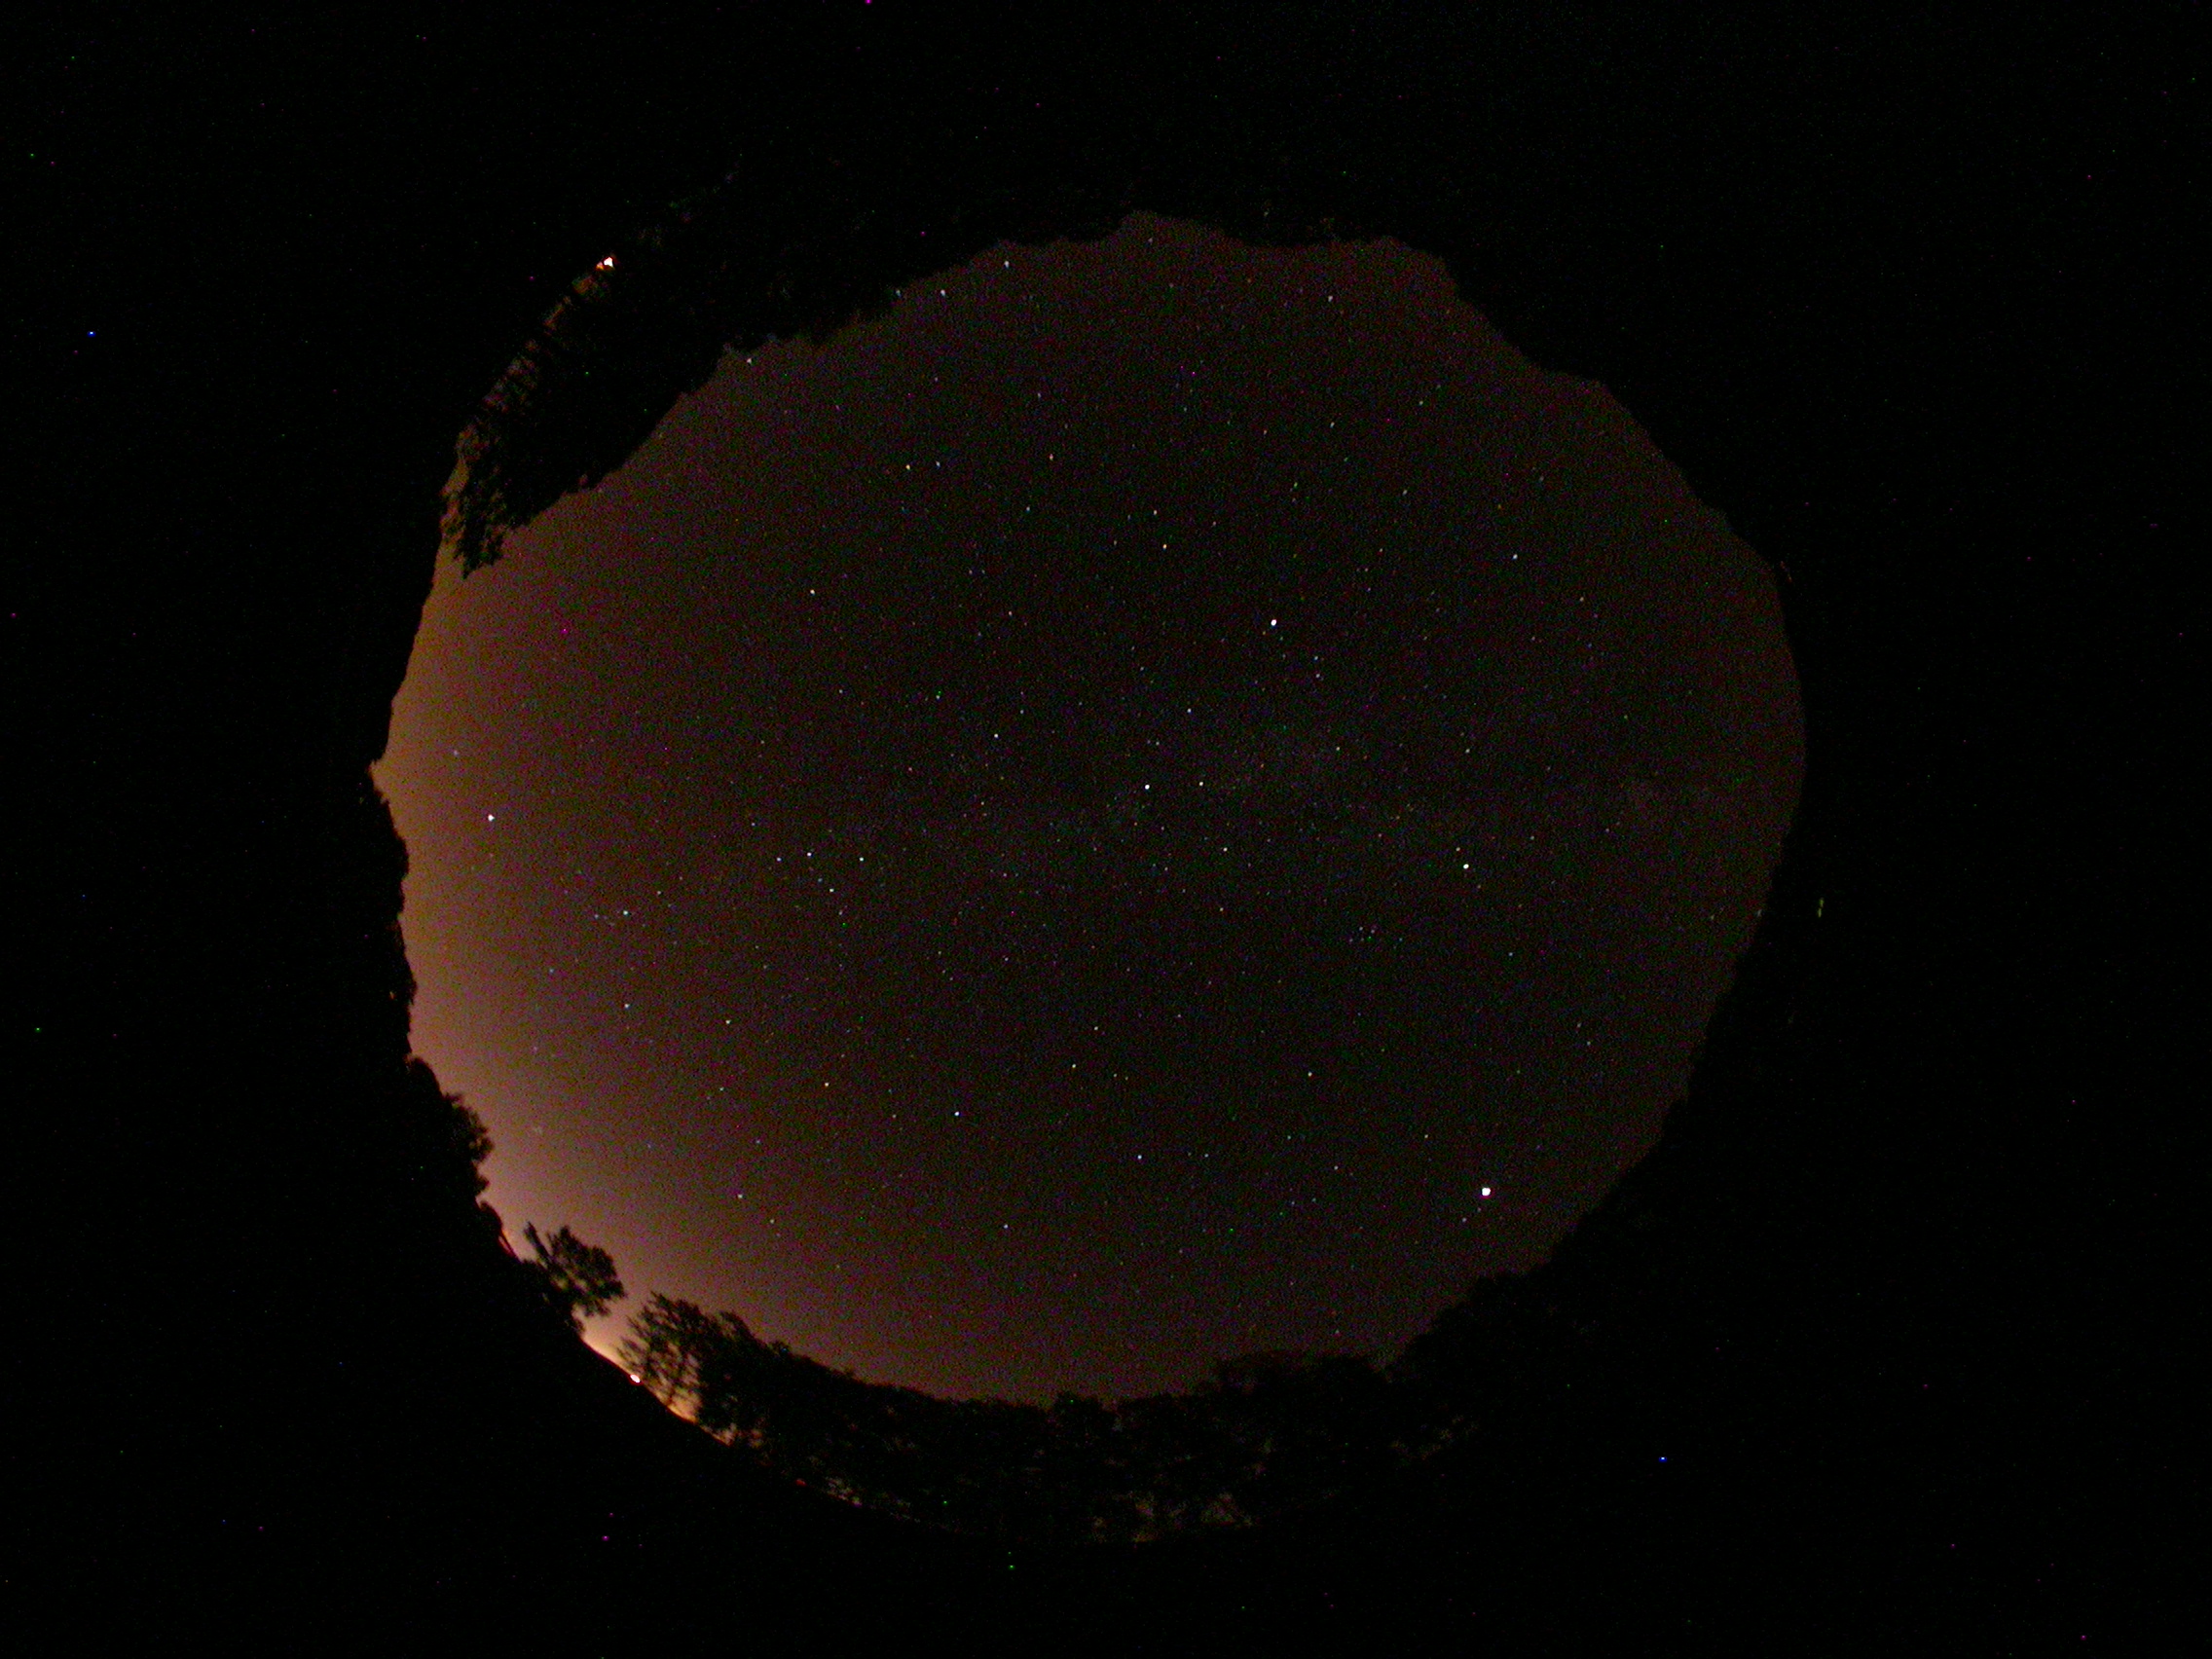
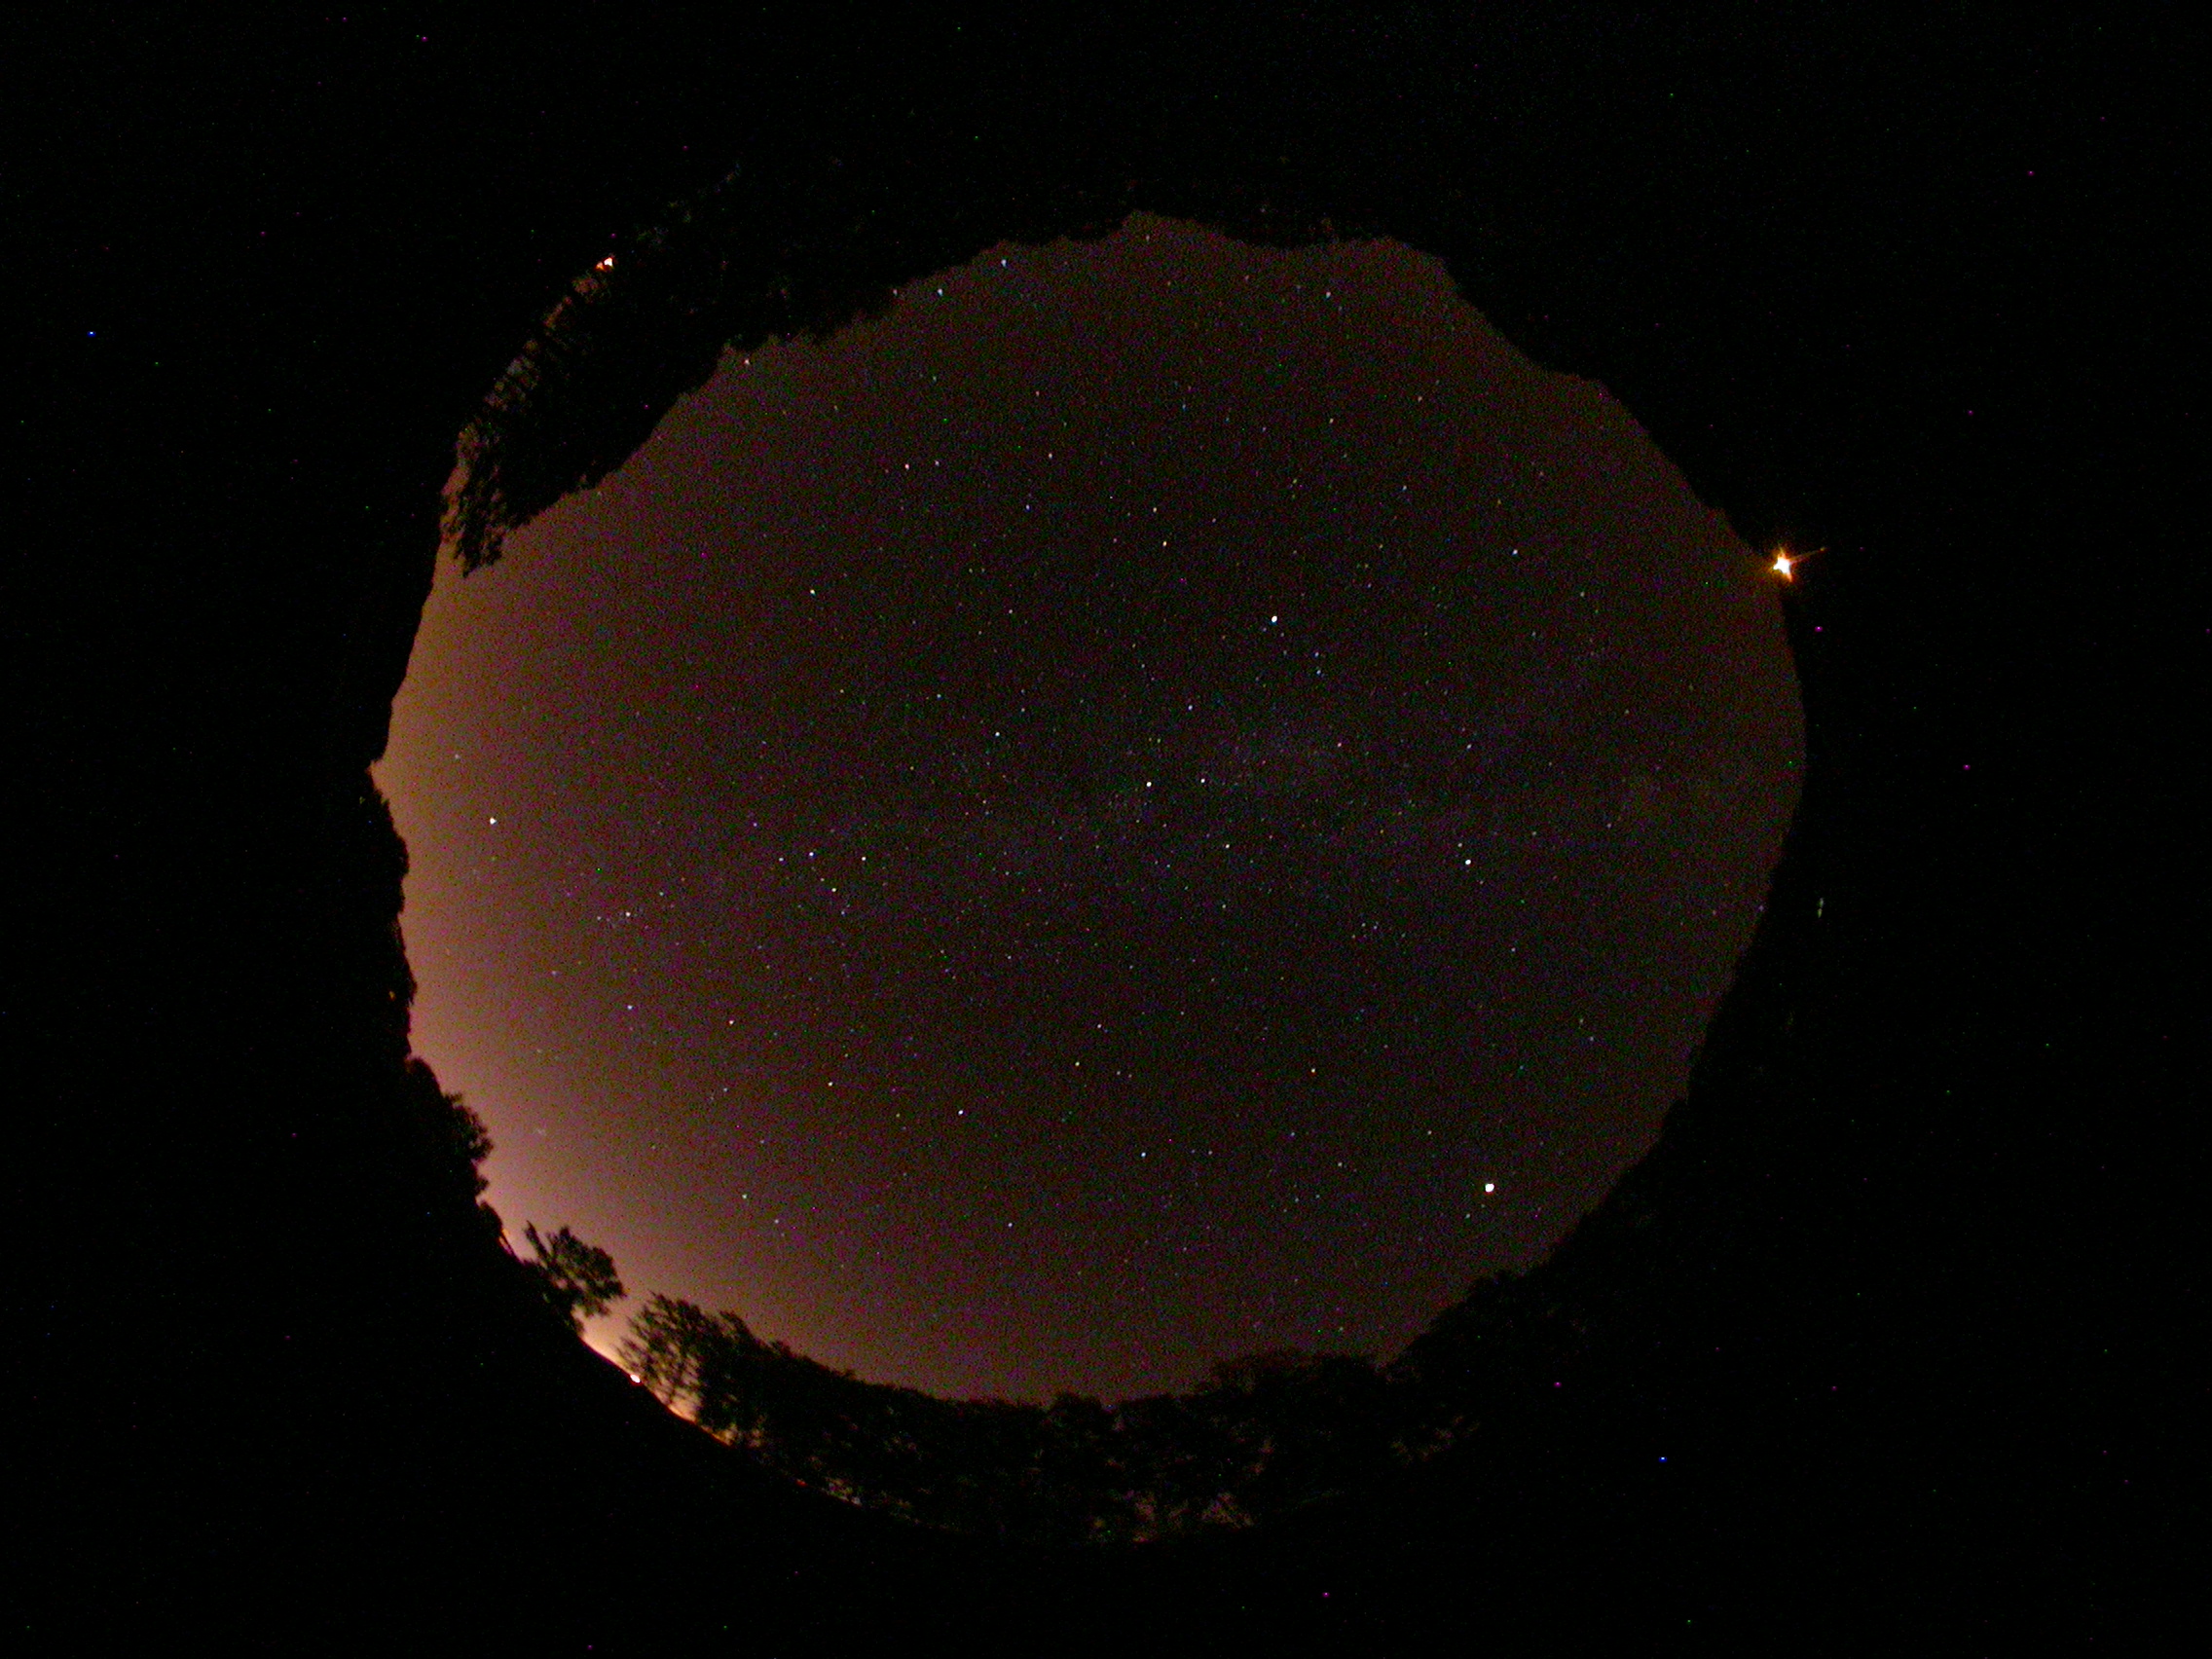
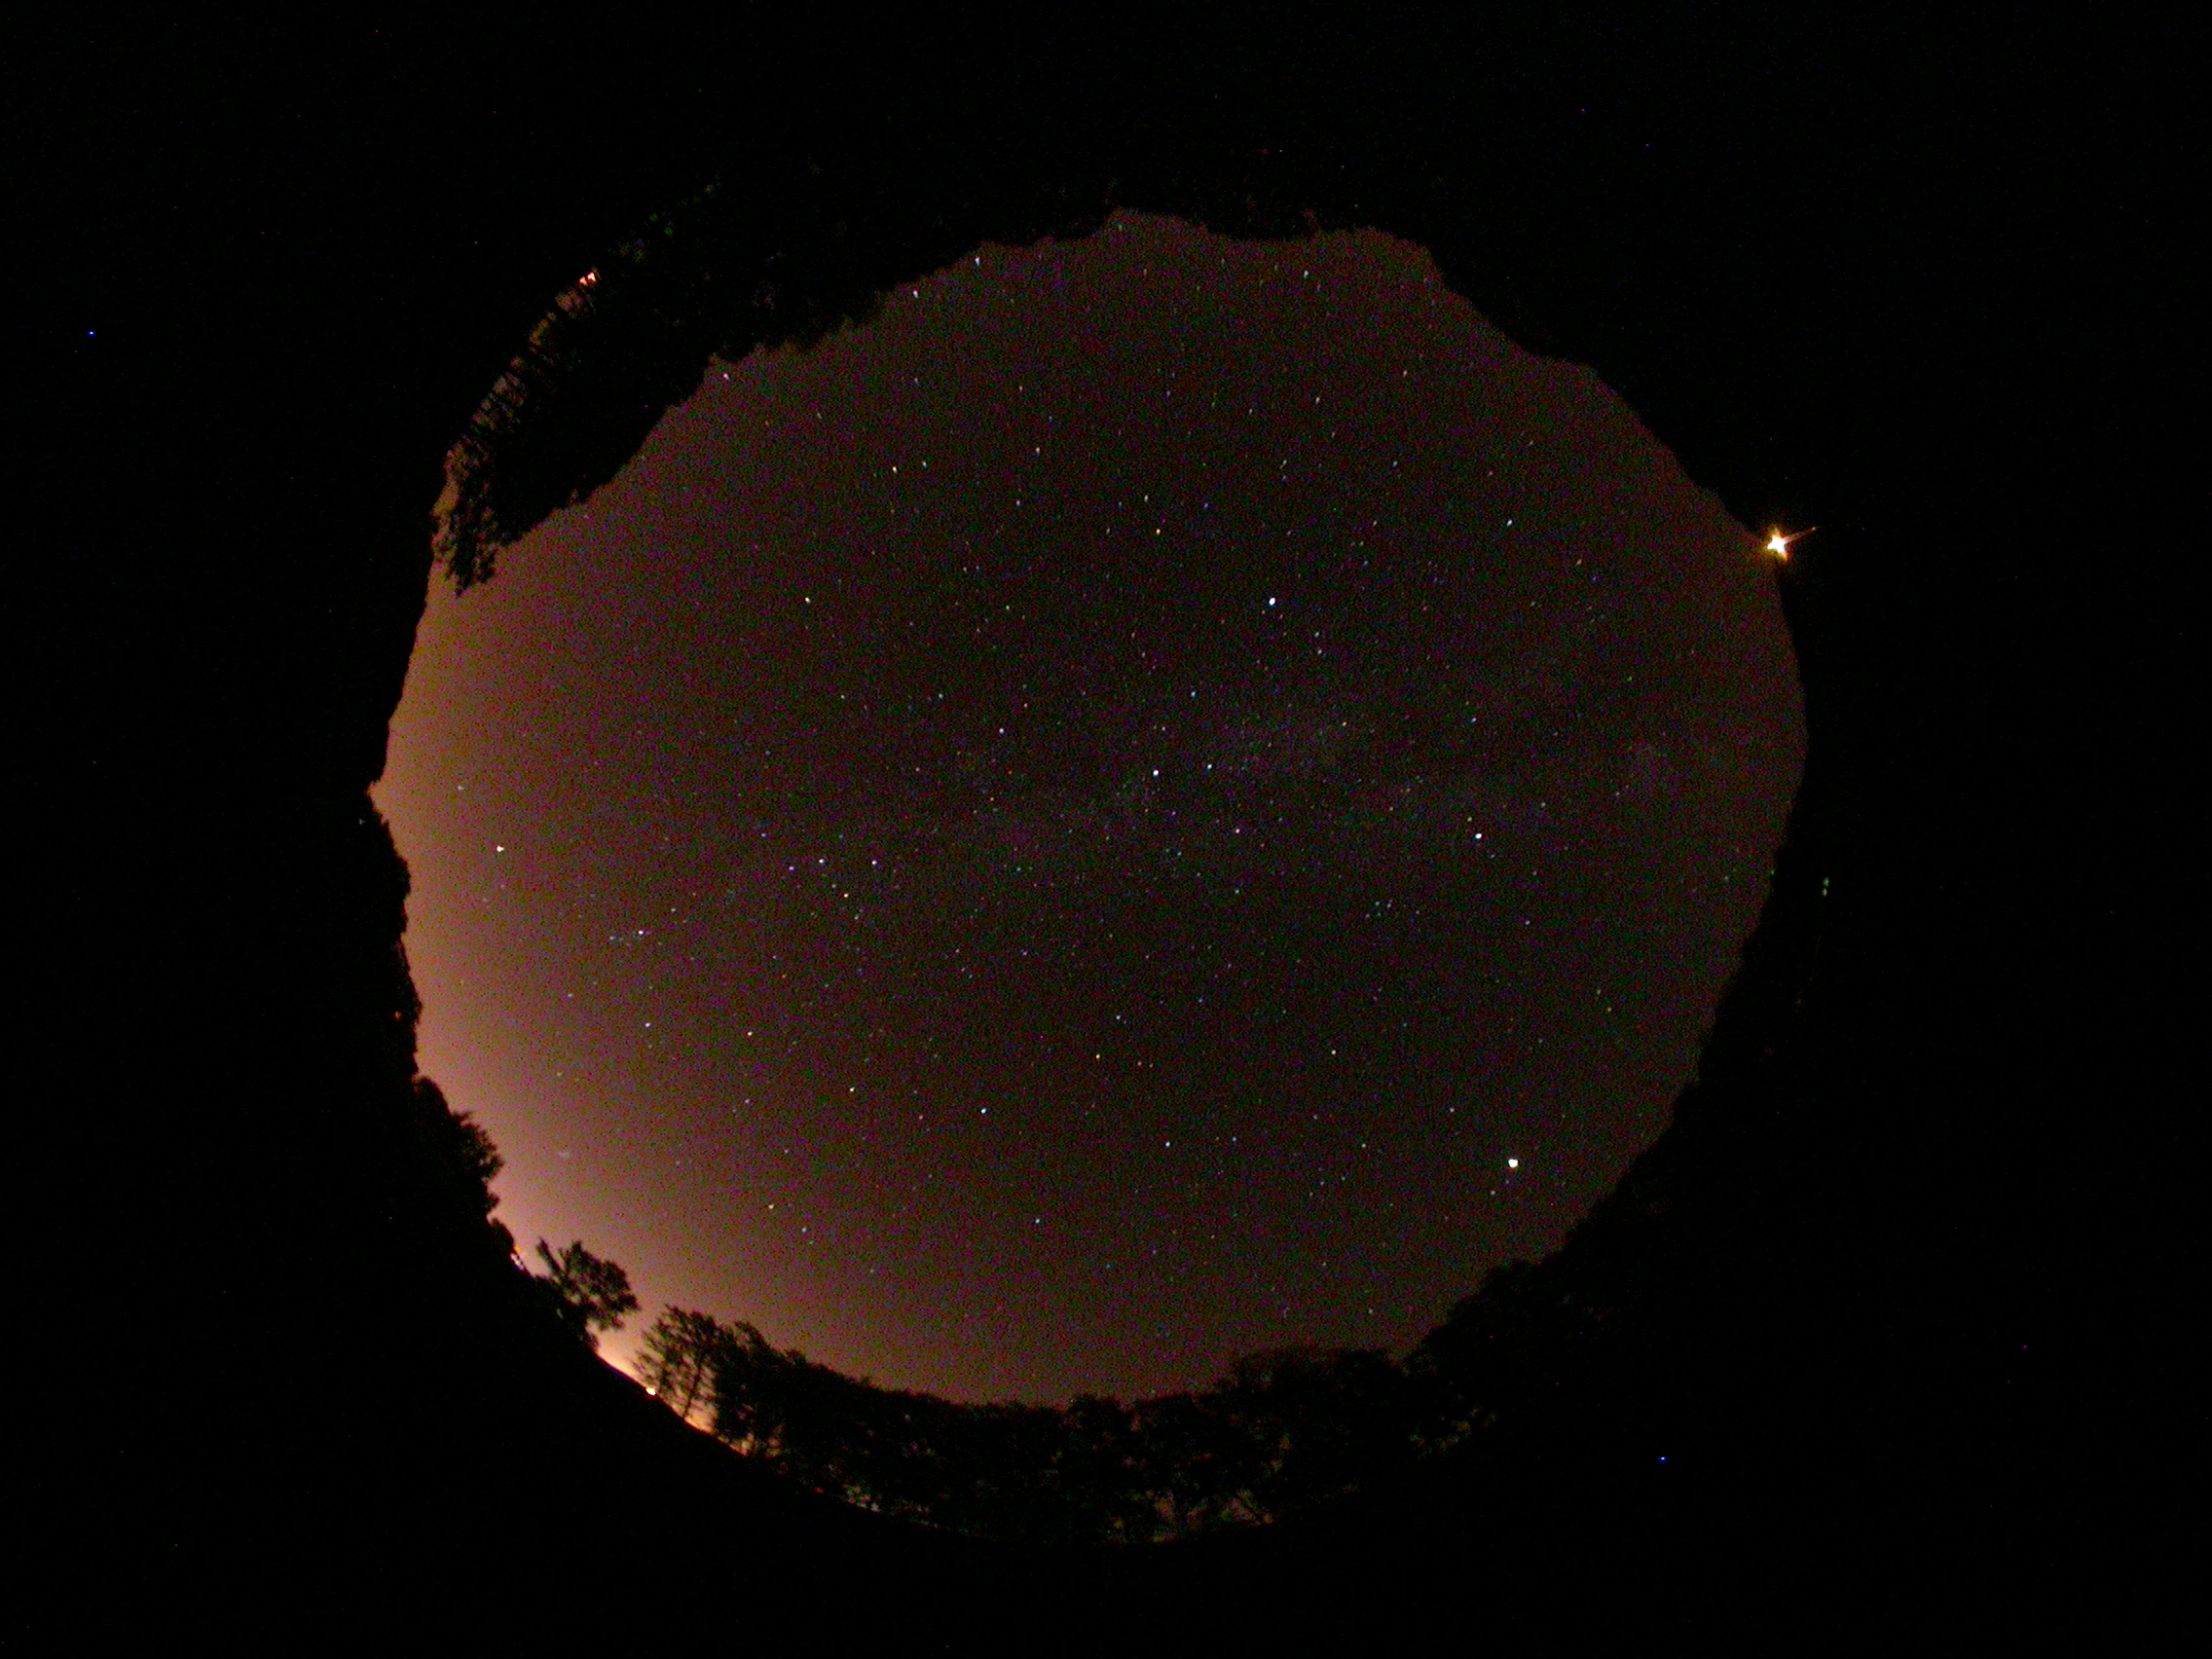
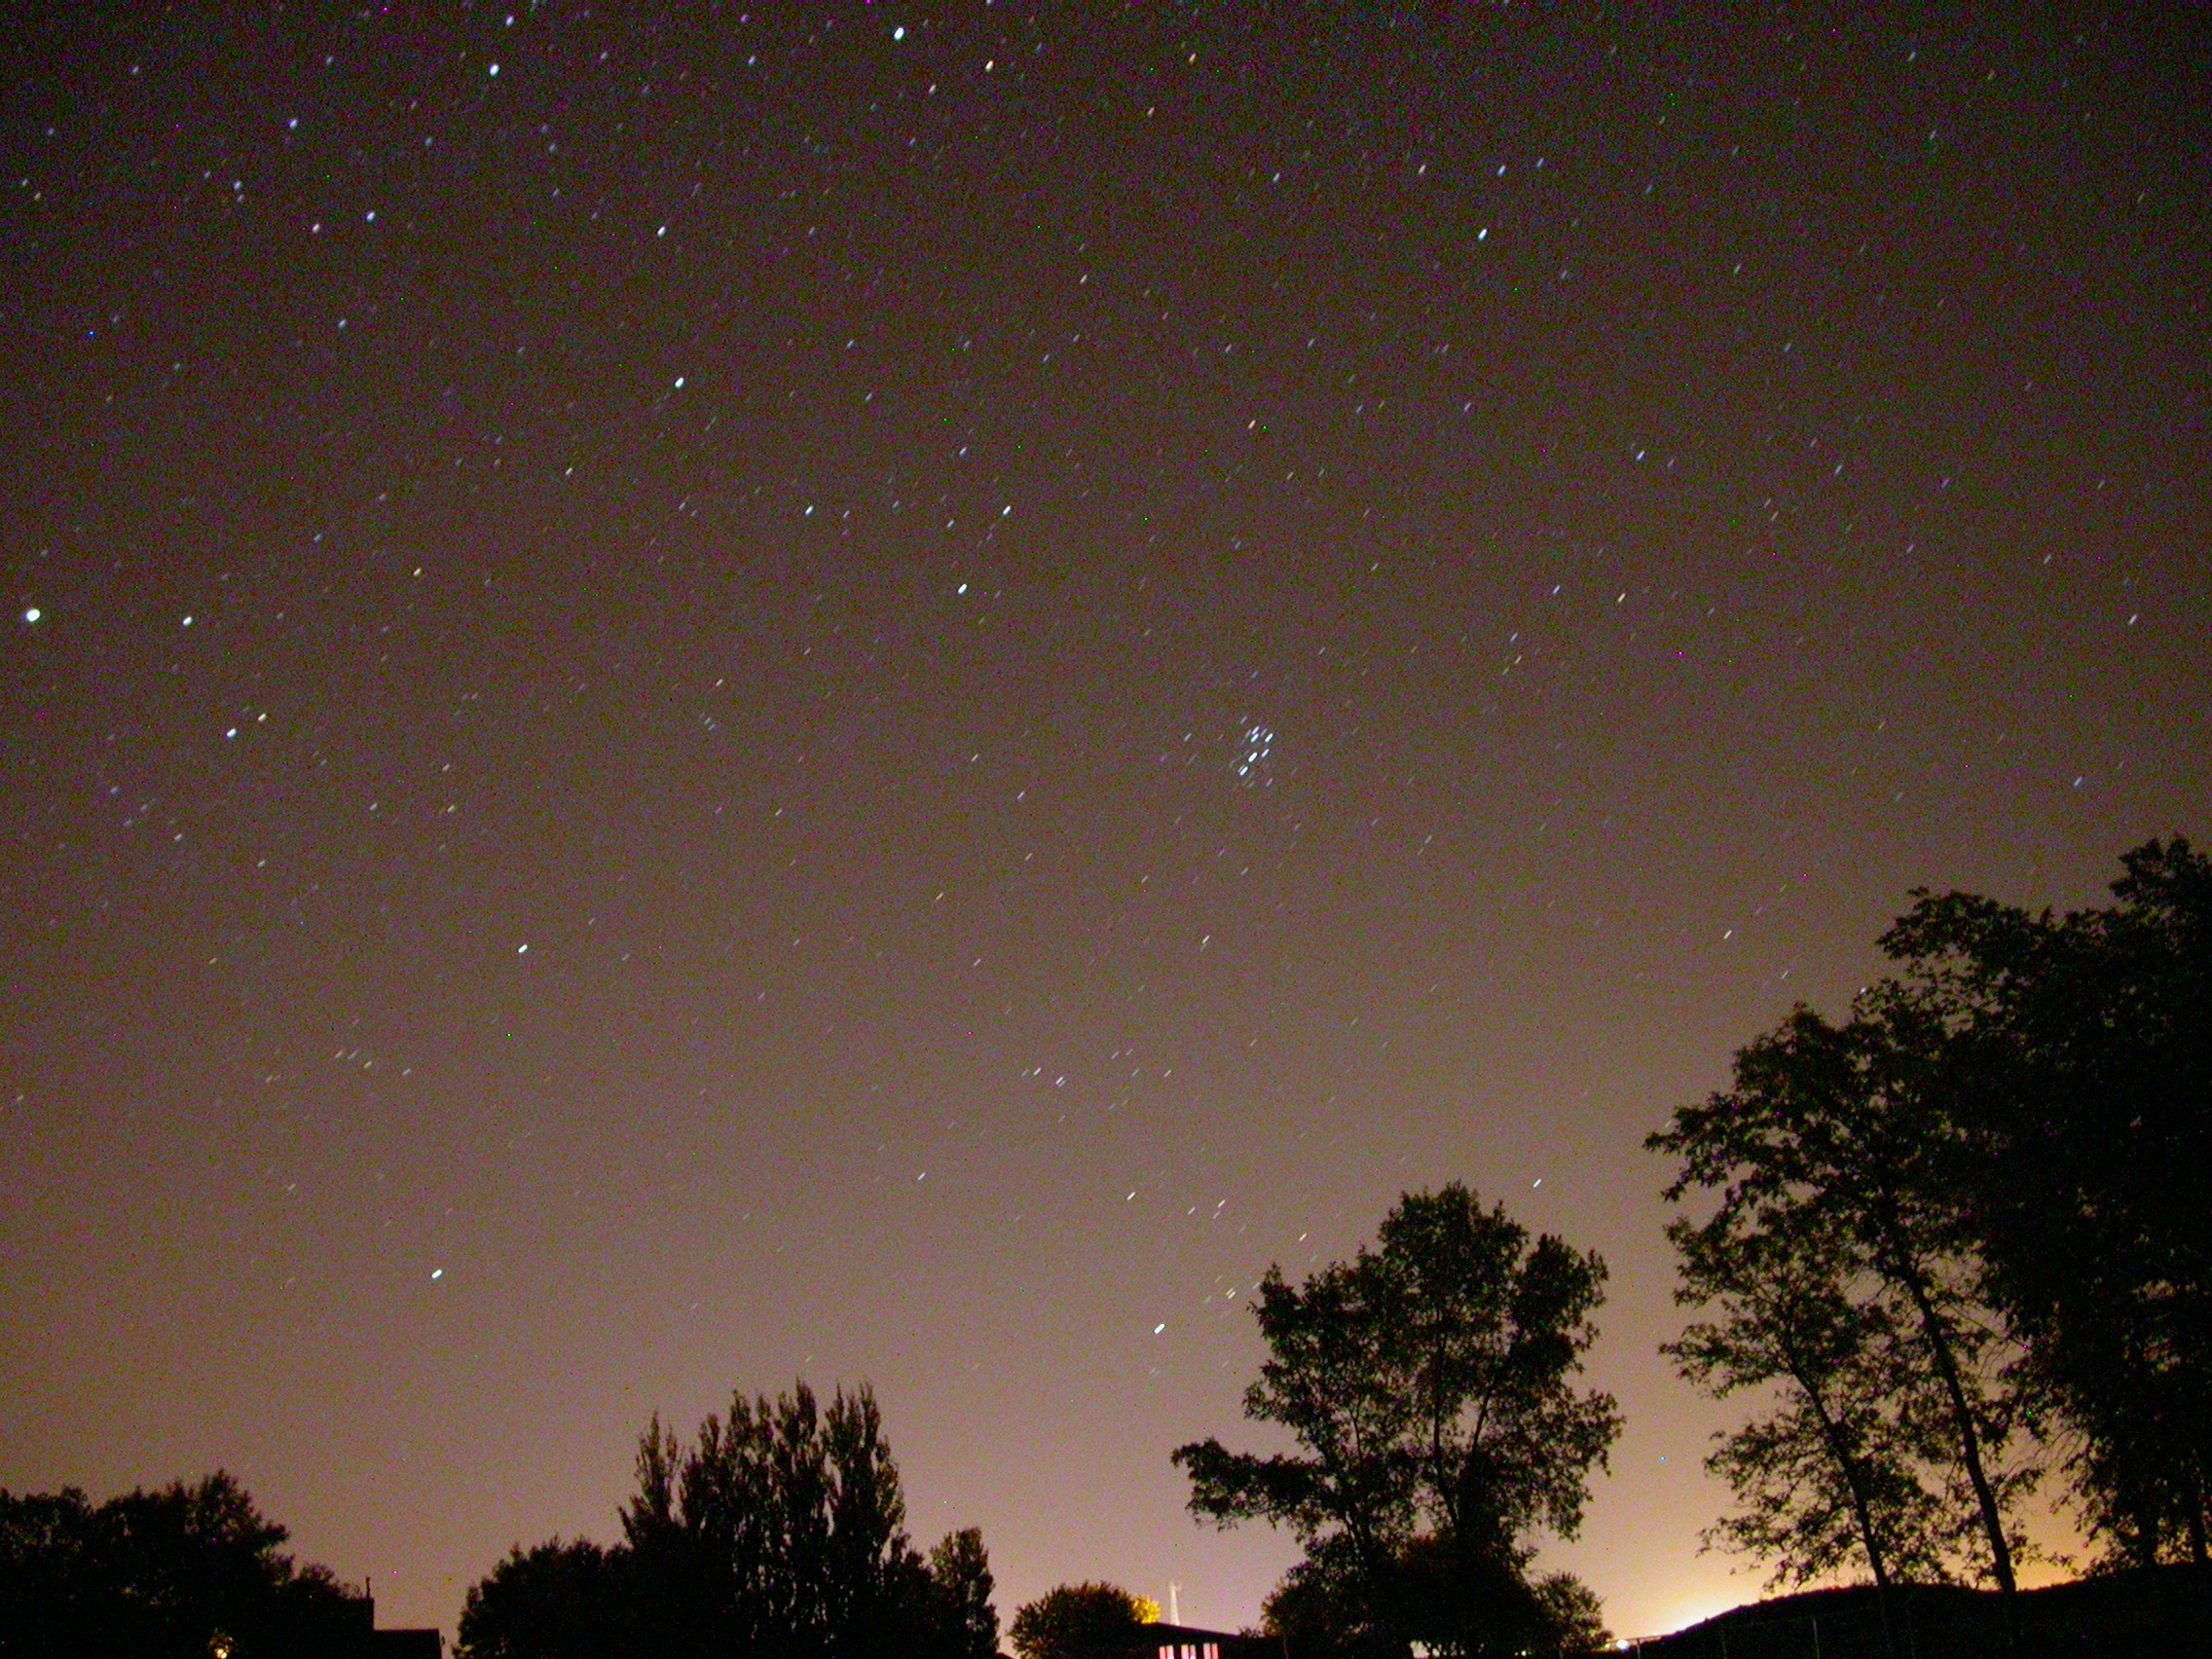
| Here are some fisheye
(180�) pics I took early on the morning of 2009/08/26,
with my Nikon
Coolpix 4500 and the 0.21x
Nikon FC-E8 fisheye lens. The moon was just
past new, so it did not interfere with the sky this
time. The 'noise reduction' feature was active
during this time, but even then 'hot pixels' are extreme
at 60 second exposures. The maximum exposure for
minimal noise is about 20s (which shows mag 5 stars), but
the Milky Way is brightest at 60s. Click on an image
for the full-size version. |
 |
 |
 |
| Sky Fisheye 5s F2.6 ISO 400 8mm |
Sky Fisheye 10s F2.6 ISO 400 8mm |
Sky Fisheye 15s F2.6 ISO 400 8mm |
 |
 |
 |
| Sky Fisheye 20s F2.6 ISO 400 8mm |
Sky Fisheye 25s F2.6 ISO 400 8mm |
Sky Fisheye 30s F2.6 ISO 400 8mm |
 |
 |
 |
| Sky Fisheye 40s F2.6 ISO 400 8mm |
Sky Fisheye 50s F2.6 ISO 400 8mm |
Sky Fisheye 60s F2.6 ISO 400 8mm |
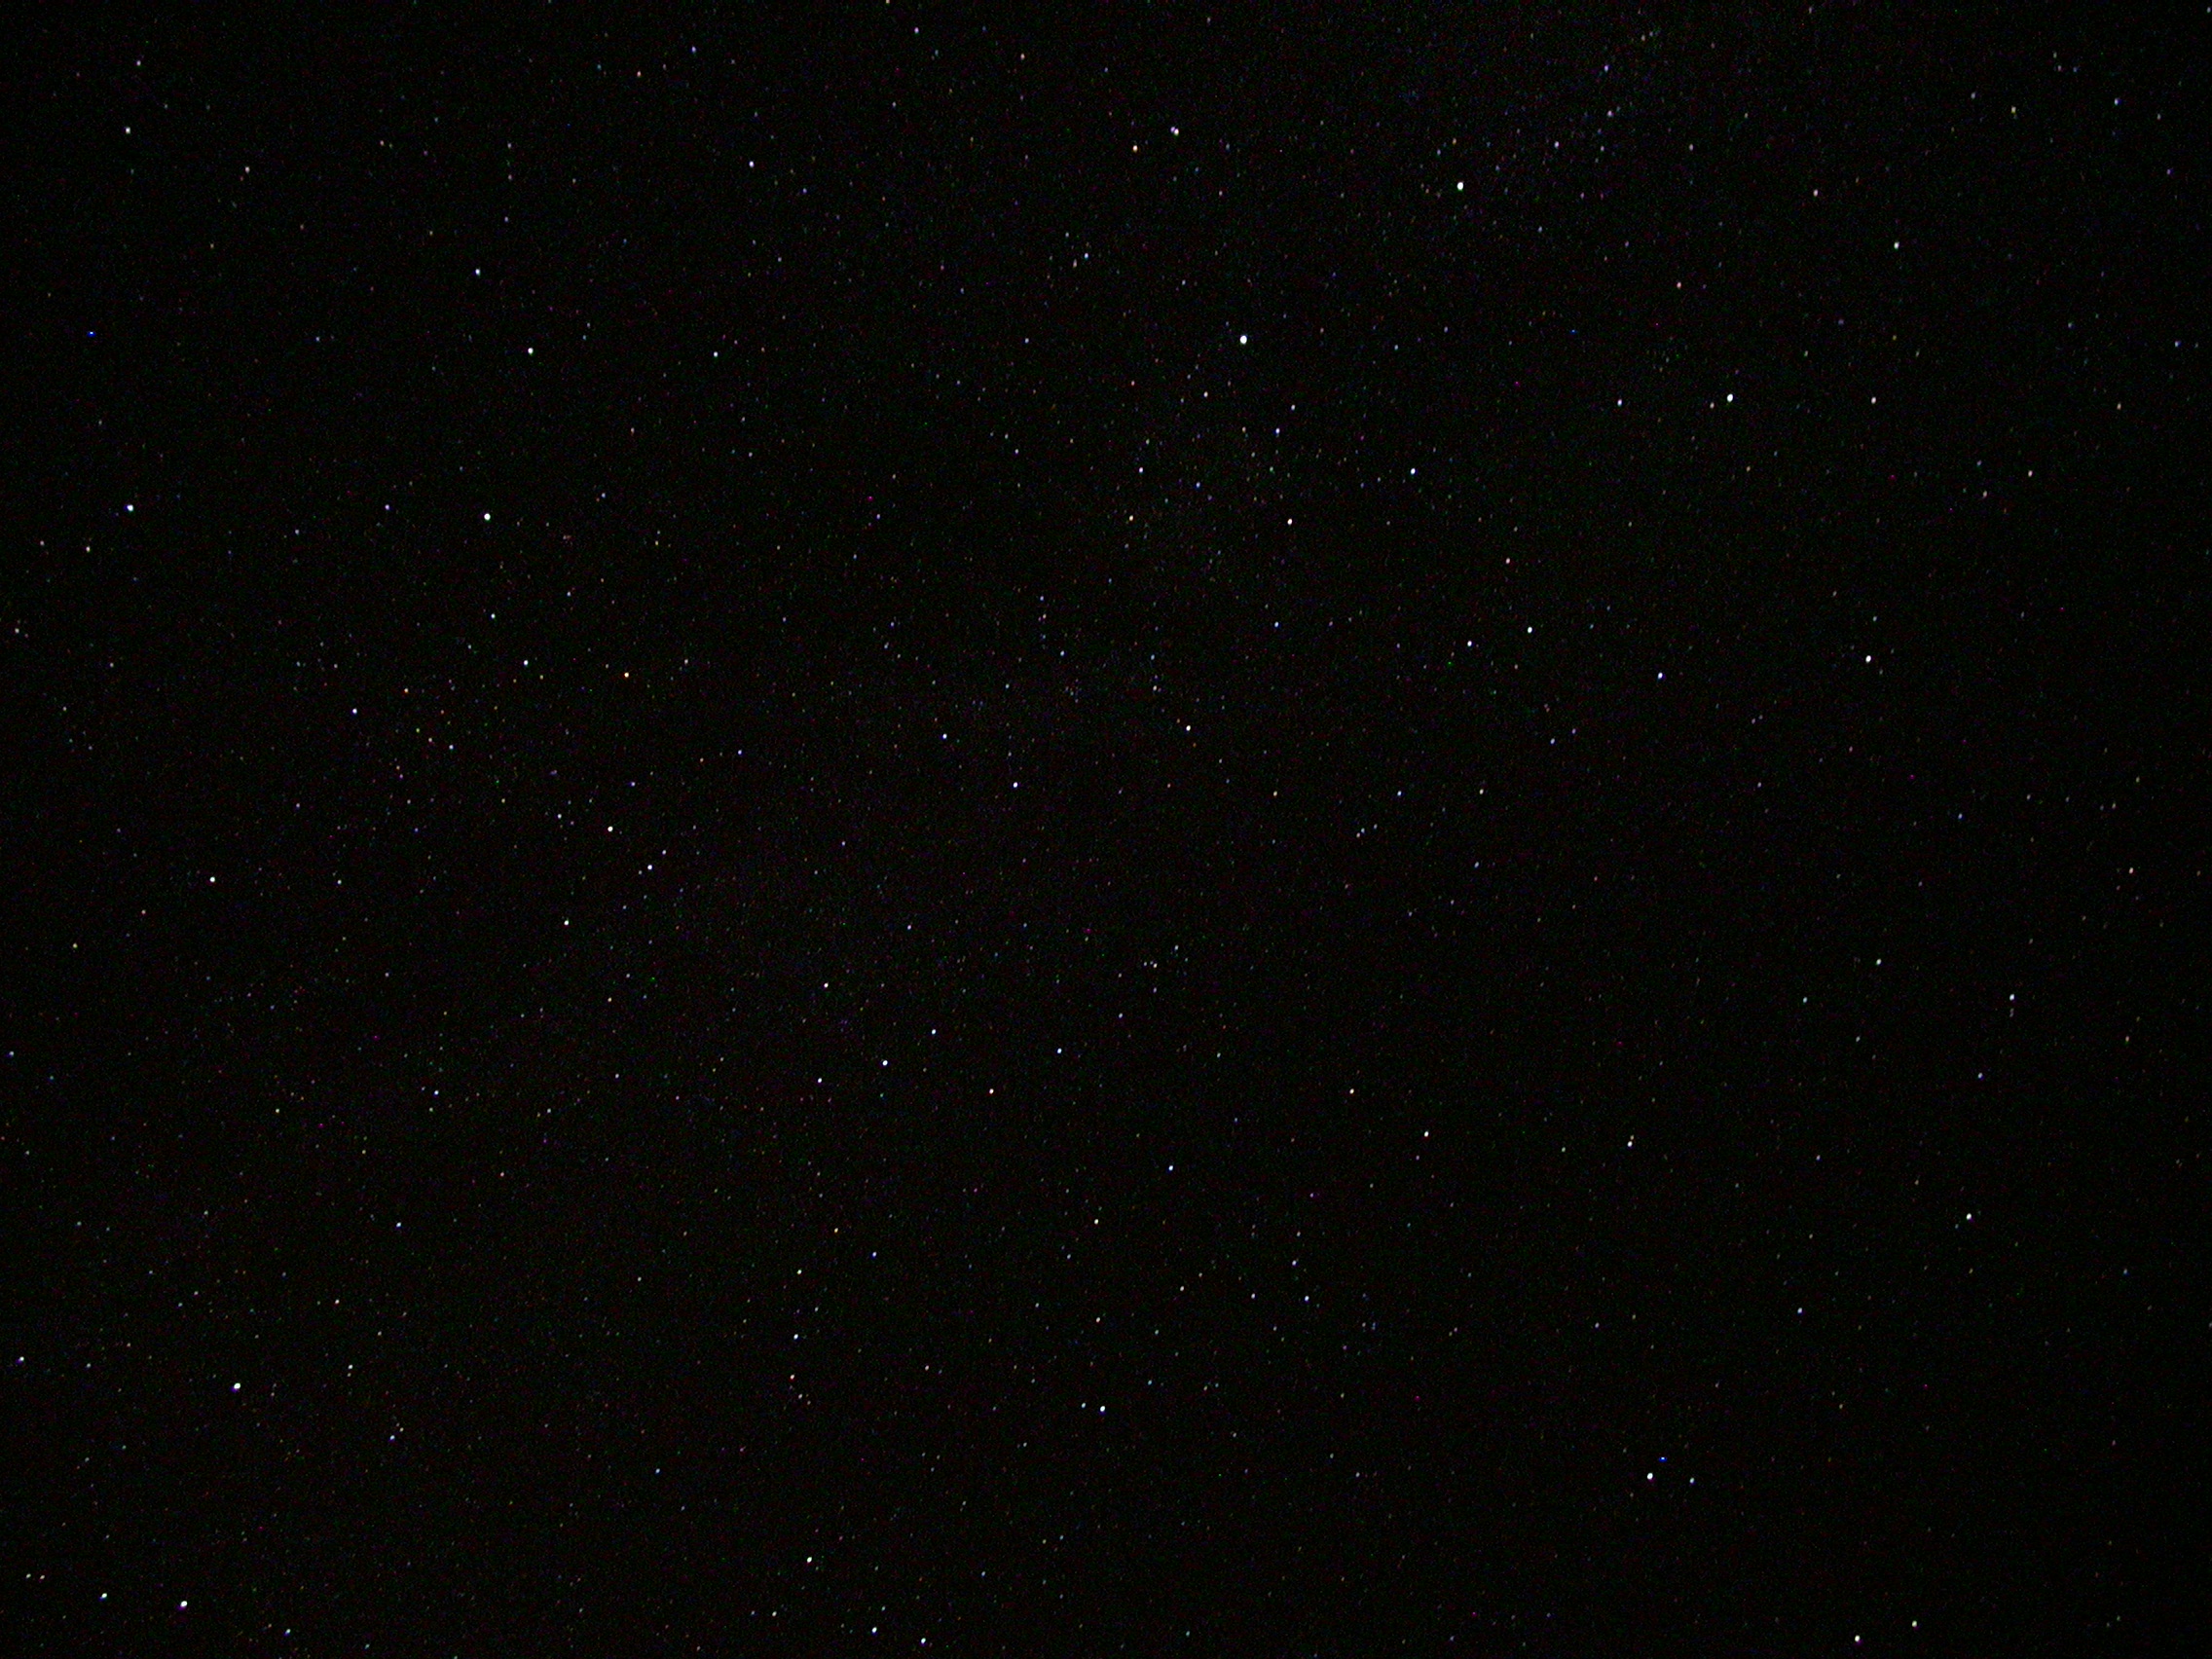
| Here are normal pics I took
early on the morning of 2009/08/26, with my Nikon
Coolpix 4500. The maximum exposure for
minimal noise is about 20s, due to blur that occurs with
the Earth's rotation. Click on an image for the
full-size version. |
 |
 |
| M45 Pleiades 20s F2.6 ISO
400 8mm |
M45 Pleiades 30s F2.6 ISO 400 8mm |
 |
 |
| M45 Pleiades 40s F2.6 ISO 400 8mm | M45 Pleiades 50s F2.6 ISO 400 8mm |
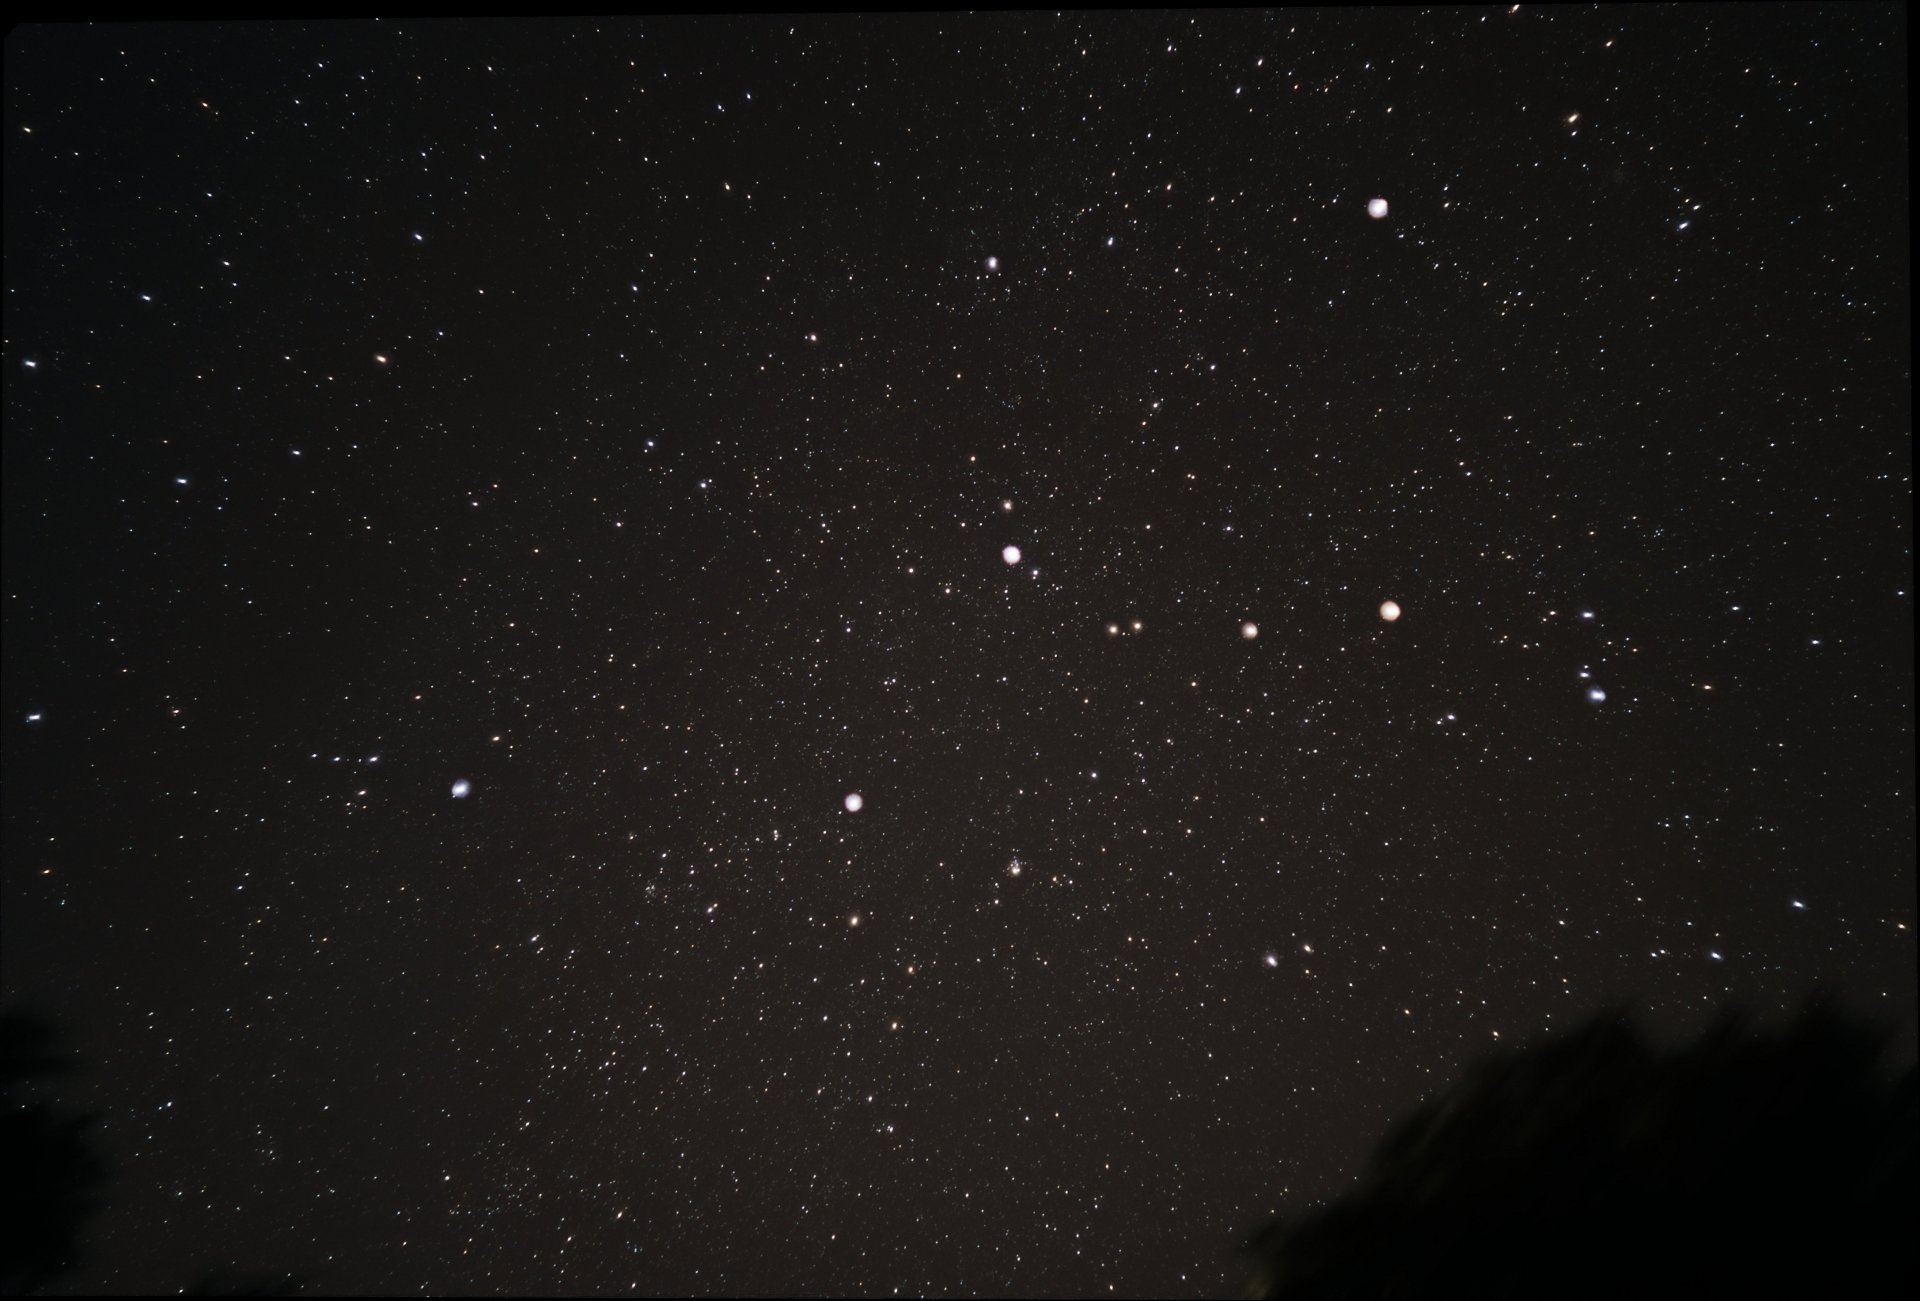
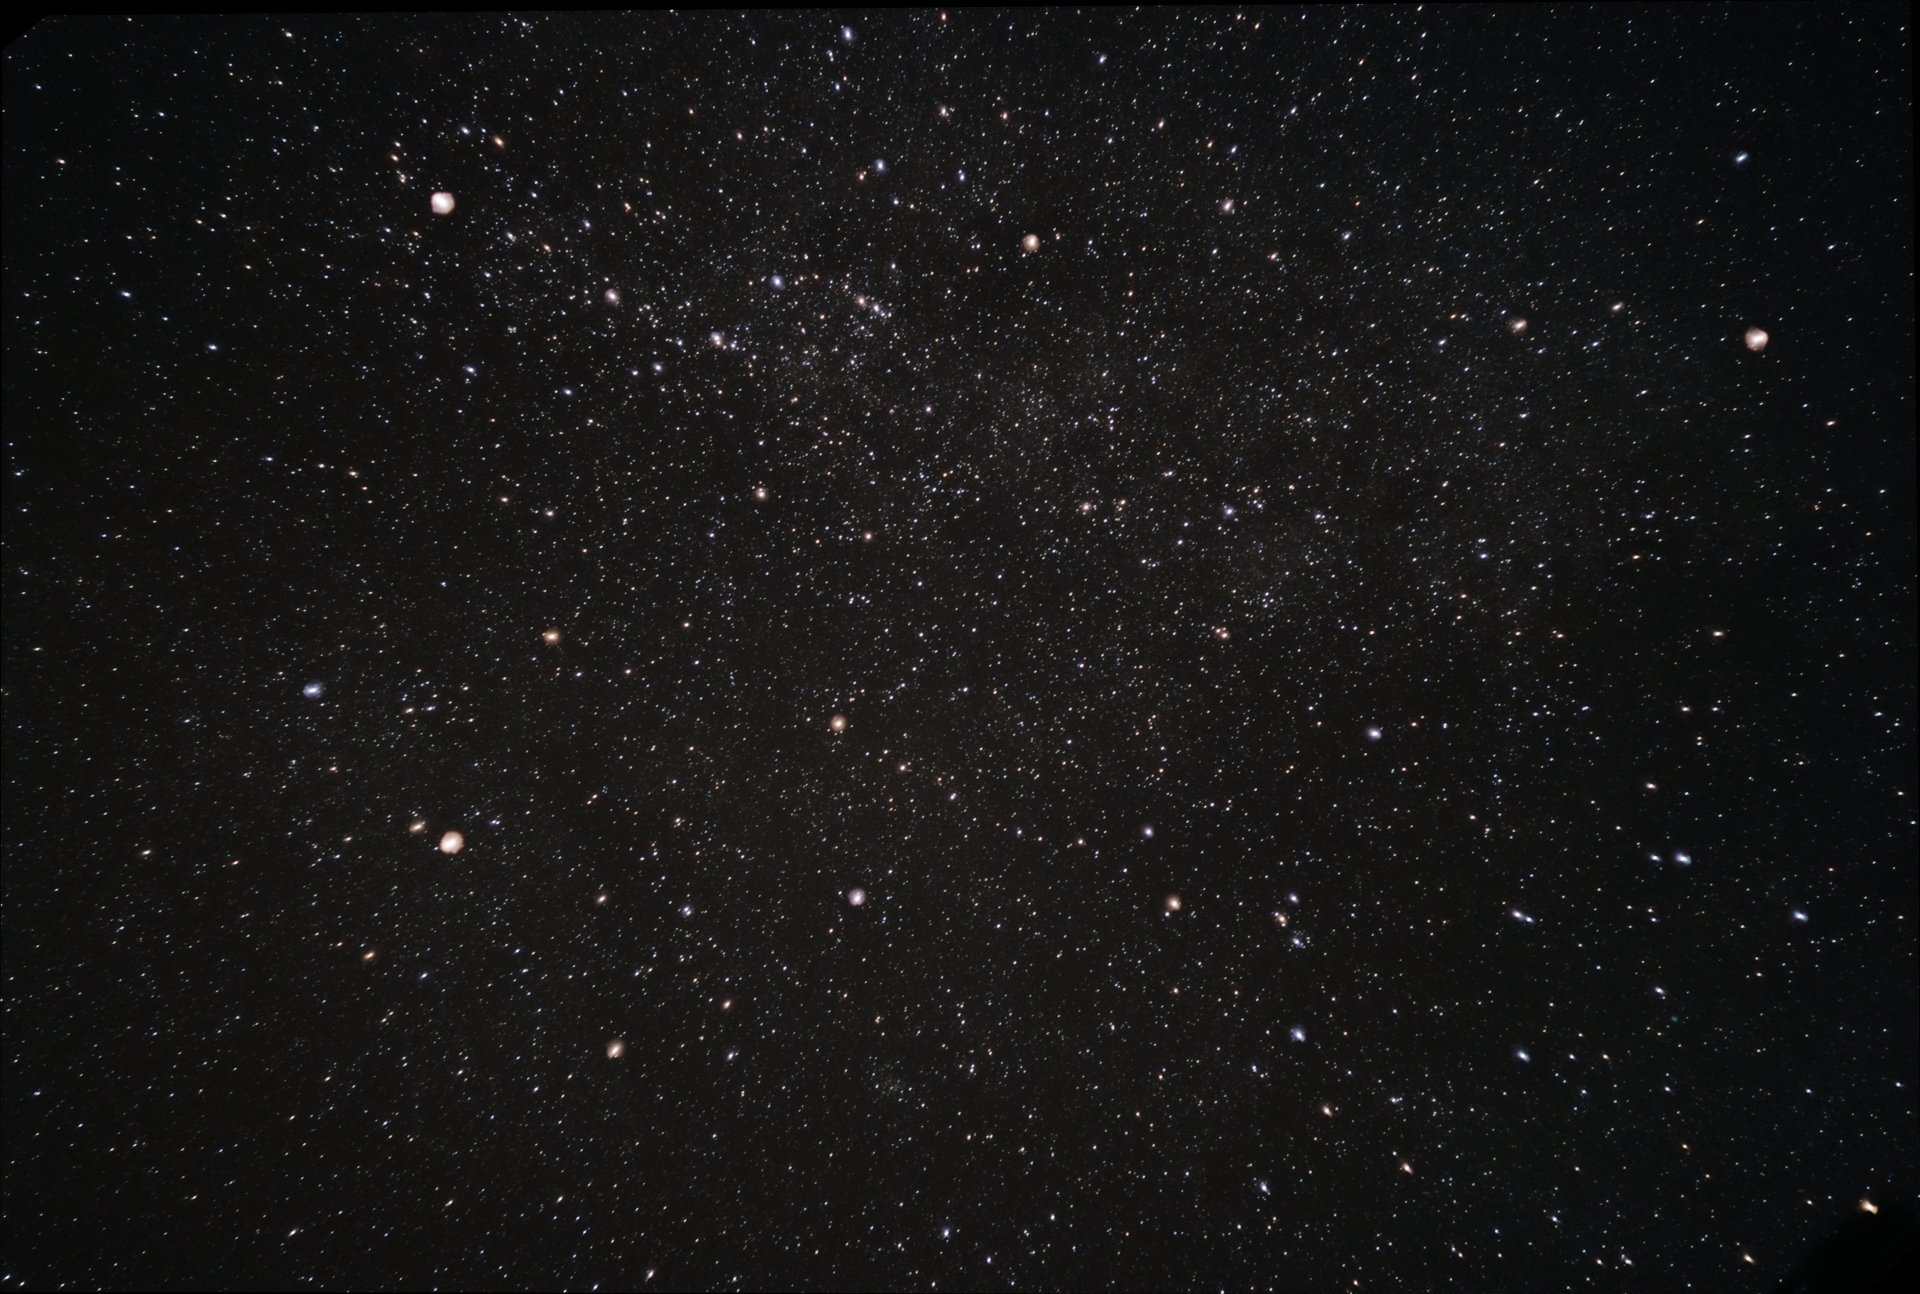
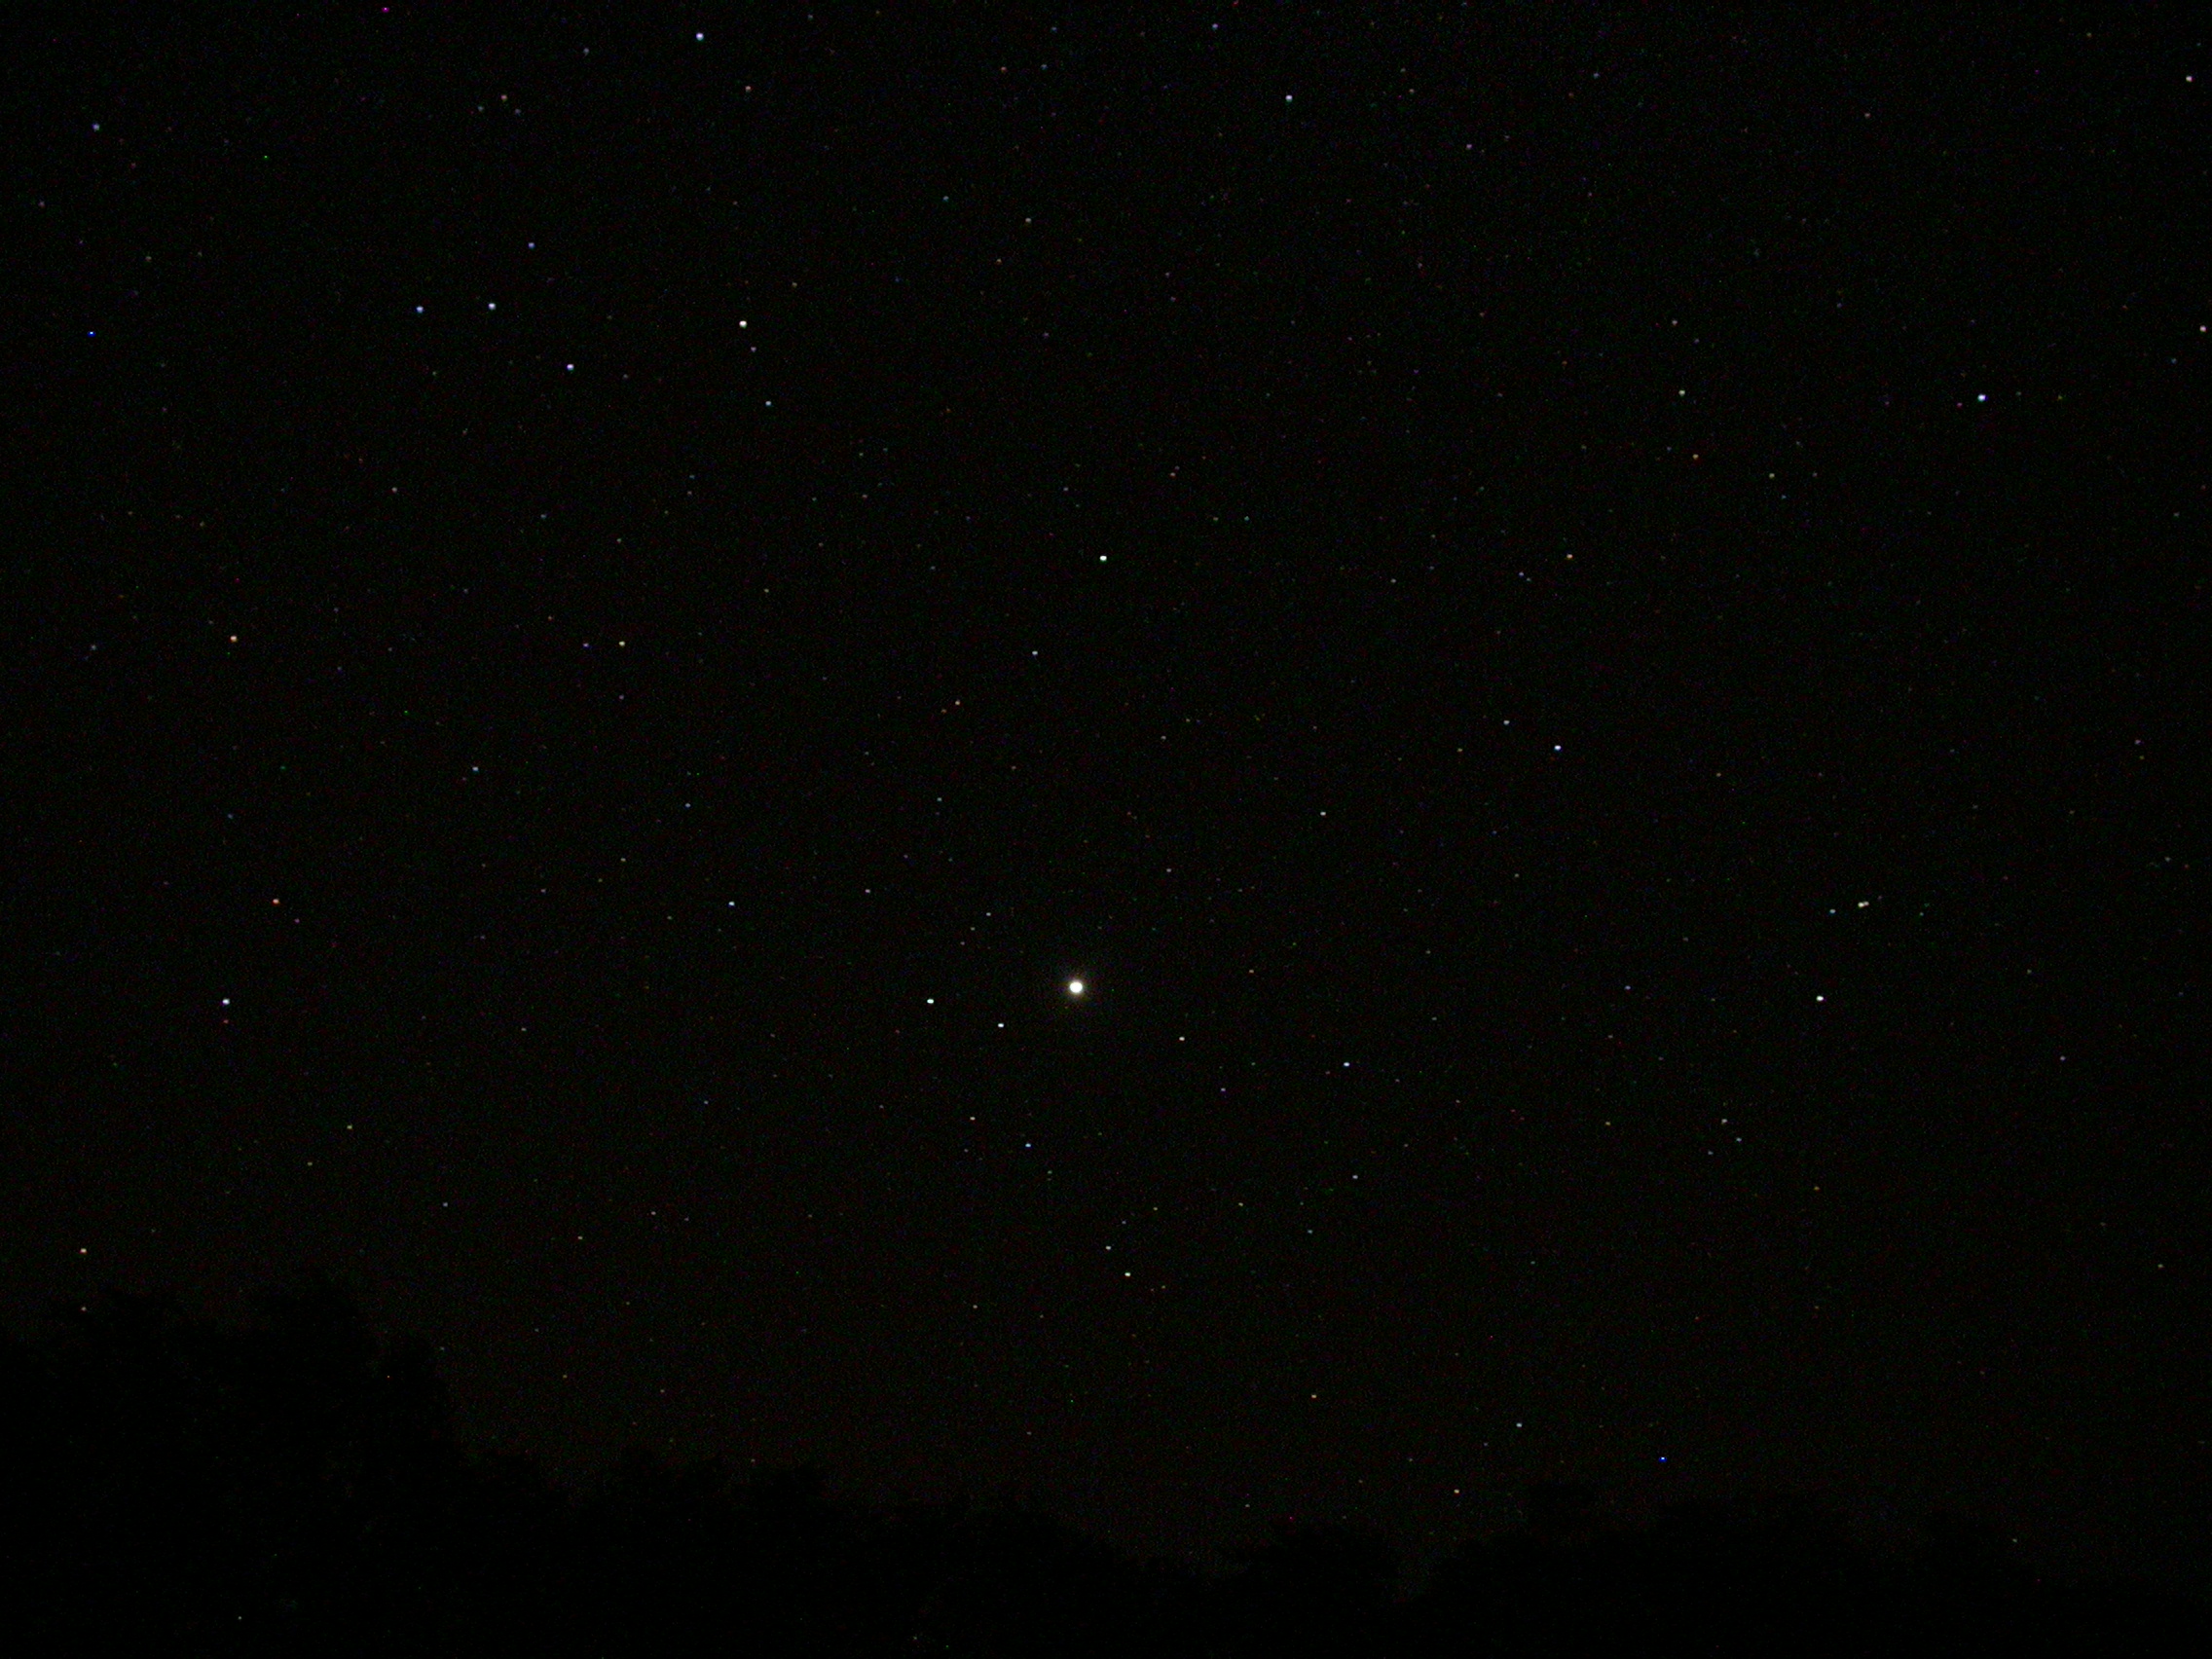
| Here are normal pics I took
early on the morning of 2009/08/26, with my Nikon
Coolpix 4500. These are just the 20s
exposures. At this exposure, the magnitude limit
appears to be about 5. Click on an image for the
full-size version. |
 |
 |
| Jupiter in Capricornus 20s
F2.6 ISO 400 8mm |
Ursa Major 20s F2.6 ISO 400
8mm |
 |
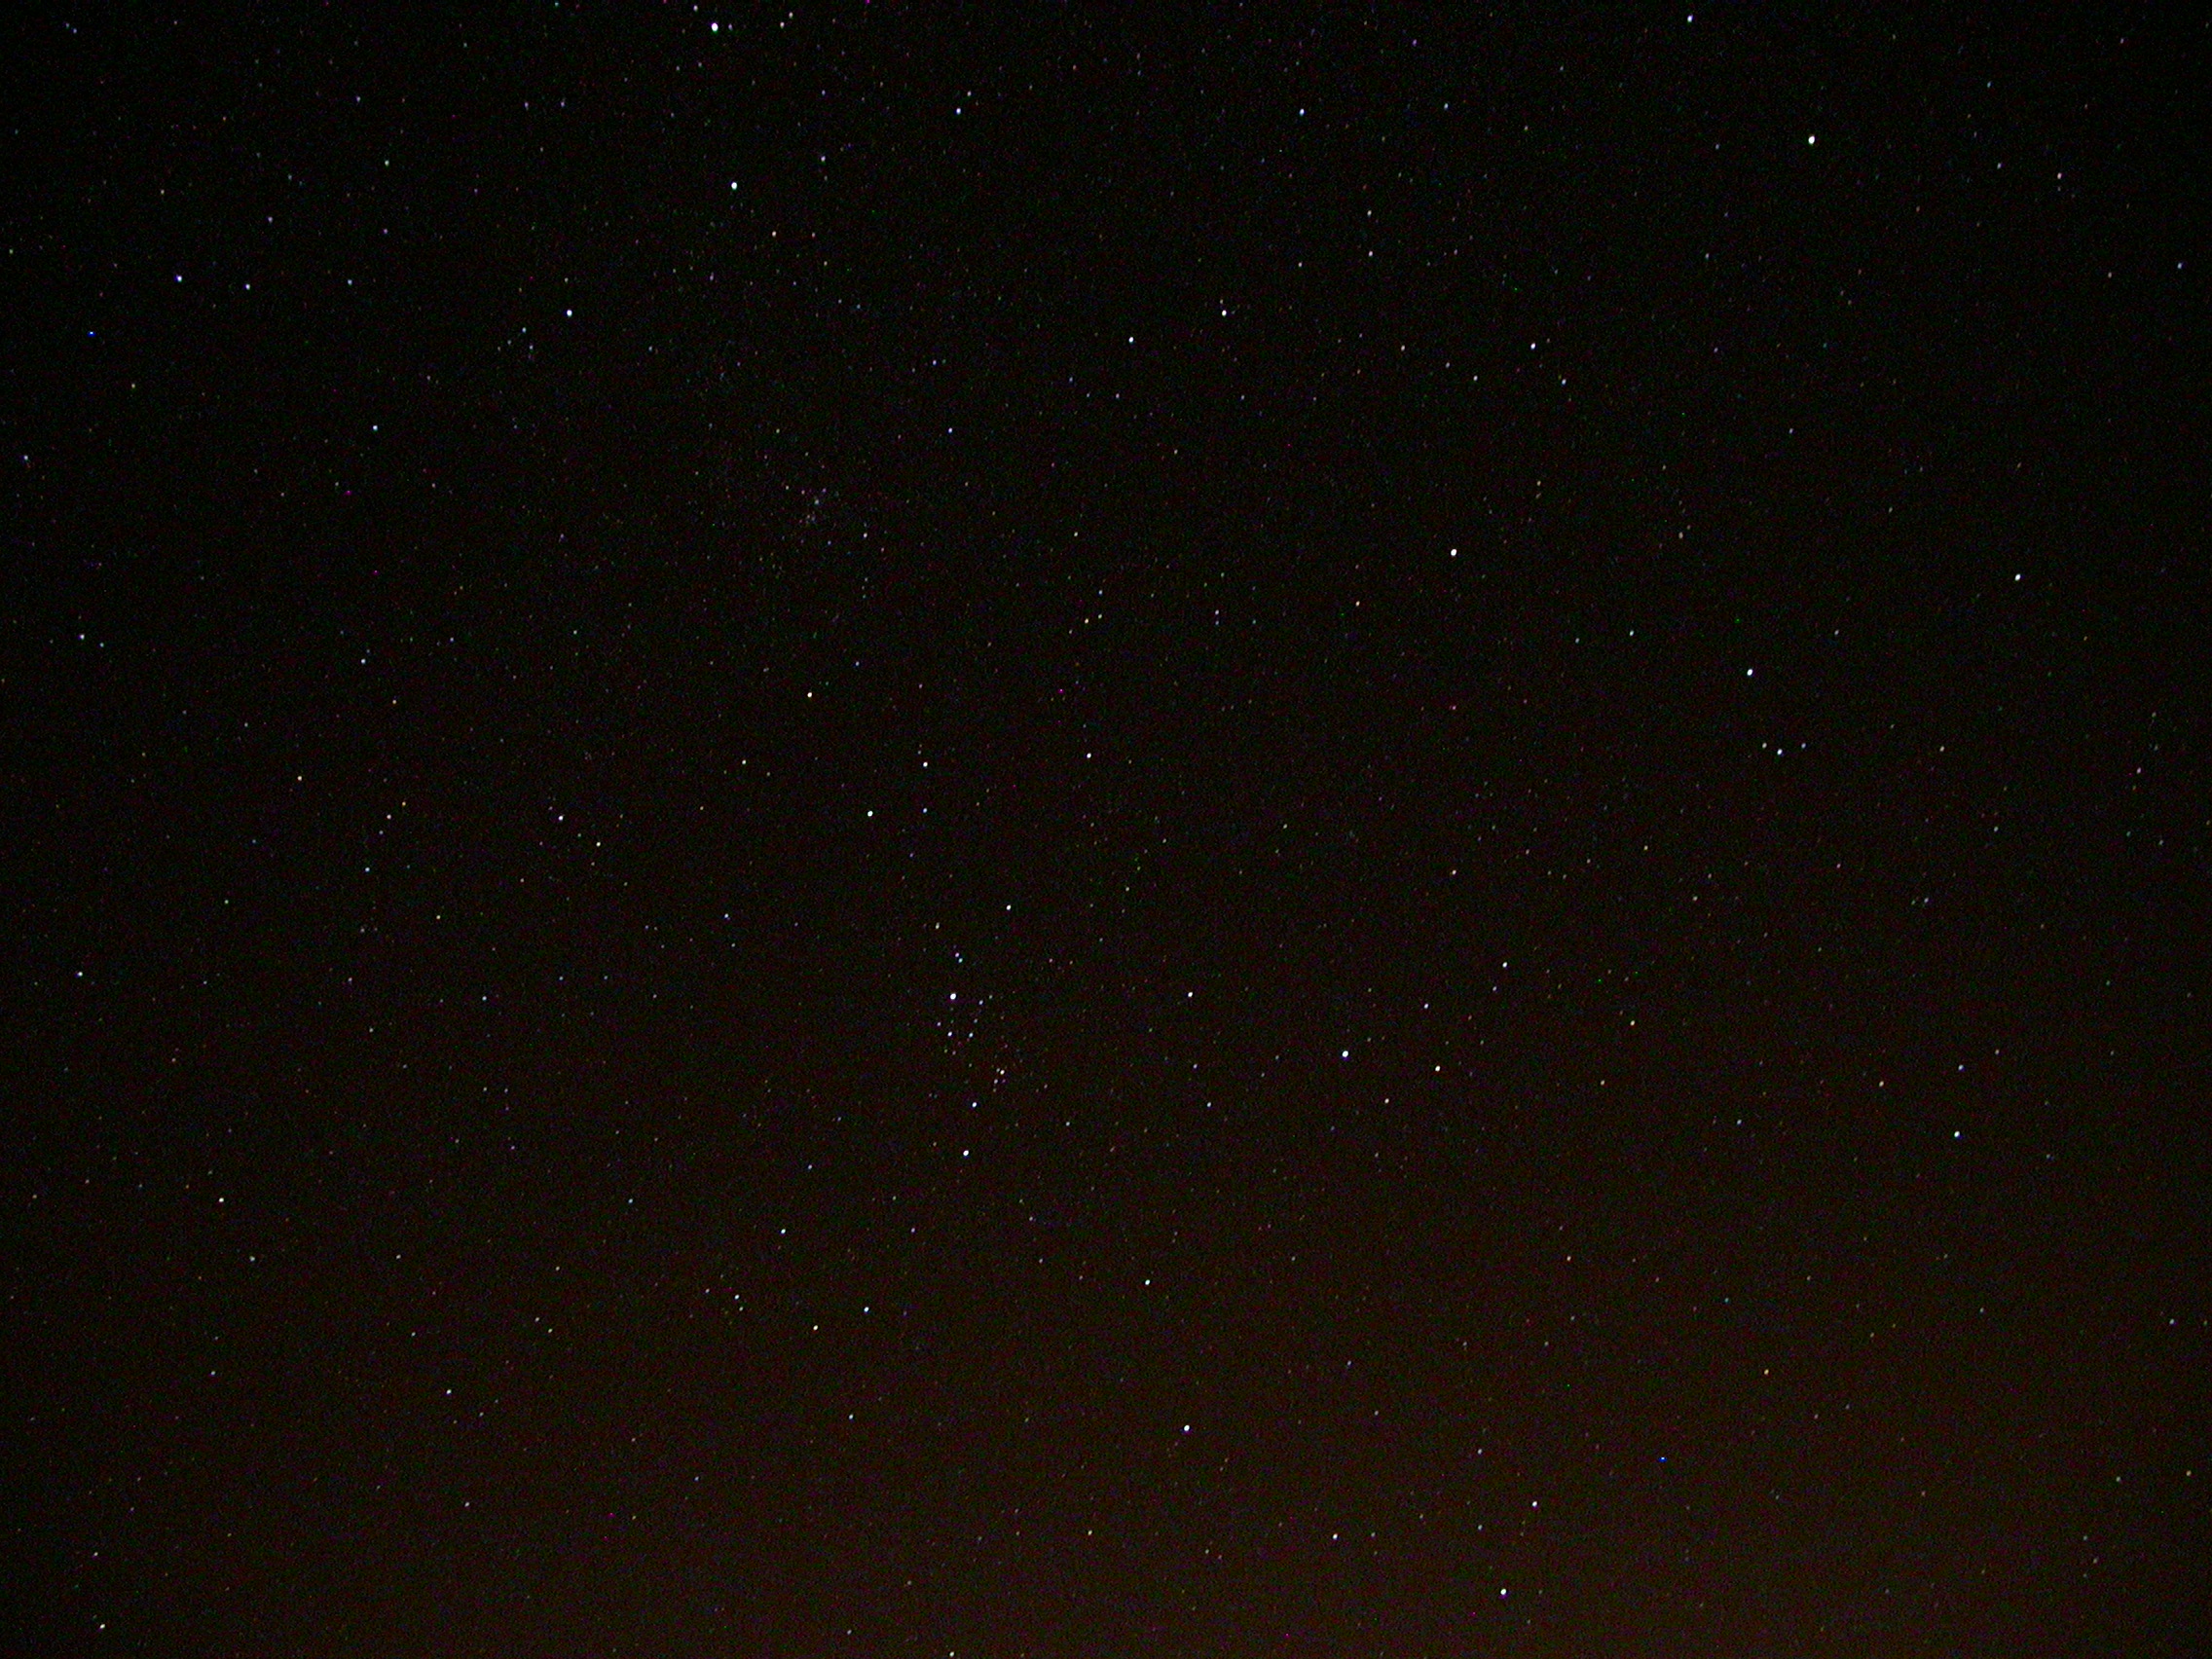 |
| Unknown Sky View #1 20s
F2.6 ISO 400 8mm |
Unknown Sky View #2 20s F2.6 ISO 400 8mm |
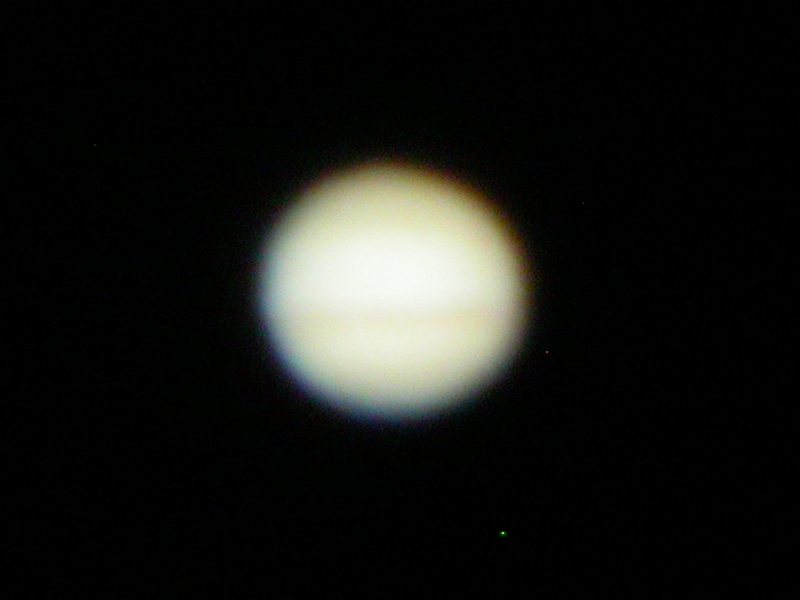
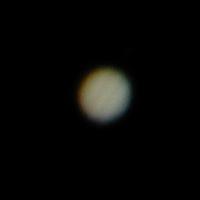
| Here are some pictures that
I took of the planet Jupiter on the morning of October
19/2003. I wanted to grab some shots of these 'old
favorites' before the temperatures became too
uncomfotable. I found that taking these pictures of
Jupiter and Saturn were much more difficult that those I
took earlier in the fall of Mars. Jupiter was 6.0419 AU (903855374 km) from the Earth. |
 |
 |
 |
| Jupiter Manual Zoom 1/8 second F4.2 ISO100 20mm |
Jupiter Manual Zoom 1/15 second F4.2 ISO100 20mm |
Jupiter Manual Zoom 1/15 second F4.2 ISO100 20mm |
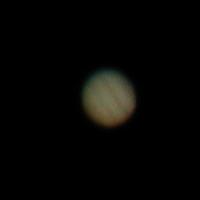
| Here are some Jupiter pics that I took the next morning (October 20/2003). Now that I had realized that sky conditions and eyepiece focus were even more important than exposure, I tried again and got better results. This is more by accident than skill, though, since it is almost impossible to focus properly using the preview screen on the digital camera (the image is too tiny). |
 |
 |
 |
| Jupiter Manual Zoom 1/30 second F4.2 ISO100 20mm |
Jupiter Manual Zoom 1/30 second F4.2 ISO100 20mm |
Jupiter Manual Zoom 1/30 second F4.2 ISO100 20mm |
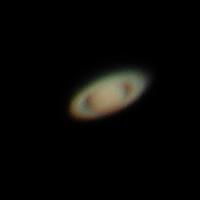
| Here are some pictures
that I took of the planet Saturn on the morning of
October 19/2003. I got these at the same time as
the Jupiter pics above. Saturn was 8.7543 AU (1309624639 km) from the Earth. |
 |
 |
 |
| Saturn Manual Zoom 1/4 second F4.2 ISO100 20mm |
Saturn Manual Zoom 1/8 second F4.2 ISO100 20mm |
Saturn Manual Zoom 1/8 second F4.2 ISO100 20mm |
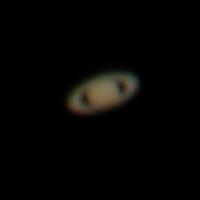
| Here are some Saturn pics
that I took the next morning (October 20/2003). The
same story applies here to the Jupiter pics mentioned
above -- but the results are even better for Saturn! |
 |
 |
 |
| Saturn Manual Zoom 1/4 second F4.2 ISO100 20mm |
Saturn Manual Zoom 1/4 second F4.2 ISO100 20mm |
Saturn Manual Zoom 1/8 second F4.2 ISO100 20mm |
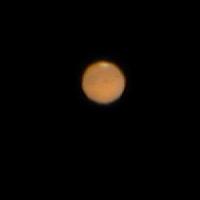
| At 04:51 CDT on the morning of August
27/2003, Mars was within 55758006 km (34646418 miles) of
Earth. This is the closest that it has been in over
73000 years! |

| Here are some pictures that
I took of the planet Mars early on the morning of August
26/2003. Although the closest approach of Mars to
Earth only occured on August 27, I didn't want to take a
chance of bad weather messing up my plans. Plus,
this was the first time that I had attempted to take
digital pictures of astronomical objects through my
telescope. In that hour between 01:00 and 02:00, I
learned a lot about what to do, and what NOT to do... |
| My first lesson was not to put the digital
camera into 'auto-exposure' mode -- the camera
over-compensates for the dark image, and you end up with
mars images that look like little suns. The 2.5x
zoom on the camera was impressive, though. The
effective magnification is 68 (telescope) x 2.5 (camera) =
170x. |
 |
 |
 |
| Mars Auto-Exposure Zoom 1 second F4.2 ISO400 20mm |
Mars Auto-Exposure Zoom 1 second F4.2 ISO400 20mm |
Mars Auto-Exposure Zoom 1 second F4.2 ISO400 20mm |
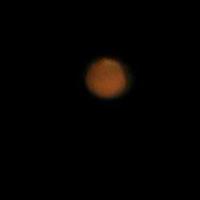
| Having learned that auto-exposure was not appropriate, I tried manual exposure mode without any zooming. The default setting of 1/125 seconds, F2.9, and ISO 100 seems just about perfect for this situation. The image of Mars on the viewfinder was extremely small, but actually the images turned out to be not too bad! The effective magnification is 68x (telescope) x 1 (camera) = 68x. |
 |
 |
 |
 |
| Mars Manual Normal 1/125 second F2.9 ISO100 8mm |
Mars Manual Normal 1/125 second F2.9 ISO100 8mm |
Mars Manual Normal 1/125 second F2.9 ISO100 8mm |
Mars Manual Normal 1/125 second F2.9 ISO100 8mm |
| My next shots were with the full 2.5x zoom. For safety, I decided to use the exposure 'bracketing' feature so that I would get a range of exposures around the default value. As it turns out, the images on the '+' side turned out to be the best of all, in my opinion. The effective magnification is 68 (telescope) x 2.5 (camera) = 170x. |
 |
 |
 |
| Mars Manual Normal Zoom 1/125 seconds F4.2 ISO100 20mm |
Mars Manual Normal Zoom 1/125 seconds F4.2 ISO100 20mm |
Mars Manual Normal Zoom 1/125 seconds F4.2 ISO100 20mm |
 |
 |
|
| Mars Manual Dark Zoom 5/788 seconds F4.2 ISO100 20mm |
Mars Manual Dark Zoom 5/594 seconds F4.2 ISO100 20mm |
|
 |
 |
 |
| Mars Manual Bright Zoom 5/394 seconds F4.2 ISO100 20mm |
Mars Manual Bright Zoom 5/394 seconds F4.2 ISO100 20mm |
Mars ManuaMars Manual 1/99 seconds F4.2 ISO100 20mm |
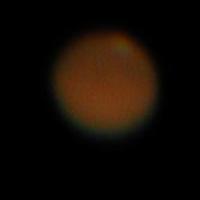
| The next day, during 01:30
to 03:30 August 27/2003, I took my final round of pictures
-- this time clicking until my battery ran out. With
a great deal of patience, I managed to get some pics out
my the extremely narrow field of my 7mm (290x)
eyepiece. Since I (inadvertently) has a moderate
amount of zoom activated, the effective magnification is
290 (telescope) x 1.73 (camera) = 504x. This is just
over the 480x limit of the optics involved. |
 |
 |
 |
| Mars Manual Normal Zoom 1/60 seconds F3.5 ISO100 13.9mm |
Mars Manual Normal Zoom 1/60 seconds F3.5 ISO100 13.9mm |
Mars Manual Normal Zoom 1/60 seconds F3.5 ISO100 13.9mm |
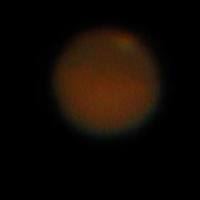
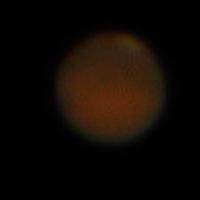
| In my final round of
pictures, I managed to push the limits of both the camera,
telescope, and my skill. The effective magnification
is 290 (telescope) x 2.5 (camera) = 725x. This is
well beyond the practical 480x limit of the telescope, but
shows what can be done. |
 |
 |
 |
| Mars Manual Normal Zoom 1/60 seconds F4.2 ISO100 20mm |
Mars Manual Normal Zoom 1/30 seconds F4.2 ISO100 20mm |
Mars Manual Normal Zoom 1/30 seconds F4.2 ISO100 20mm |
| Here is a small experimental photograph of
the Sun taken on October 20/2003. The picture was
taken though my digital camera with the 8x CrystalVue
SharpShooter monocular, combined with the camera's 2.5x
zoom (combined total of 20x zoom). On the front of
the monocular, I taped the filter that I used to visually
observe the 1979 solar eclipse (yes, over 24 years
ago!). The image is very disappointing. |
 |
| This next shot was taken on November
1/2003, except this time it was taken through my big scope
with a Baader
solar filter (ND=5.0 for 100000x reduction in light
intensity) from Kendrick
Astro
Instruments. The improvement in resolution is
substantial. The closeups of the sunspots are not
enlargements -- they are direct digital crops from the
original. Click on the first image for a link to the full-sized version. |
 |
 |
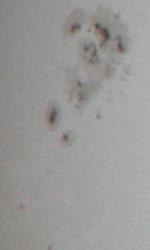 |
| Sun (6x reduction in size) 1/1000 second F2.8 ISO100 8mm |
Solar Sunspot #0488 1/1000 second F2.8 ISO100 8mm |
Solar Sunspot #0486 1/1000 second F2.8 ISO100 8mm |
 |
| A quick snap of the Moon (in waxing phase) taken the evening of September 4/2003 with the 8x CrystalVue SharpShooter monocular, combined with the camera's 2.5x zoom (combined total of 20x zoom). I reduced the exposure to bring out more detail. The final exposure was 1/60 seconds F4.2 ISO100 20mm. |
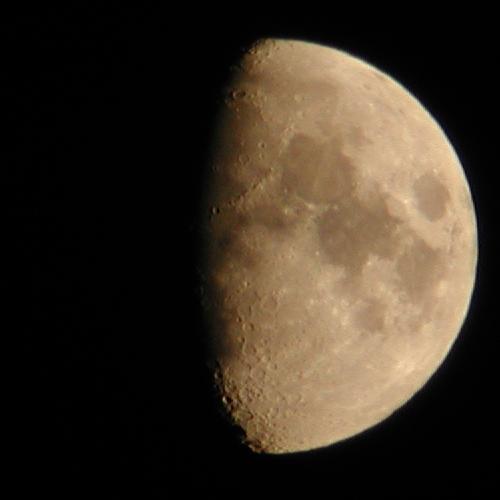
| This picture of the Moon
(in waning phase) was taken the evening of November
30/2003 with my large telescope and the 30mm
eyepiece. There was no camera zoom involved, and the
image was reduced in size by 2/3. The exposure was 1/60
seconds
F2.8
ISO100 8mm. |
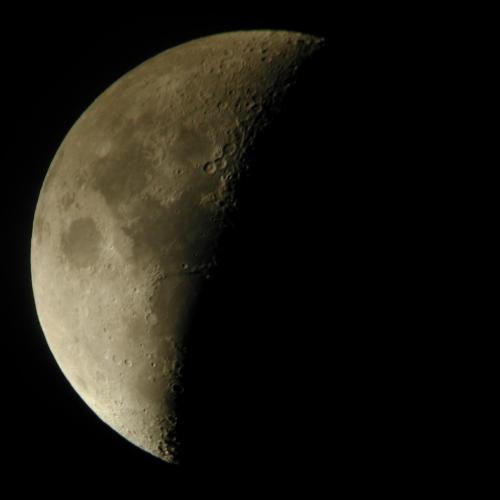
| This picture of the Moon
(in waning phase) was taken the same evening of November
30/2003 with my large telescope and my new 18mm
eyepiece. There was no camera zoom involved, and the
image was reduced in size by 2/3. The exposure was 1/125
seconds F2.8 ISO100 8mm. |
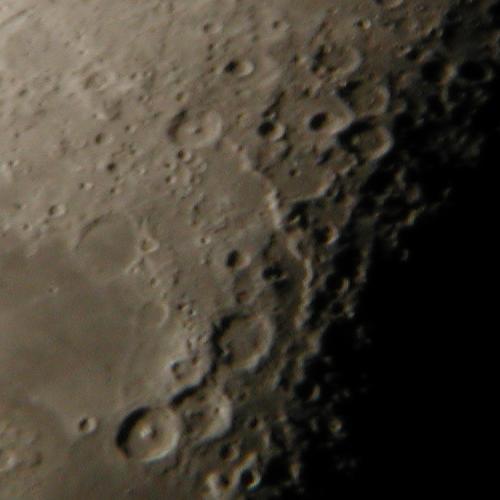
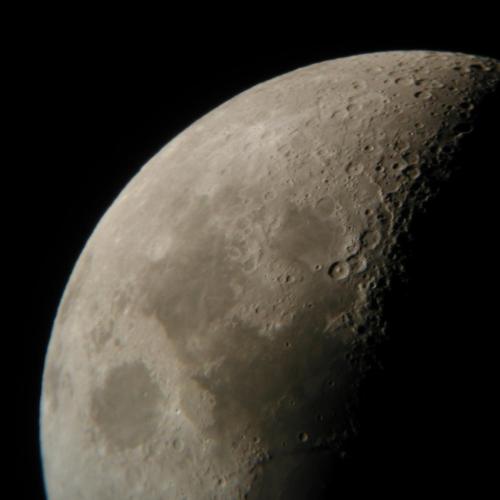
| This closeup picture of
some Moon craters was taken the same evening of November
30/2003 with my large telescope and my new 18mm
eyepiece. There was no camera zoom involved and no
image size reduction. The exposure was 1/125
seconds F2.8 ISO100 8mm. |
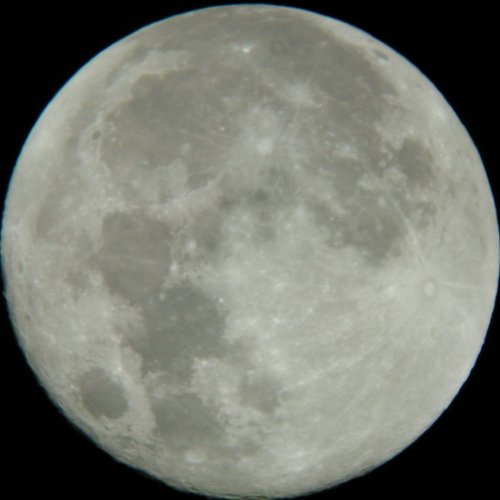
| This full moon was taken on
September 29/2004 with my medium 'Orbitor' telescope with
my 18mm eyepiece. The image was reduced about
3x. The exposure was 1/85.5 seconds F2.8
ISO100 8mm. |
|
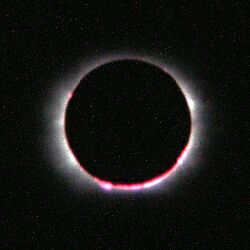
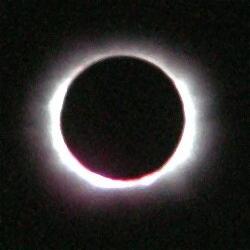
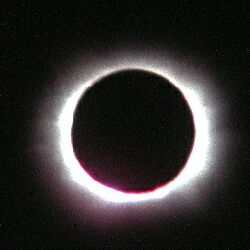
These are pics of my the solar eclipse that took place in Manitoba in February 26/1979. This was one of the few times in my entire life that I 'skipped school'. Taking pictures of this event was far more important than being in school (grade 11) that day. I was 16, with a cheap SLR camera and an army surplus telescopic lens, but a lot of enthusiasm! |
 |
 |
 |
|
|
|
|
|
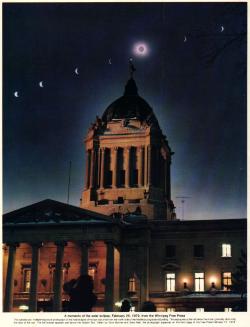
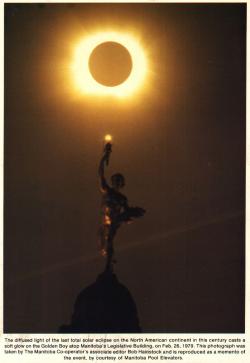
These are some pics of the solar eclipse from the print media at the time (Winnipeg Free Press and Manitoba Cooperator). |
 |
 |
| Here is the cover of an envelope containing
an 'Eclipse Visor' produced by "The Manitoba Planetarium"
and distributed "Champs Food Systems Ltd." (KFC!): |
| Williams College Website |
| Glenn Connell Website |
| Ted Espenak Website |
| Ted Pedas Website |
 |
Way back, when I was 13 or
so, I noticed an ad for a used telescope in our local
newspaper -- surprising since a lived in a small
town. After some appropriate begging and pleading, I
was soon the proud owner of my own telescope: a Bushnell
Sky Chief Jr! It was an achromatic refractor-style 60mm aperature scope with two eyepieces, a 2x barlow, a right-angle viewer, and a (dangerous!) eyepiece-attached sun filter, all on a wooden alt/az tripod. I spent many hours with that scope, even trying to take some long-exposure film-based SLR photos -- even though the mount was inappropriate. 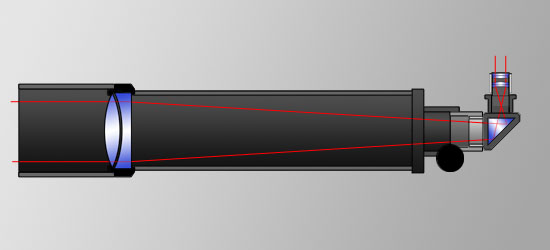 |
Here are the specs that I
could read from the scope or determine on my own:
|
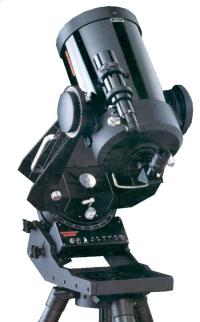 |
My main telescope was purchased in
October/1990 from a now-defunct Manitoba company named
"Cosmic Connection". I love it, but hardly use it,
since city lights are a major nuisance. It lacks a
computer control and/or interface, which is what I would
want if I were to purchase a new one some day. The telescope is great, with a heavy duty mount and tripod -- which you take for granted until you compare it to the typical telescope mounts that you see on 'department store' telescopes! It is rather heavy and bulky to move around, which is why I was interested in a smaller (but high-quality) scope for 'quick peeks' (see below). This is Schmidt-Cassegrain design, which is a 'catadioptric':  |
Here are the specs from the catalog:
Here is a commentary on the history this this particular model of Celestron telescope from: http://www.company7.com/celestron/index.html 1989 saw the introduction of the Ultima line. The Ultima 8 telescope is arguably one of the most stable commercially built SCTs for the amateur. Apporpriately it is also one of the heaviest. This line maintained the same basic "Starbright" multi-coated optics of previous models in redesigned castings for the optical tube. This is coupled to a redesigned, heavier fork mount with carrying handles and a large 2 5/8" diameter polar shaft. The initial drive system was unique, but with some deficiencies. The telescope was driven by an AC motor, run by a high efficiency quartz locked inverter. This, in turn, was powered by internal, rechargeable, lead acid batteries. Although this resulted in a fairly long lasting power supply and did not involve replacing batteries, some of the advantages of the DC drive used on the Powerstars were lost. Standard accessories included a heavy duty wedge and tripod, 1 1/4" star diagonal and eyepiece and an 8x50 polar finder. A heavy duty, high impact molded plastic carrying case provided good protection for the telescope. The very next year, the rechargable battery was replaced with a 9 volt alkaline battery and the drive was replaced by true DC motors and a microprocessor. The processor allowed four digitally controlled drive rates, including solar, lunar, siderial and King. It also allowed use in both hemispheres just by flipping a switch as well as the addition of Periodic Error Correction (PEC). This electronic wizardry was a great benefit to astrophotographers, allowing them to track almost any object and to "train" the drive to automatically counteract the errors that are inherent in any gear system. While even the basic system without PEC was extremely accurate, enough to allow unguided piggyback photography with as much as a 500mm lens, using the new feature further reduced guiding effort for photography. A minor irritation to some was that the PEC training was lost each time you turned off the telescope. There was, of course, a tradeoff between losing precious dark time and assuring that each PEC training session addressed the situations peculiar to that setup. The hand control box, optional on the initial units, was now made standard. Efforts by Celestron to take in the comments of the meeting in 1987 produced what are fundamentally two of the best engineered 8 inch SCT made in the 20th centruy: the Ultima 8 and the Utima 8 PEC. These reliable telescopes featured comparatively massive Fork Mounts incorporating large bearings and a precision Byers worm gear drive set. The Ultima 8 base housed two cylindrical rechargeable lead acid batteries; this was a product first offered by Roger Tuthill as a retrofit for older telescopes. These telescopes had the capability to operate off external 12 volts DC sources, a wonderfully rigid and easy to adjust Equatorial Wedge. And yes, it had carrying handles on the Fork Tines and hand control knobs that could be operated even when wearing gloves. The provided 50mm Finder and the hard shell but light weight carrying case are still missed by us who recall these telescopes. The Ultima 8 PEC followed with some improvements, including the capability to operate off an internal 9 volt battery that is easy to find in stores, but not changed as easily as we'd like in a cold dark night. Celestron introduced "PEC" (Periodic Error Correction) circuitry with the Ultima 8 PEC telescope. These telescopes could be programmed by the user before starting to take astrophotos with an easy 4 minute recording cycle, this dramatically reduced the amplitude of periodic errors that occur when a telescope relies on a worm gear set for tracking. This meant the telescopes could take better images without spending the costs associated with larger and heaver precision worm gear and wheel sets. In a Sky & Telescope review of 8" Schmidt-Cassegrains, it was noted, "the Ultima 8's drive error was the least I have ever seen in a mass-market telescope." Astronomy Magazine said of the drive, "a textbook straight line" and "the PEC is impressive. It worked better than advertised." PEC would soon be offered in some third party Drive Correctors, while Meade and others would follow this path opened by Celestron. |
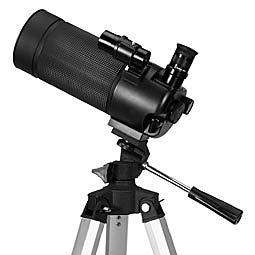 |
My most recent
mini-telescope purchased in April 2004 from a
liquidation store named XS-Cargo.
Since this particular model uses an alt-azimuth mount,
it really is more of a 'spotting' scope than an
astronomy telescope, but it is still great for 'quick
looks' at anything, and the 1.25" eyepieces are
interchangable with the Ultima ones above. This is Maksutov-Cassegrain design, which is still 'catadioptric' but not a 'Schmidt-Cassegrain' like the Celestron Ultima:  |
|
Here are the specs from
the catalog (with my own additions in italics):
The manual for this Chinese-made telescope does not mention the manufacturer, but I have determined that this Orbitor OR3900 is marketed by Citiwell International Inc.. They also market telescopes for National Geographic, which explains why this same telescope is sometimes seen with the National Geographic logo on it. |
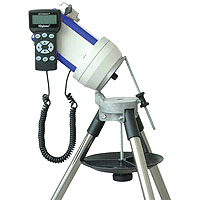 |
Having lacked any sort of
computer/GOTO/digital telescope control for my entire
astronomical life (due to the high expense that
historically occurred), I was very pleased to find a used
iOptron
SmartStar-A GOTO telescope mount on the useful
Canadian AstroBuySell
site in September 2009 -- and even better it was a
fellow from my own province! |
|
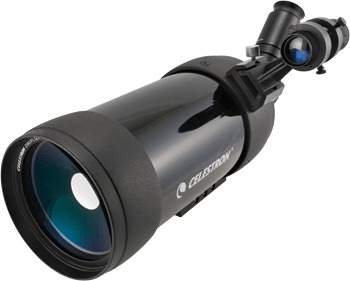 |
I was curious about the
quality of the Celestron version of my 2004 'Orbitor'
Maksutov-Cassegrain, especially considering that it was
noted as having 'built-in' T-threads -- matching my
Canon T1i and its T-ring adapter. I purchased it
as a used item on the useful Canadian AstroBuySell
site in July 2011. It works! This is Maksutov-Cassegrain design, which is still 'catadioptric' but not a 'Schmidt-Cassegrain' like the Celestron Ultima: |
Here are the specs (with
my own additions in italics):
|
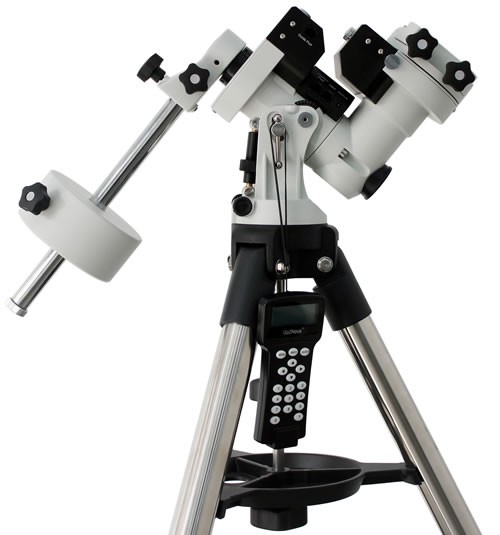 |
After reading of the new
amazing portable telescope mount from iOptron ($500 less
than the previous IEQ30!), and waiting for positive
reviews to roll in, I eventually decided to make the
largest GOTO mount purchase of my amateur astronomy
career -- the ZEQ25GT
:) |
|
Here are the specs:
|
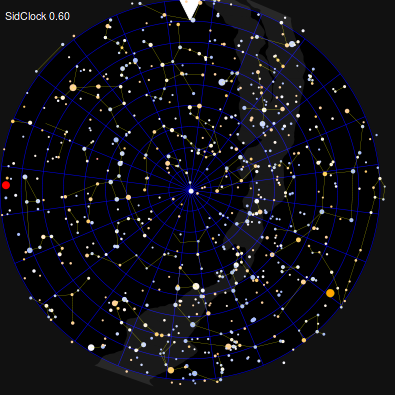
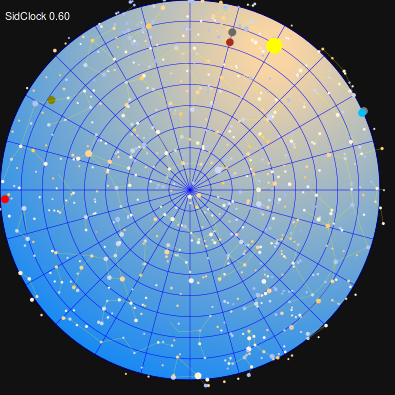
| My own contribution to a
cross-platform web browser-based astronomy is an
HTML5-based app named SidClock. |
 |
 |
 |
 |
| Thanks to Attilla
Danko for adding Morden to his Clear Sky Chart
database! |
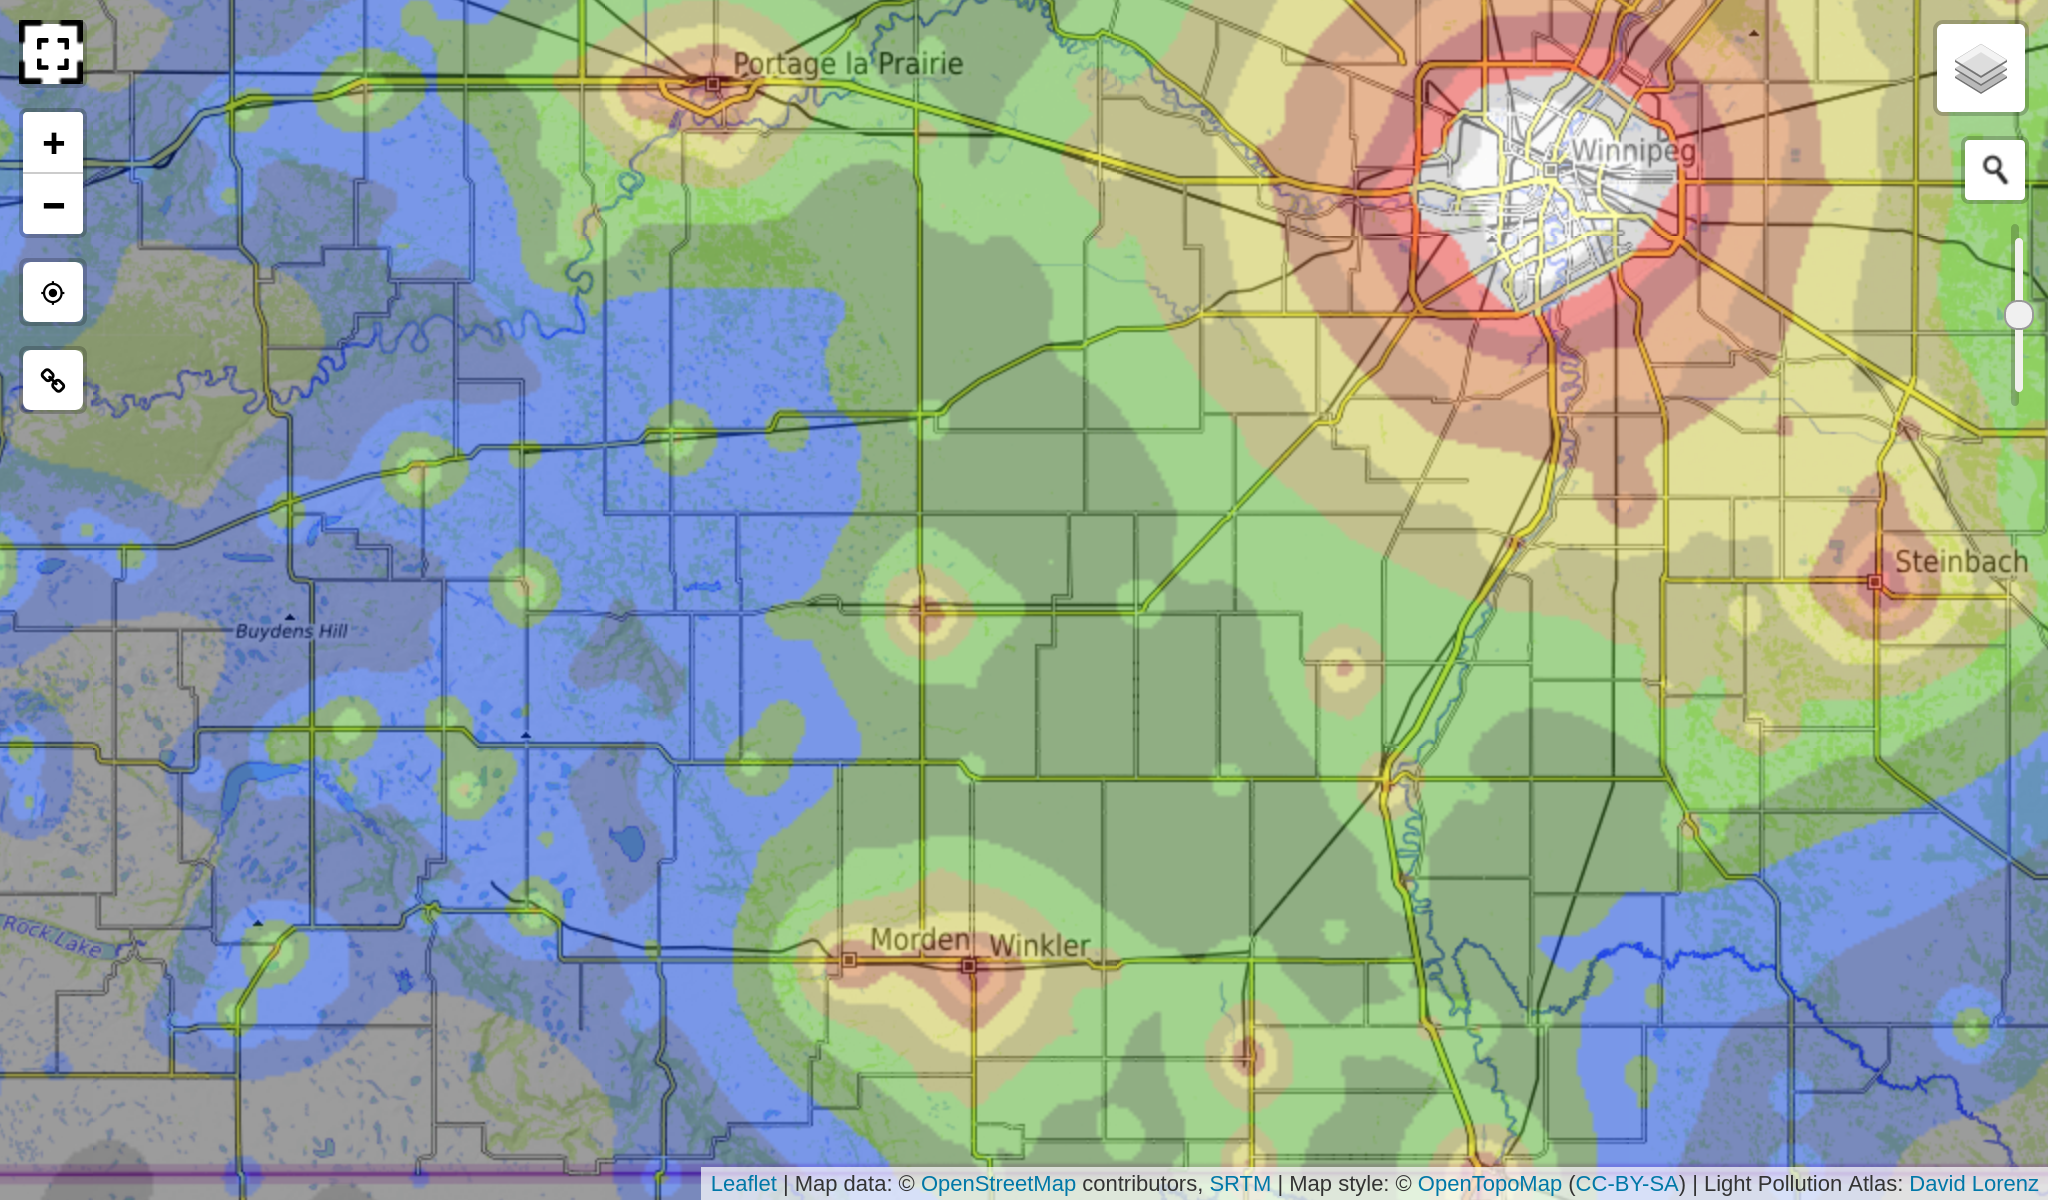
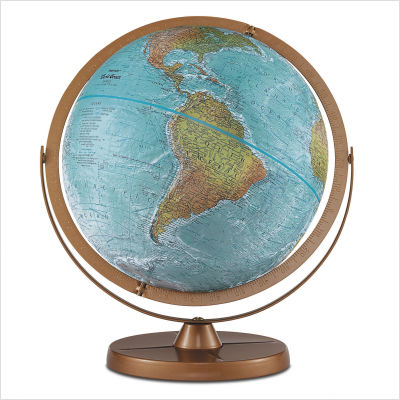
| Imagine shrinking
the Earth down to the same size as a typical 12"
(30 cm) diameter desk-top world globe
(1:41849600). Now imagine using the same scale to
shrink the entire Solar System, and overlay the
size of the Sun, and the average orbits of the
planets, as concentric rings centered on downtown
Morden
Manitoba, Canada -- using OpenStreetMap.
For a separate page of the same map, see here. NOTE: The orbits of
the planets are not perfectly circular
(especially Pluto!) but the distance rings show
the average
distance from the planets to the Sun.
You can manually zoom in/out, and you can also chose between different background map types. By the way, at this scale a single grain of table salt would be over 20 km (65 thousand feet) in height when placed on the globe -- about twice the height that commercial airlines fly :) |
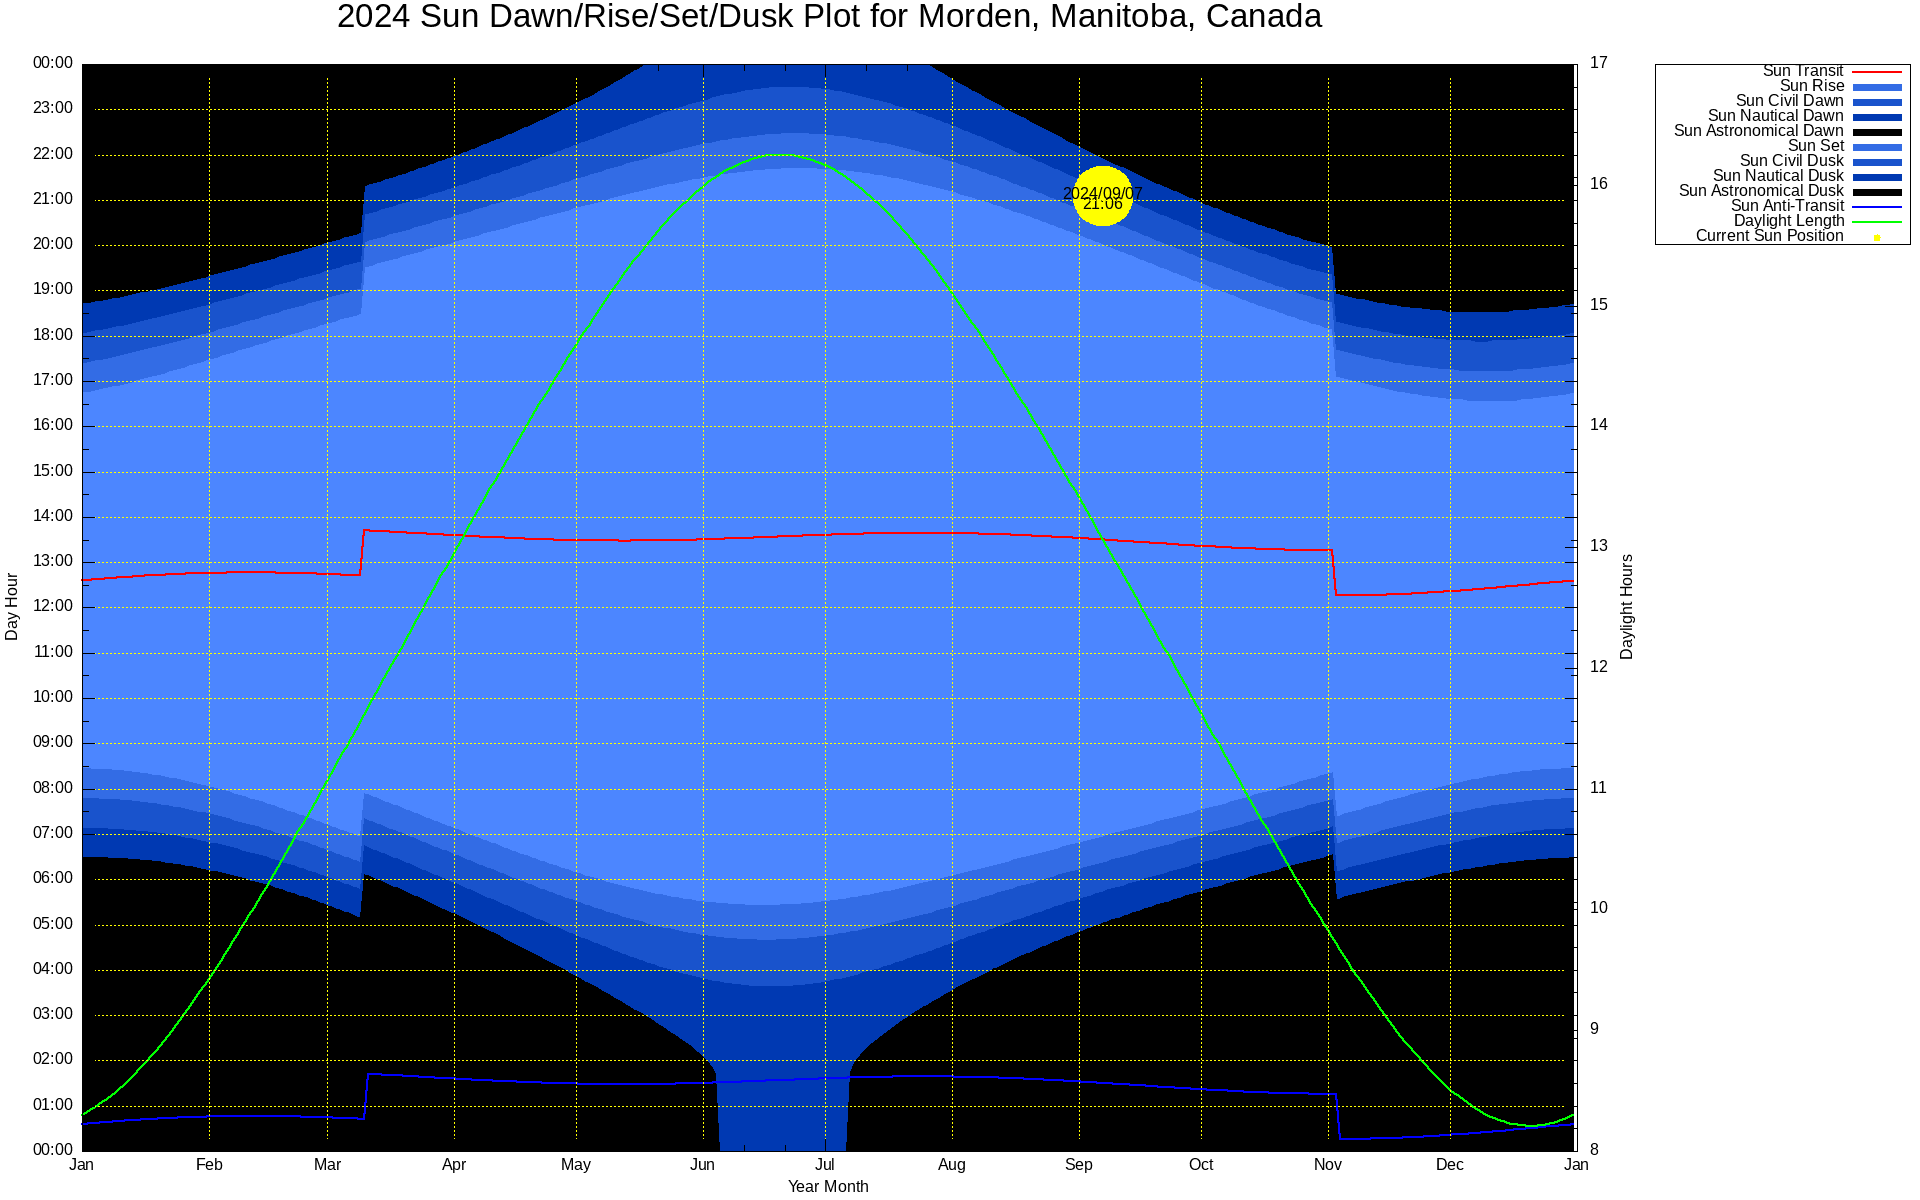
SUN
RISE/SET GRAPH FOR MORDEN, MB
| Using data for my
city, and Gnuplot,
I was able to create this Sun Rise/Set graph for
the entire year at a glance. |
 |
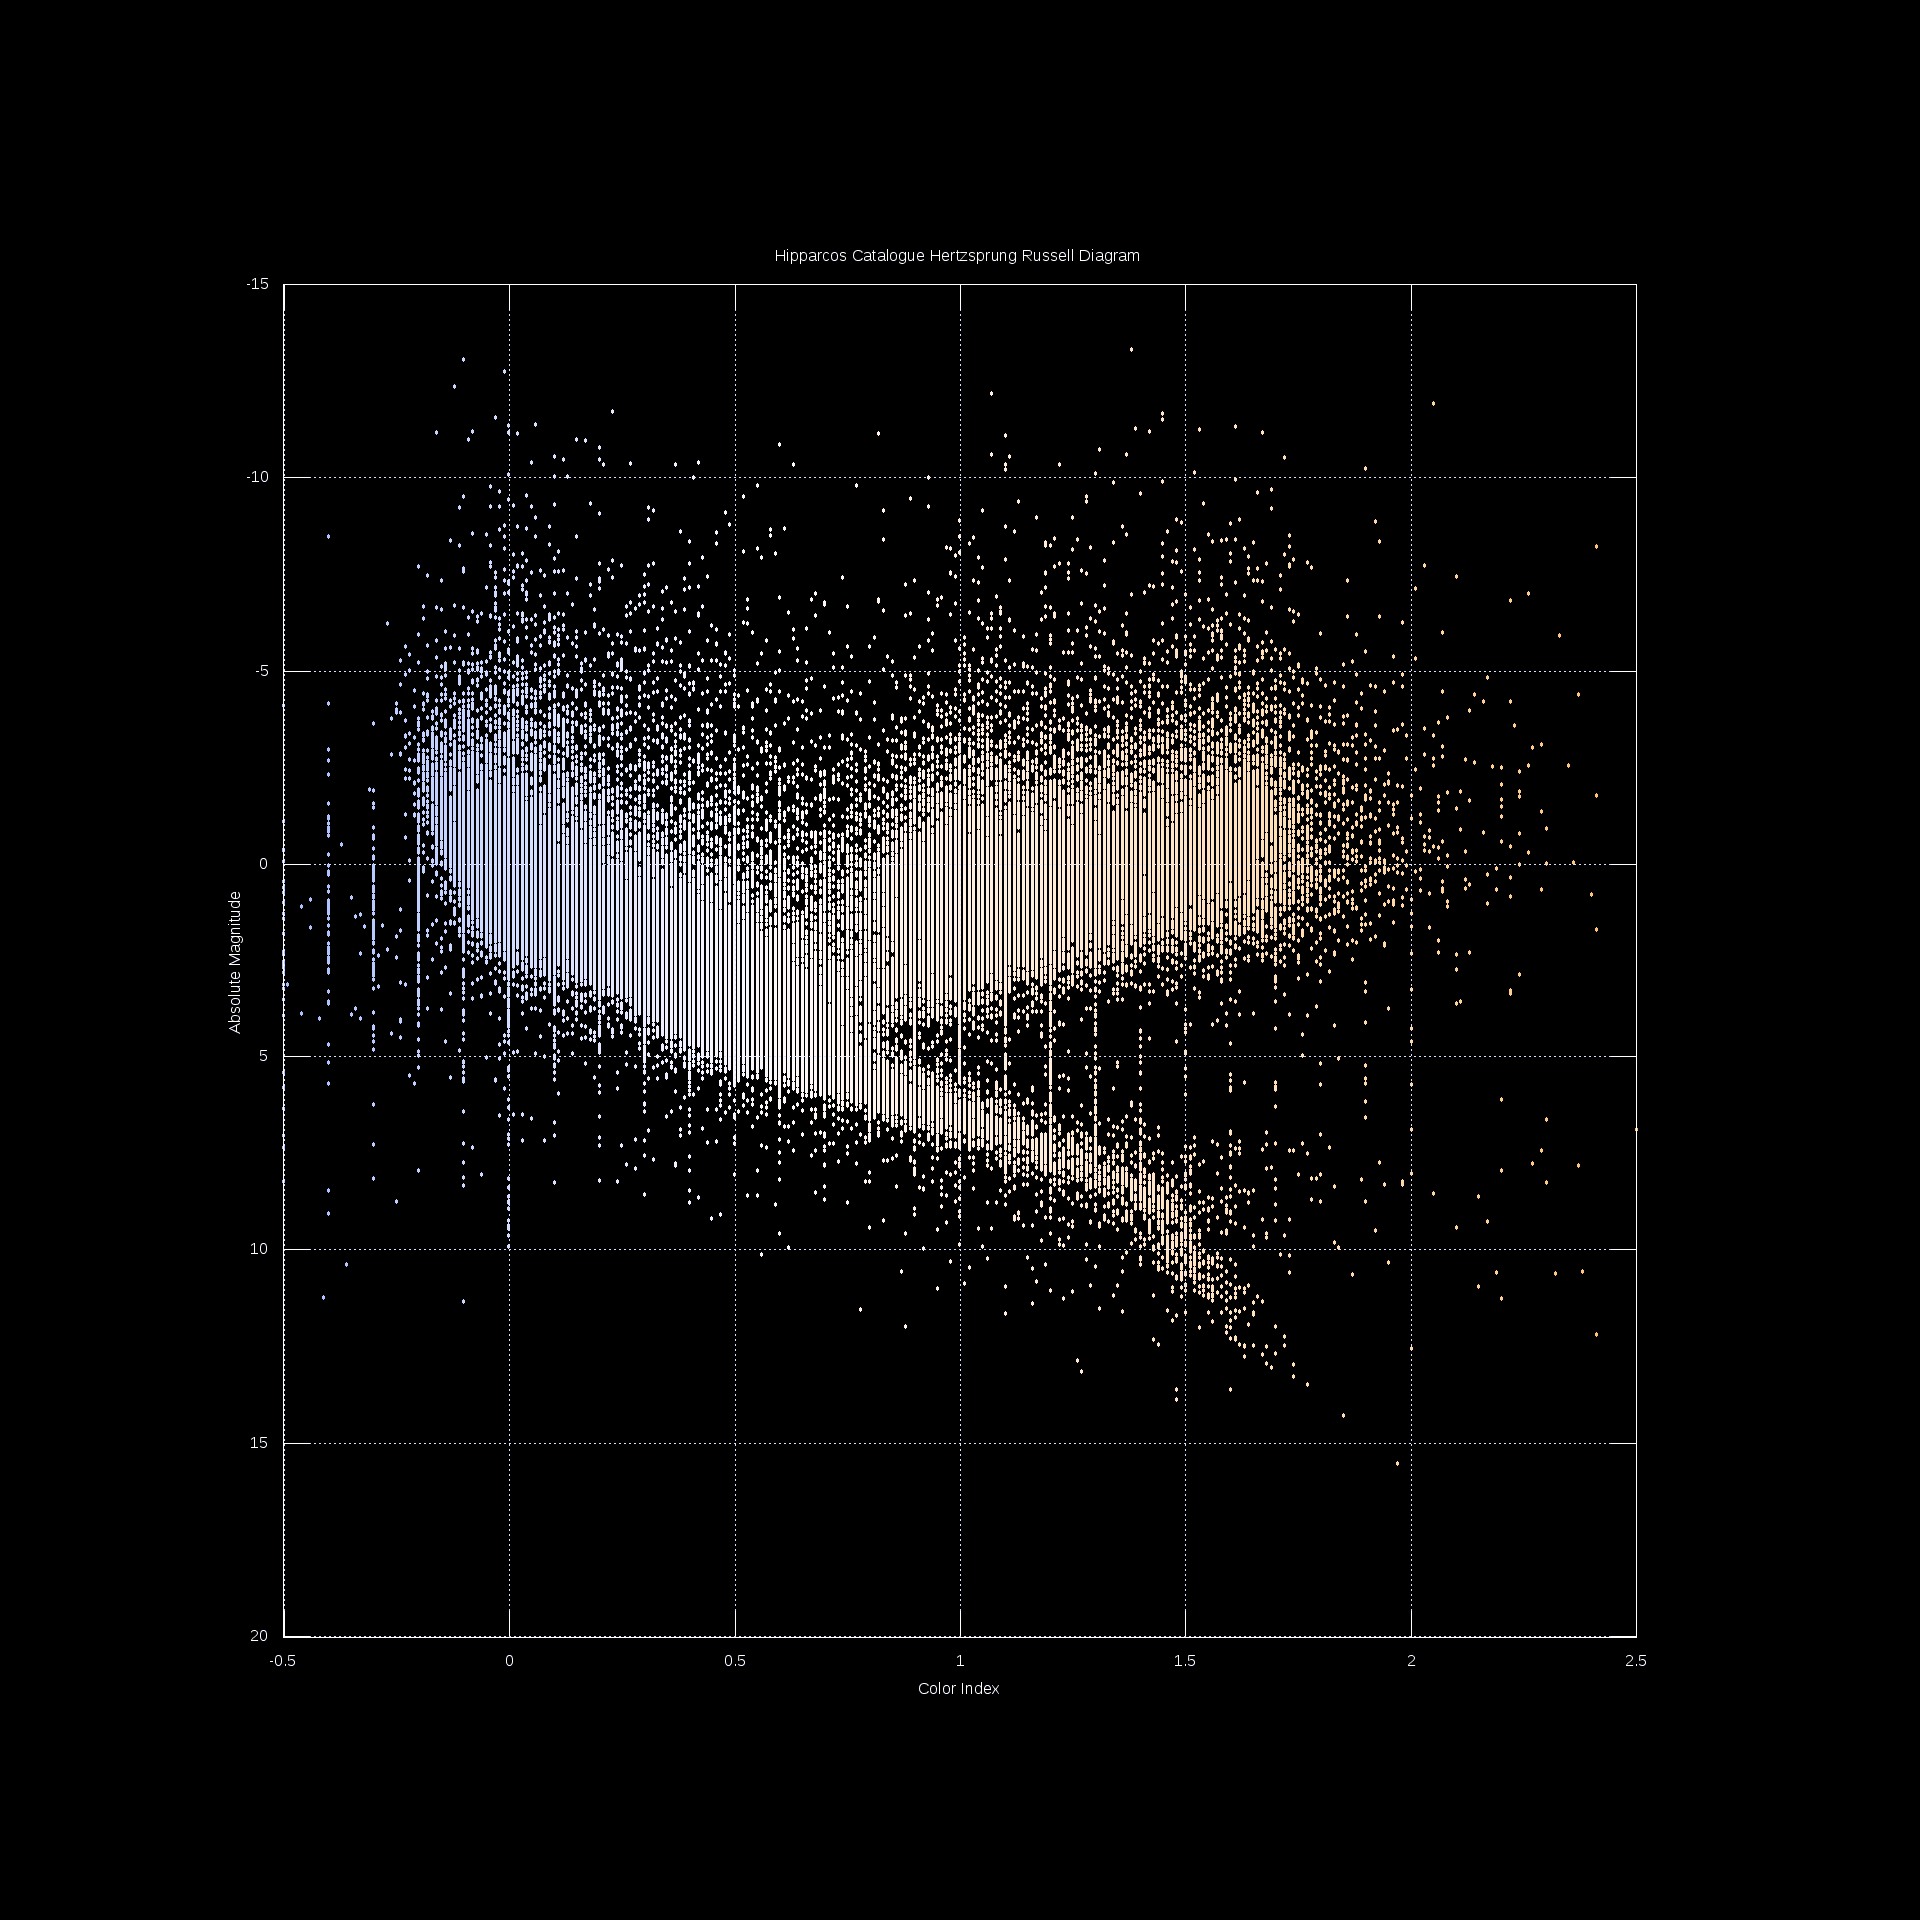
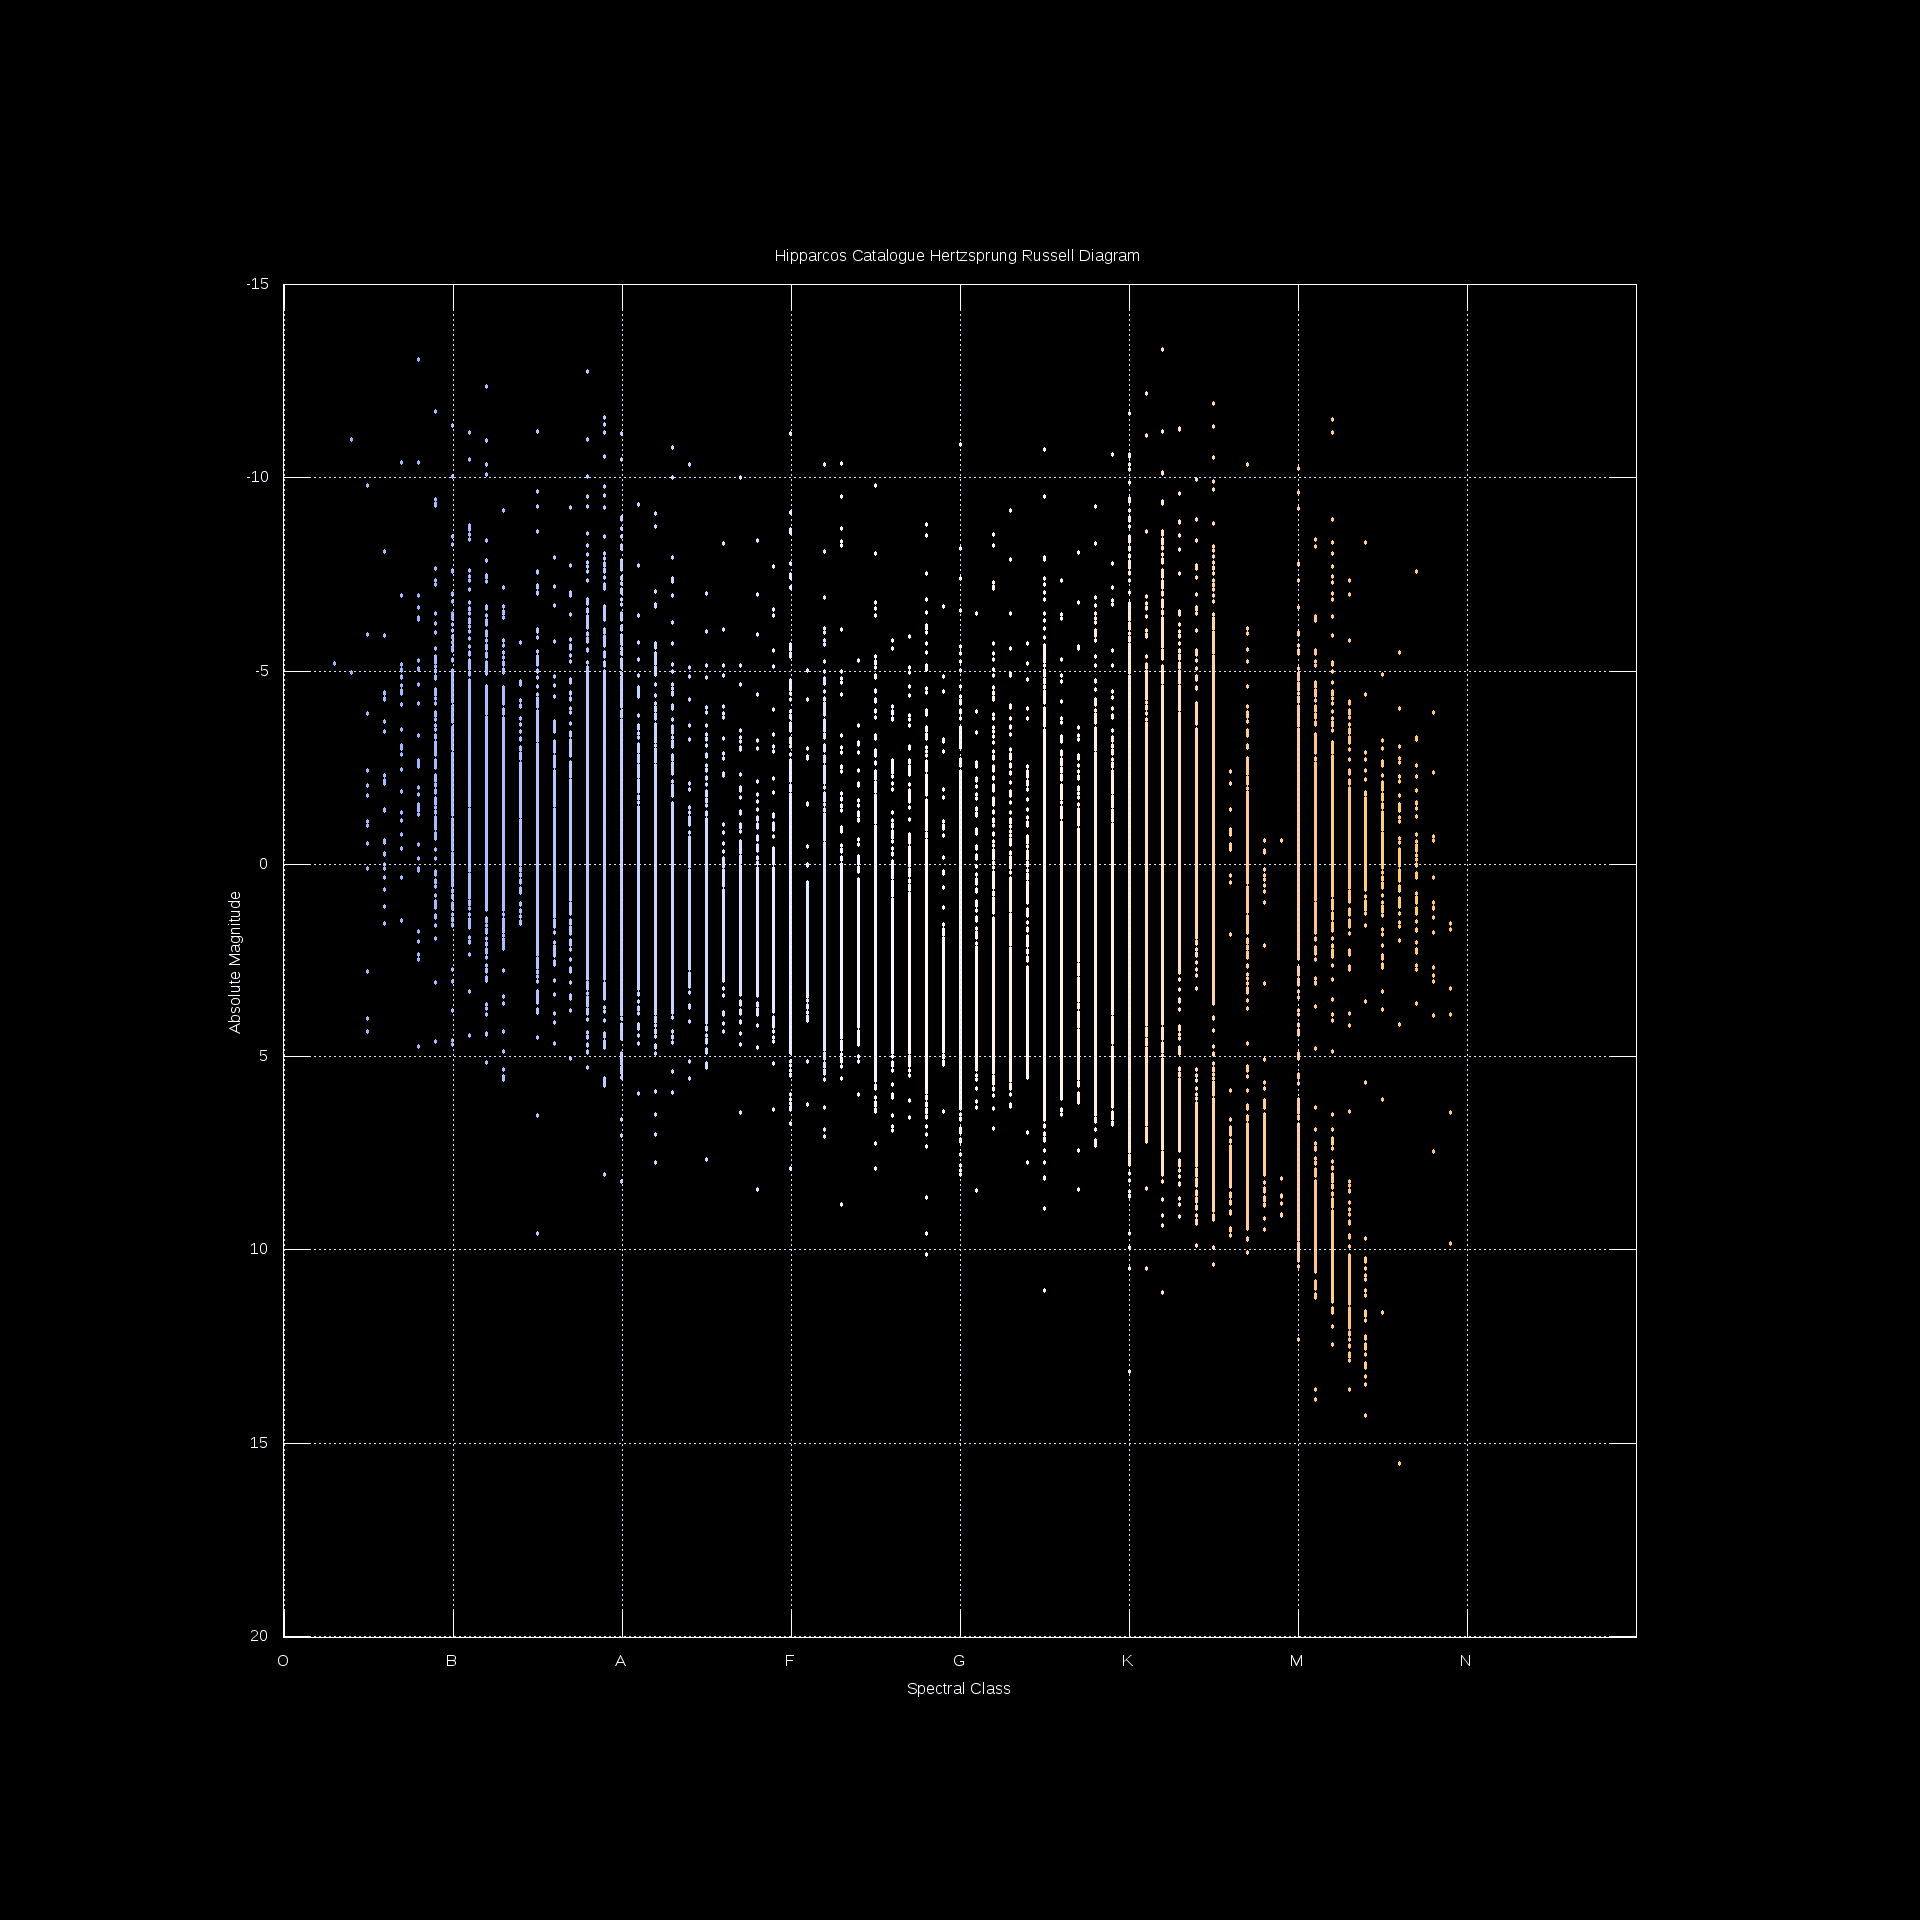
HIPPARCOS
CATALOGUE HERTZSPRUNG-RUSSELL DIAGRAM
| Back in 1981, in my
2nd year of a university Computer Science degree,
my friend and I decided to wite a program (in the
'APL'
language, the only one we had available at the
time to do 'graphics' plotting, and on 'paper'
yet) to plot the famous 'Hertzsprung-Russell'
diagram, which illustrates the correlation
between star luminosity and
temperature. I don't recall ever completing
the job (owing to the tedious effort to enter all
the data manually). Now, 30 years later
(2011), I finally took the time to extract the
data from the Hipparcos
catalog, clean and manipulate the data (down
to 106509 objects), and use GNUPlot to
plot the result -- and here it is! My thanks
also go to this
page for approximating the plotting color to
use for the various color spectra. This page was also
useful. In this diagram, hot/bright/blue/giant stars live in the upper left, and cool/dim/red/dwarf stars live in the lower right. White dwarf (hot/dim) stars are in the lower left, and red giant (cool/bright) stars are in the upper right. Here is the Wikipedia article to help explain. Our own Sun is a 'G2V'-type main-sequence star, which will live for approximately 10 billion years (about half of its current age). |
| First cut: Get
basic data from Hipparcos catalogue i.e. parallax,
blue and visual magnitudes, and spectral type... |
C.D.S. - SIMBAD4 rel 1.172 - 2011.03.01CET21:06:19 |
| Next cut: Remove
header/trailer lines, and generate absolute
magnitude and B-V color index... |
1 |HIP 1 |00 00 00.2158 +01 05 20.432 | 3.54| 9.52 | 9.08 |F5 | 1.83 | 0.44 |
| Final cut: Extract
only the absolute magnitude and B-V color index,
but also generate a numeric scale corresponding to
the spectral type... |
1.83 35 0.44 |
| Here is another
plot using the 'color index' (B-V) data instead of
the 'spectral class': |
 |
||
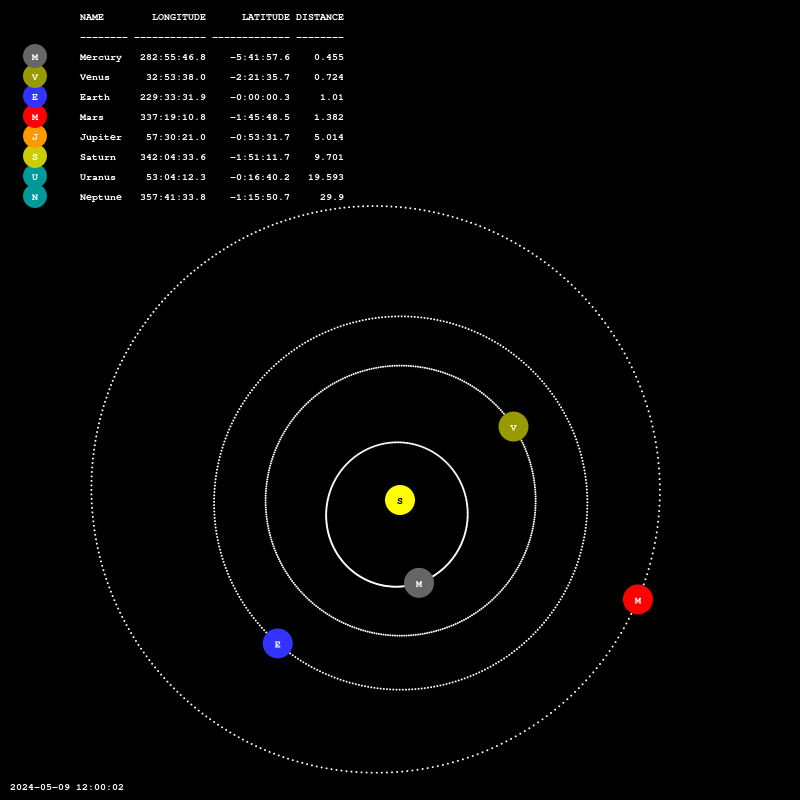
| This diagram is generated by a
Python app I wrote named 'SChronos', which in turn
was an interactive app named 'MChronos' I
originally wrote for a Nokia N800 tablet. |
||
|
||
| These diagrams are generated by a Python app I wrote named 'SOrrery', which in turn was an interactive app named 'MOrrery' I originally wrote for a Nokia N800 tablet. |