NEW! Weather Station Version 3.3
|
|
||||||||||||||||||||||
Technical Background ReferencesThe V2 and V3 NodeMCU development boards contain an
ESP12E wireless chip, which in turn contains the ESP8266
microcontroller. The NodeMCU board can run
Artduino IDE or MicroPython, but the LUA language is
implemented using the NodeMCU firmware, which I use:
I have used both the 2-pin I2C-based BME280 breakout boards and the 4-pin SPI-based version, but only use the I2C configuration: Tools (in Linux) that are used: |
||||||||||||||||||||||
DareWeather Recent History
|
||||||||||||||||||||||
DareWeather ModulesThe LUA/HTML files used in this new version are here:
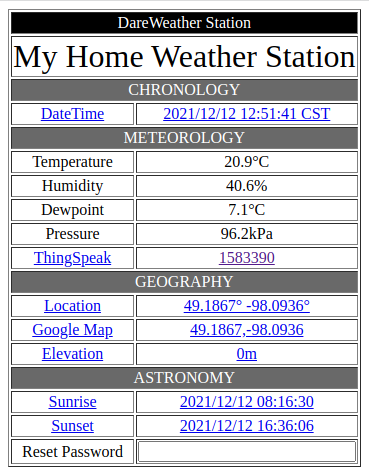
In order to minimize memory problems, all of the Lua code was compiled with the exception of 'init.lua'. DareWeather FlowchartThe 'Reset Password' input allows the user to reset the DareWeather device in one of two ways:
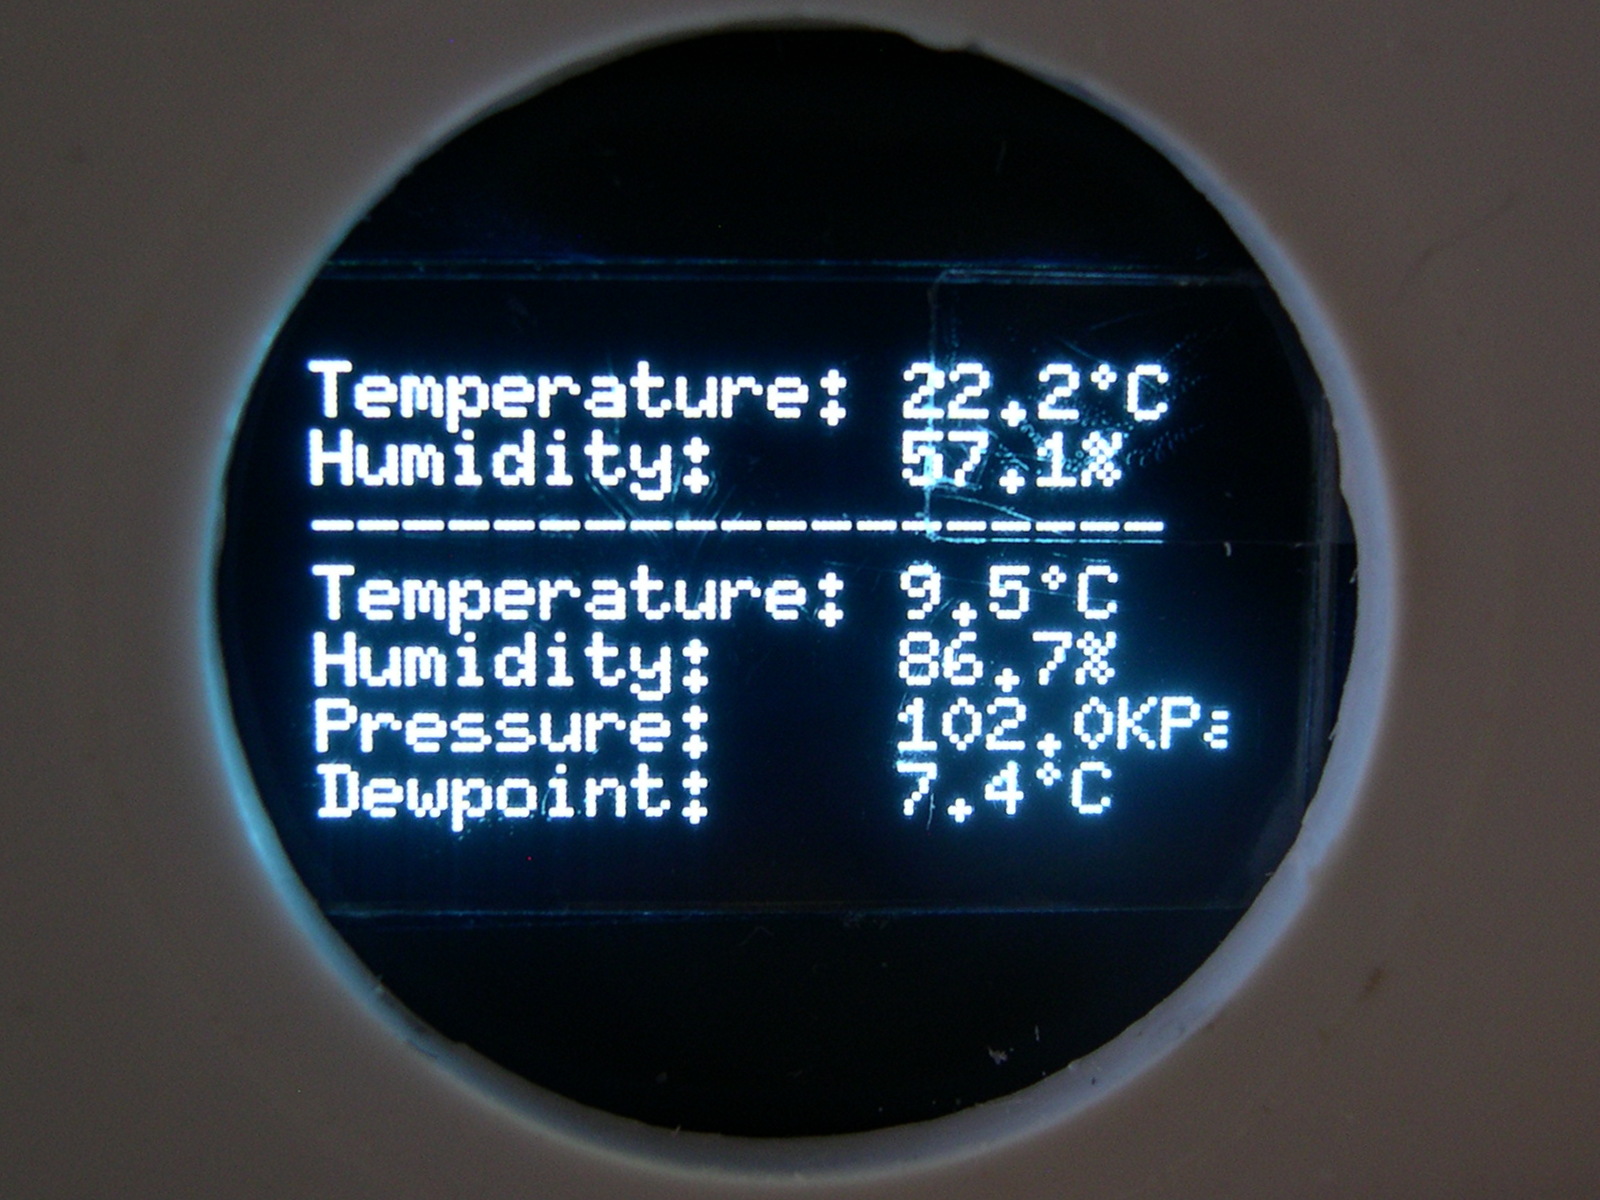
By appending the word 'json' at the end of the
DareWeather webserver URL, a valid JSON output of the
BME280 sensor values is produced -- so that other
services have the opportunity to query/use them for
another purpose. |
||||||||||||||||||||||
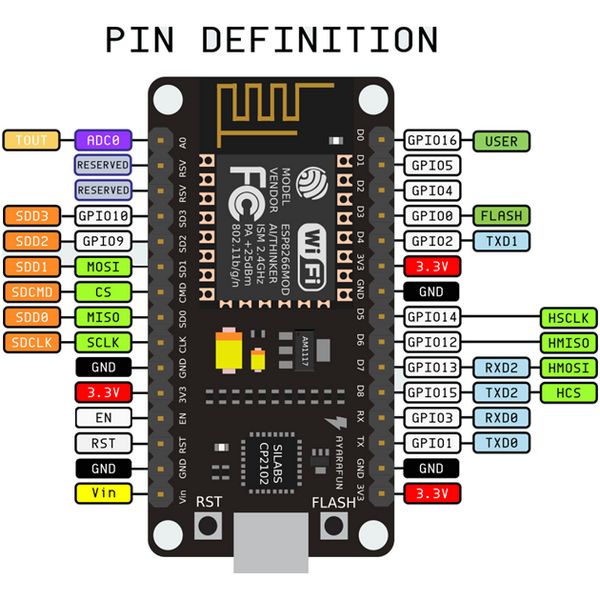
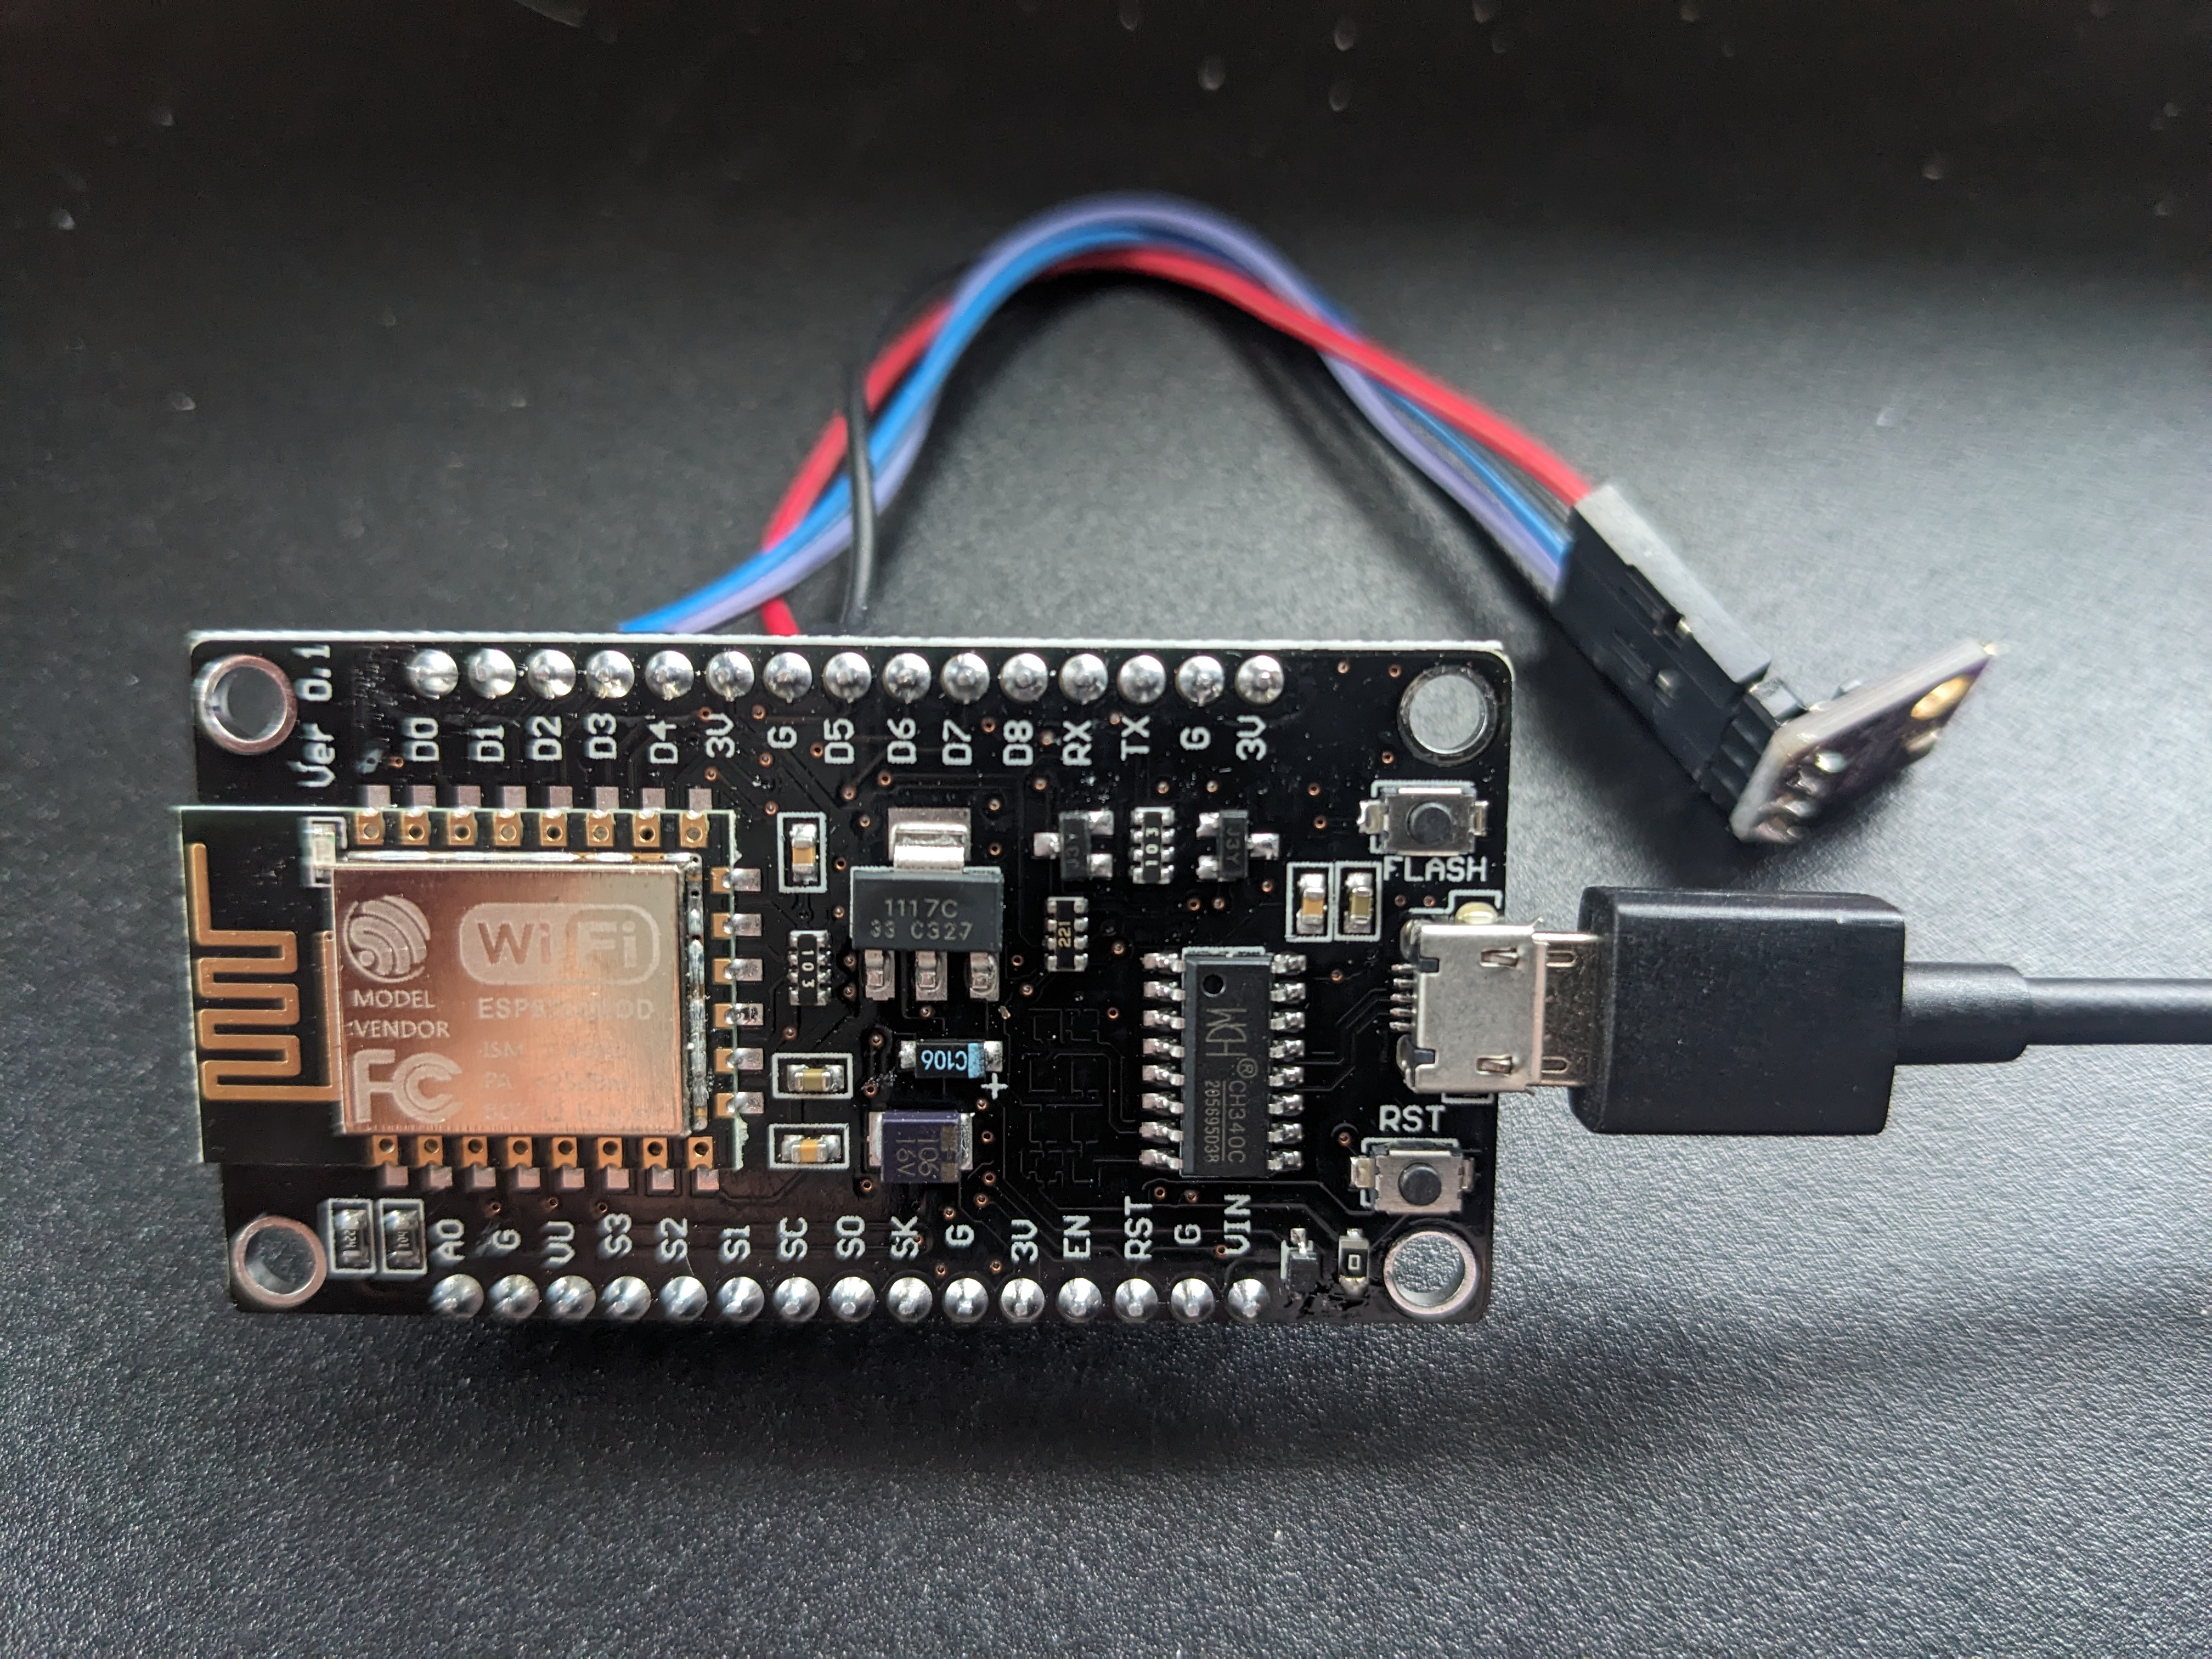
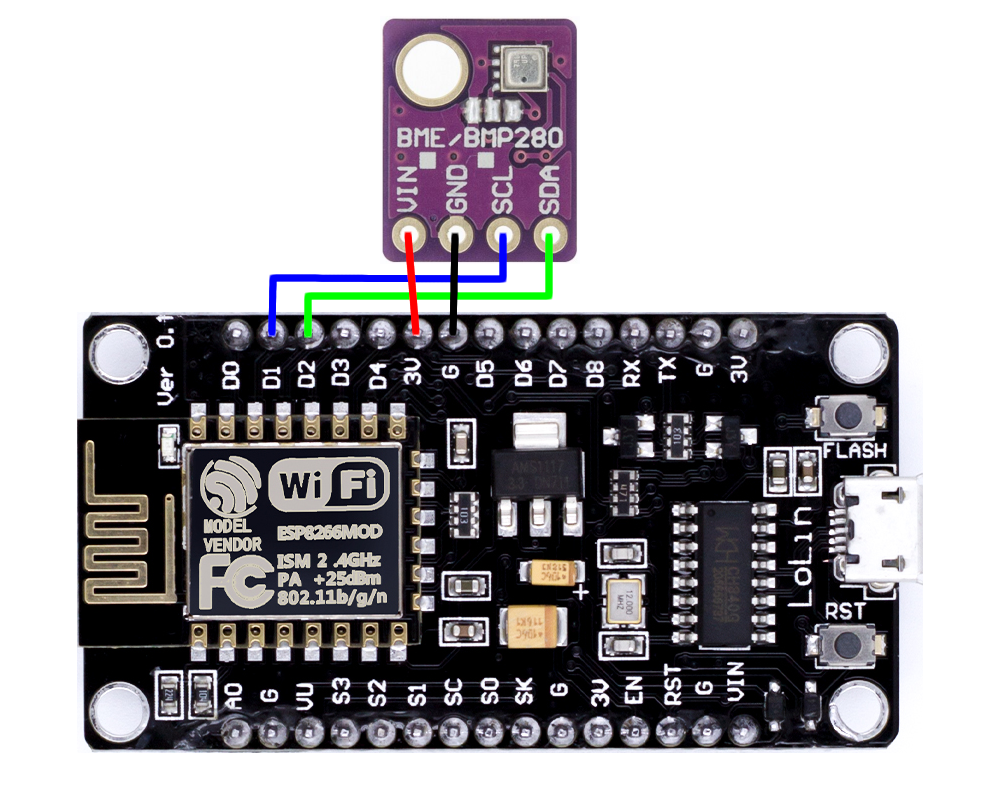
DareWeather WiringThe wiring scheme for the ESP8266/NodeMCU and BME280 sensor is extremely simple and was modified from the previous version:
|
||||||||||||||||||||||
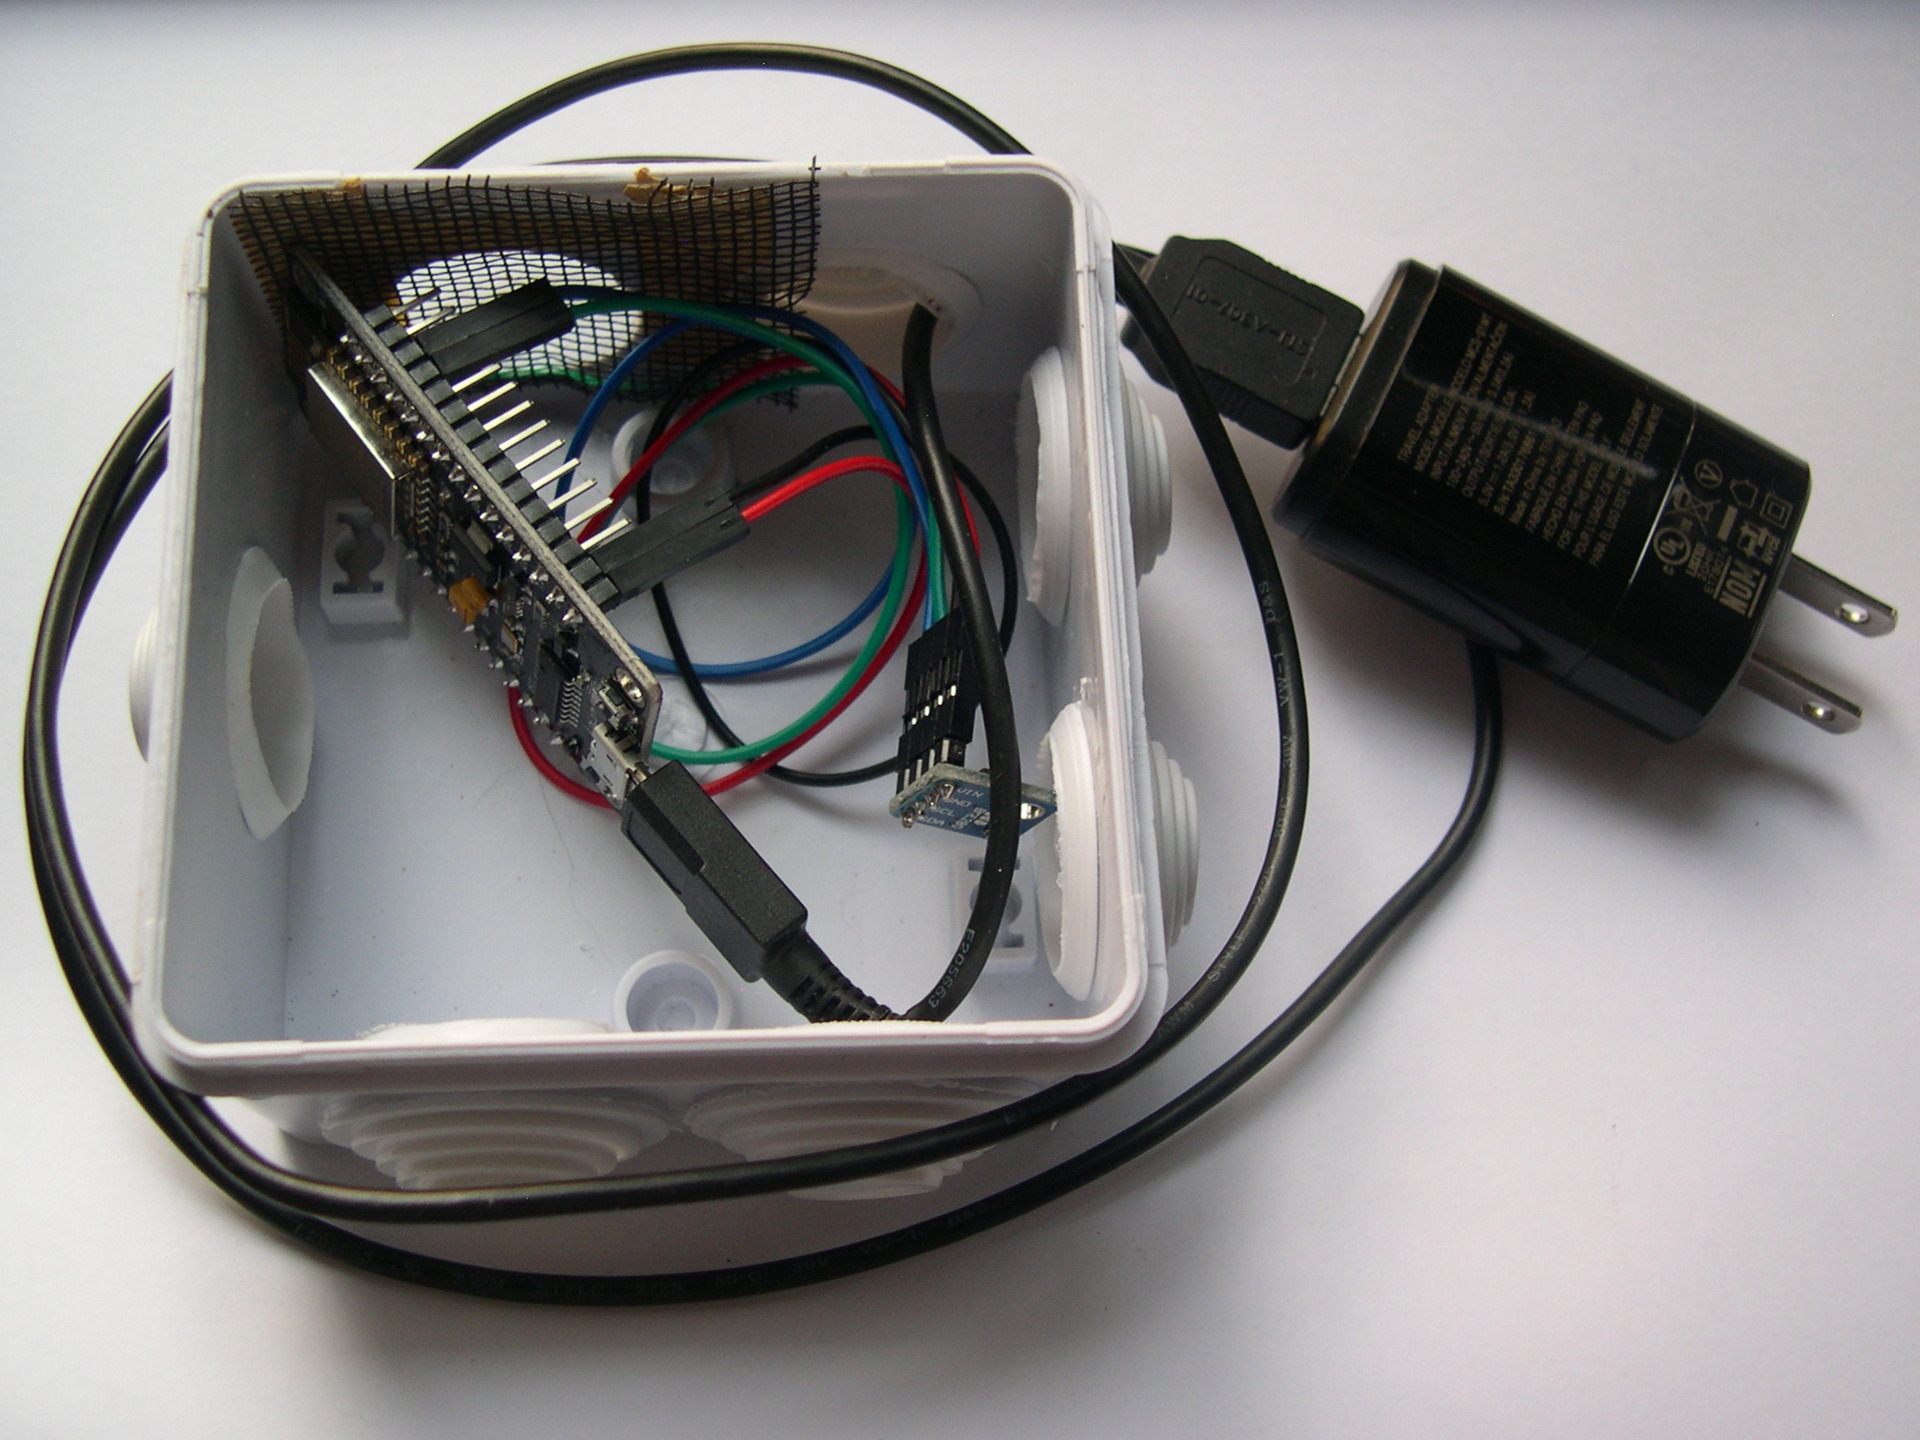
DareWeather BuildingAfter proper wiring of the BME280 sensor, the environment/system was constructed in this way, on a host PC (normally Linux-based), and copied over to the NodeMCU using a USB data cable:
$ esptool.py --port /dev/ttyUSB0 erase_flash
$ esptool.py --port /dev/ttyUSB0 write_flash -fm dio 0x0000
$ nodemcu-tool -p /dev/ttyUSB0 upload xxxl.lua --compile
$ nodemcu-tool -p /dev/ttyUSB0 upload xxx.html
$ nodemcu-tool -p /dev/ttyUSB0 upload init.lua
$ nodemcu-tool -p /dev/ttyUSB0 fsinfo
|
||||||||||||||||||||||
DareWeather StartingWhen first activated, after the firmware/software has been loaded, the device initializes into a temporary 'Access Point' mode -- where a direct wifi connection is established between DareWeather and the computer used to configure the relevant parameters. Upon connection to 192.168.4.1, the web browser screen looks like this: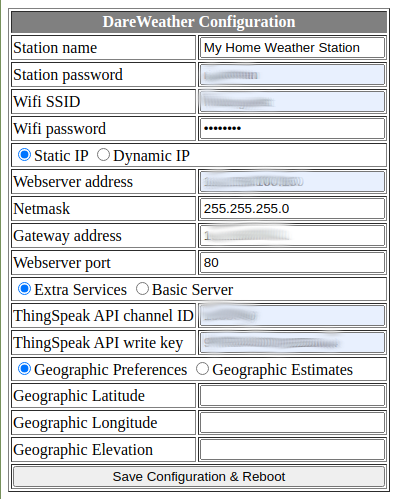 The user uses whatever names, settings, values, etc. preferred. If a ThingSpeak account is available (great idea!) the relevant channel and write key is entered here. For full accuracy for location and elevation (which affects barometric pressure readings on the BME280 sensor), exact lat/lon and elevation (meter) values can be entered. Alternatively, native geolocation and API services available on the web can be used to 'guess' the station location (anywhere) and elevation (Canada only). Once everything is set as desired, the 'Save Configuration & Reboot' option is clicked, and the new IP location is used. When the DareWeather device is (re)started, the following information is sent to the serial interface (invisible to the user unless connected to a terminal display at 115200 baud using a USB data cable): NodeMCU 3.0.0.0 built on nodemcu-build.com provided by frightanic.com
|
||||||||||||||||||||||
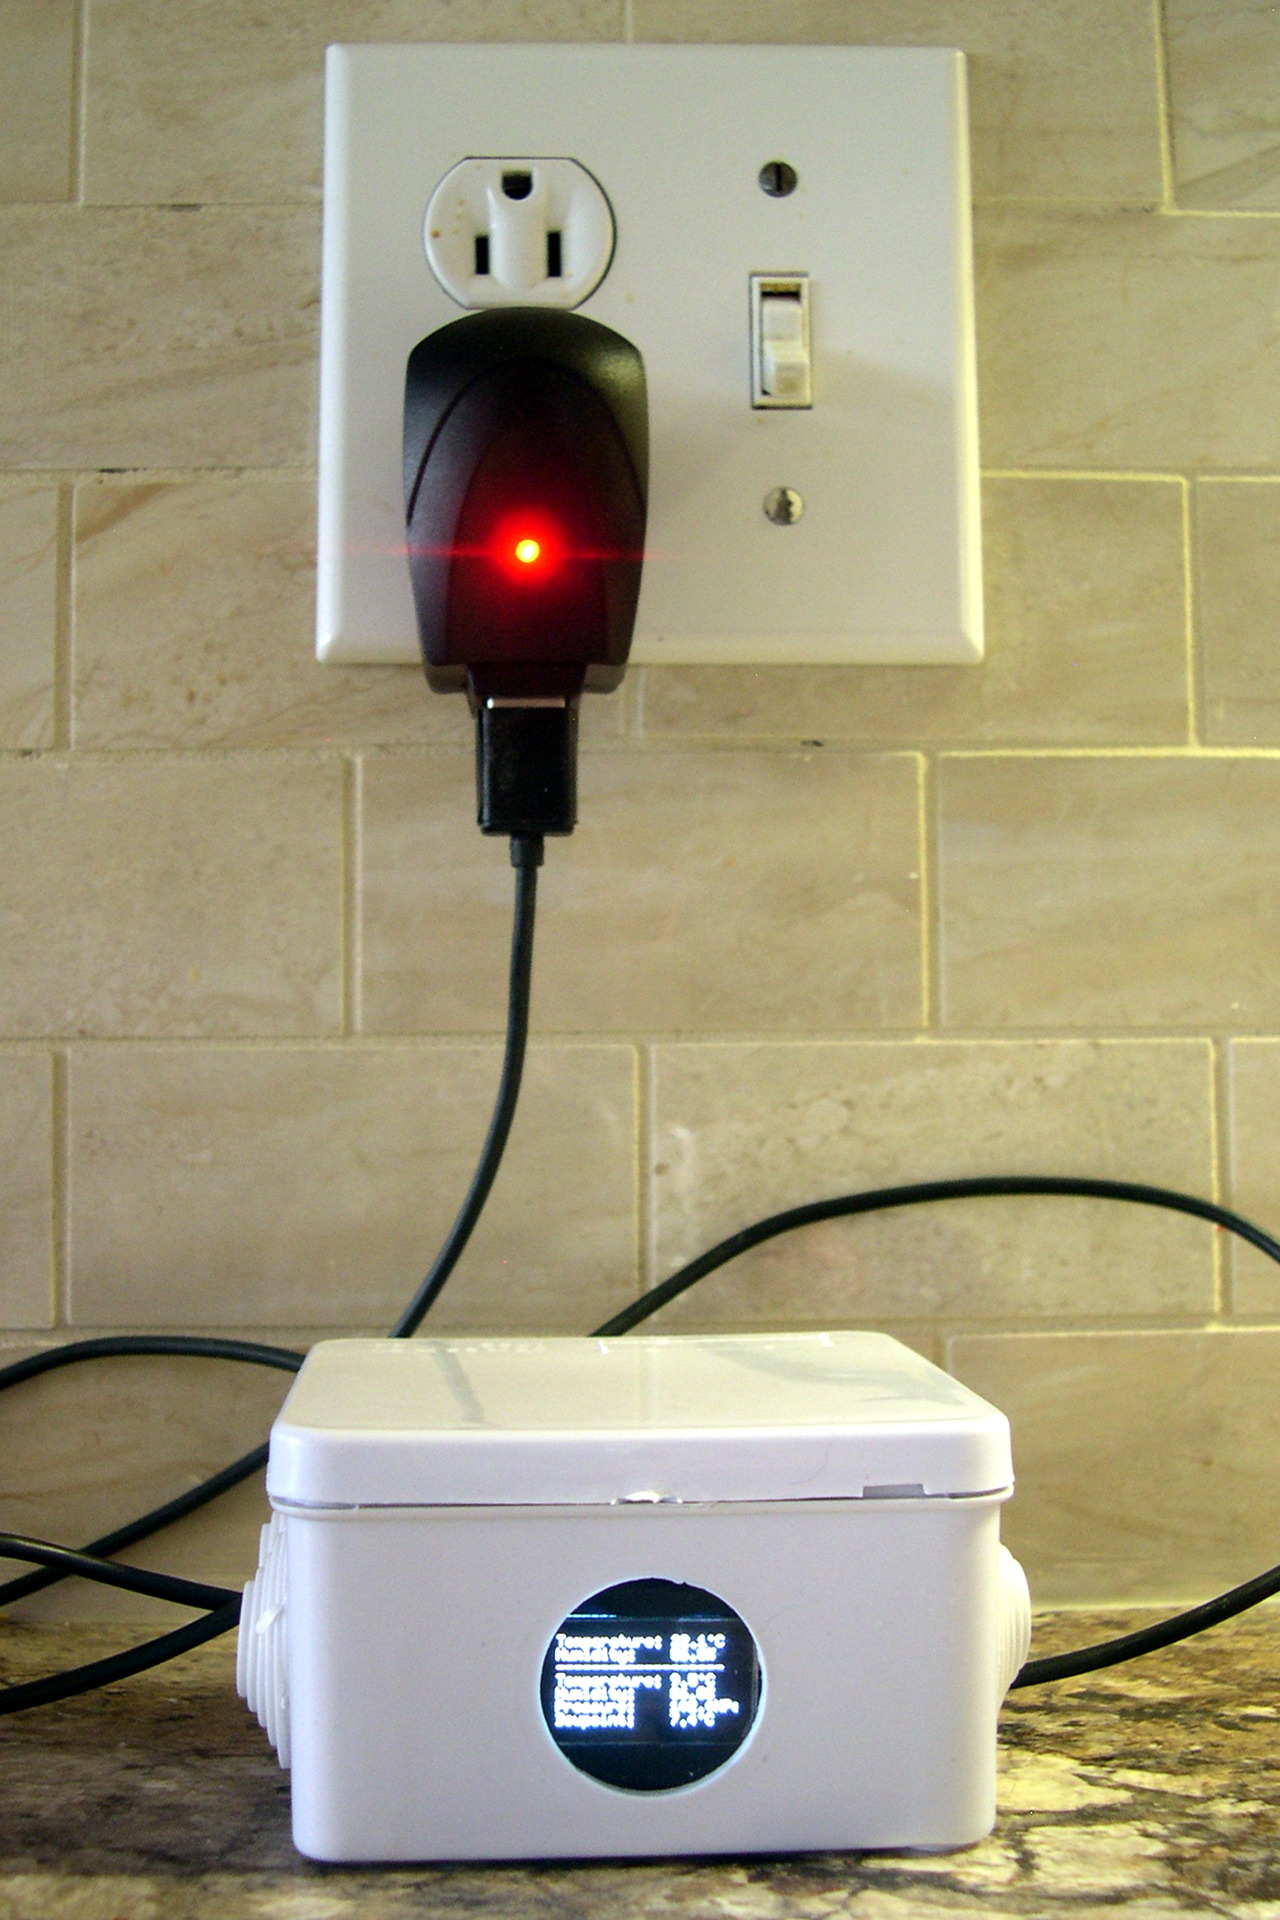
DareWeather PlacementThe ideal location for a DareWeather station is
indoors, in a protected area or container where the
devices and wires will not be disturbed, with good air
circulation, and away from drafts and direct
sunlight. But the most fun is when the device is placed outdoors,
where a true weather station should live! :) The
electronics themselves are extremely robust as far as
temperatures are concerned -- the main issues are these:
|
NEW! Weather Station Version 2
|
|||||||||||||||
| Having proven the technology required to
create a simple weather station with an ESP8266/NodeMCU
microcontroller and a BME280 weather sensor (see Weather
Station #1 below), it was time to try it again -- this
time sending the data stream to ThingSpeak and Ubidots (in addition to
the original Weather
Underground feed). My public channel page is here. Apart from the challenge/frustration of working with misbehaving NodeMCU chips, another final one was enclosing/positioning this new weather station where minimal heat buildup would occur. Despite my efforts, this station still registers hotter than Weather Station #1. The wiring scheme for the ESP8266/NodeMCU and BME280 sensor is extremely simple:
Here is the LUA computer code that I use: NEW! IMPROVED! Avoids hardcoding of configuration parameters. Instead, relevant parameters are solicited during initial configuration phase, and then re-used once the ESP8266 is rebooted into its regular data-serving mode. Also, web page display is now a standard feature. init.lua
init_ap.lua
main_ap.lua
main_bme280.lua
main_ap.html
|